23.8.2019
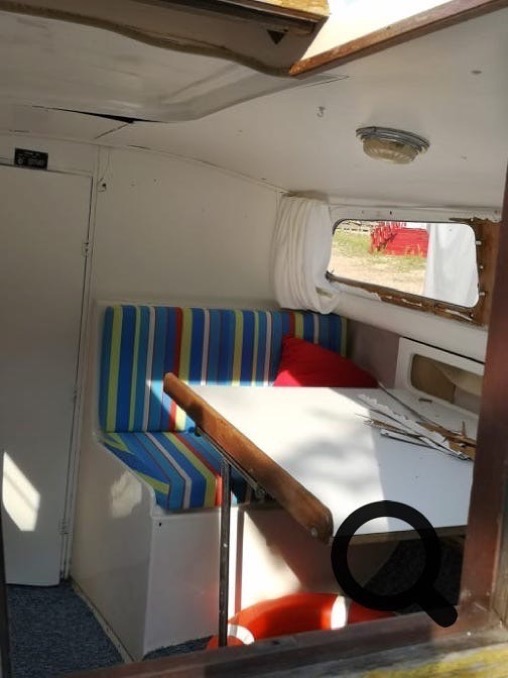
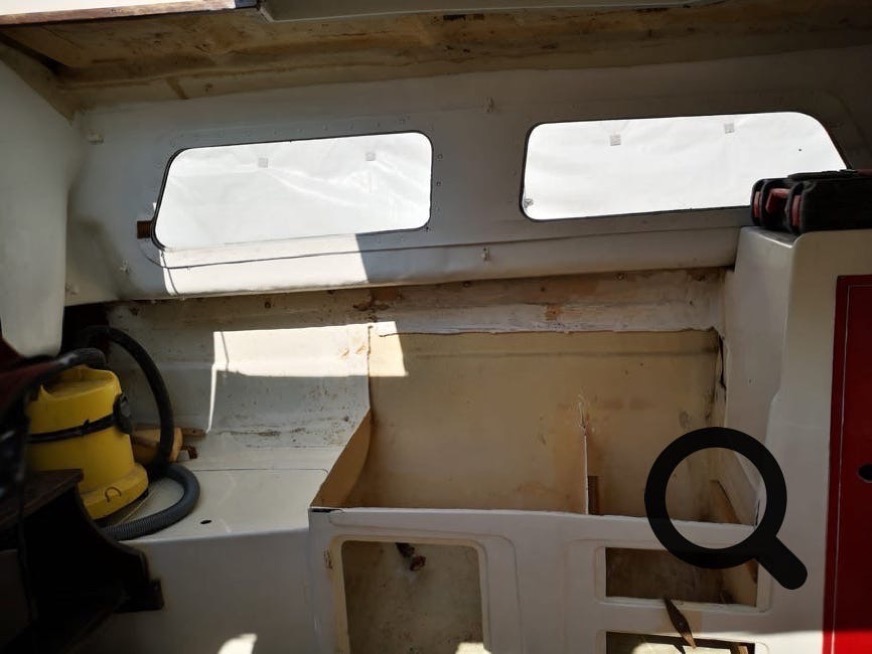
On the seats and beds, in the salon and in the bow, white rugs were attached to the side wall, which served for the insulation. This interior insulation with the appearance of WC-mat not only looked extremely unsightly but also stank and had foxing in many places. More about that right now. The ceiling cladding was no longer symmetrical and arched at the edges, the plywood paneling around the windows much apart on both sides.
Welcome to my Leisure 22 Refit Blog
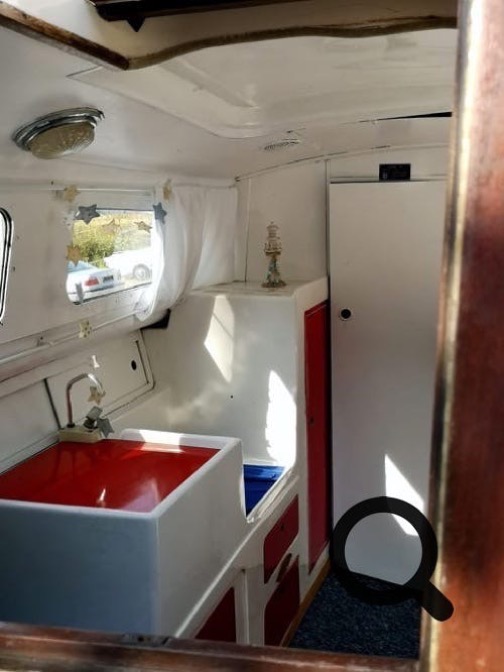
Yes, a Leisure 22 and also the Leisure 23 are very spacious inside. They remind me a bit of a KNAUR caravan from the 70s. My L22 was painted white by the previous owner and the kitchen was red accentuated. The upholstery looks light and cheerful. The rug was "Oldschool PVC Blues"

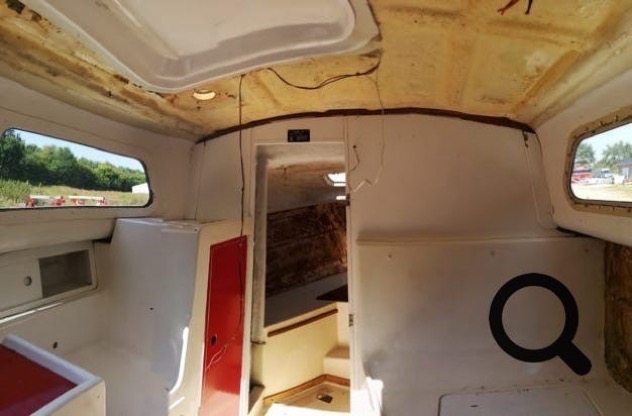
Left: The ceiling panels are easy to remove. You can see well the laminated rafters on which later the new panels will be attached. The panels were also moldy on the inside in some places.
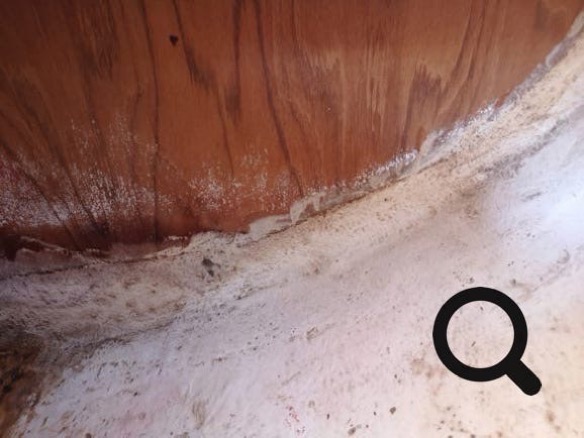
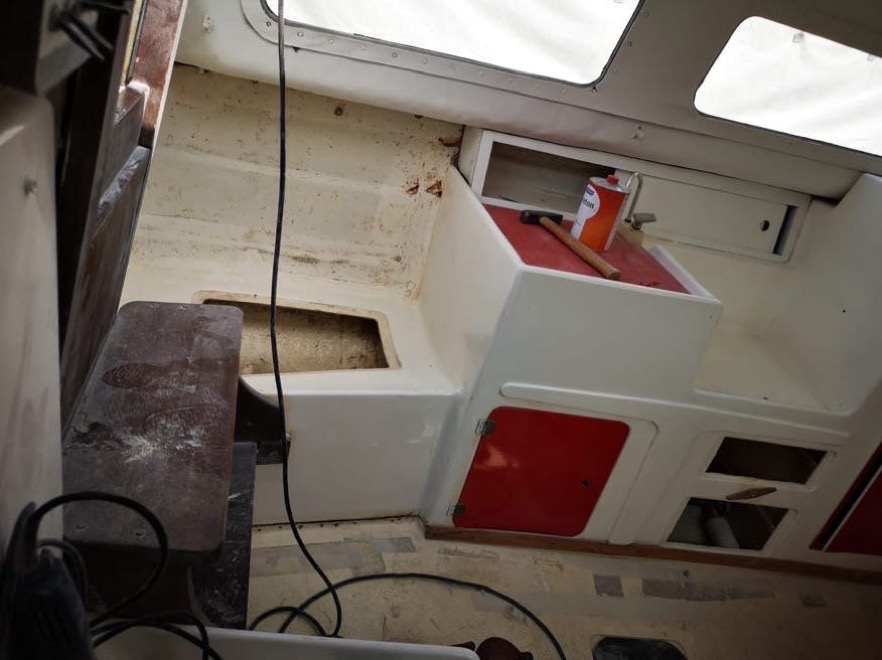
Left: Also in the storage space has deposited on the bare wood mold. It is removed and the surfaces are treated intensively with hydrogen peroxide (H2O2), then the wood is sealed.
25.8.2019
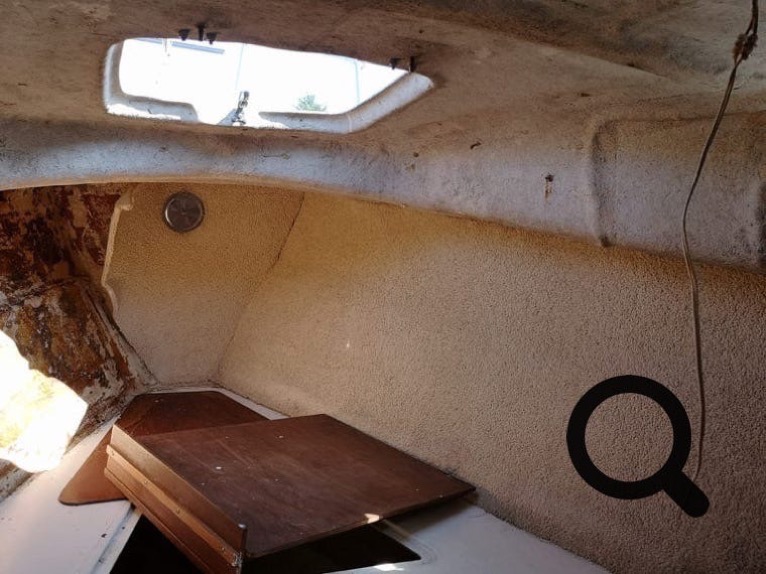
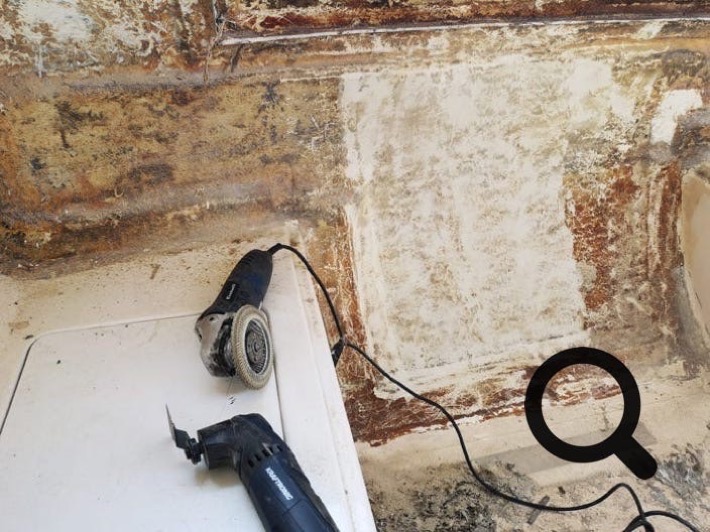
Above: In the bow area (bunk + sea toilet), the carpet can be easily removed from the ship's side. Underneath, however, is the carpet adhesive, as was glued to the carpet in all other places to the fore. He has to go down!
By the way, the hatch has to go of course!
Adhesive residues are roughly removed with the multitool and then removed completely with a flap grinder.
The GFK shelf has also been removed.
That gets dirty.
27.8.2019
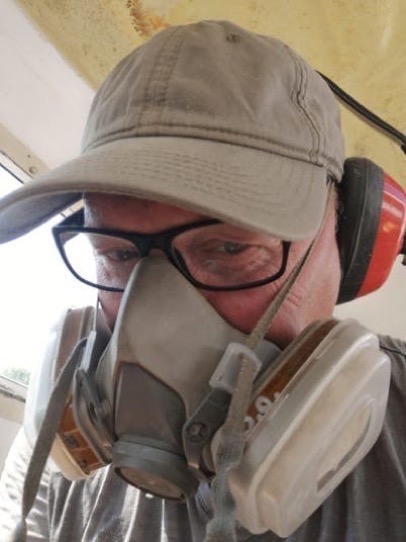
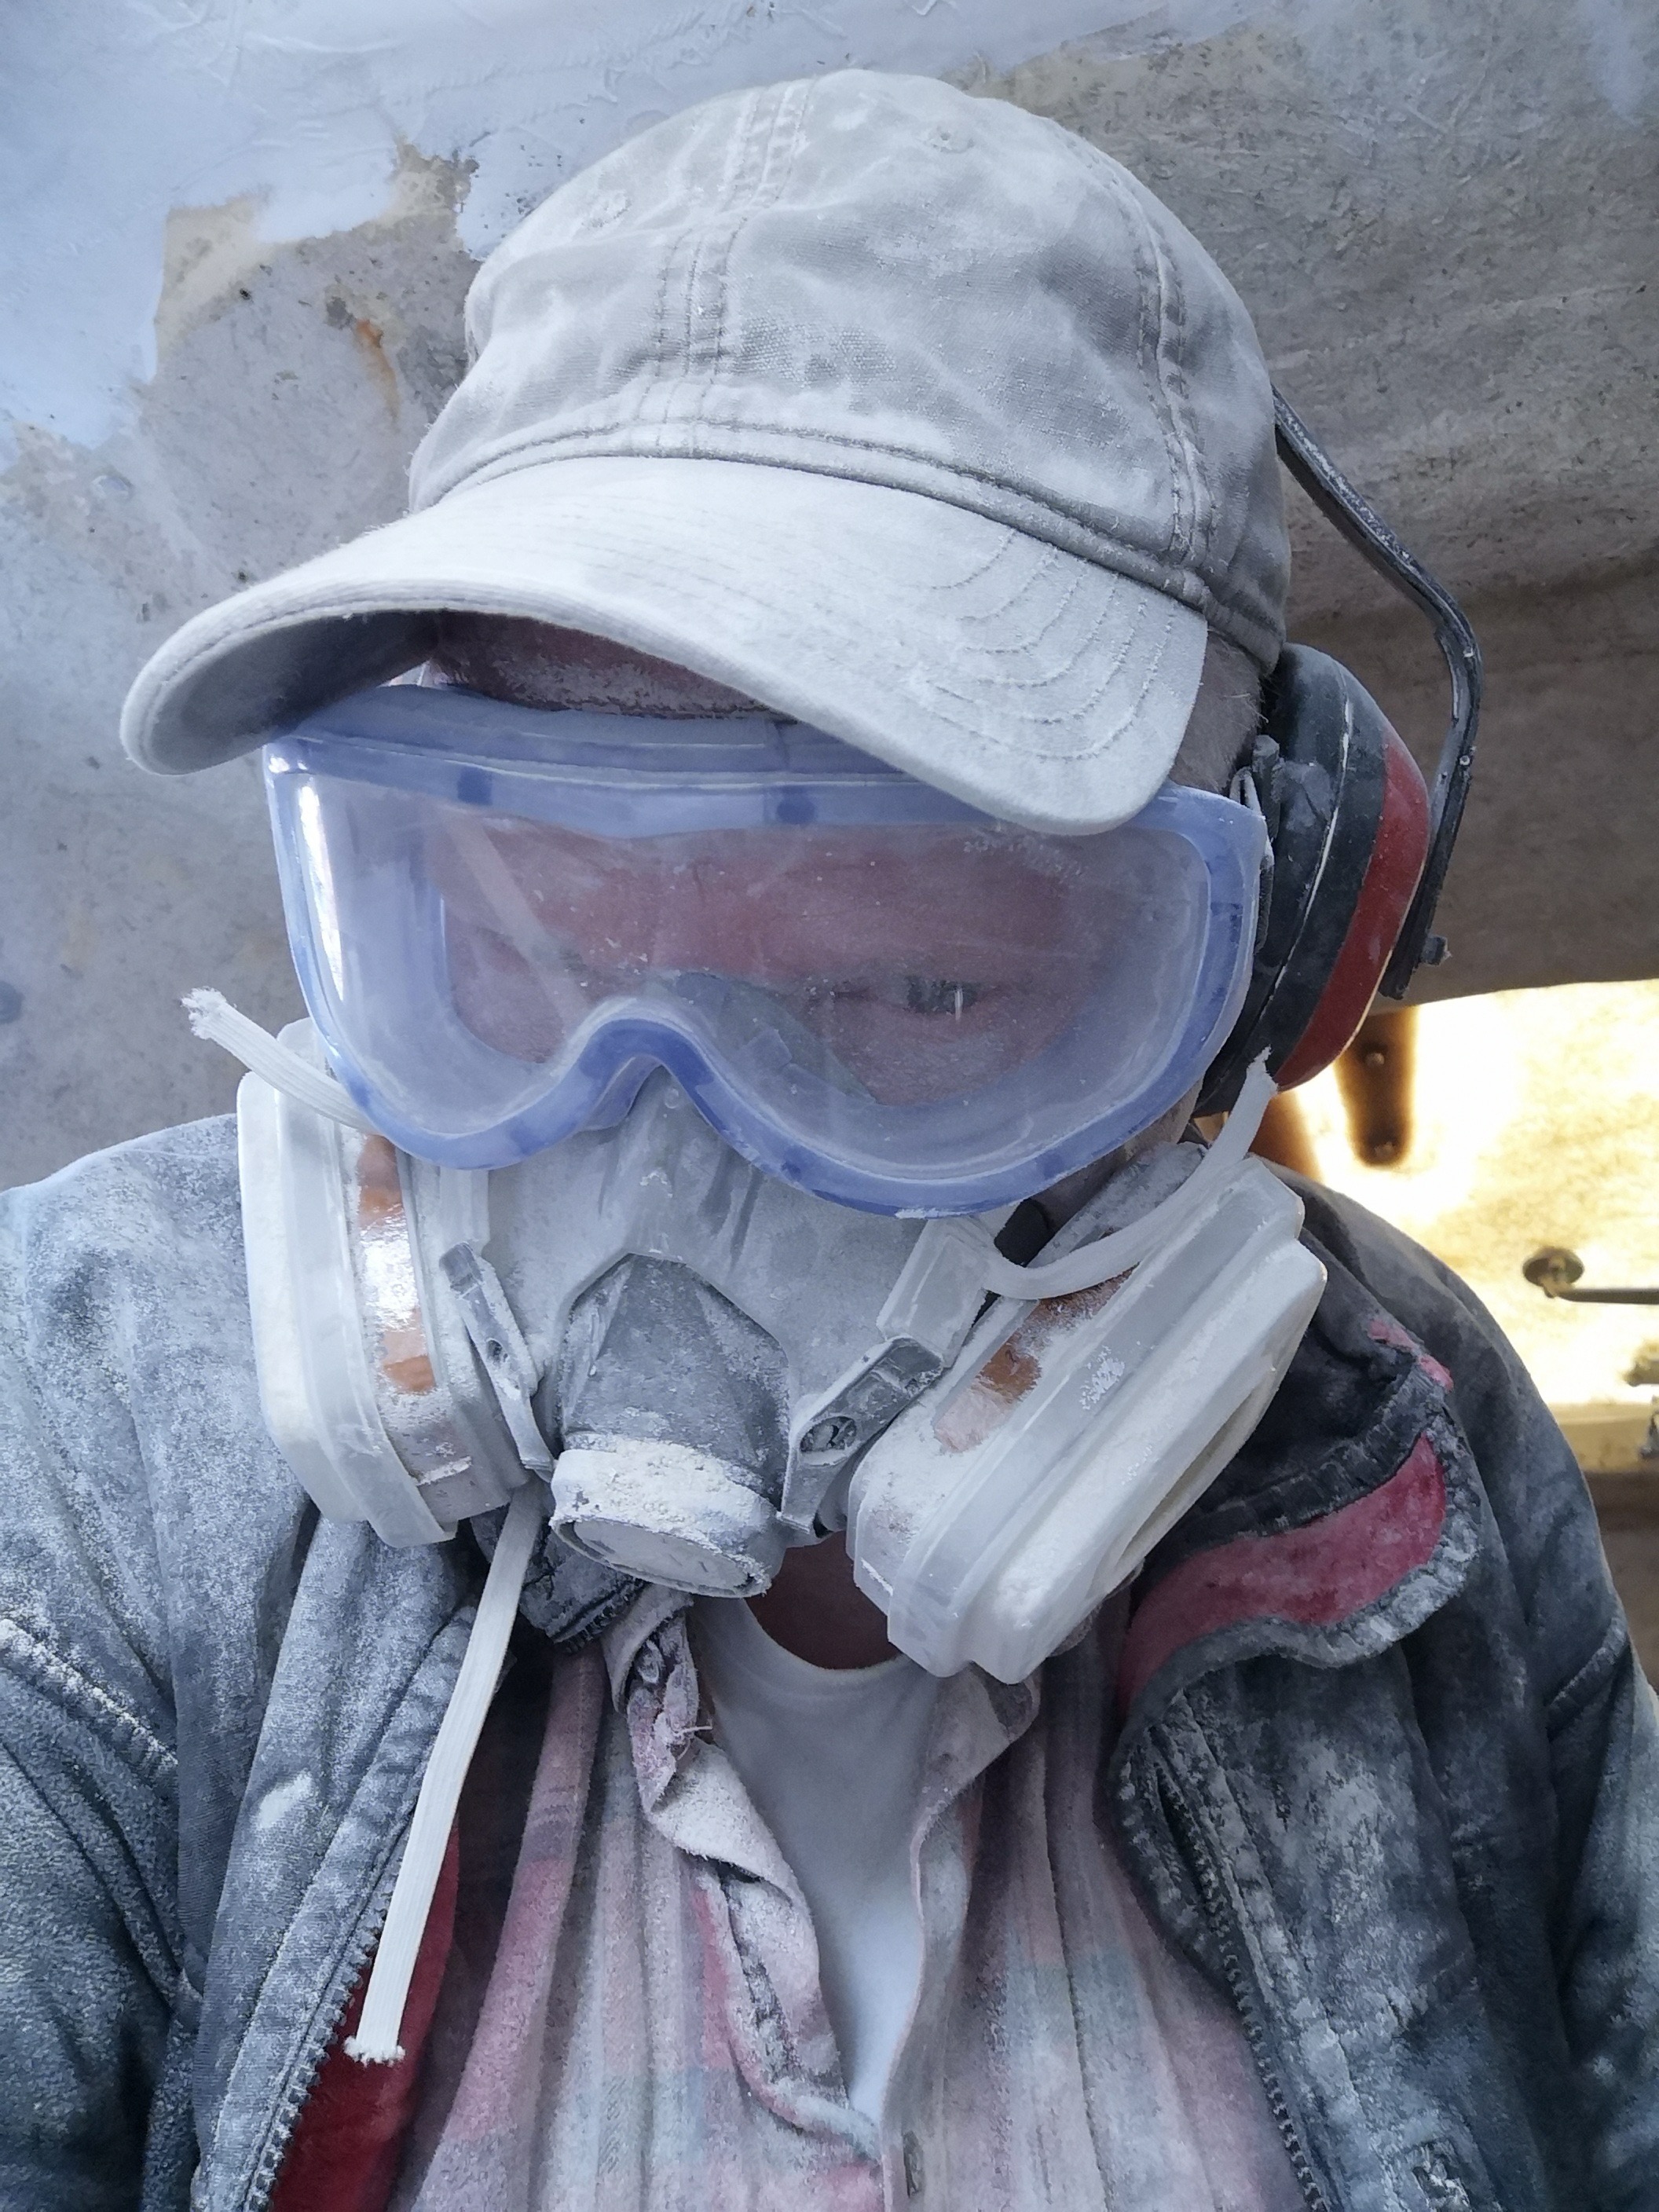
Fuc* Job ... ... But is there any use whining?
Adhesive residues turned into 15 litres of dust ;-)
28.8.2019
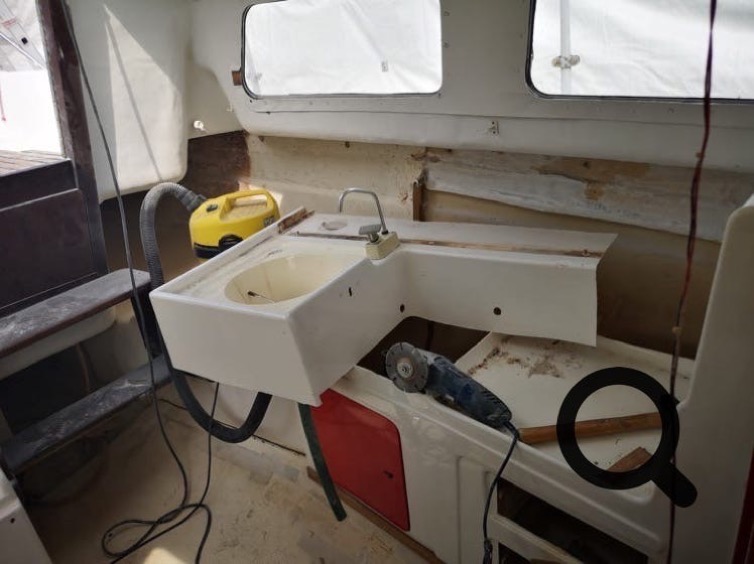
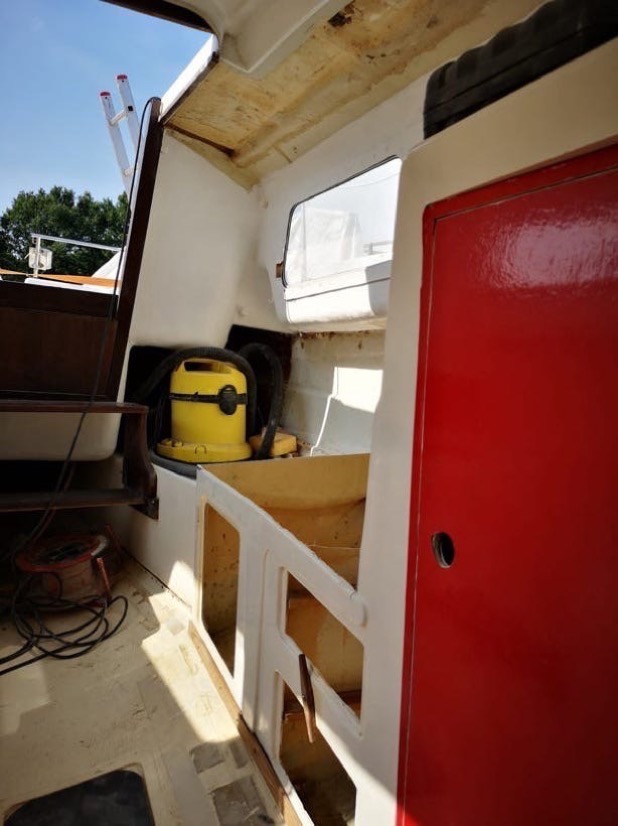
The ReFIT comes down to a comfortable day cruiser and bathing boat. Who needs a kitchen block of the 70s, which does not get any nicer with even more color ideas? Sorry, but the kitchen has to leave for the some parts and becomes the Recamiere ... I'm looking forward to it already.
30.8.2019
05.09.2019
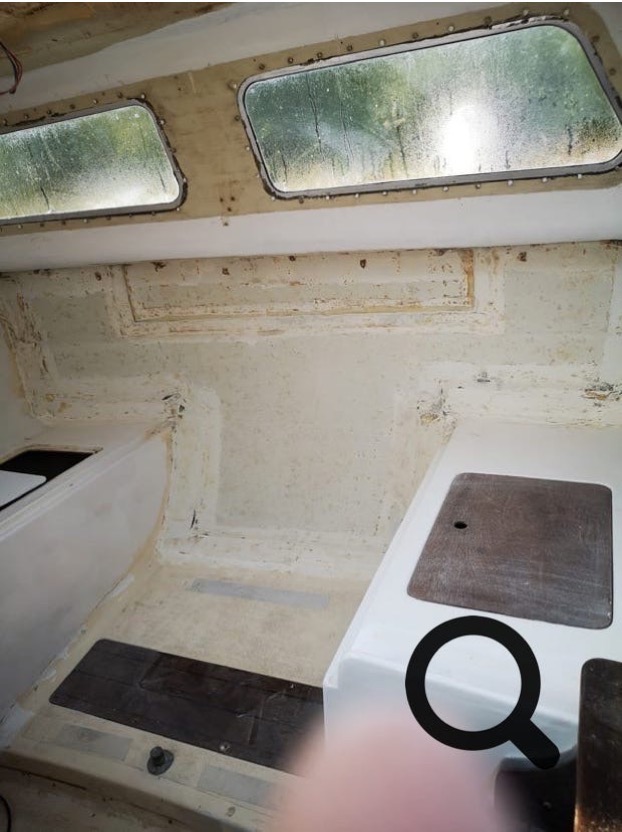
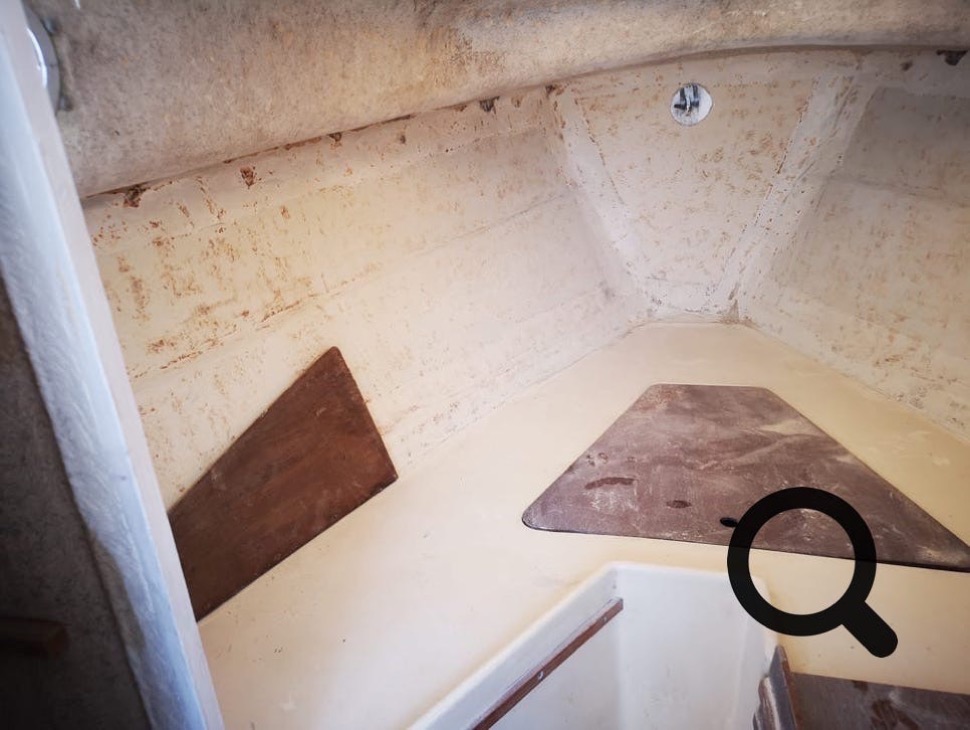
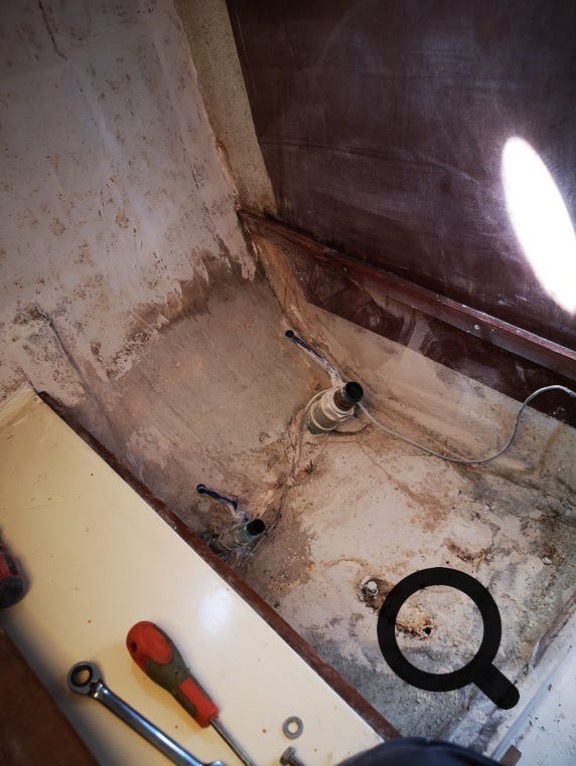
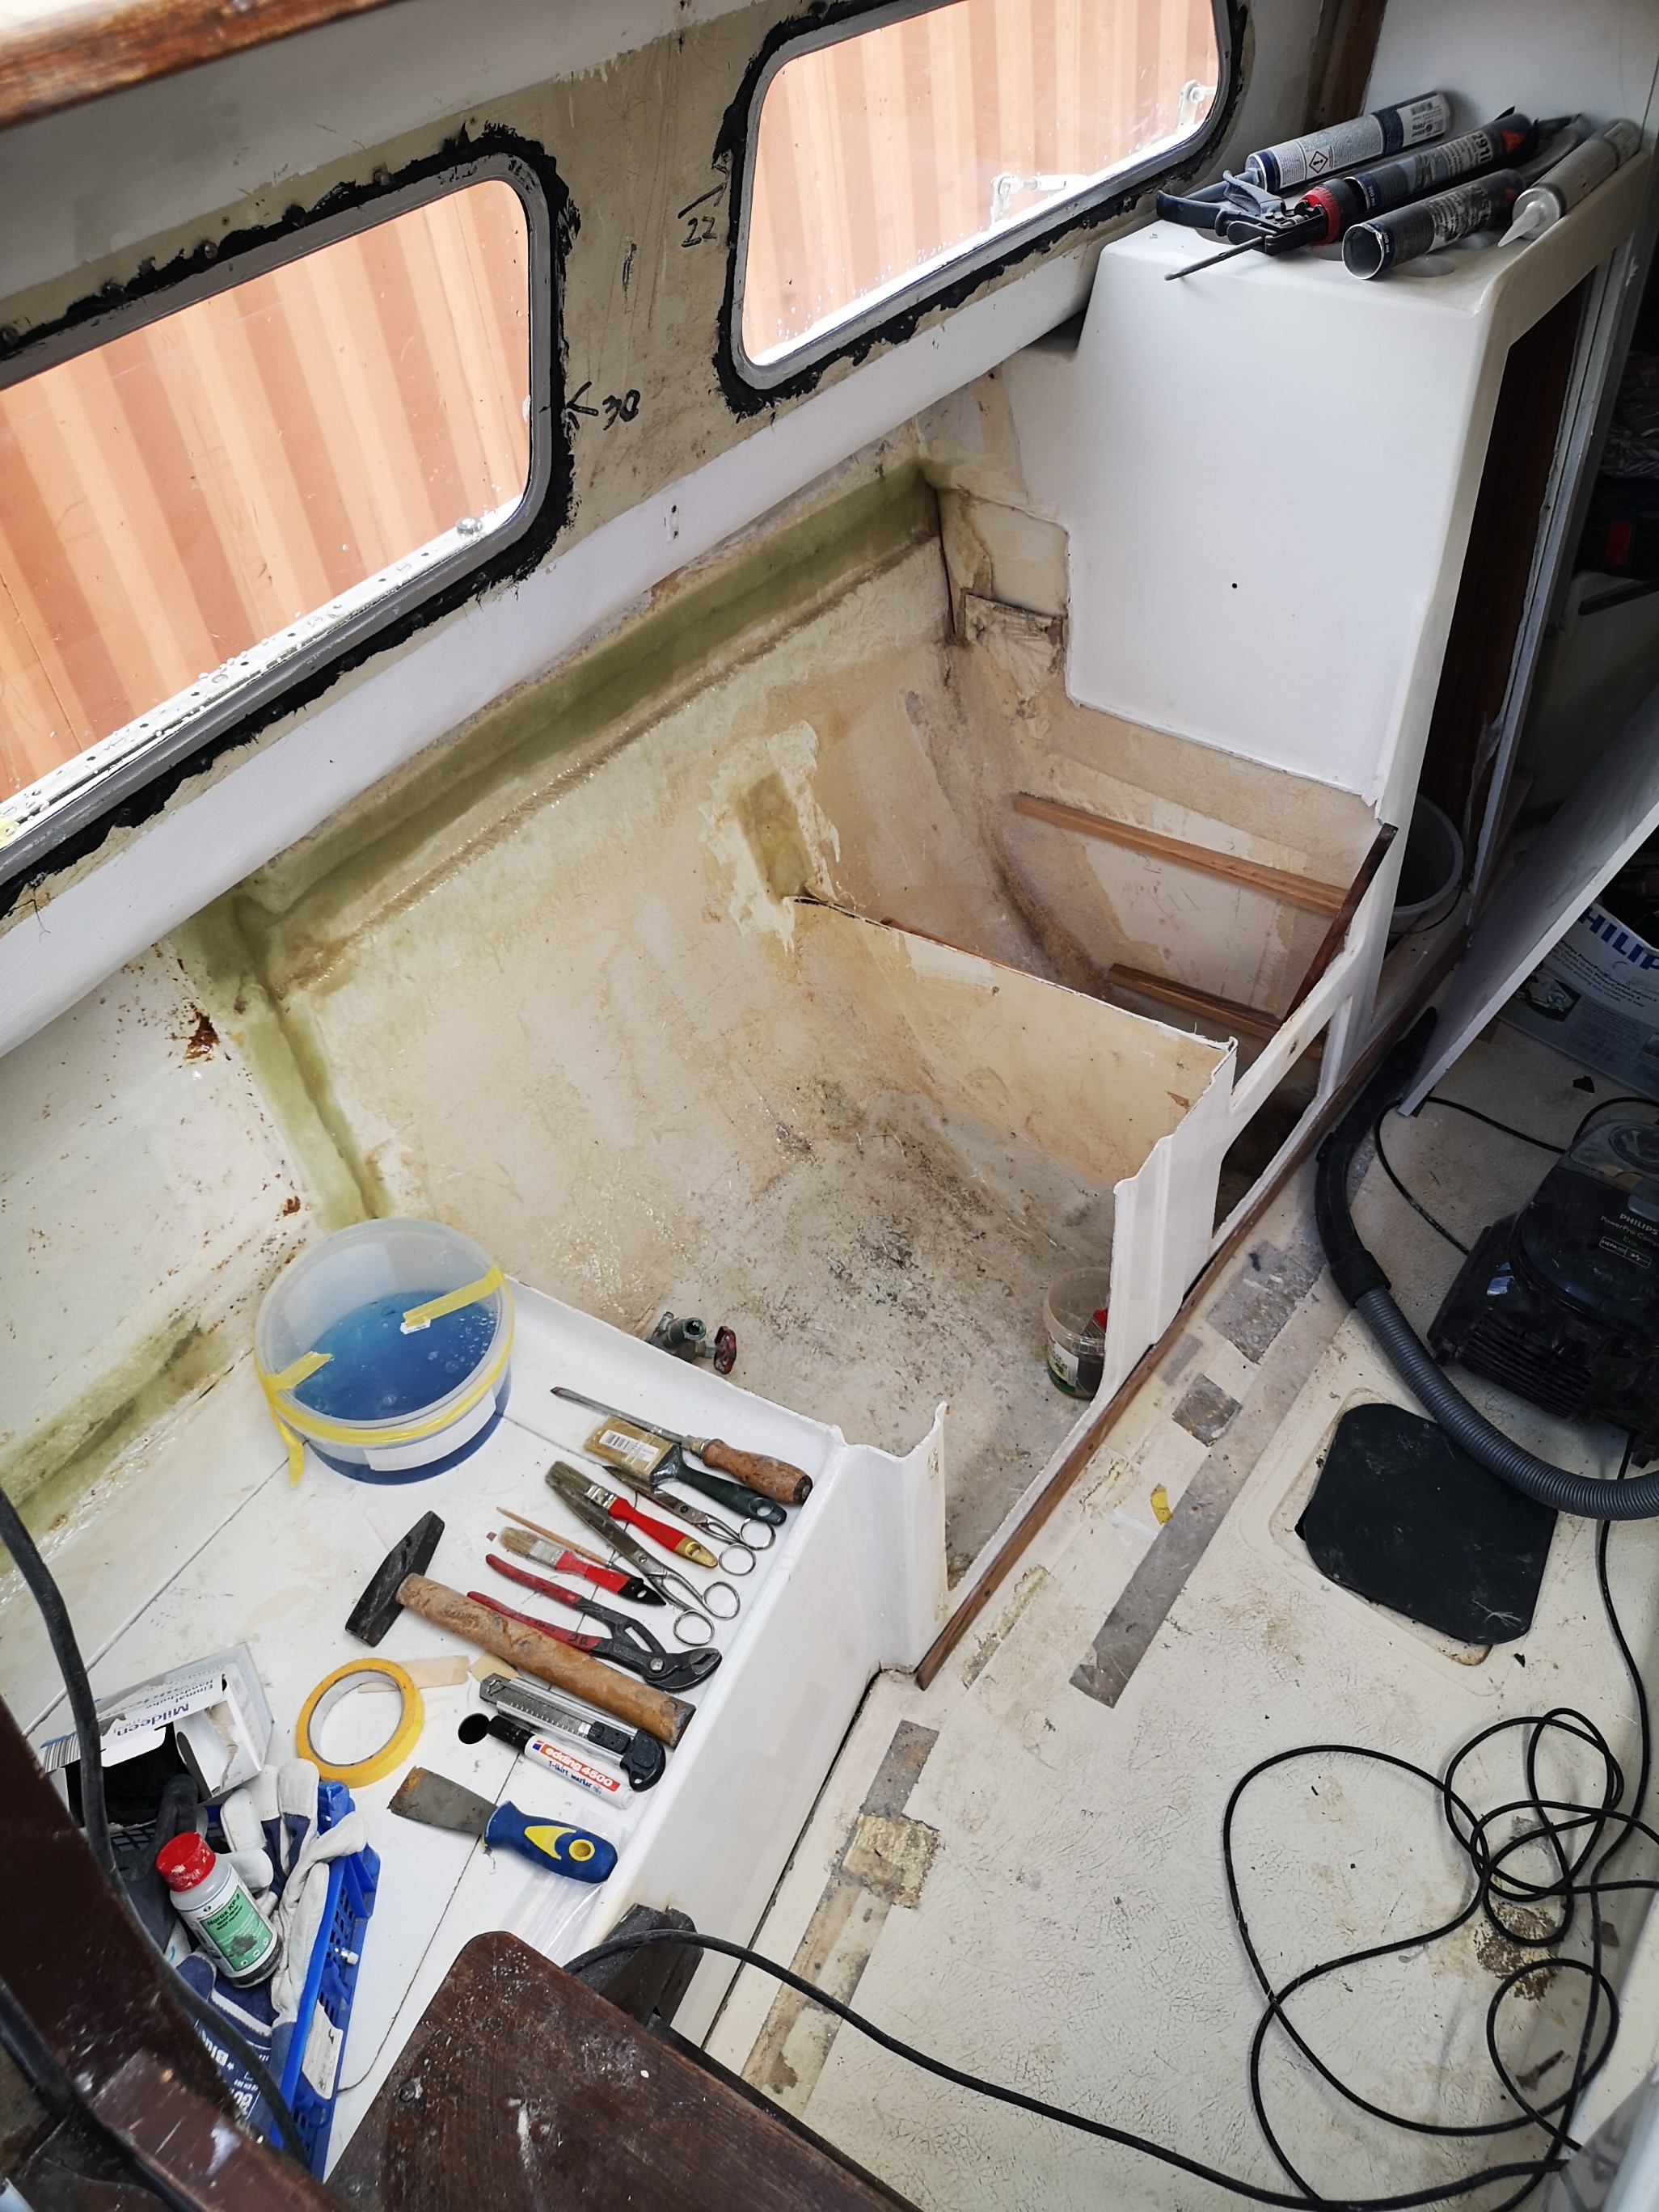
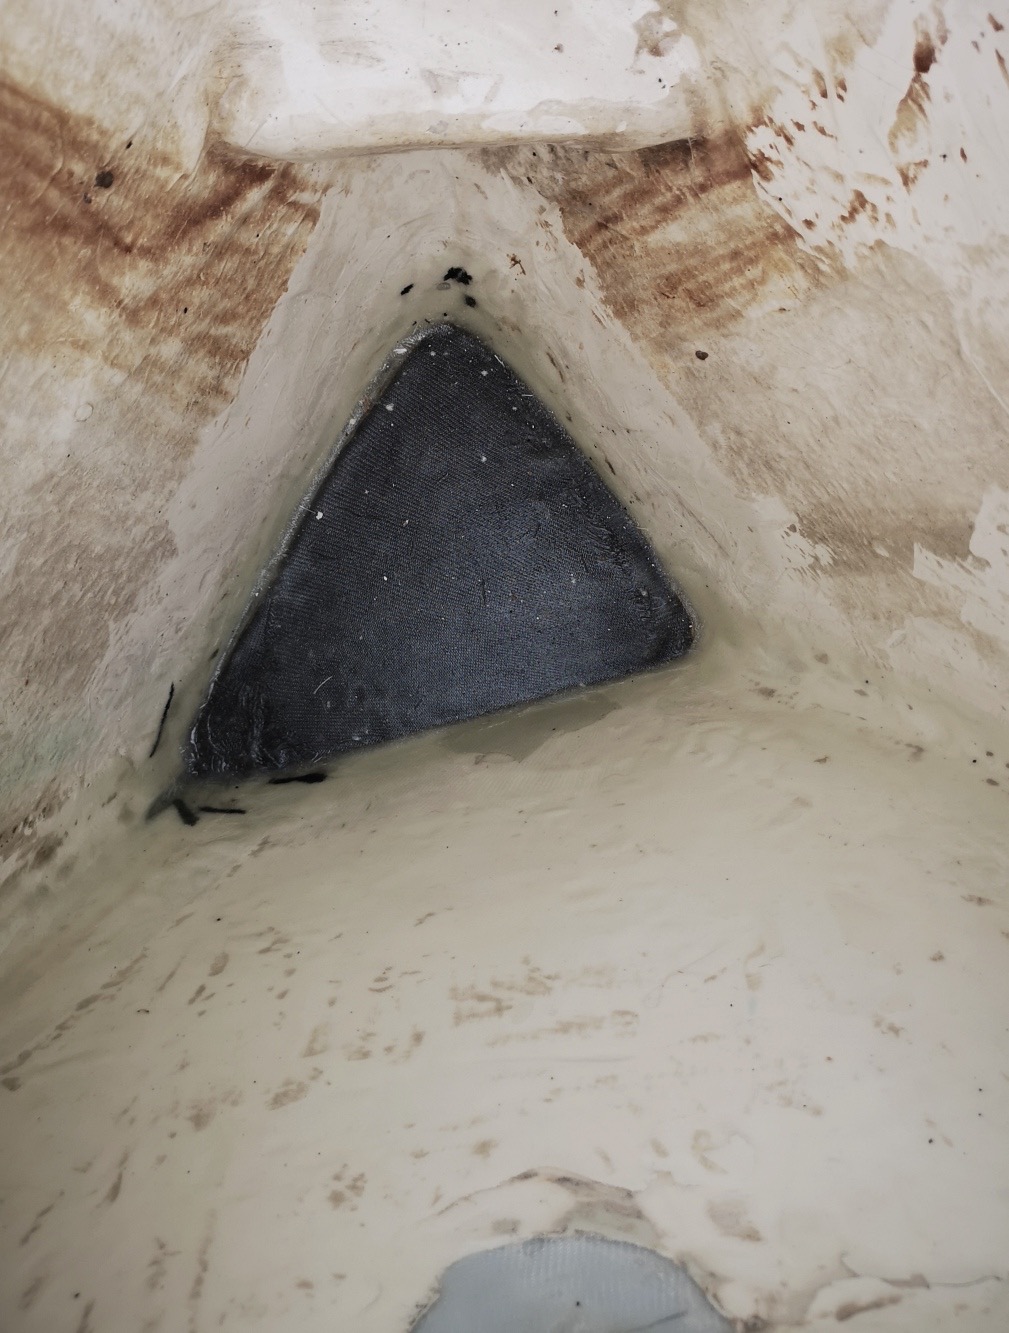
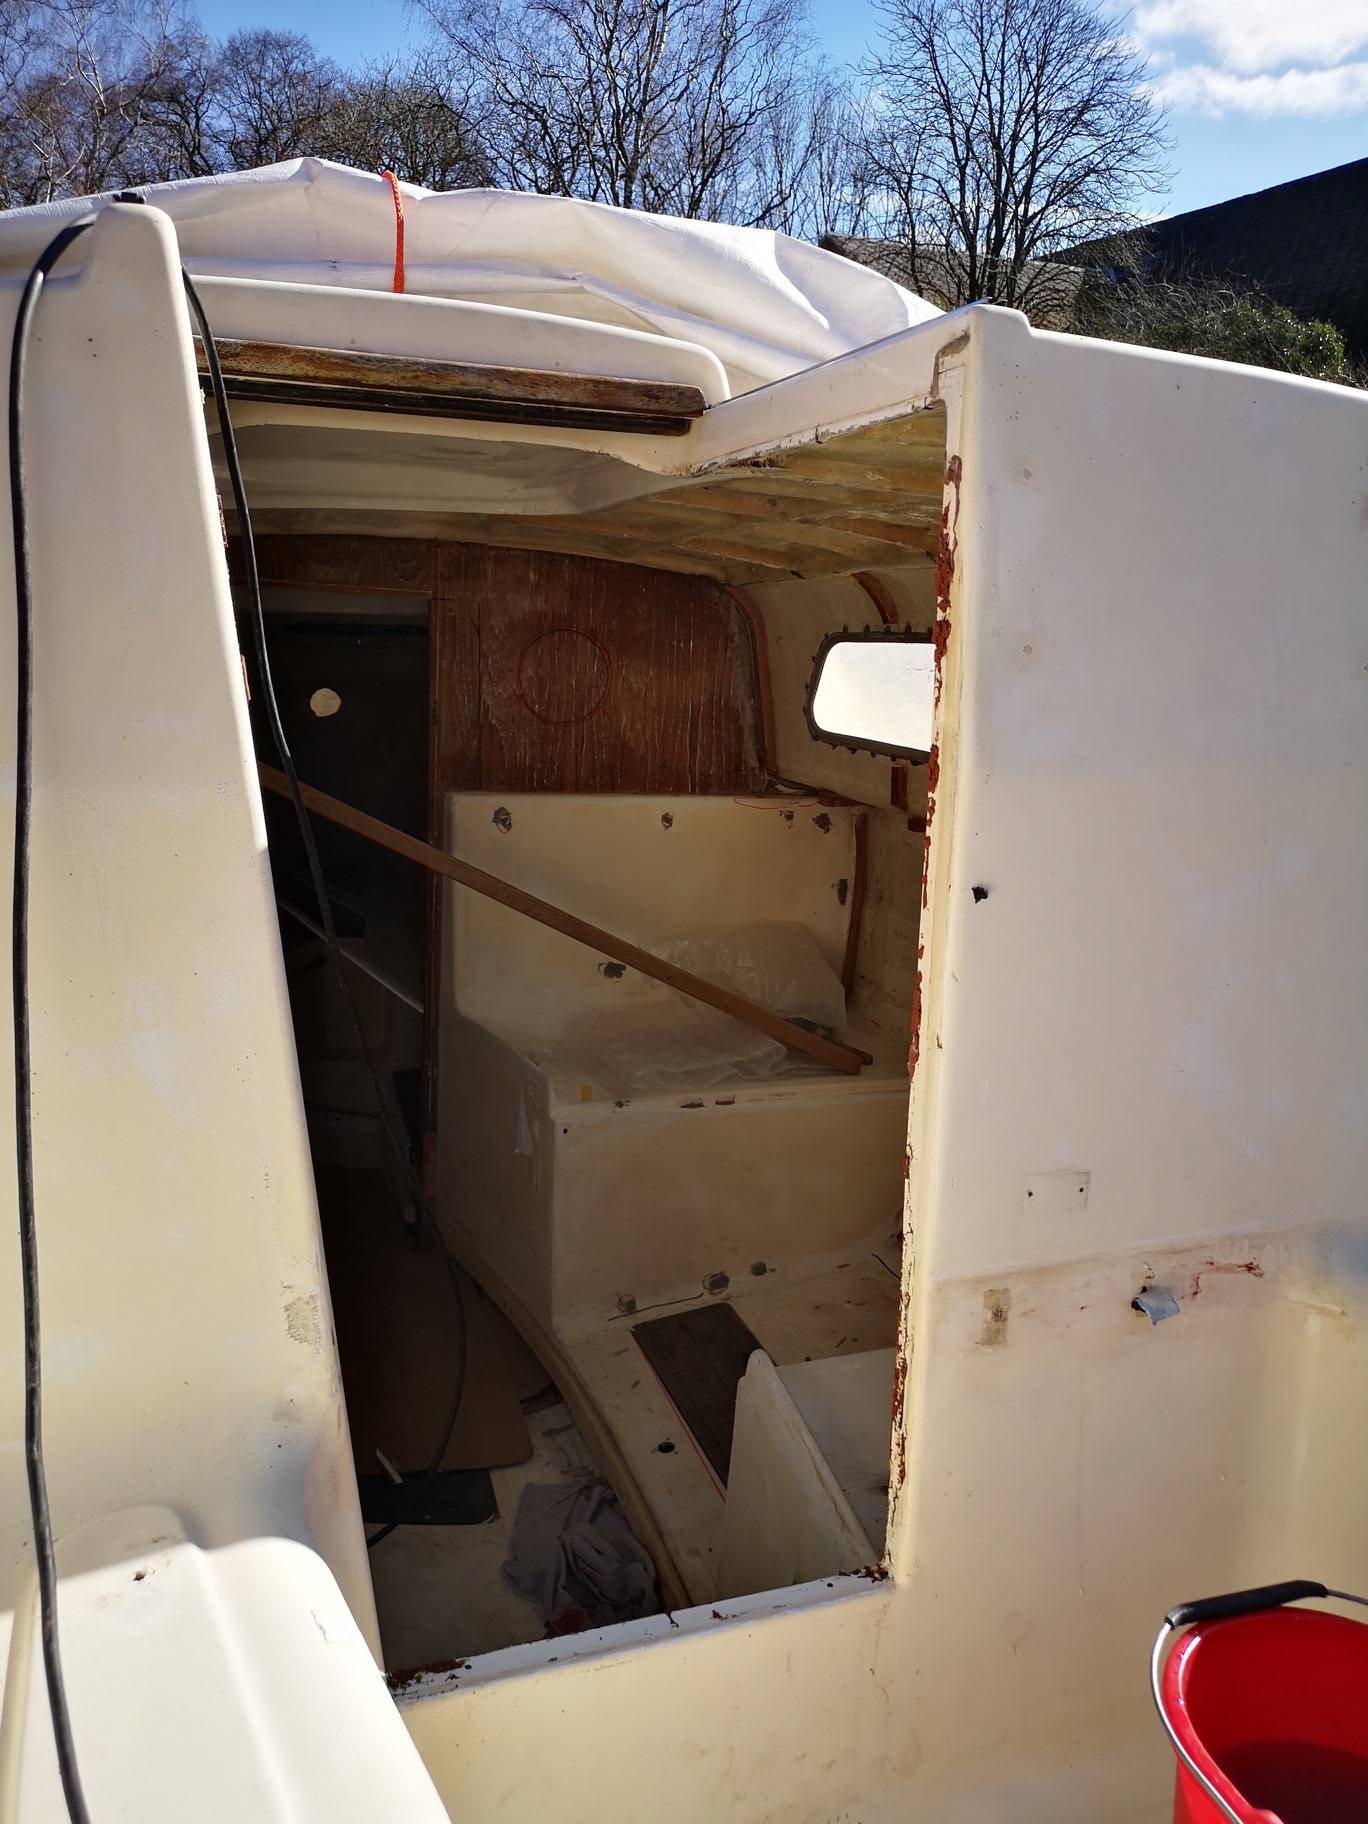
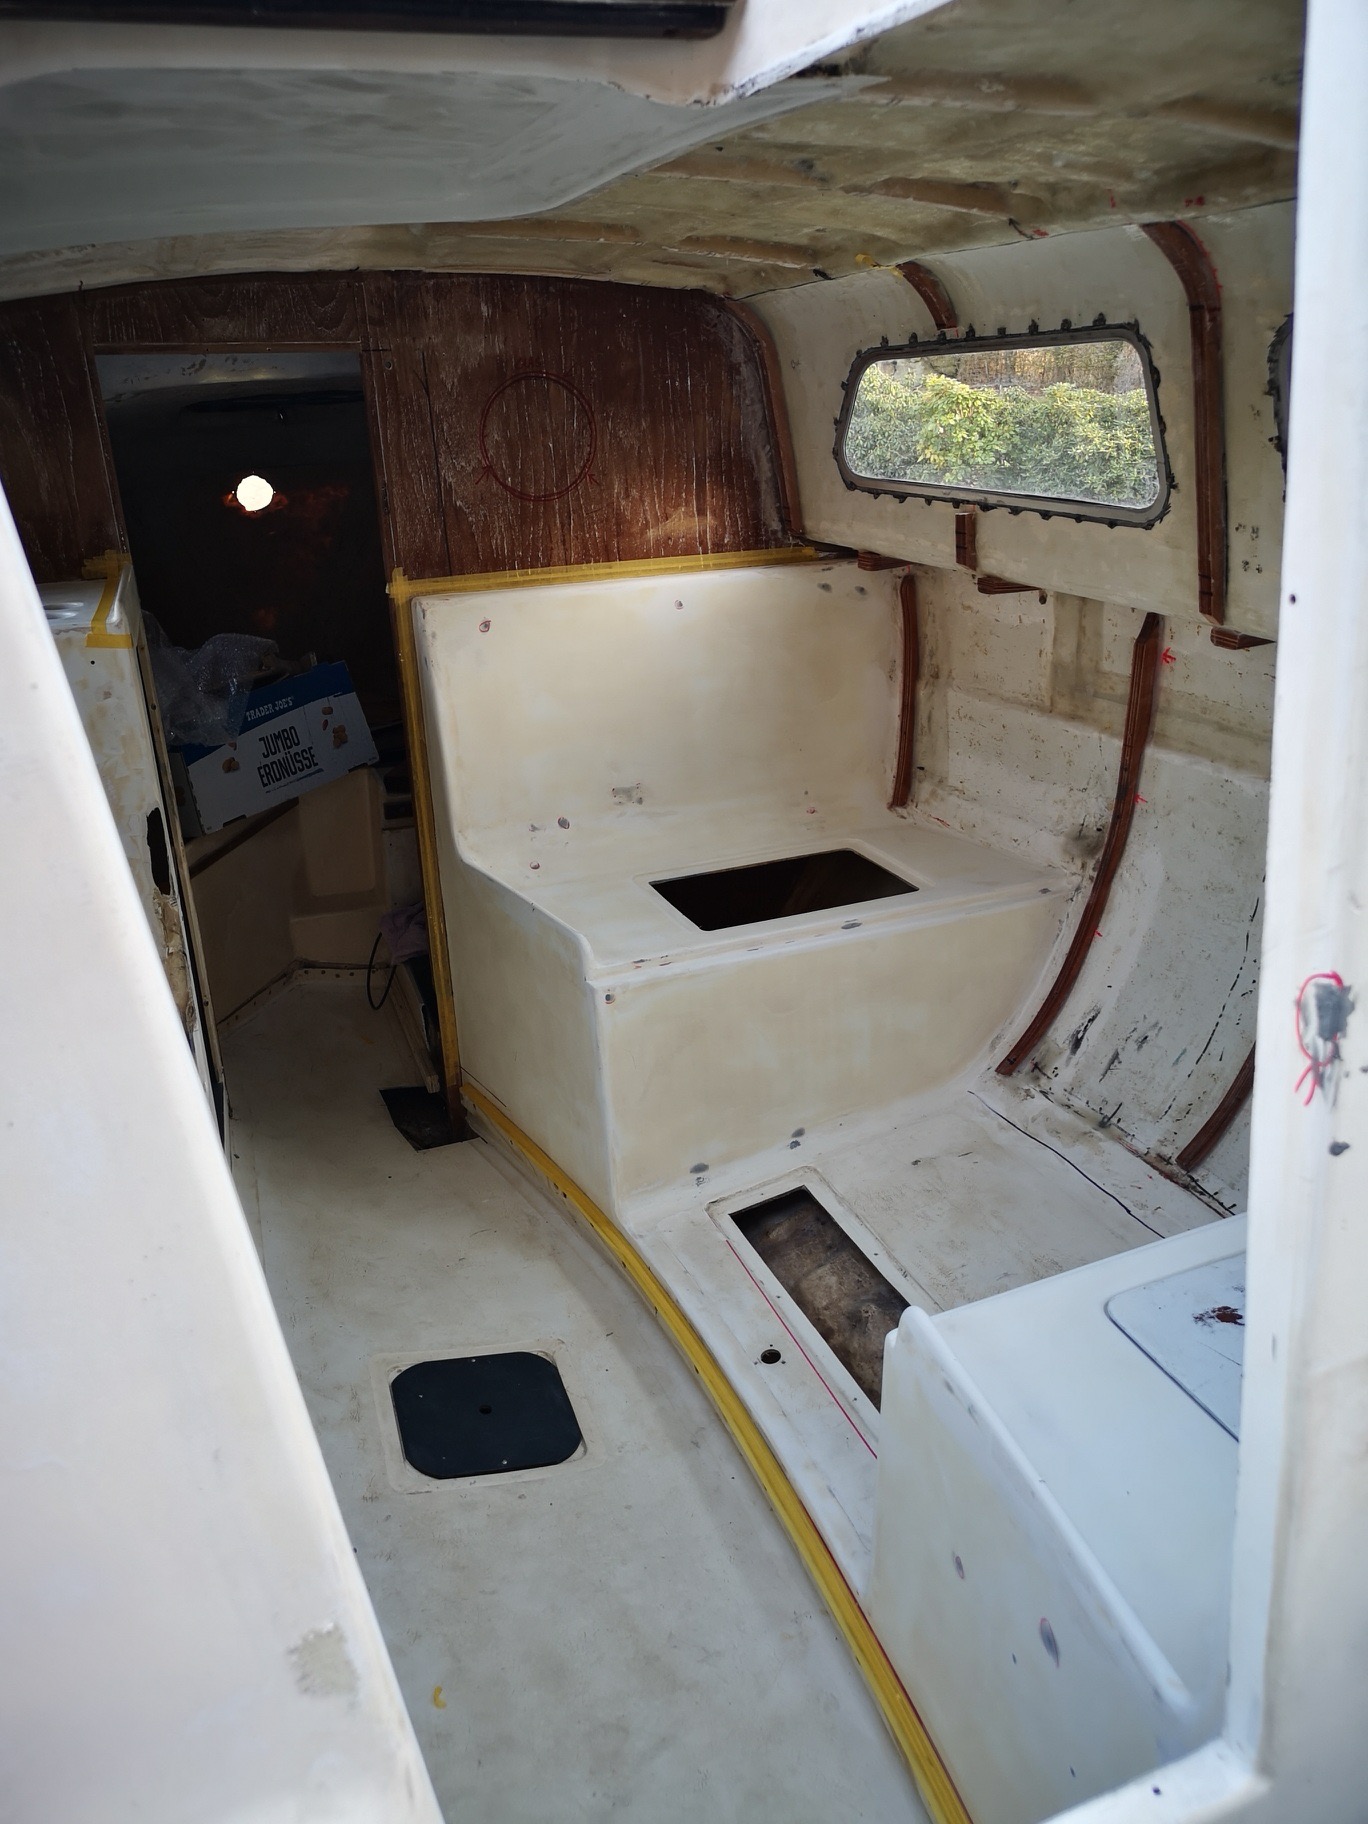
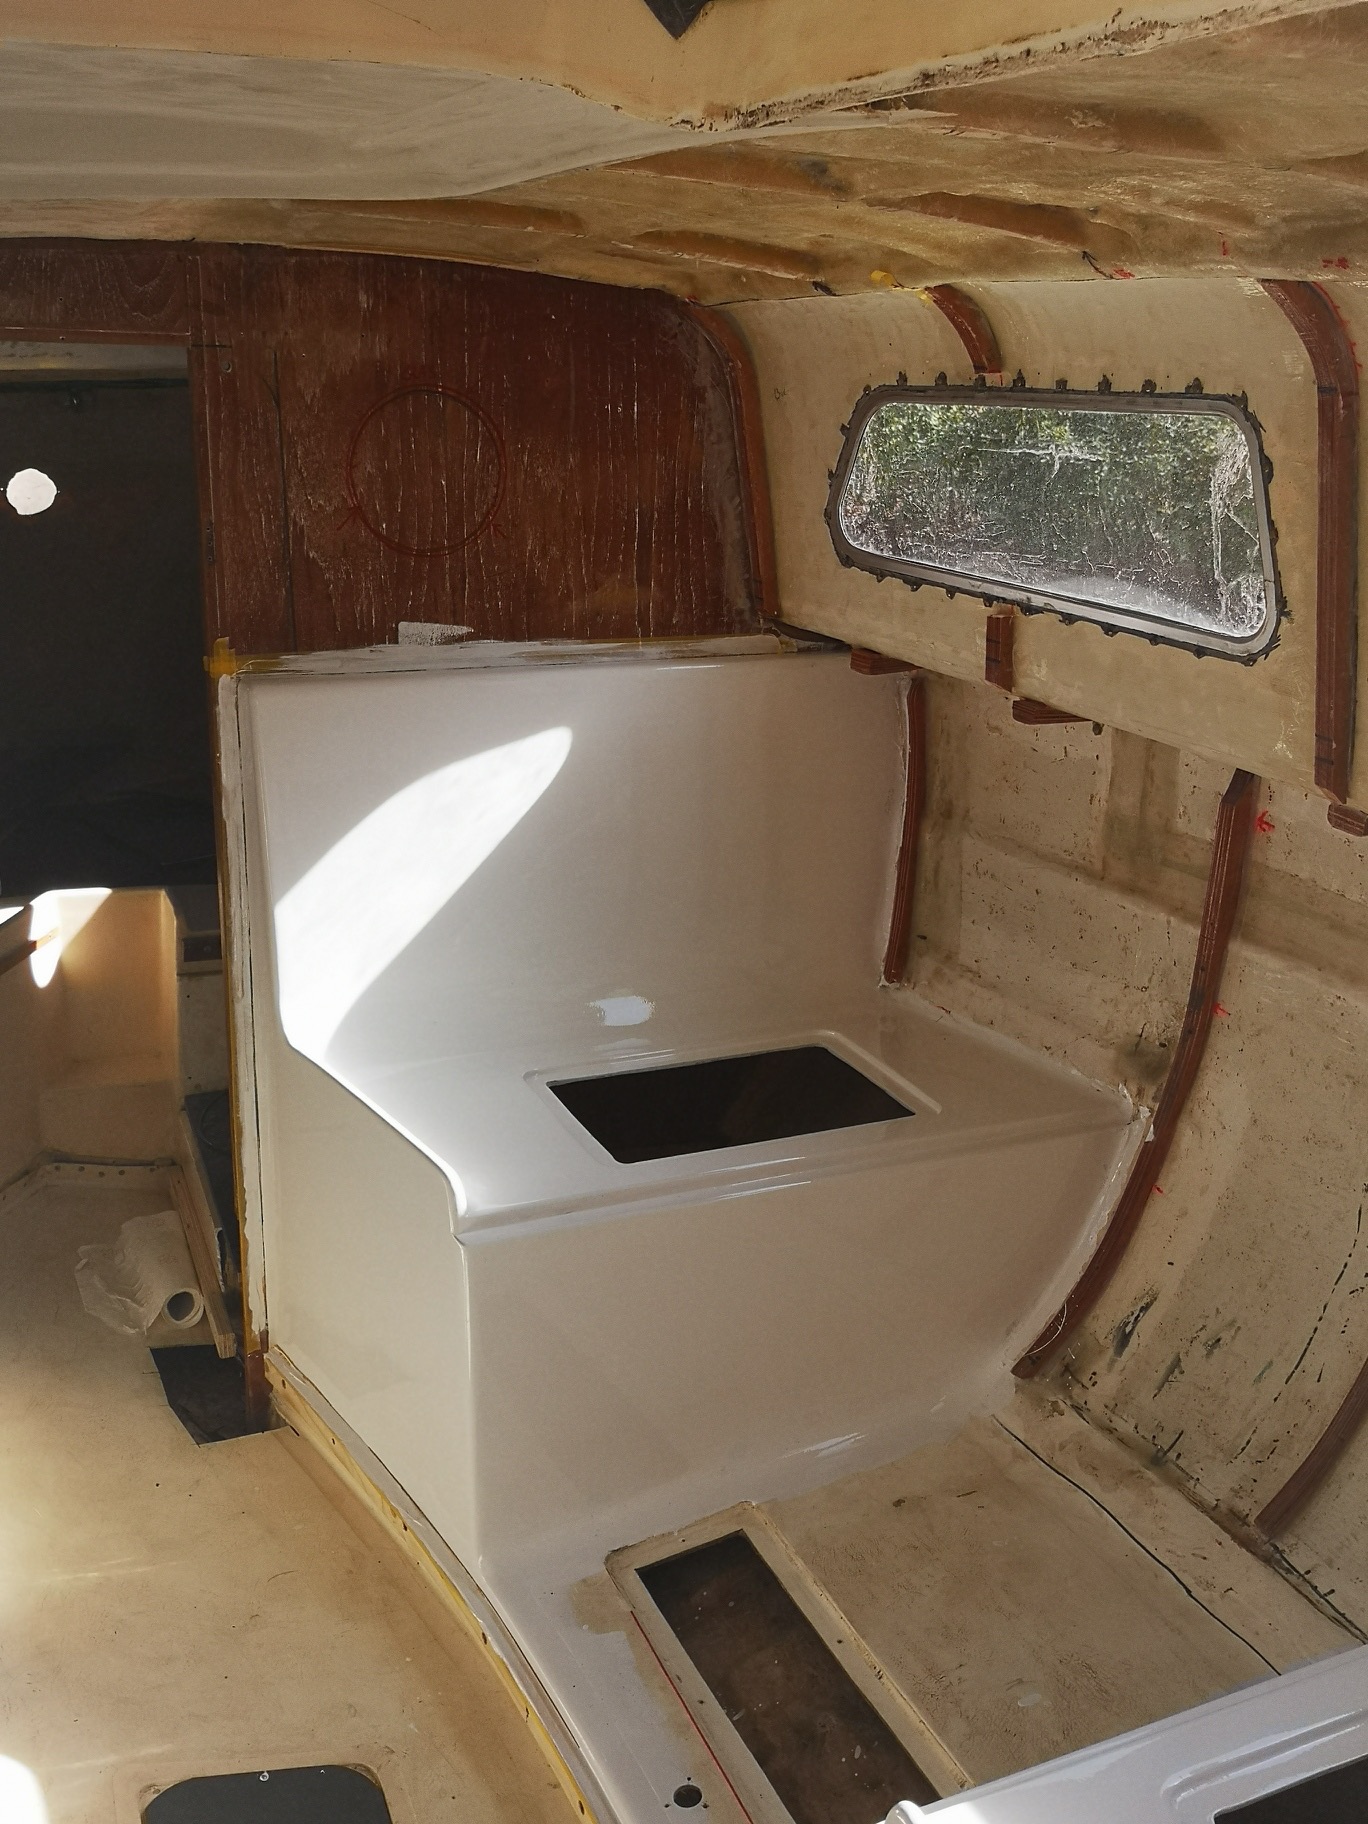
Today I have removed the sea toilet, because this place just looks pretty bad, as you can easily see in the pictures. Since I could not rule out wether water had been deposited, I flexed away the console. What should I tell you, … under the console "JABBA THE HUTT" had been sleeping ... but at least water did not accumulated there. This toilet sneeze will be reworked with fiberglass and a new console. The sea toilet will be converted into a hybrid toilet and will be used on the one hand as a sea toilet and on the other as a composting toilet, but more if the renovation is completed.
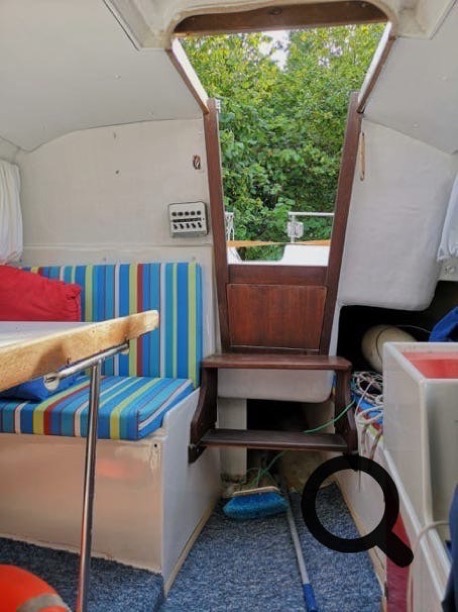
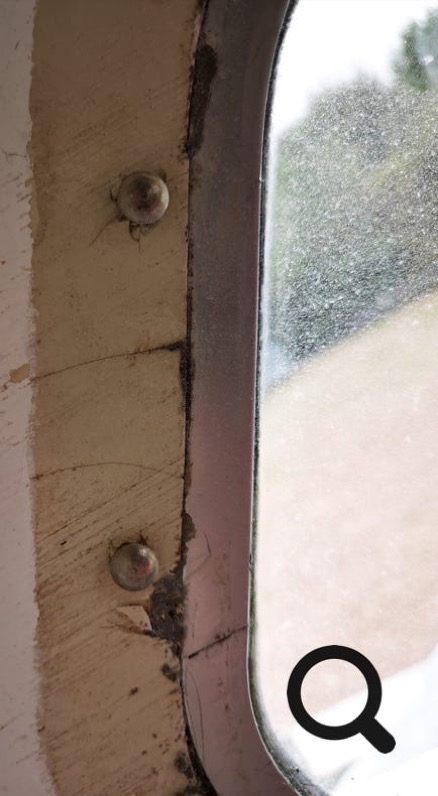
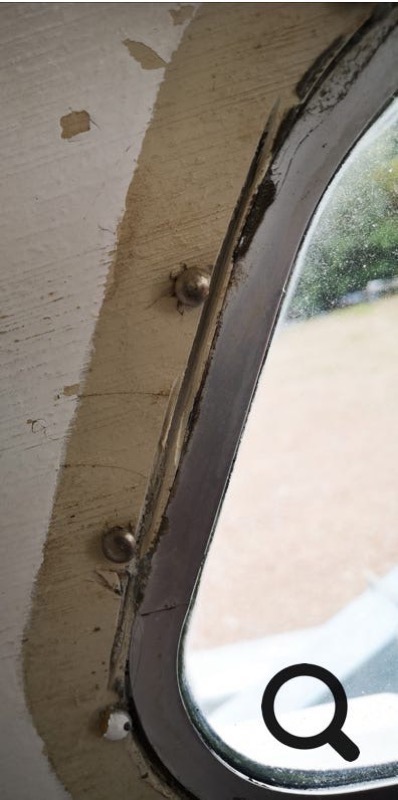
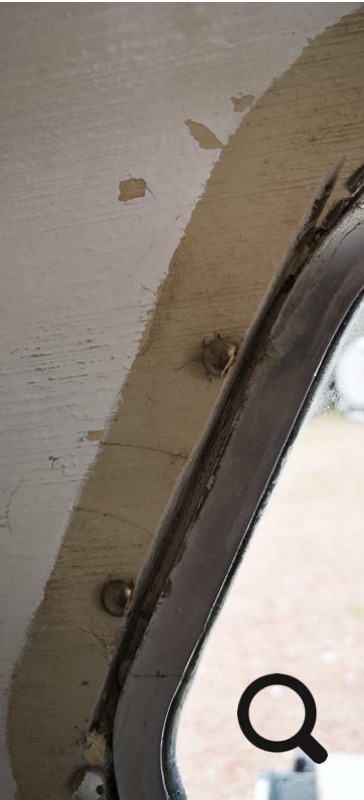
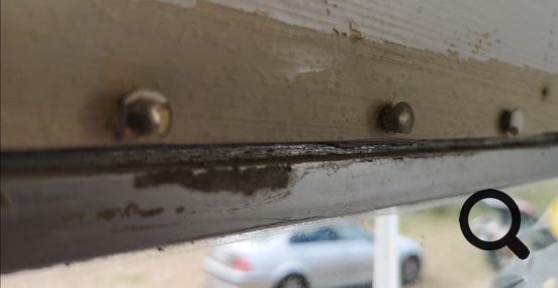
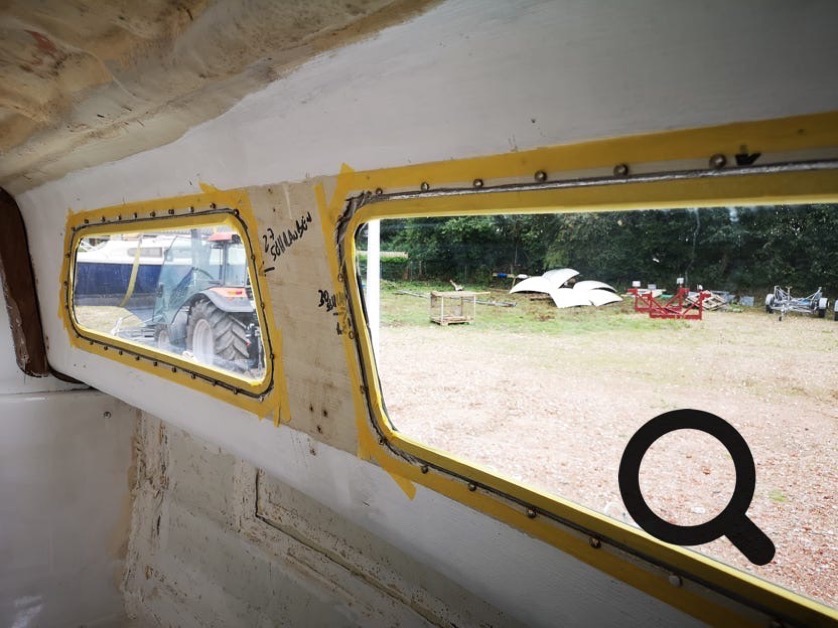
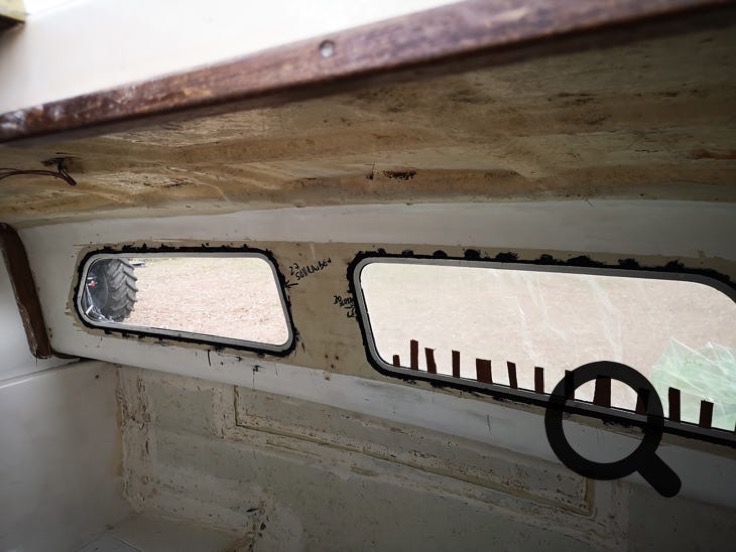
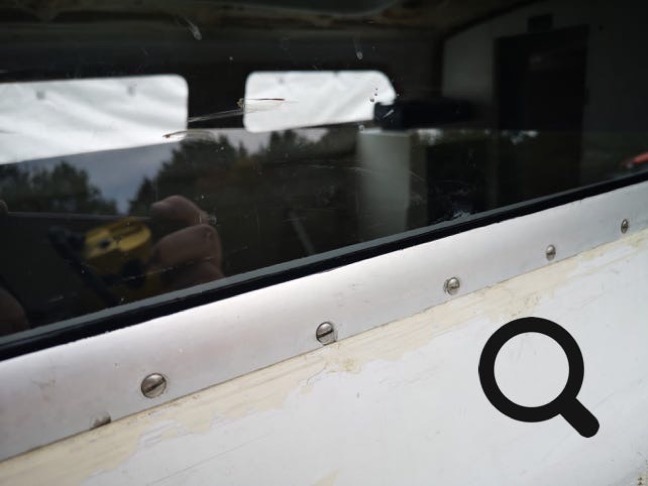
I do worry al little about the windows. I do not like to take them out, but there will be no other way out, because I have to be quite sure before the interior work, that the windows do not allow any water inside. However, the plywood around the windows was completely wavy and had peeled apart layer by layer.
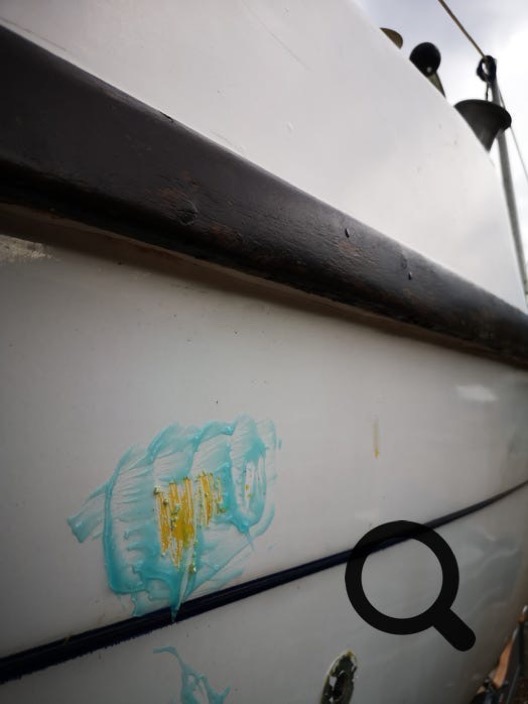
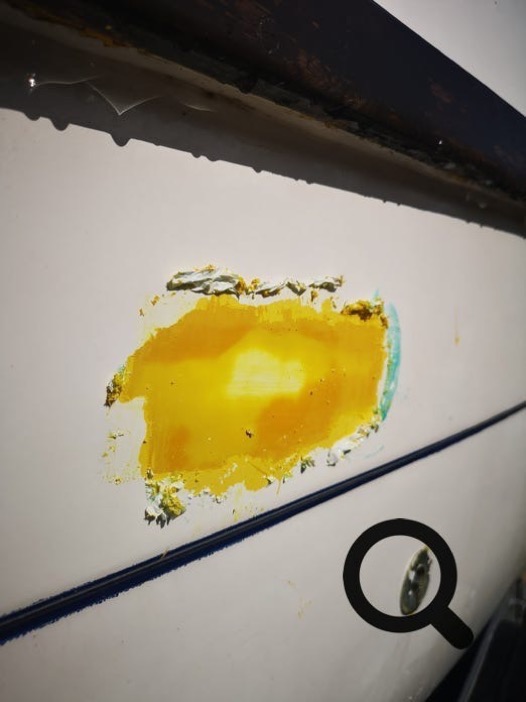
Today, I've tested quite casually, if the color over the gelcoat can be removed with a stripping agent. The answer is a startling YES. It came four layers to light. Yellow, below orange and below white again. It is clear that the gelcoat had originally been white.
Here I definitely need an exchange of experience with other L22 / L23 boatbuilders.
Windows - Windows - Windows - Windows - Windows - Windows - Windows - Windows - Windows
06.09.2019
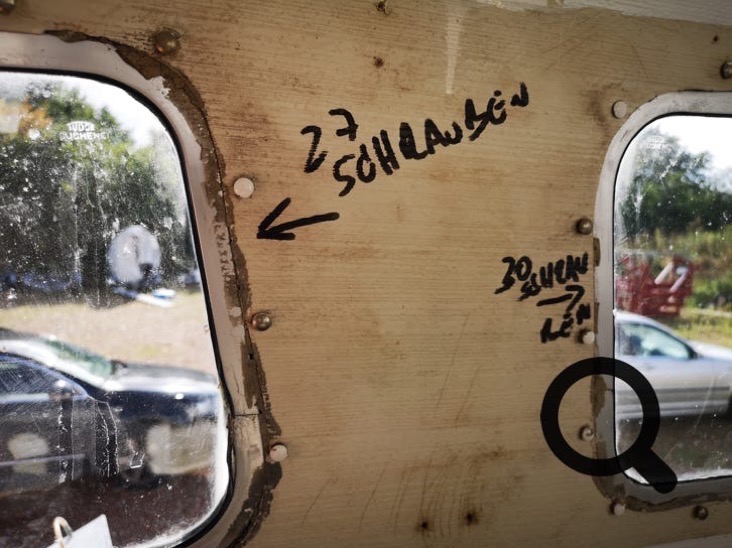
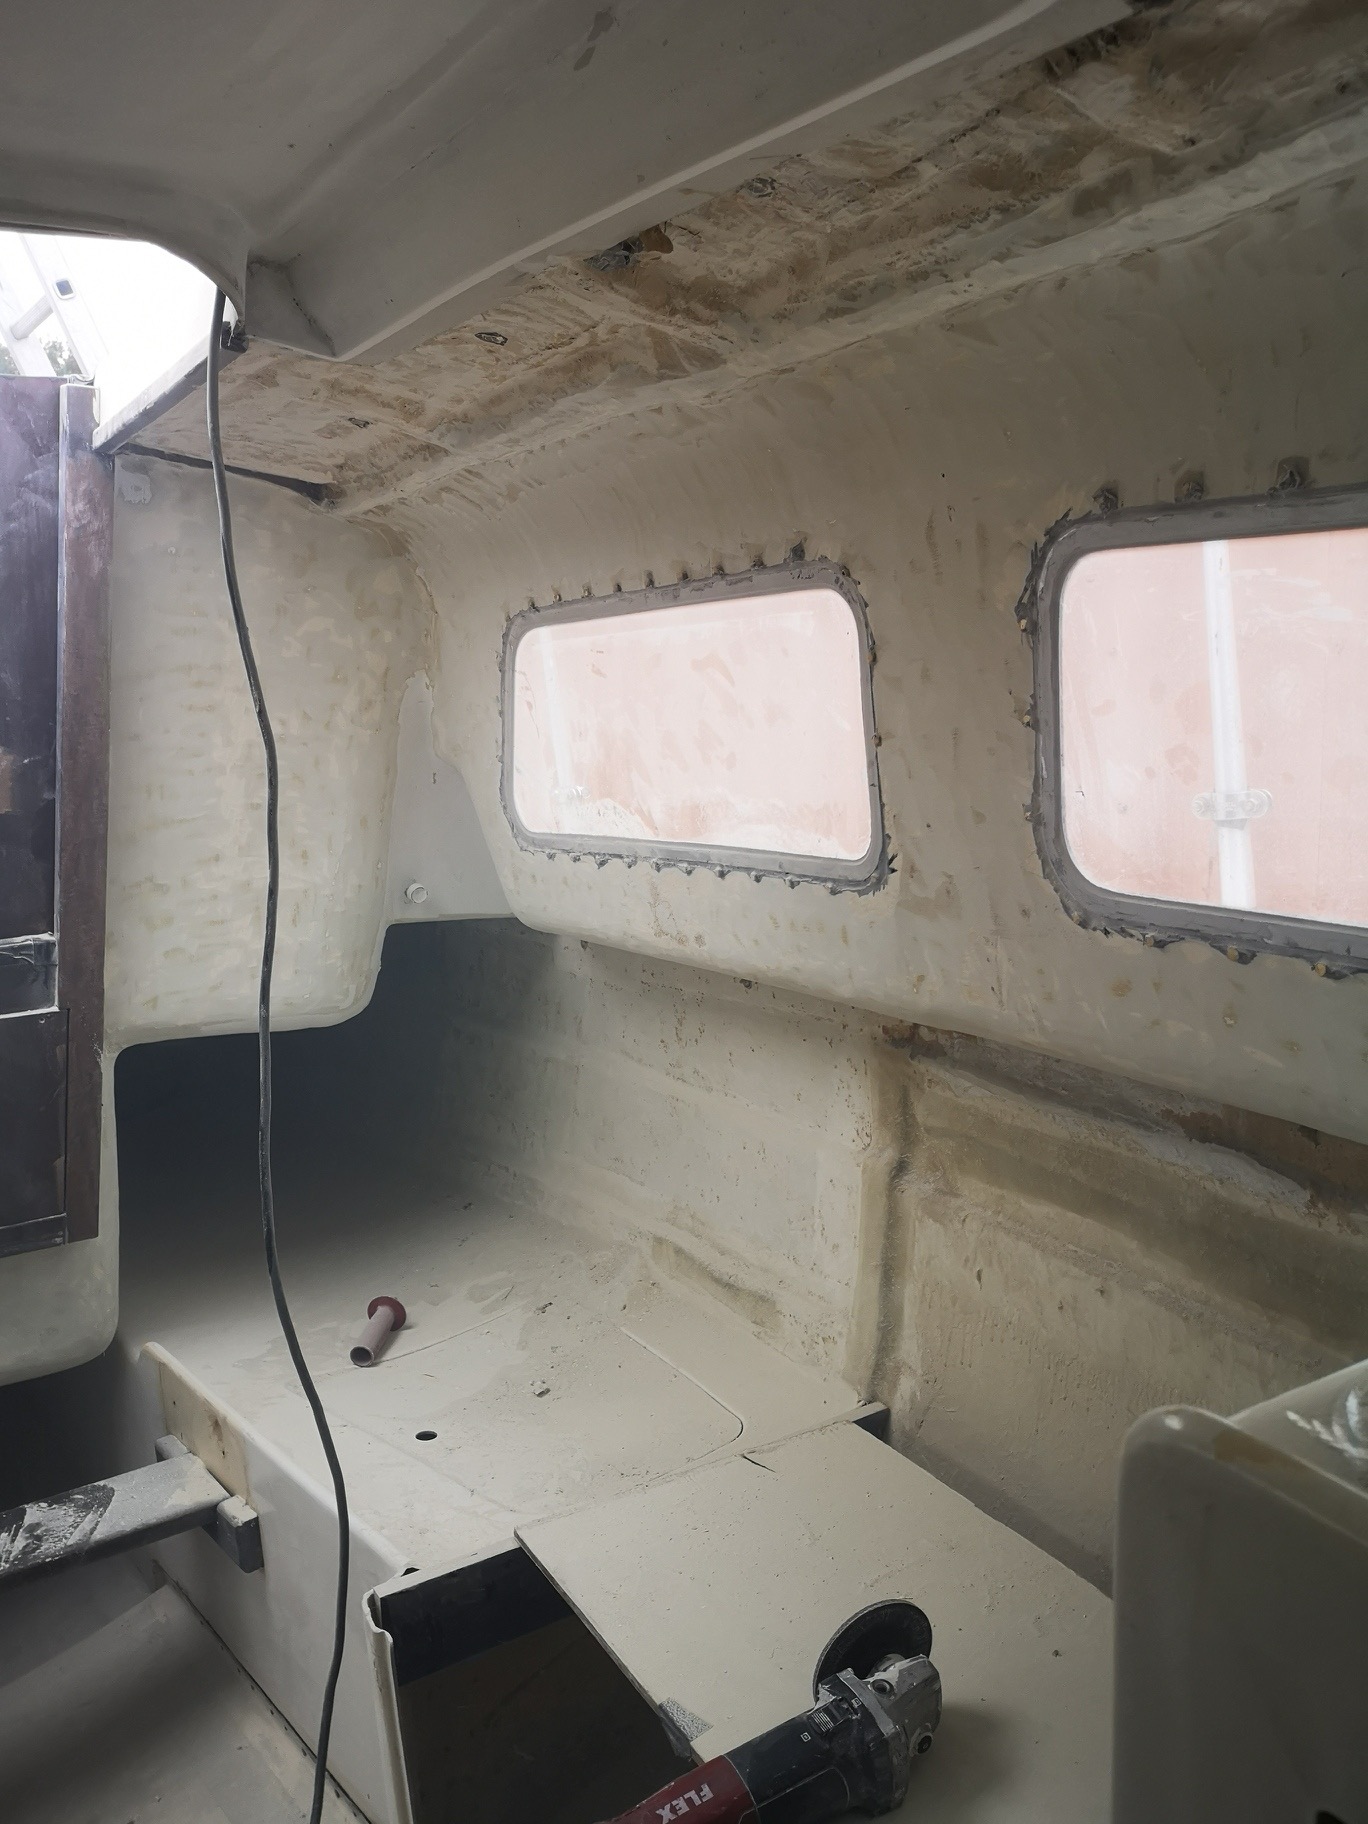
First of all, I decided to renovate the windows without removing them, which means removing the old sealing putty and scraping the sealant between the glass and the aluminum frame as far as possible. With the Flex (with diamond wheel) around the windows, I have milled a joint into the fiberglass, which will later be grouted with Sikaflex. I do the same between glass and frame.
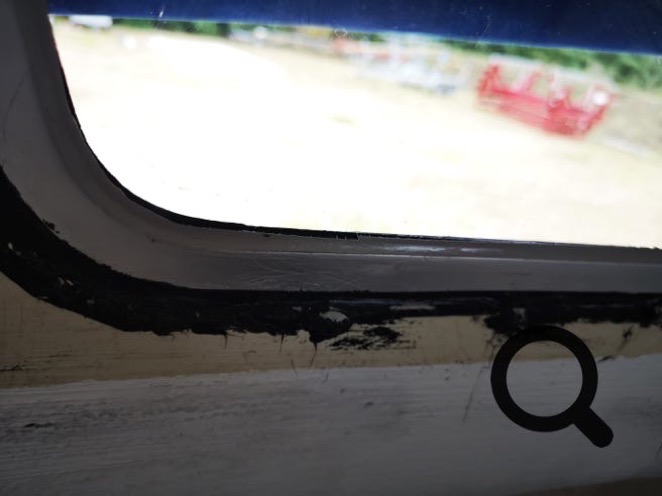
Today, I taped the windows, pre-treated the joints with Sikaflex primer and then, after the drying time, filled the joints with Sikaflex 211,
10.09.2019
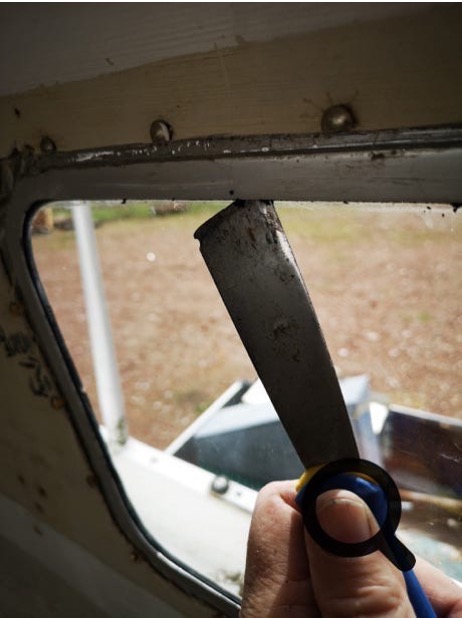
The rubber between the disc and the frame I pulled out with a spatula. The spatula I have for it, as seen in the picture at the outer edges sawn in each case a hook. This makes it easy to scratch out the old, porous and leaky rubber.
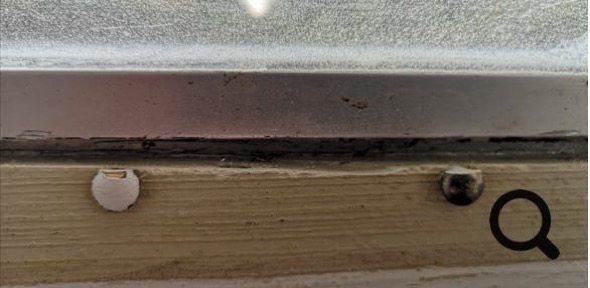
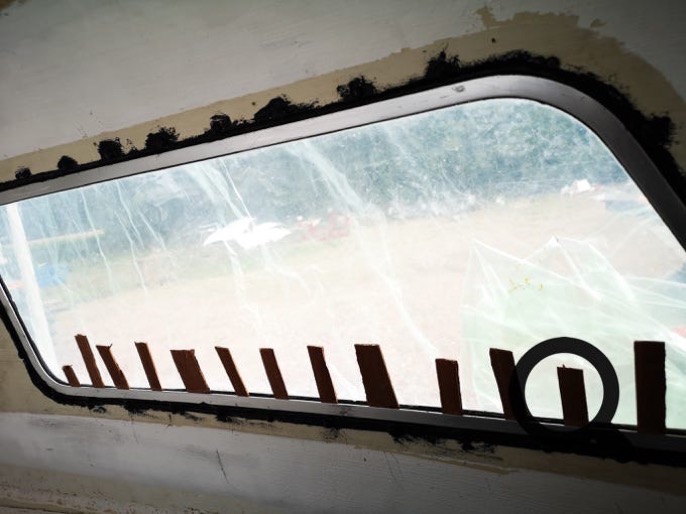
In a window there is water in the frame. I drove thin wooden wedges between the disc and the frame so that the water can evaporate before I can continue working there.

11.09.2019
Today I started to re-seal the glued discs, inside and out with Sikaflex. With a small spatula I pressed the Sikaflex into the very narrow joints very elaborately before the typical conclusion was drawn with the Spüli-finger. Incidentally, I took a UV-resistant Sikaflex for outdoor use.
18.09.2019
Also on the port side, the windows are almost completely renovated. However, the storm and the rain of the past few days have stopped me a bit. Tomorrow the sun will shine again and I will be able to finish the windows on port side from the outside.
Then it goes on with the interior, the polyester resin has arrived ;-)
Windows - Windows - Windows - Windows - Windows - Windows - Windows - Windows - Windows
So, my getaway is over. The heavy rains of the past 2 days have shown that the windows are now completely sealed.
1.10 .2019
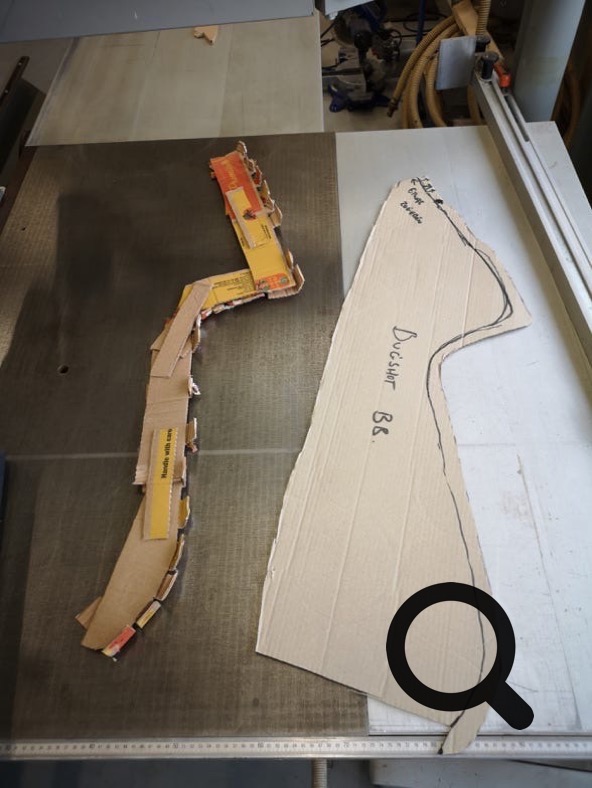
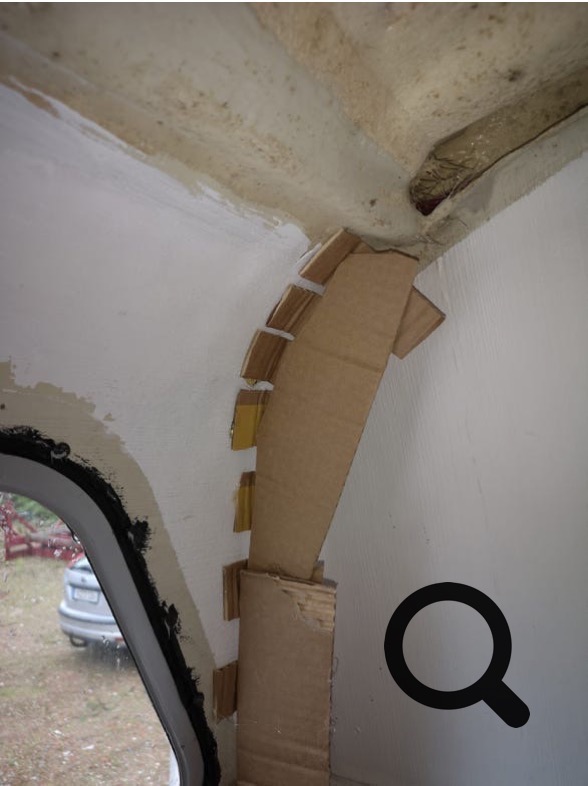
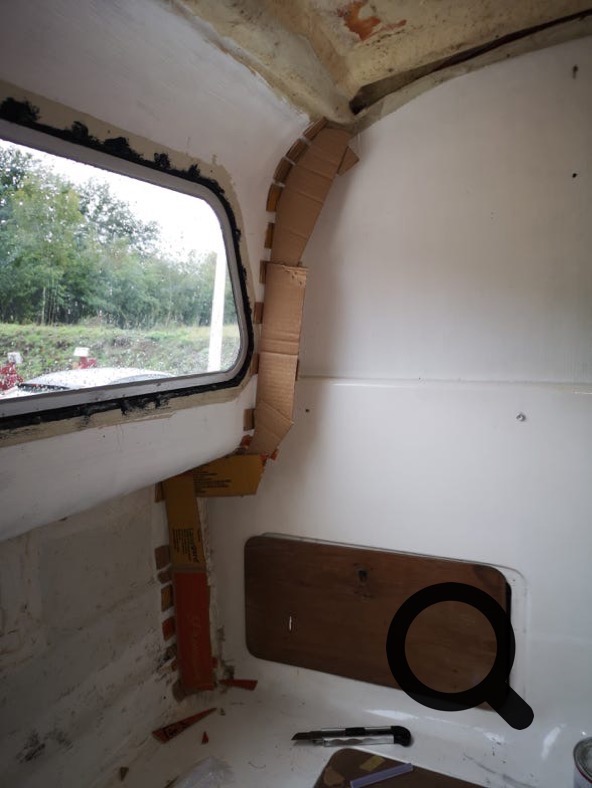
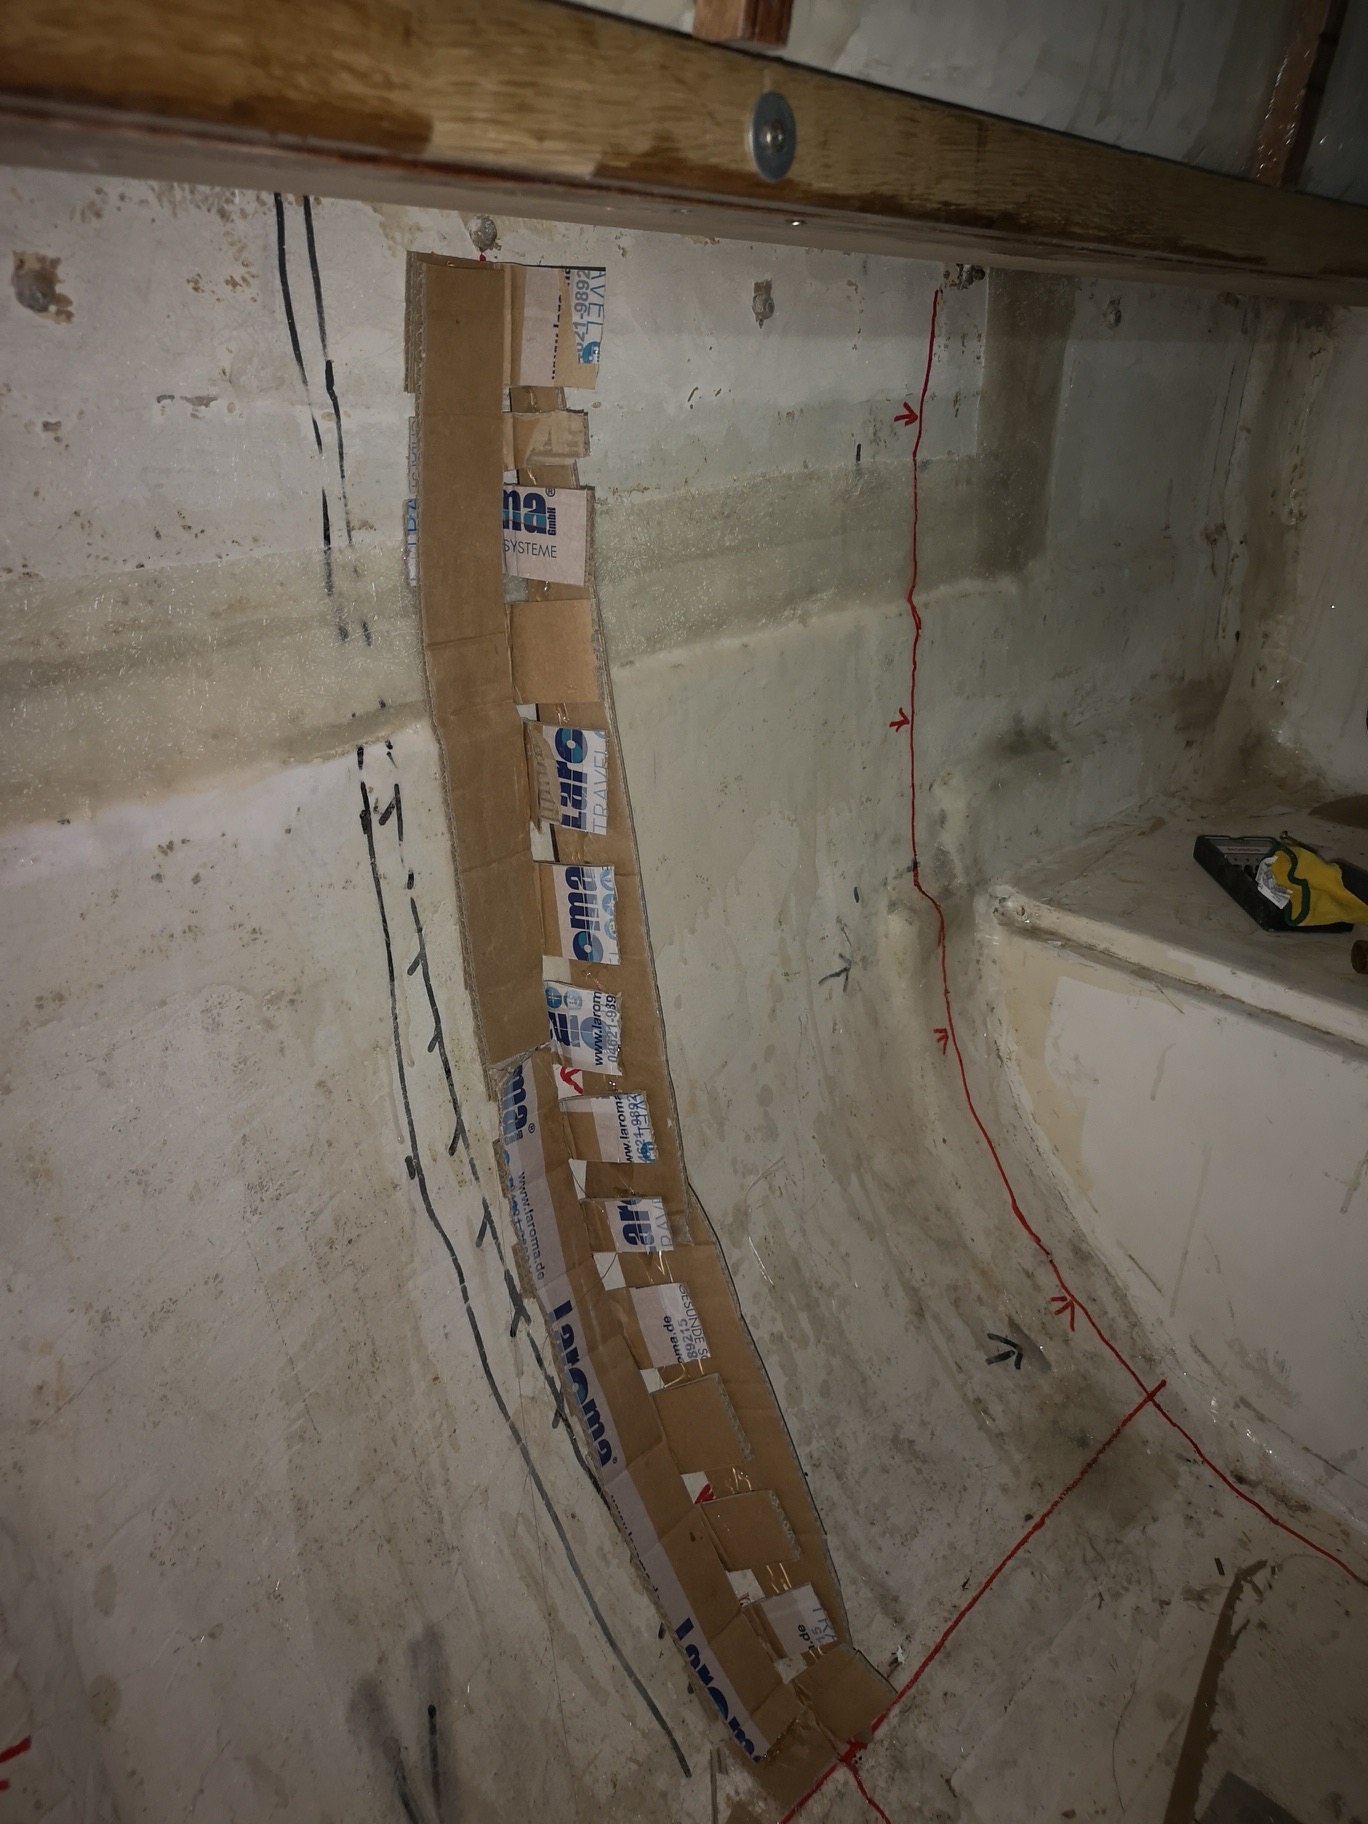
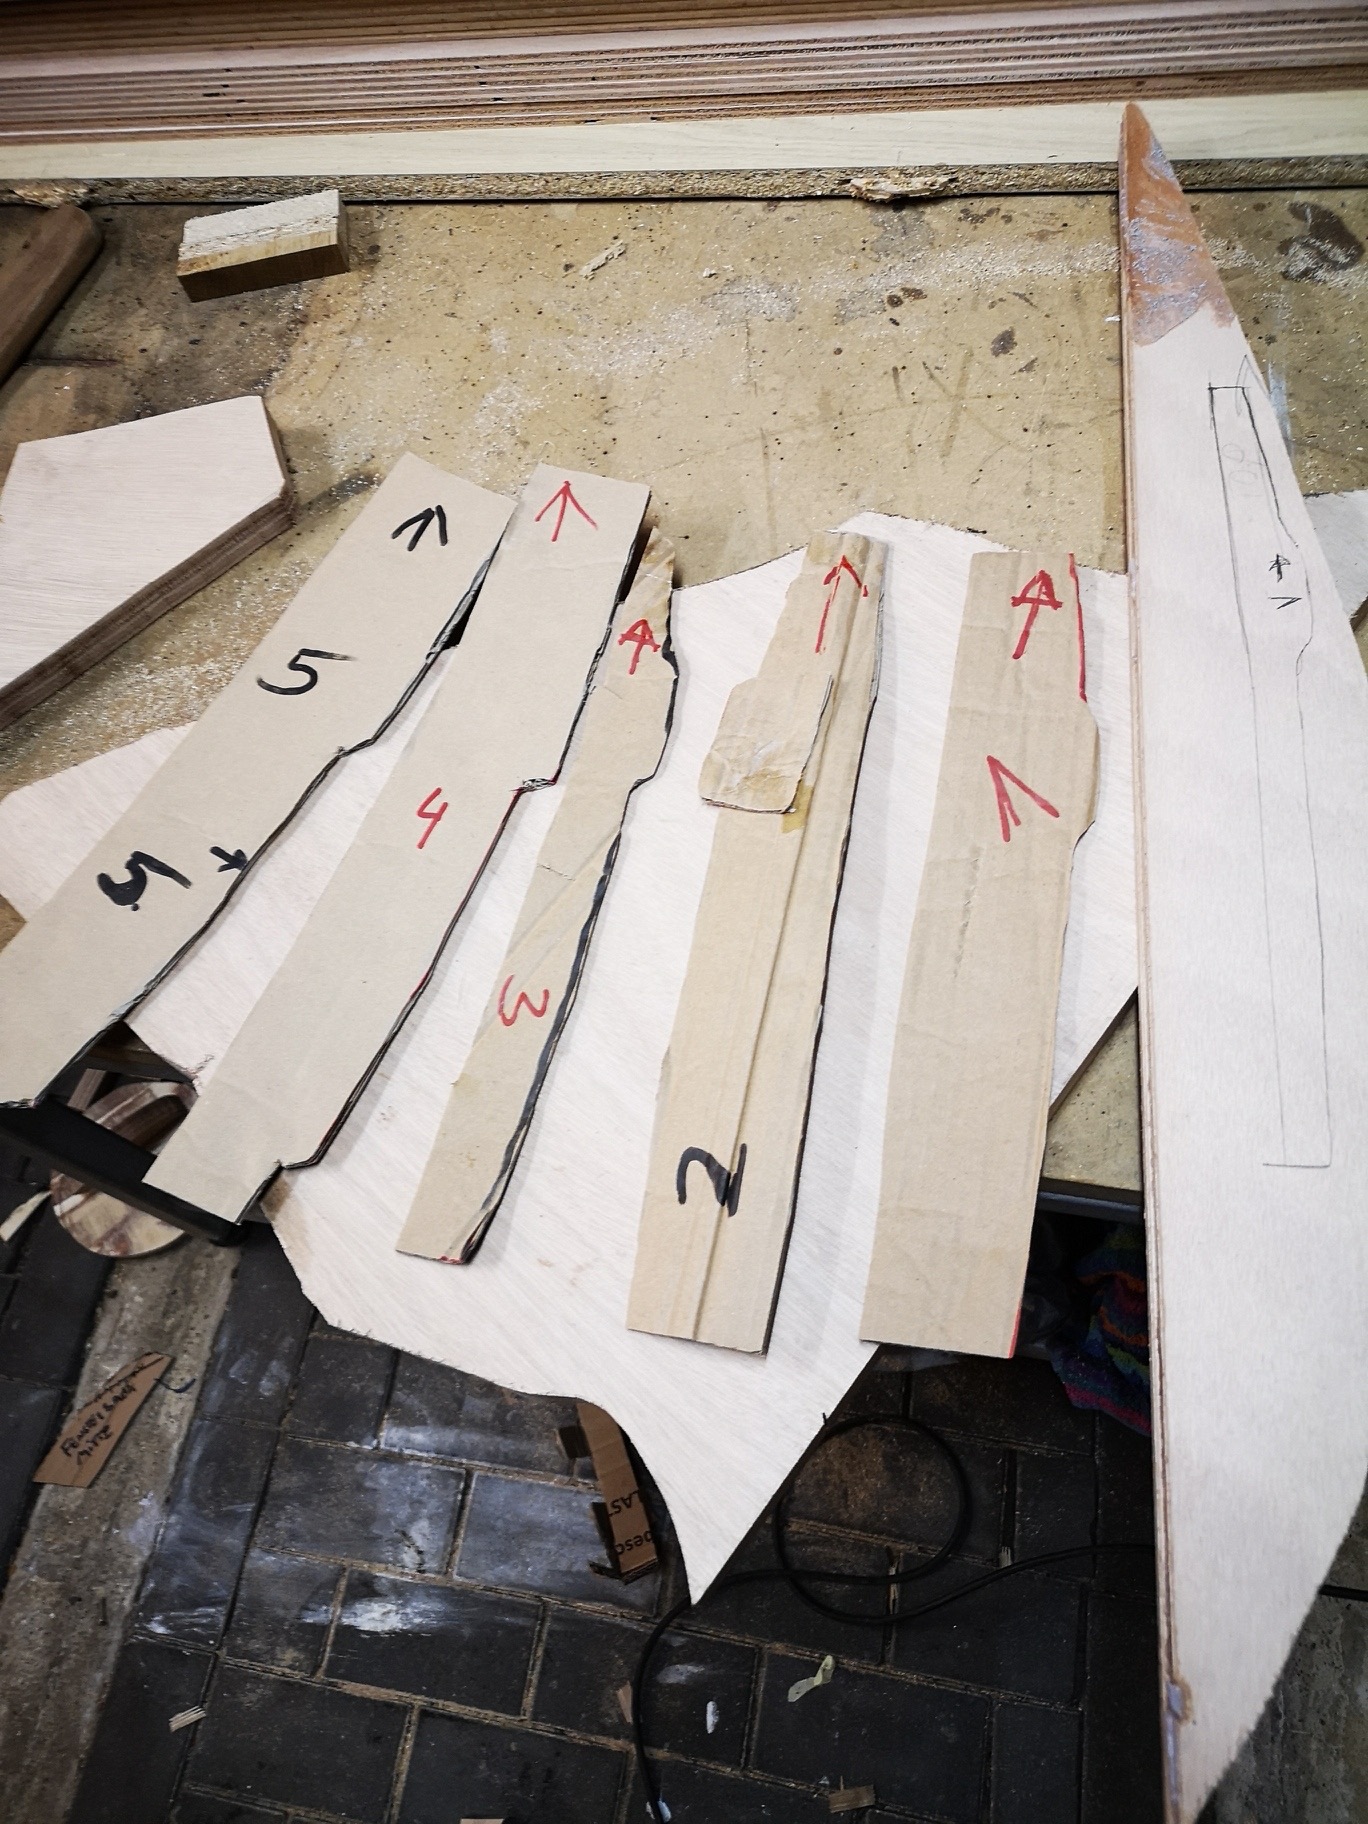
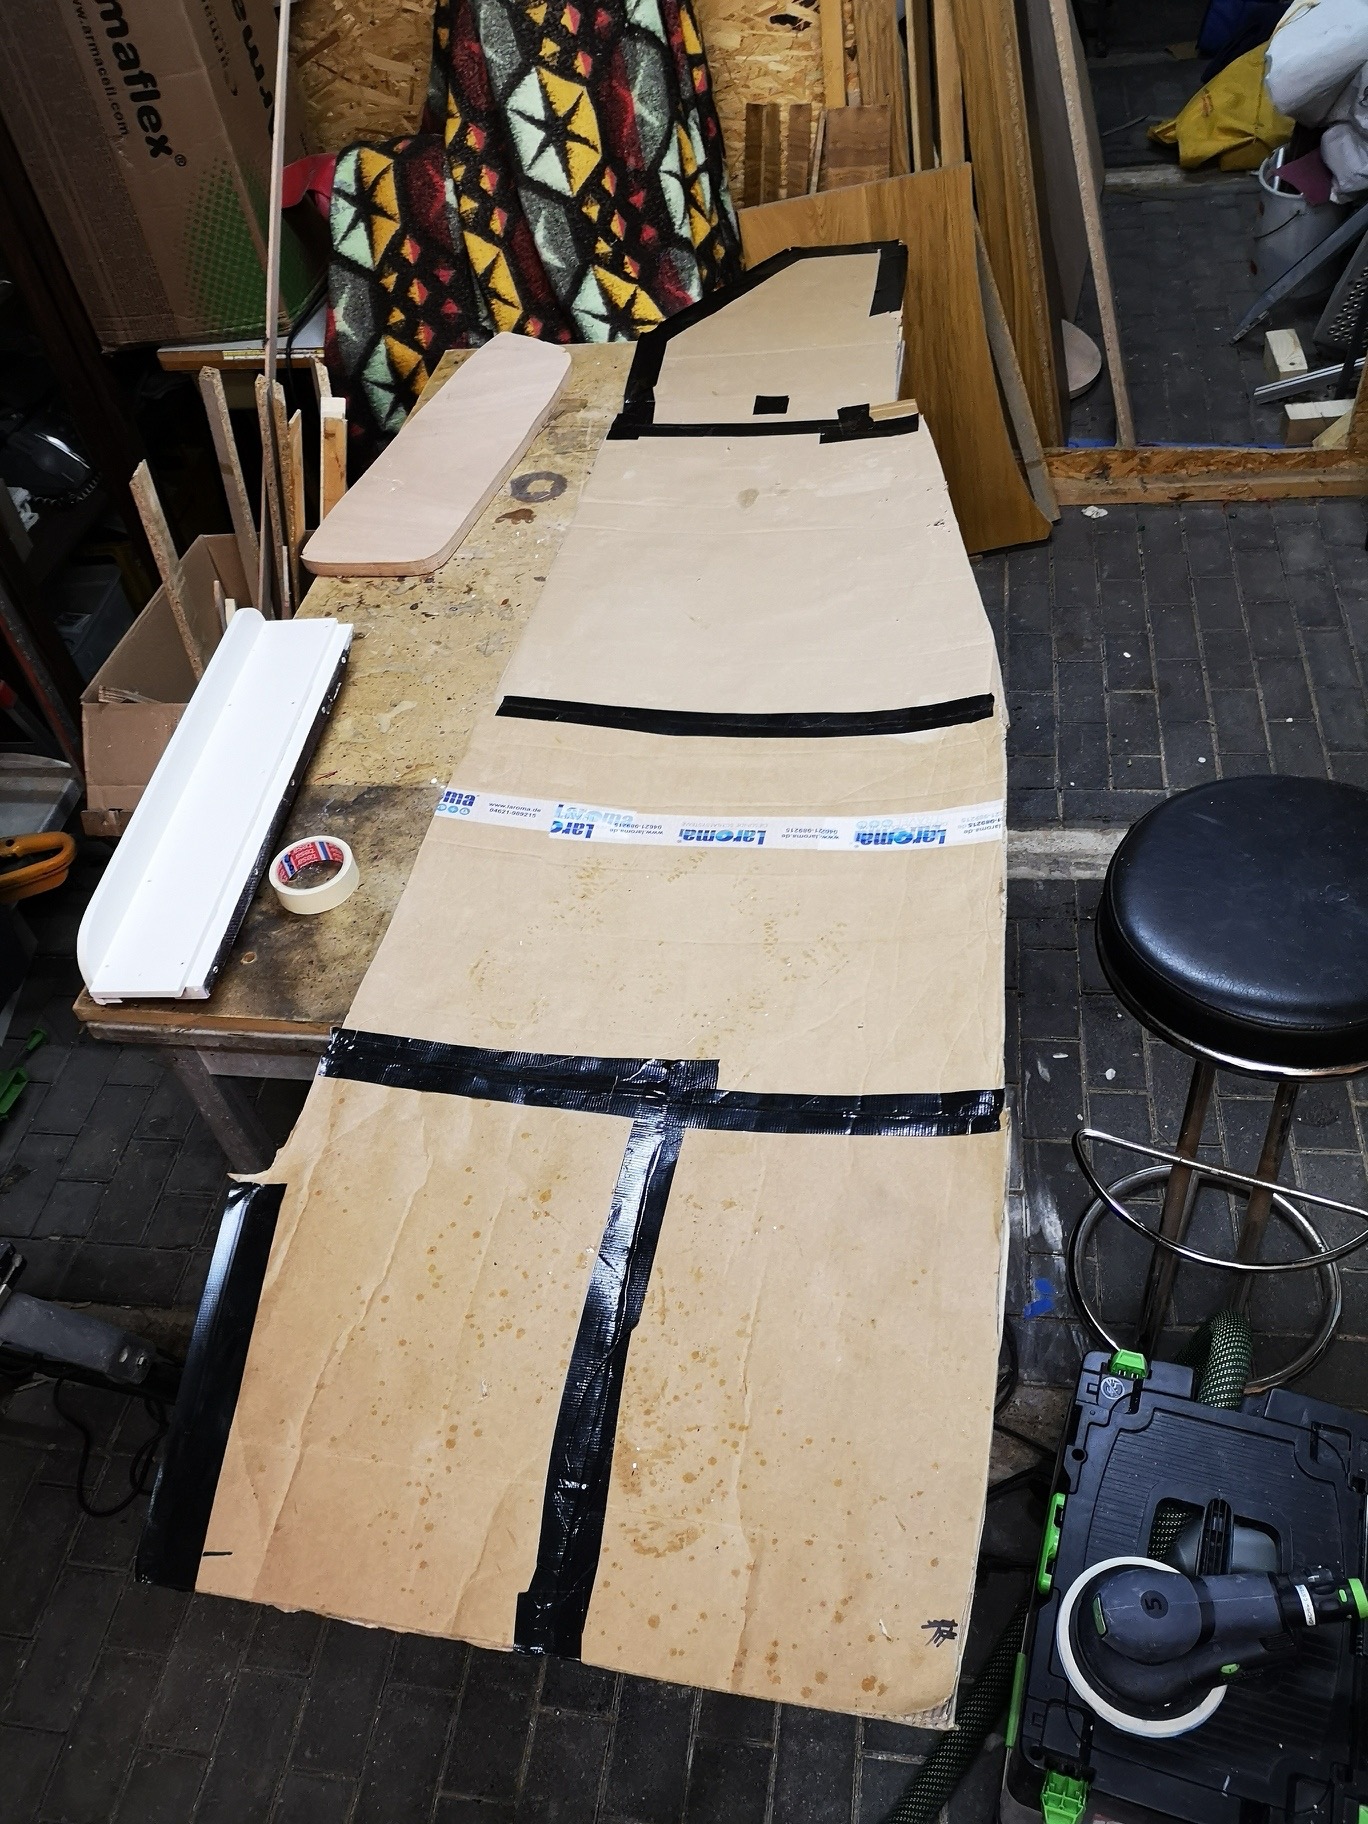
Today I started to take measurements for the frames on which the panel and the wooden strips are to be attached. For this I cut in the first step about 4cm wide strips of cardboard from old banana boxes and kinked at right angles and then stuck with a hot glue gun vertically to the inner wall, exactly where later a bulkhead should be attached. The loose ends of the cardboard strips I then again connected / glued with long cardboard strips, so that this is a stable structure. Then I carefully removed the entire cardboard construction with my spatula from the side wall and later applied the curves to a large cardboard.
I was surprised how well you can design a template in this way and how well it fits.
3.10.2019
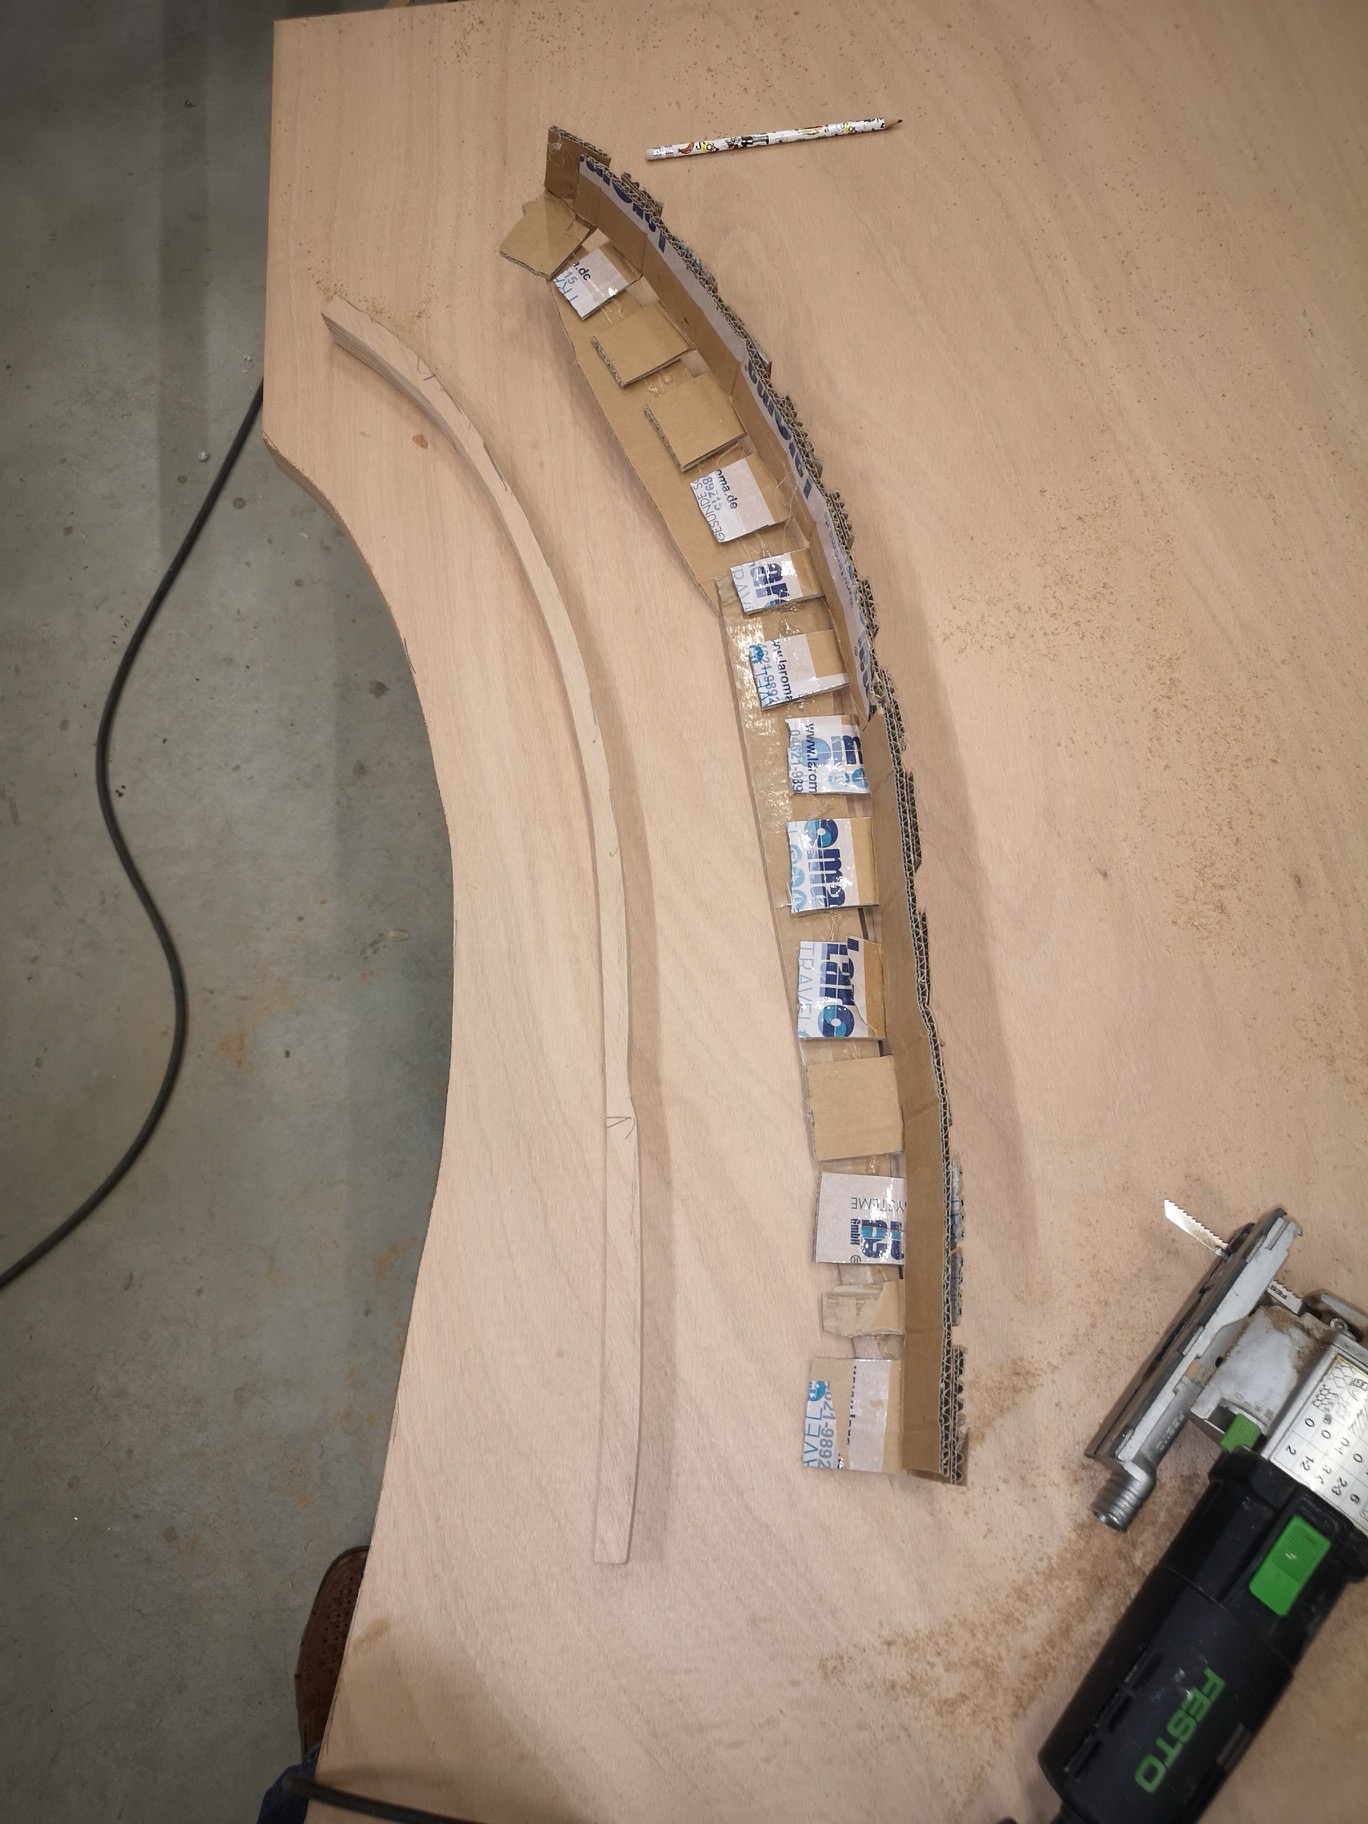
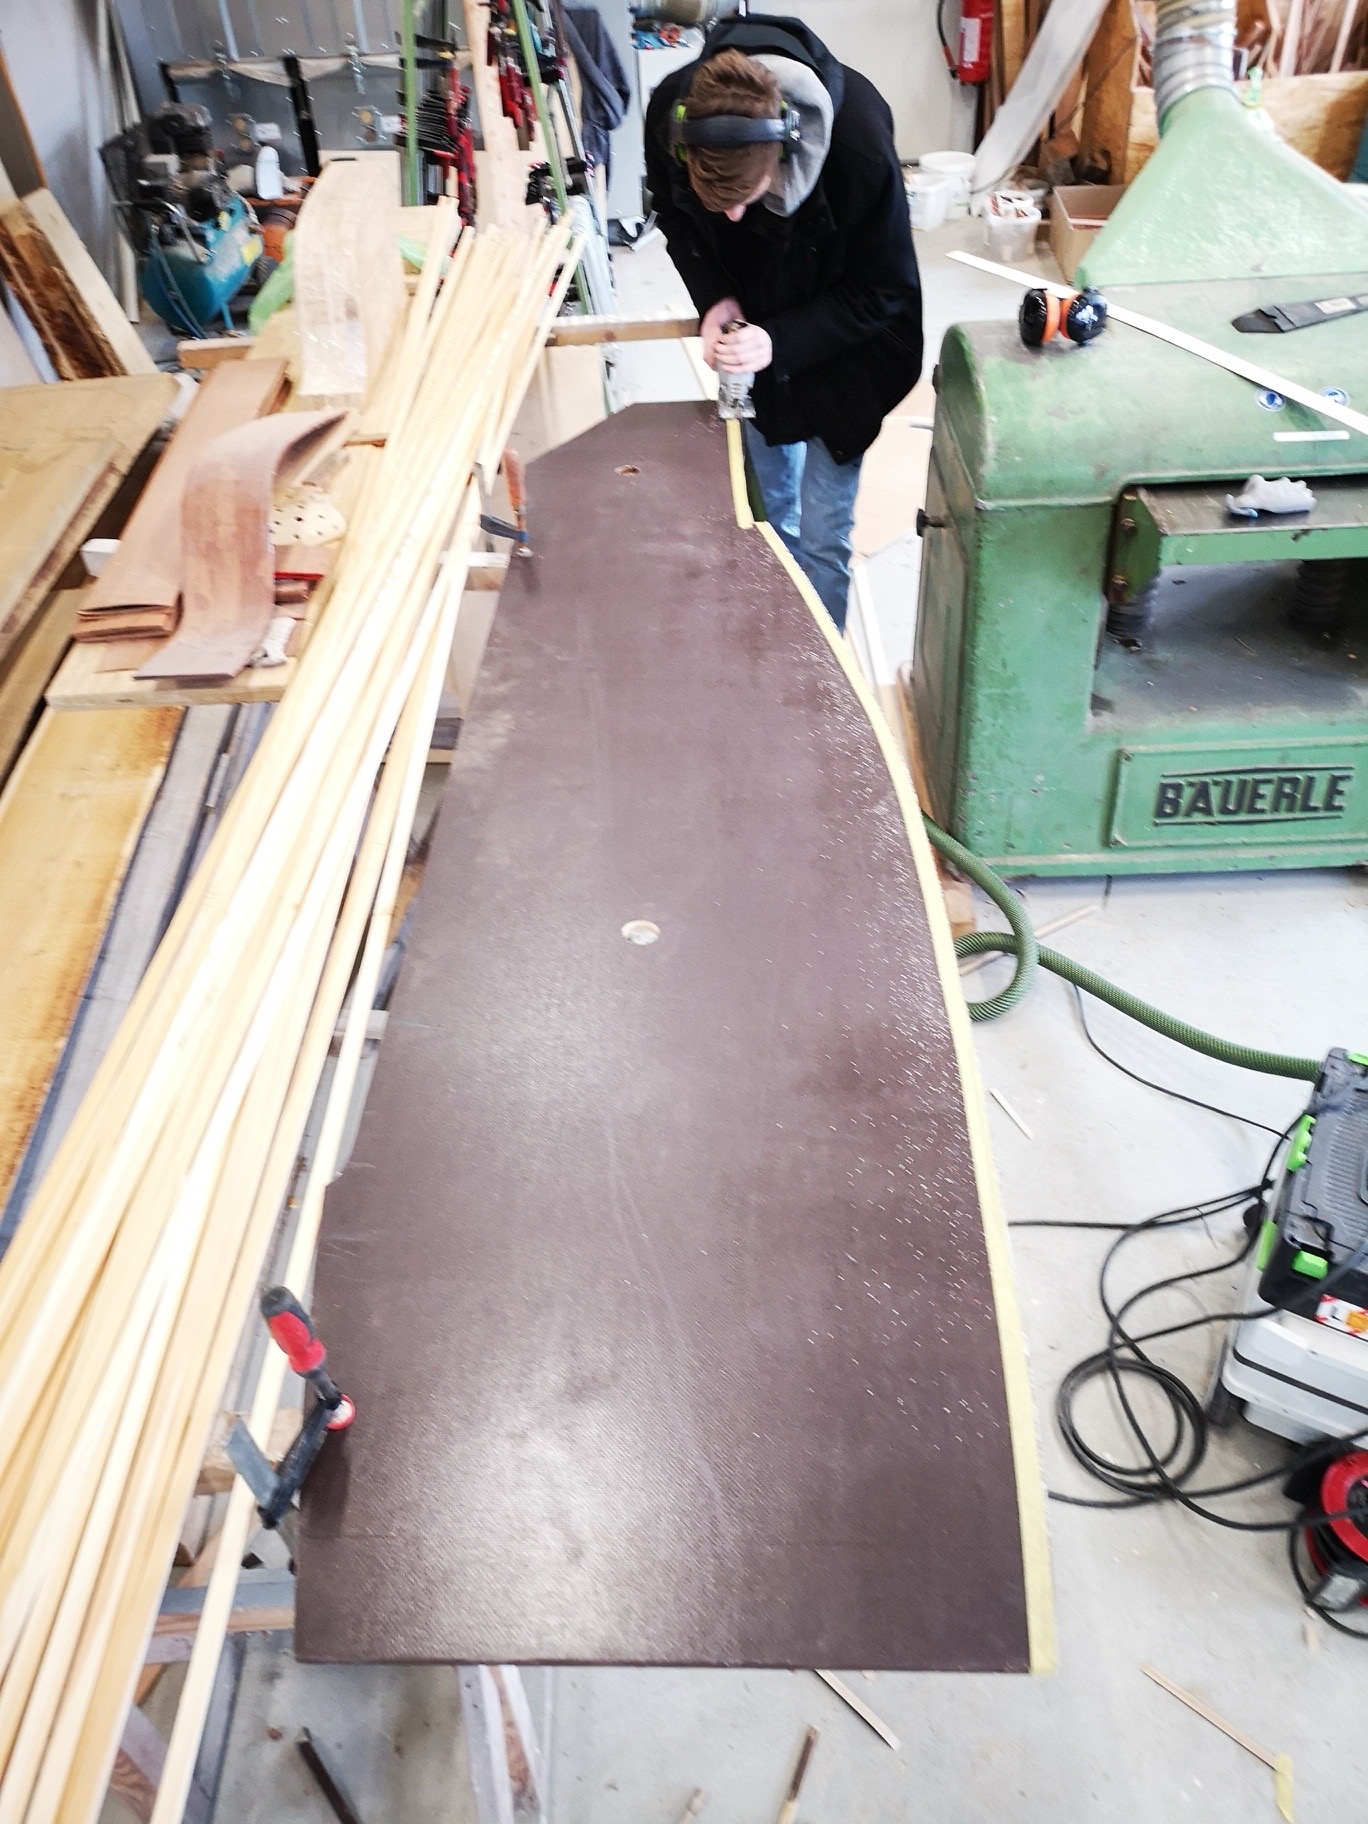
Overnight, I glued two waterproof plywood panels together with epoxy so that it had twice the thickness. Today I sawed out the first frame with my jigsaw and was pleased that it fit ;-)
4.10.2019
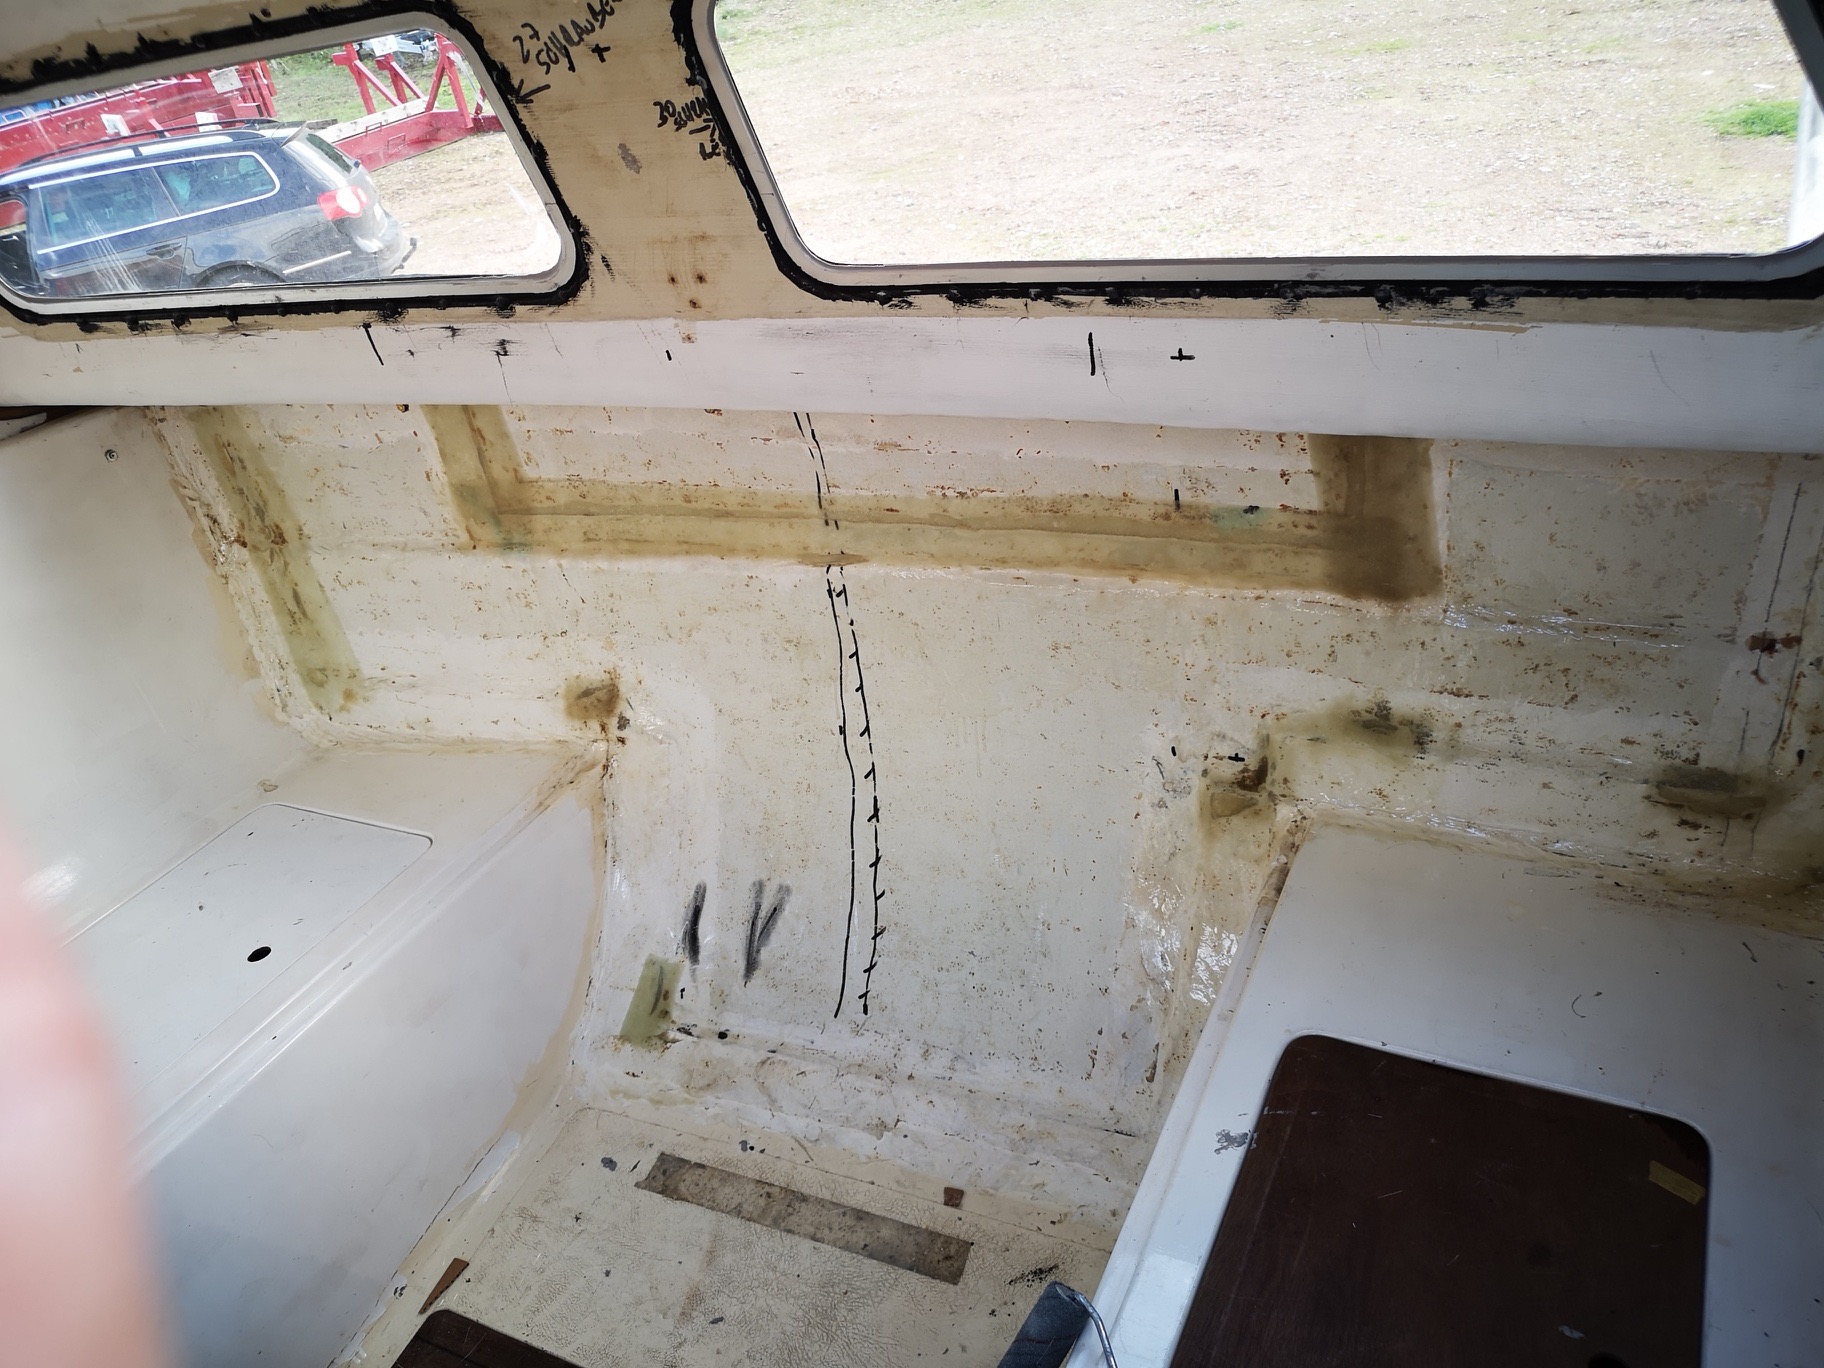
.... But before all the frames for the salon can be made and installed, the holes and open areas in the inner side wall must be sealed with polyester resin and GRP mats. On the port side (right photo), the chaise longue must first be built.
…. Here the laminate is already applied.
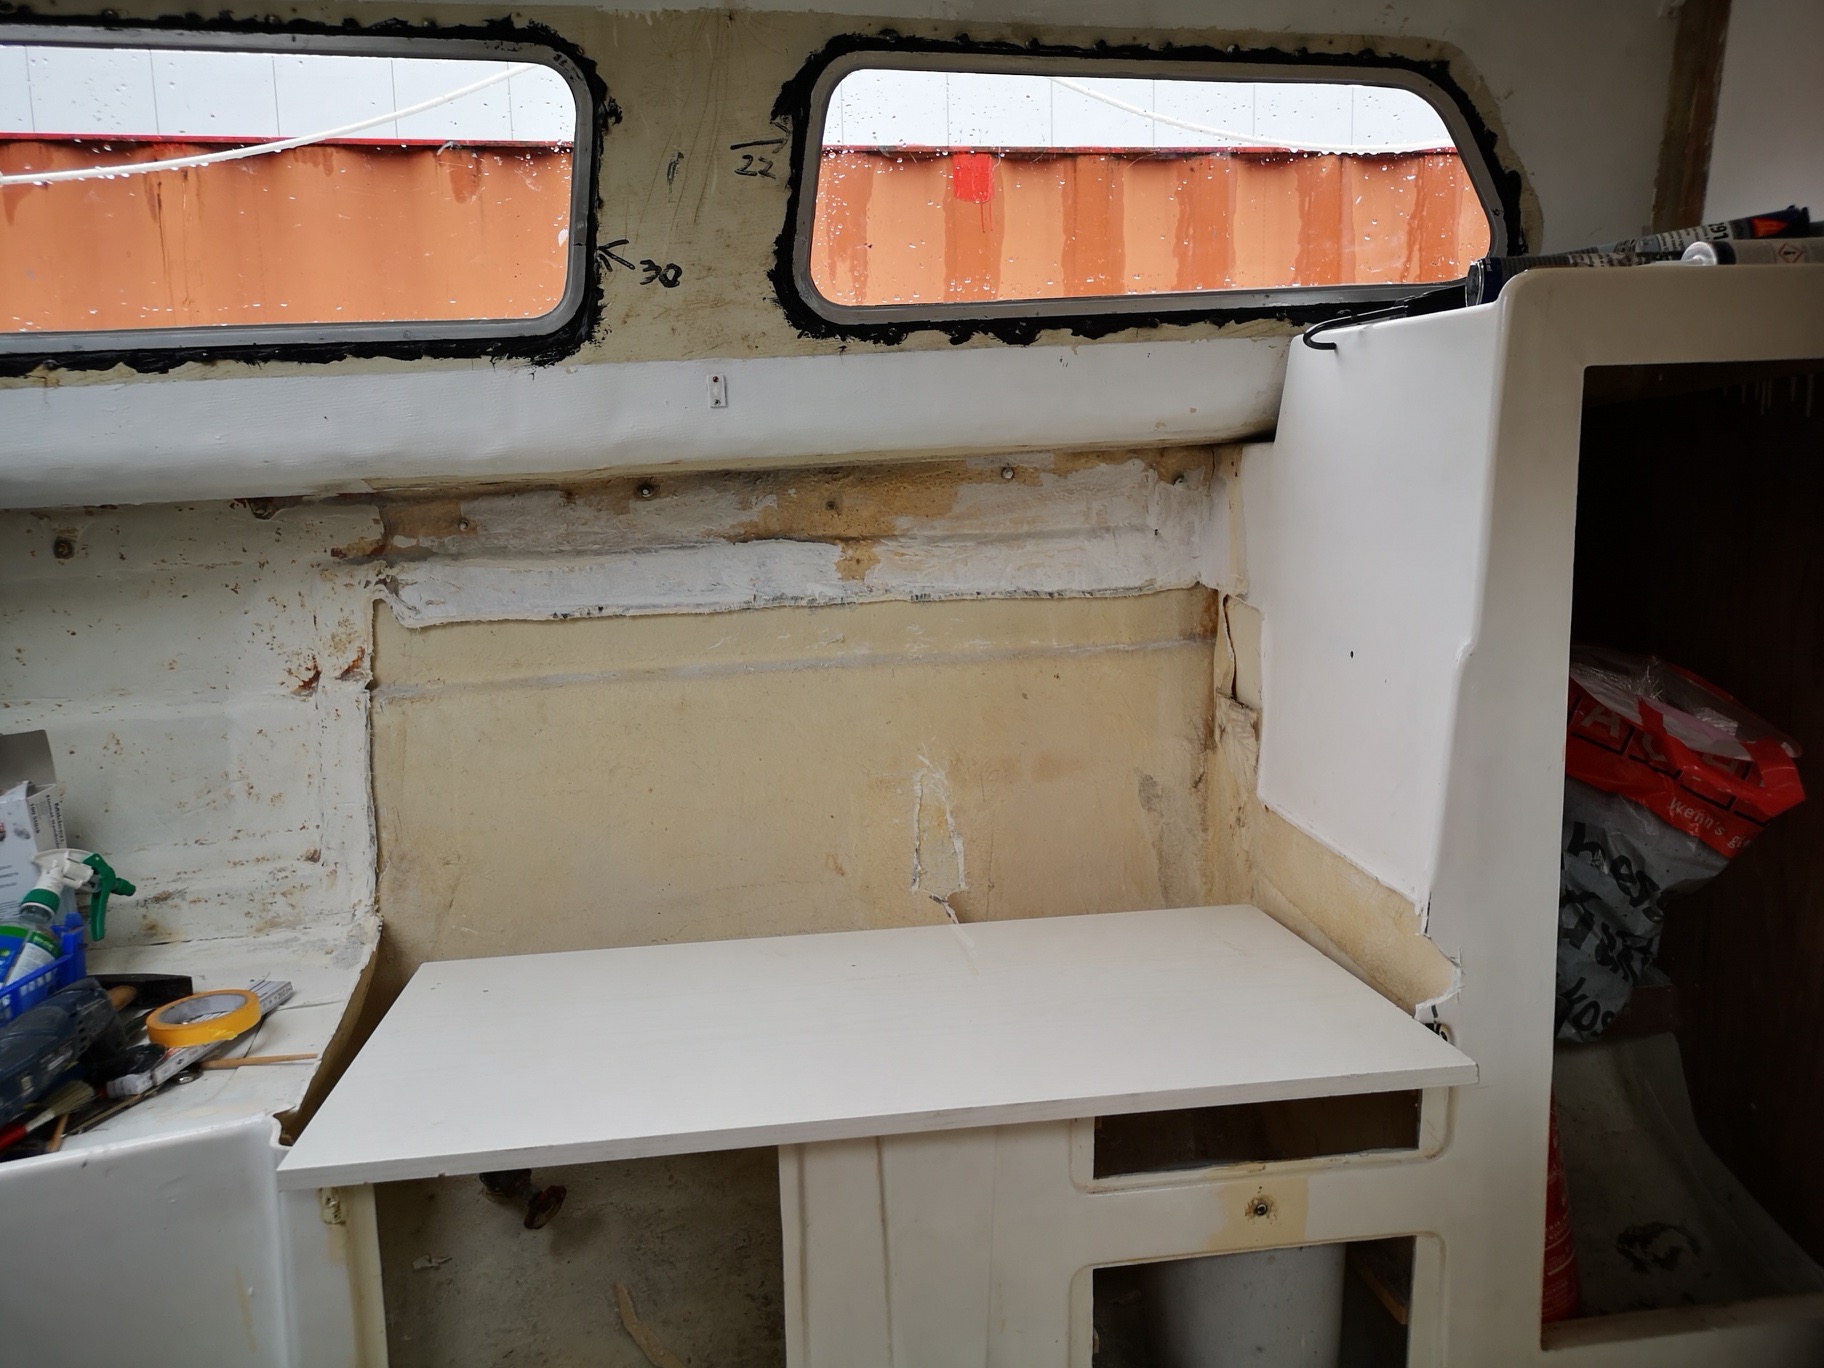
…. Here I have to laminate the gaps. Then the seat can be installed. …
… Now the open crevices (on port side) are also tightly laminated.
5.10.2019
6.10.2019
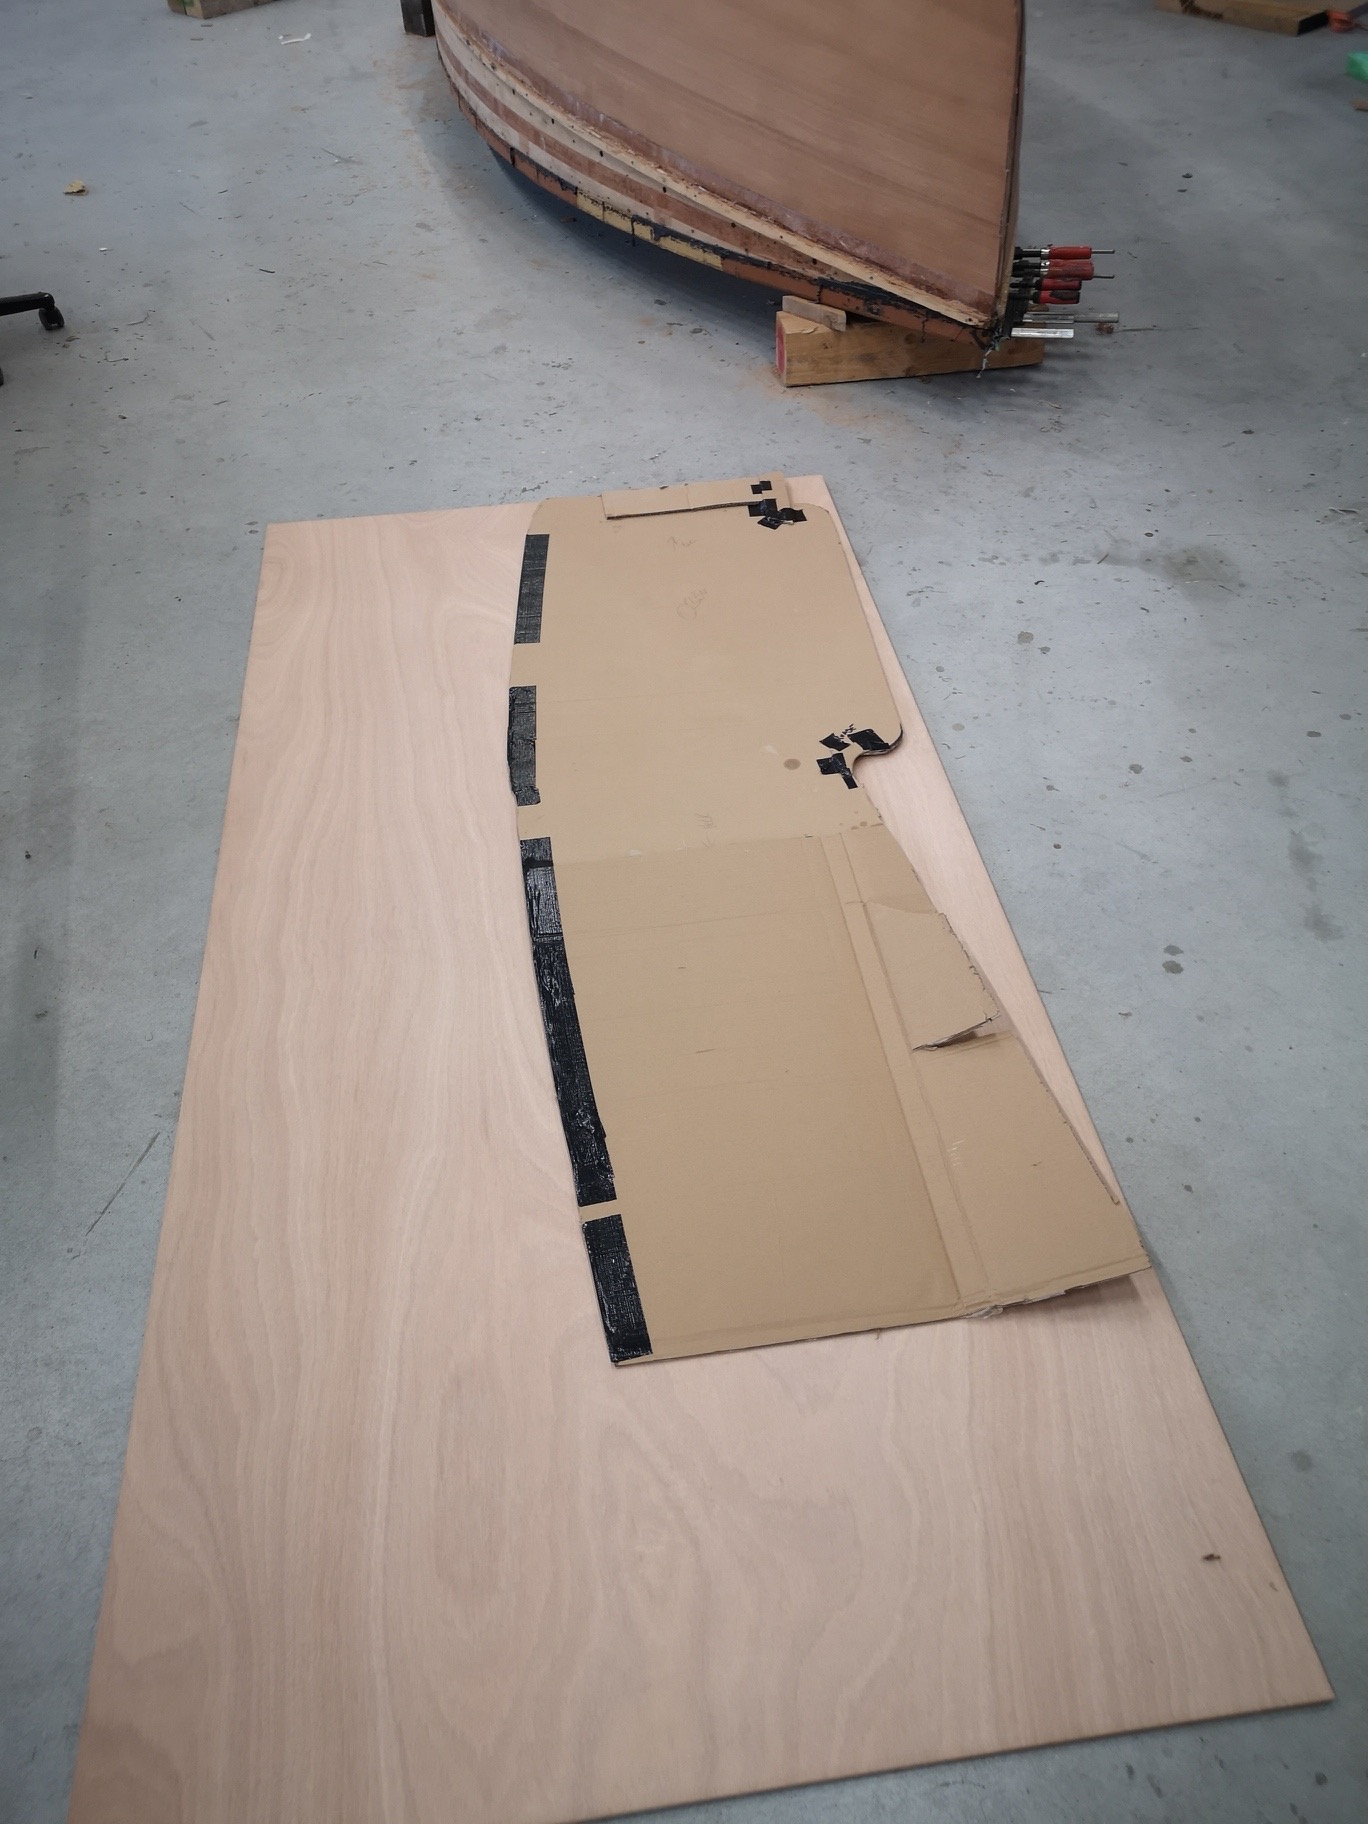
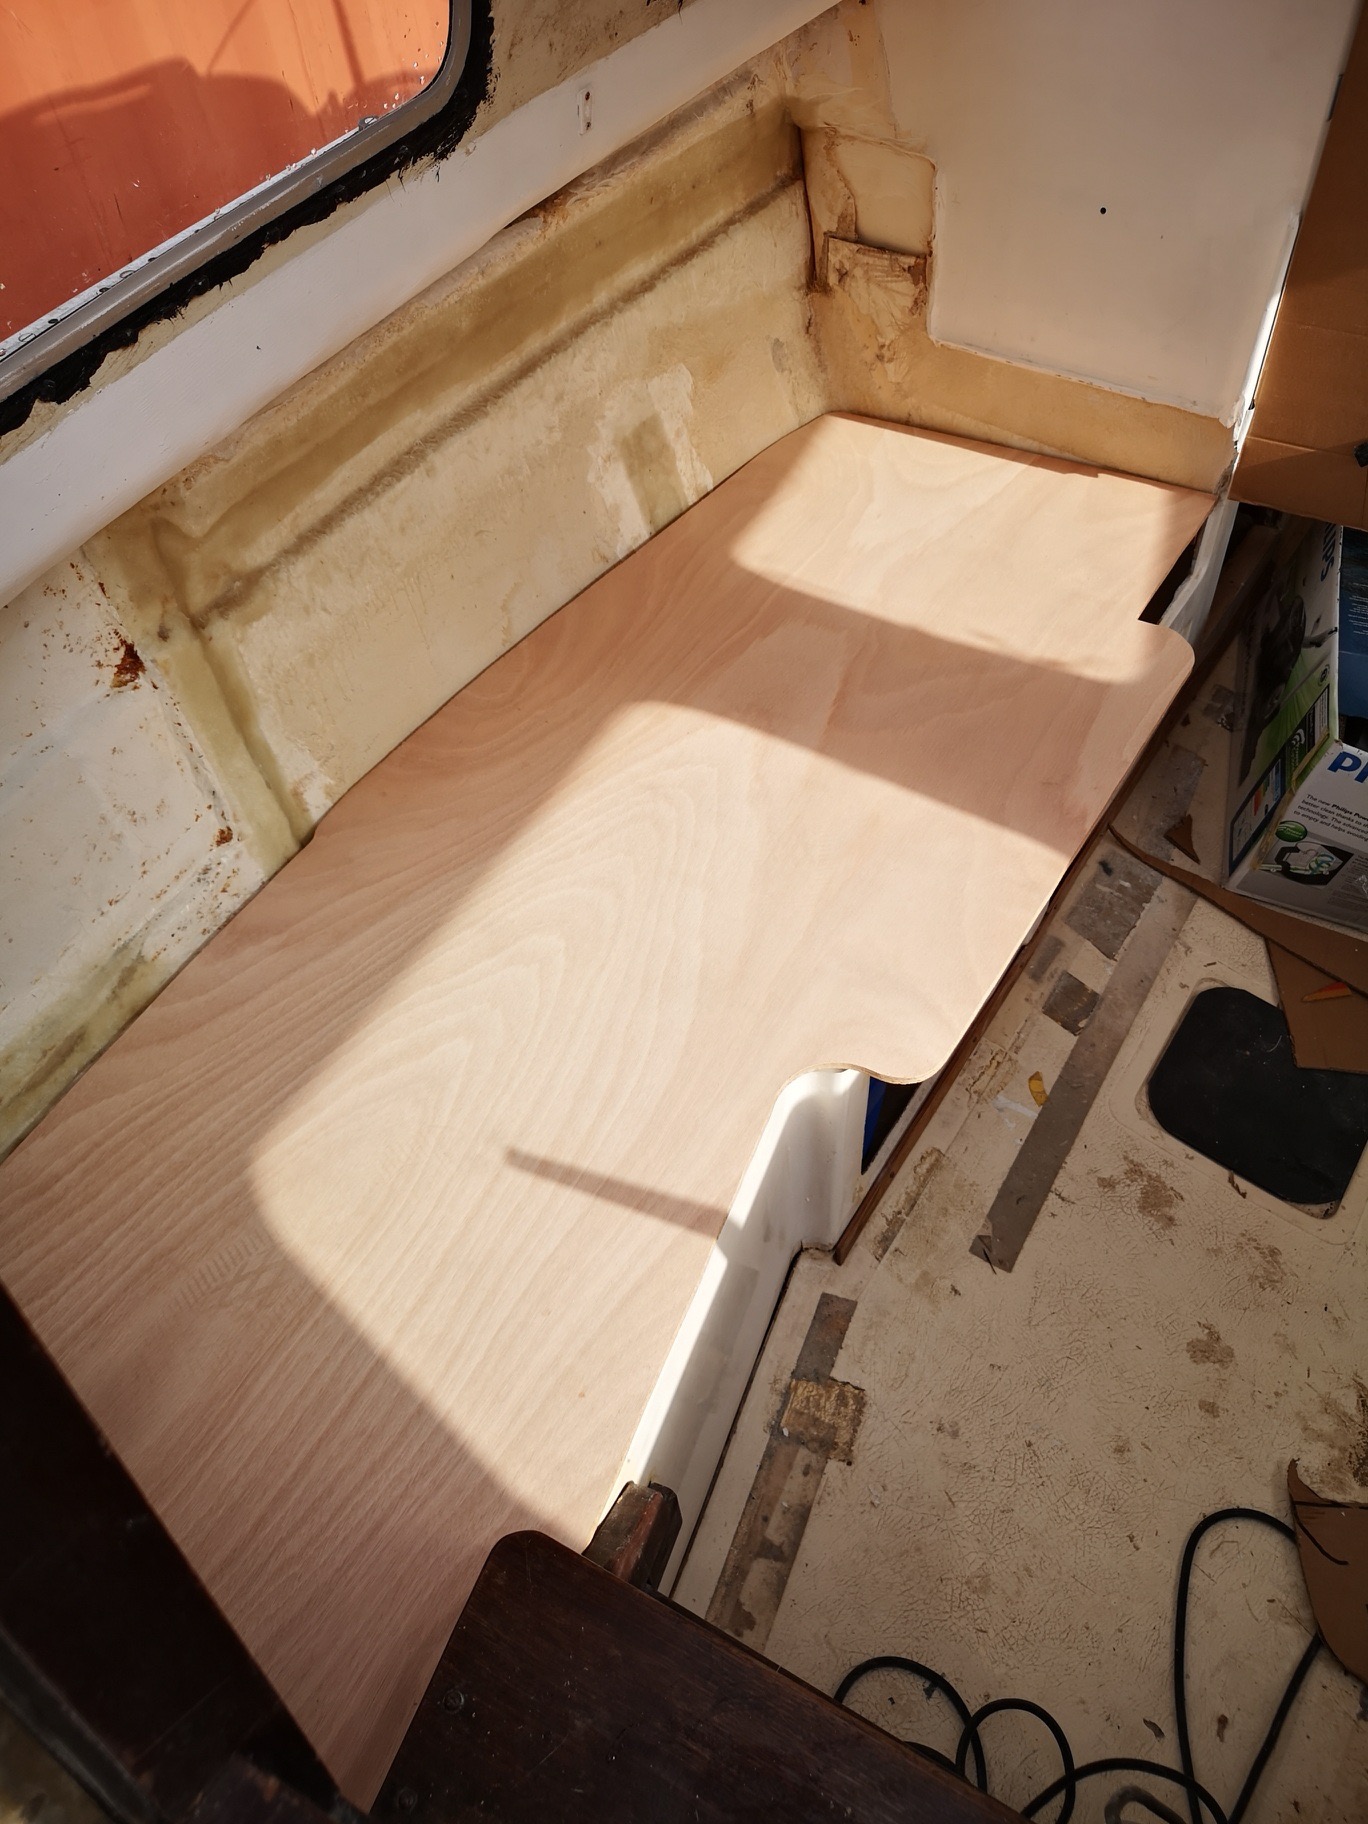
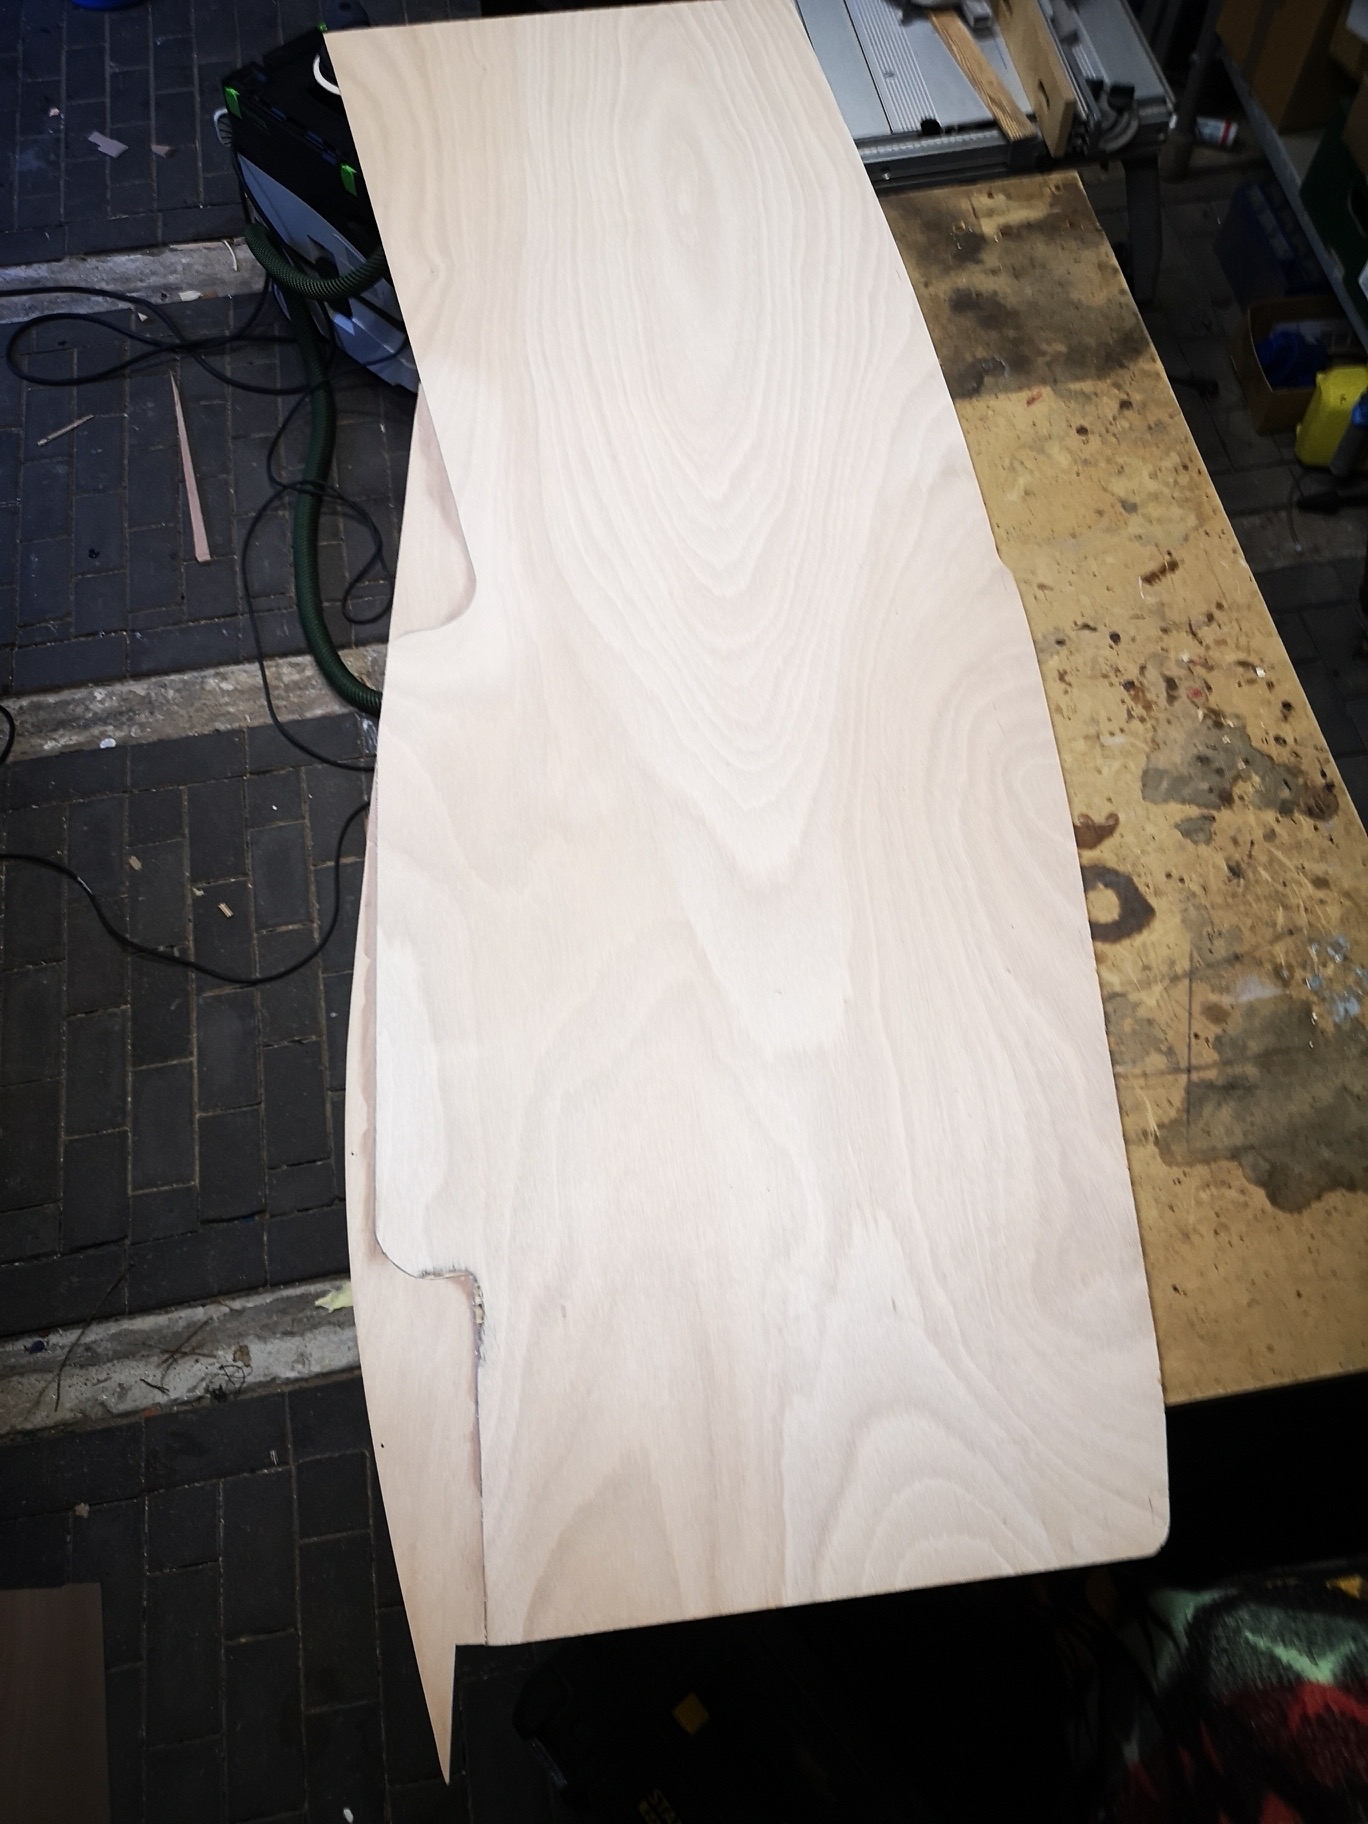
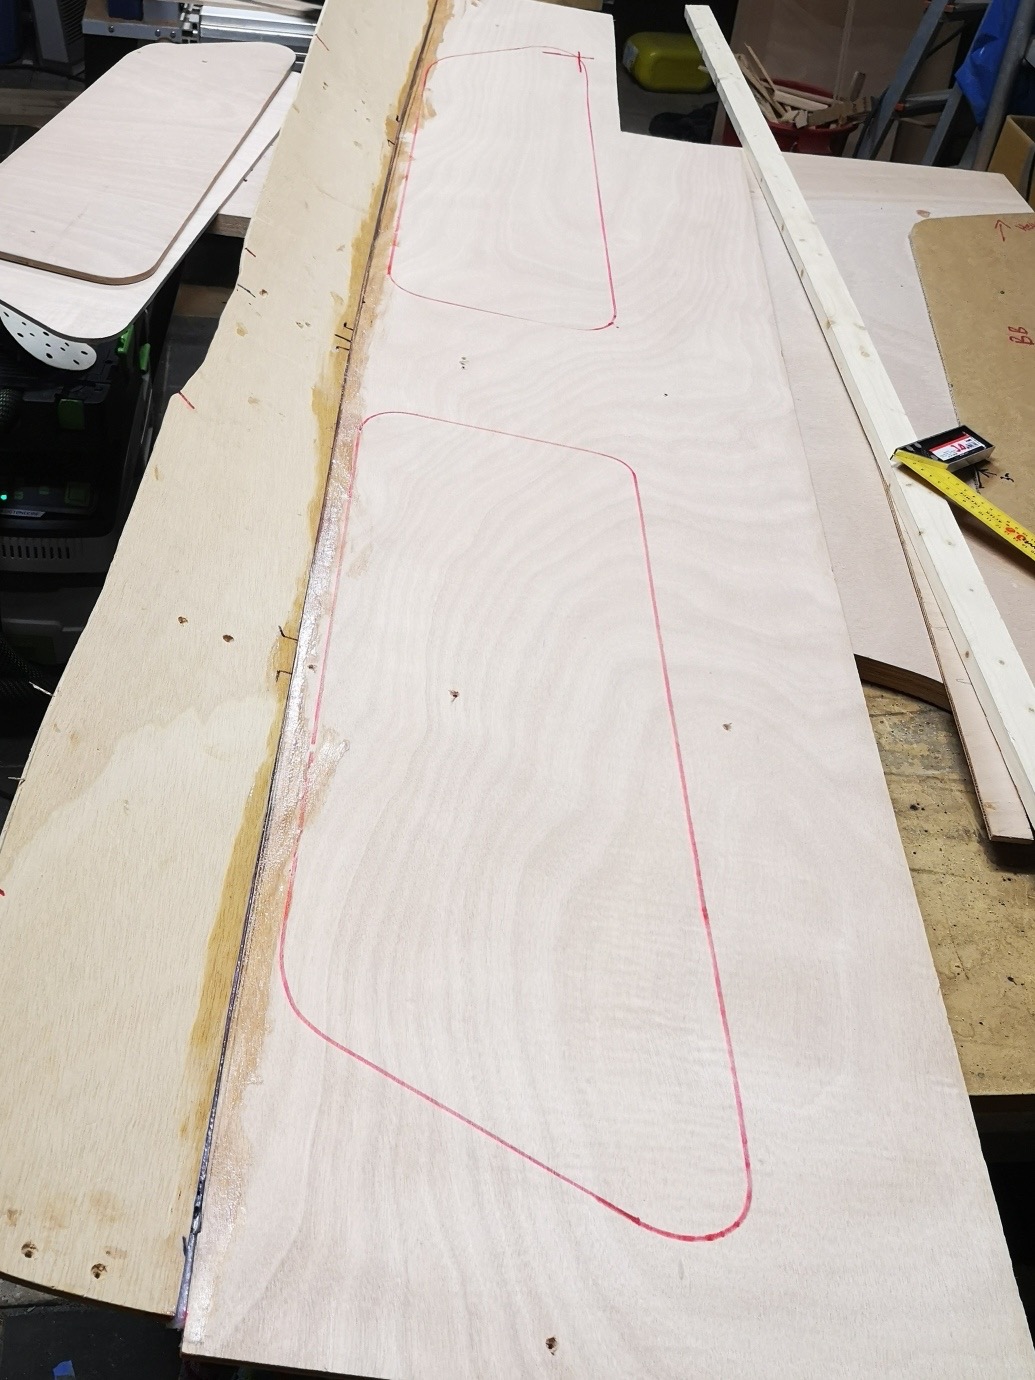
The cardboard template for the seat is made and applied to the plywood.
10.10.2019
… it fits
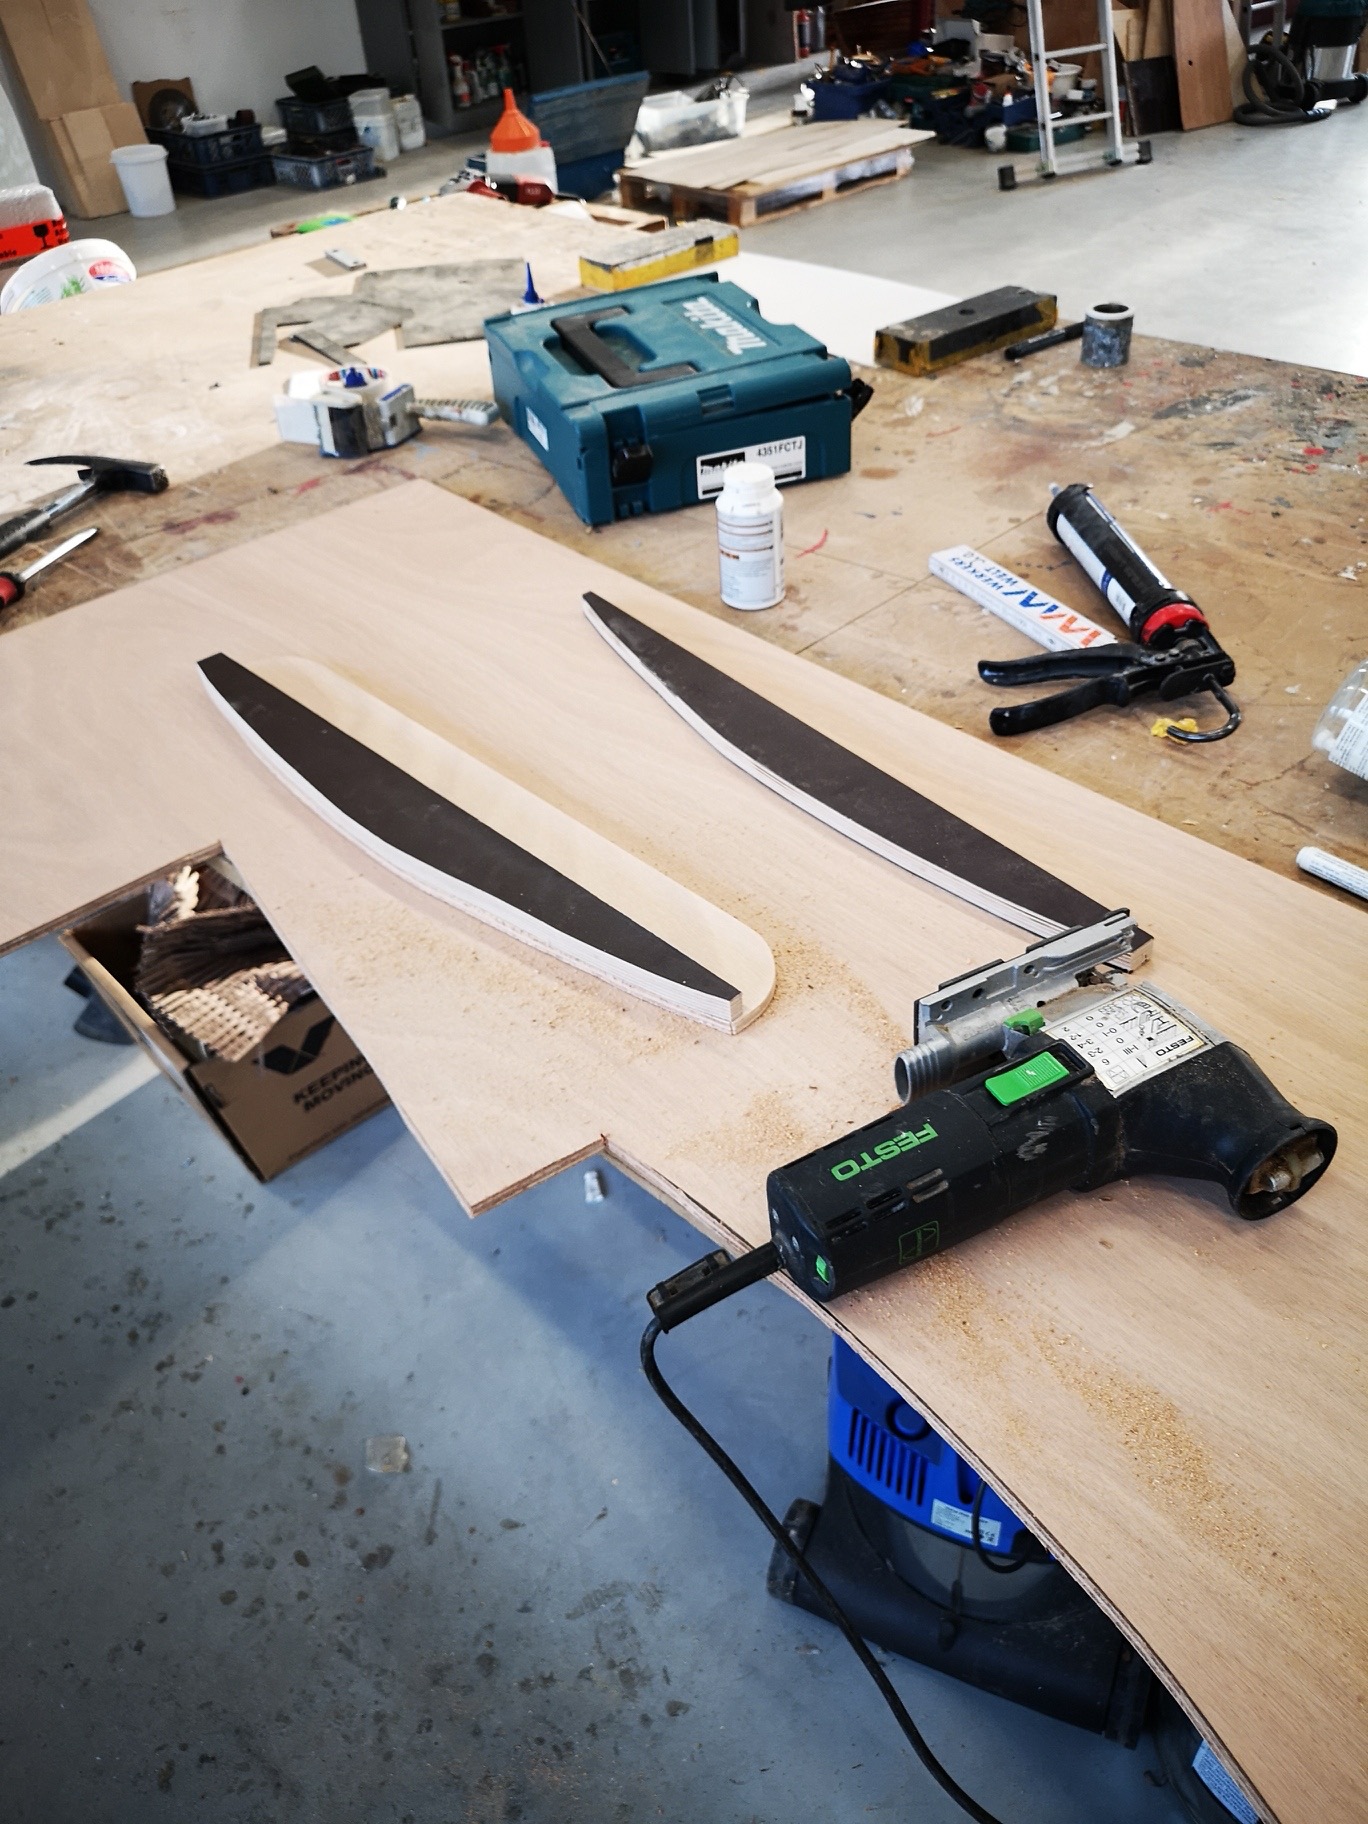
The planks for the recamiere be sawn ...
14.10.2019
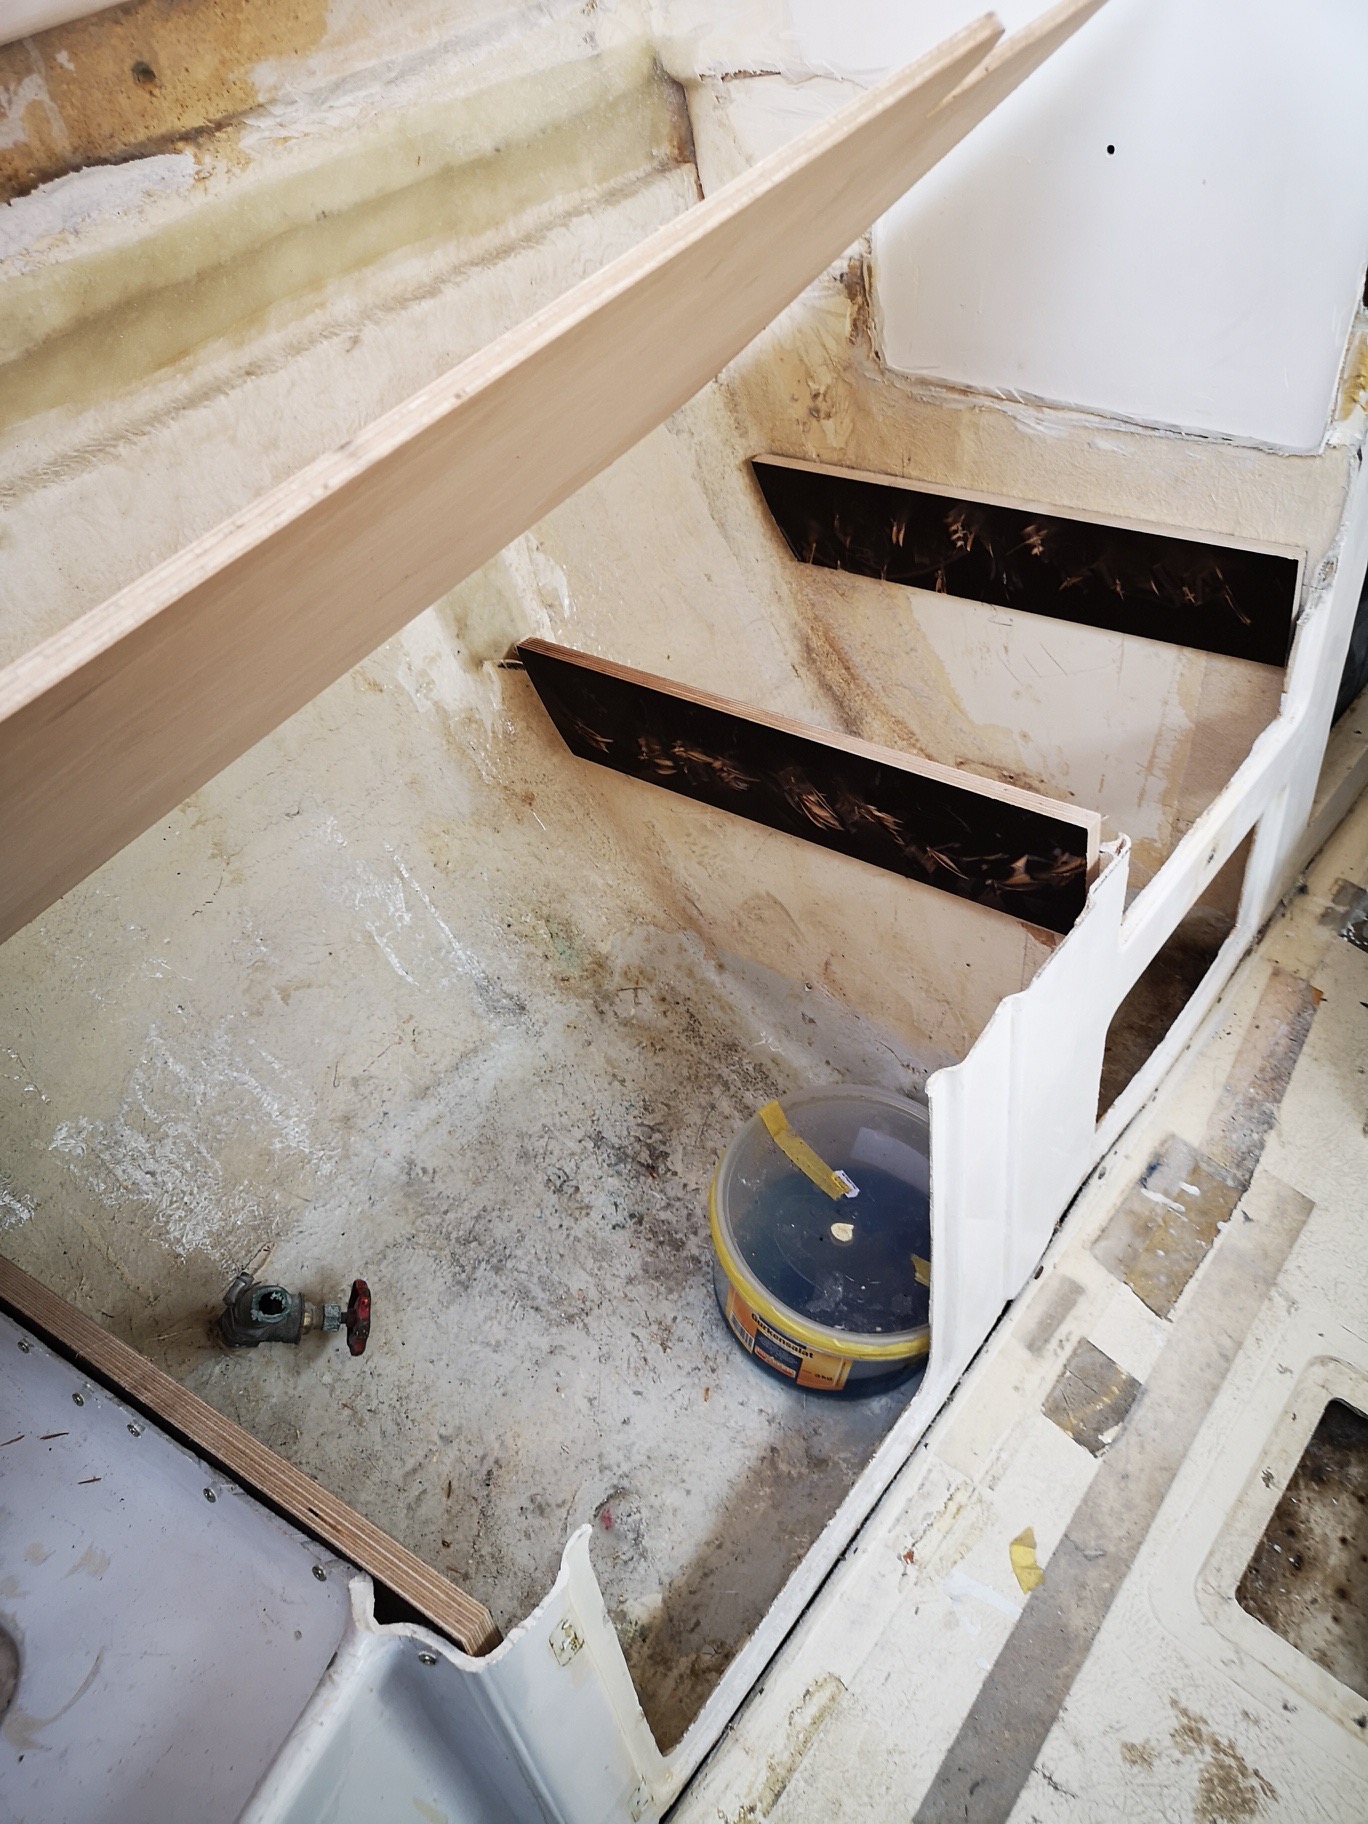
.... fitted and screwed.
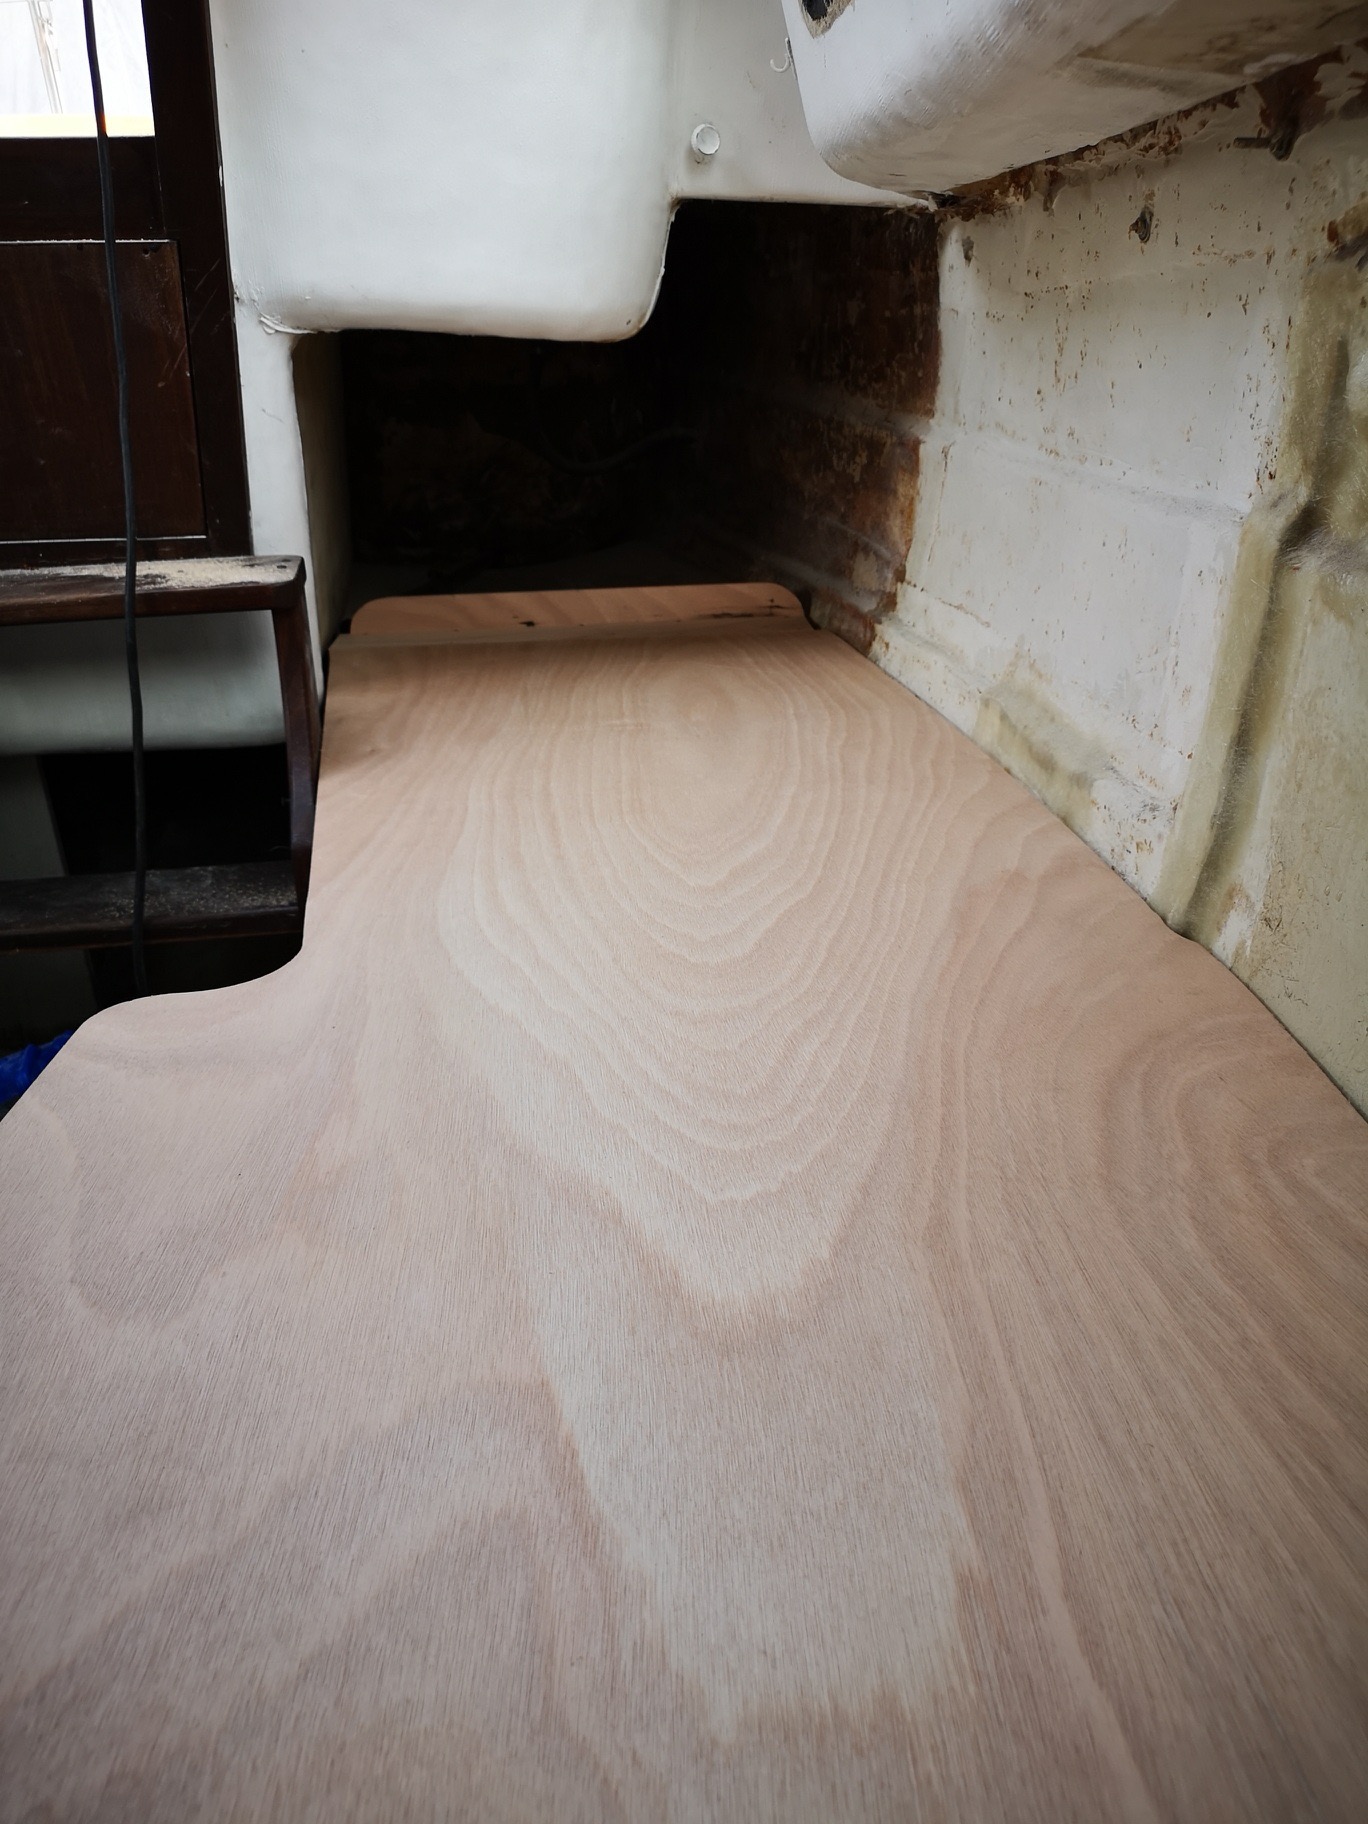
The seat is already very stable. But I will continue to work here later.
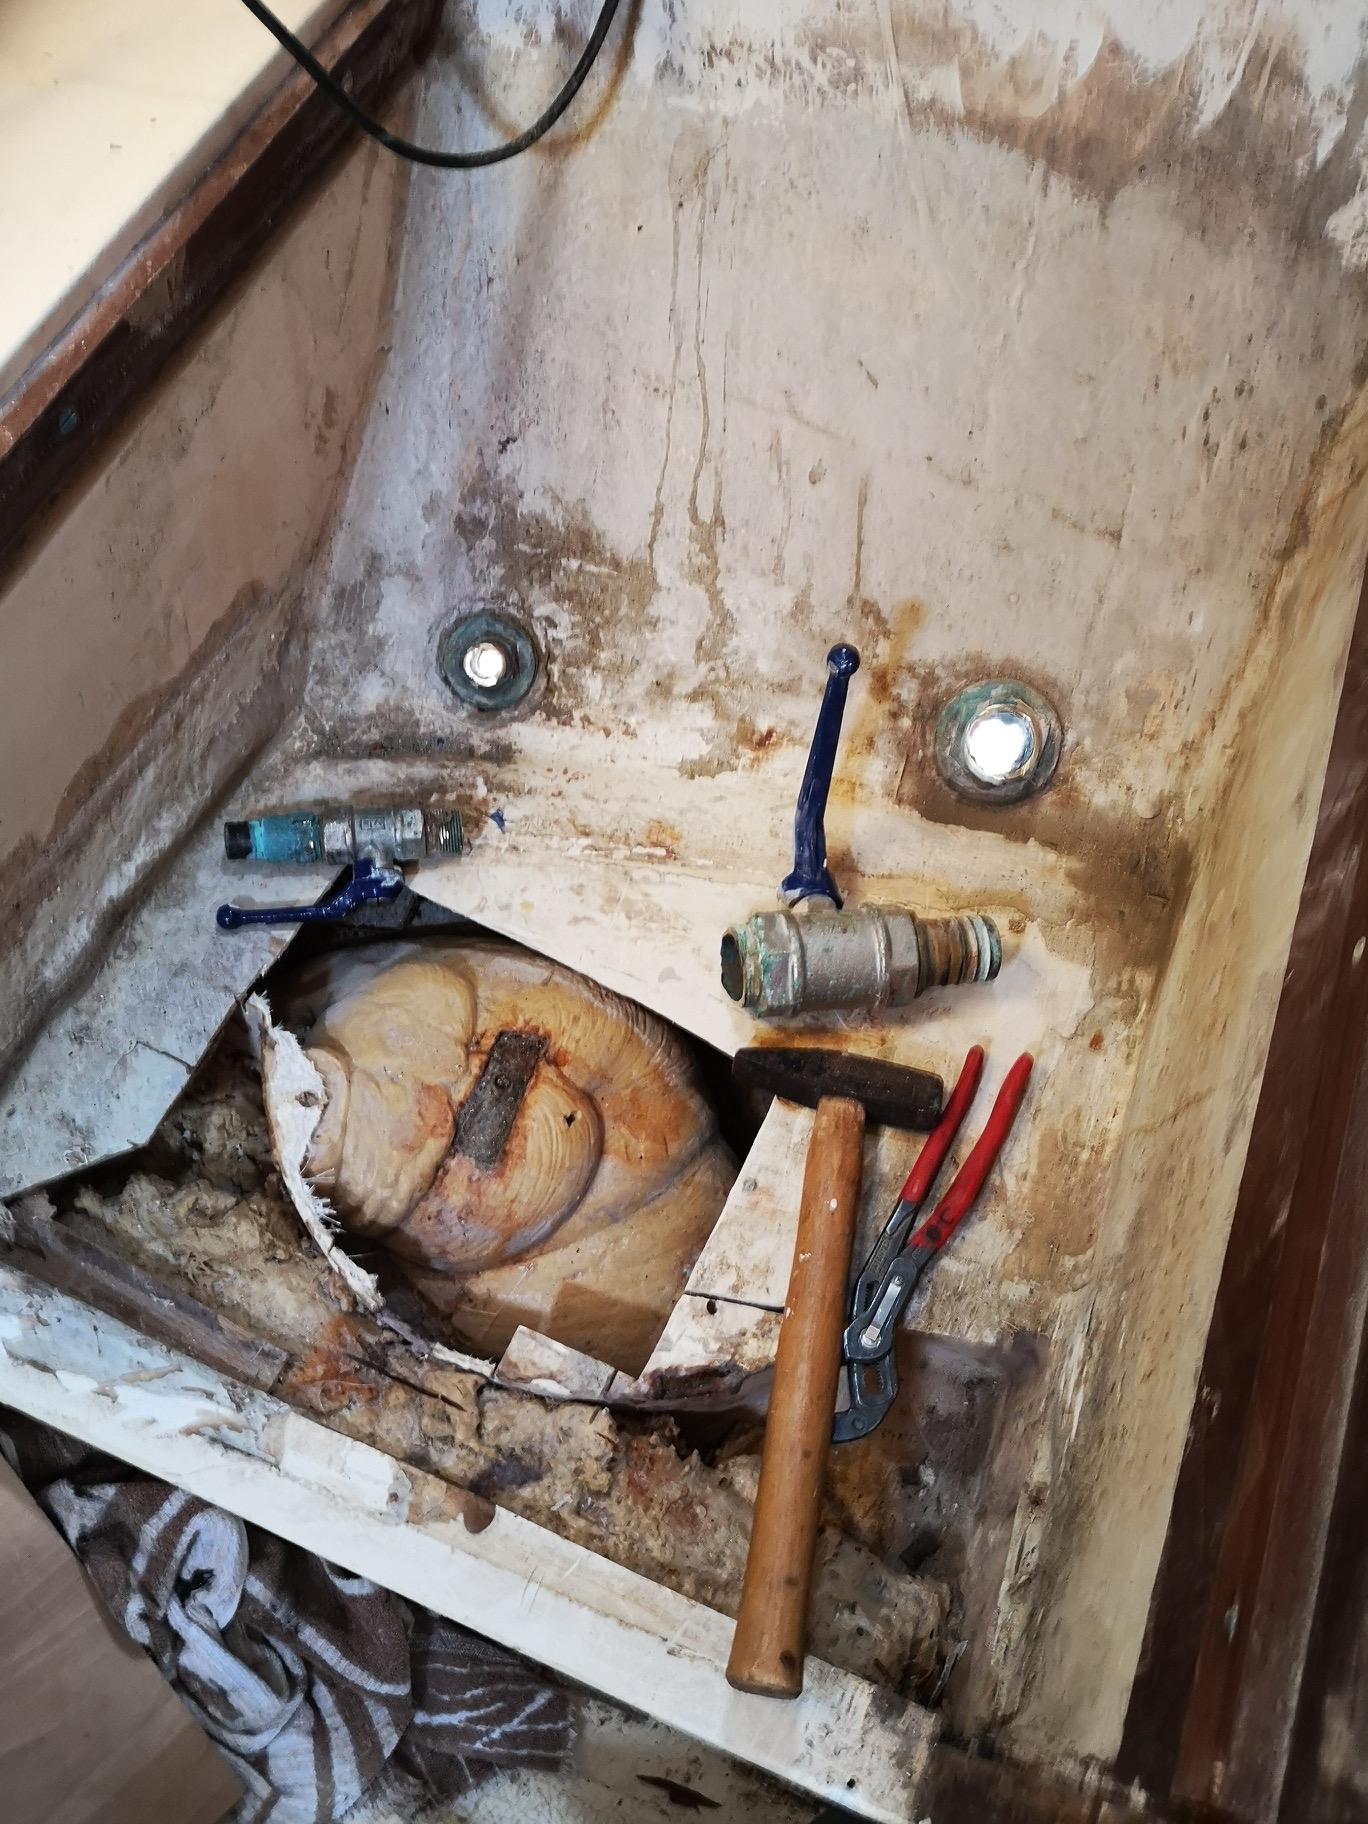
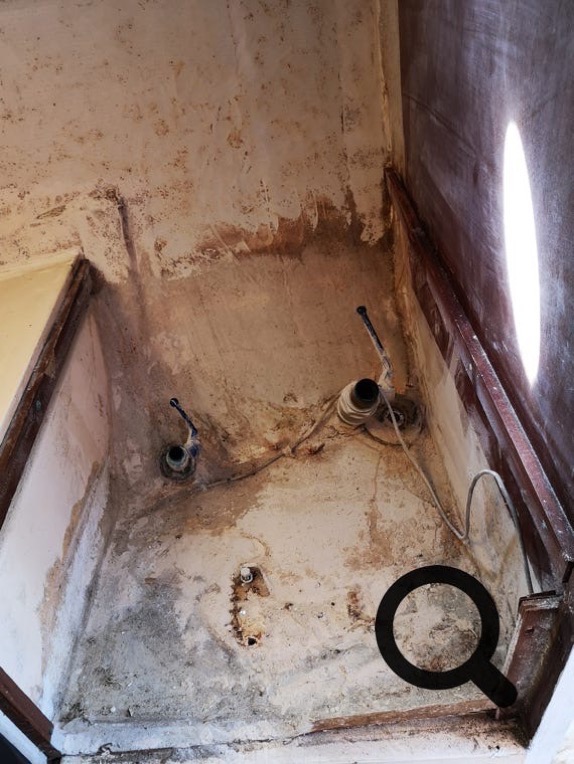
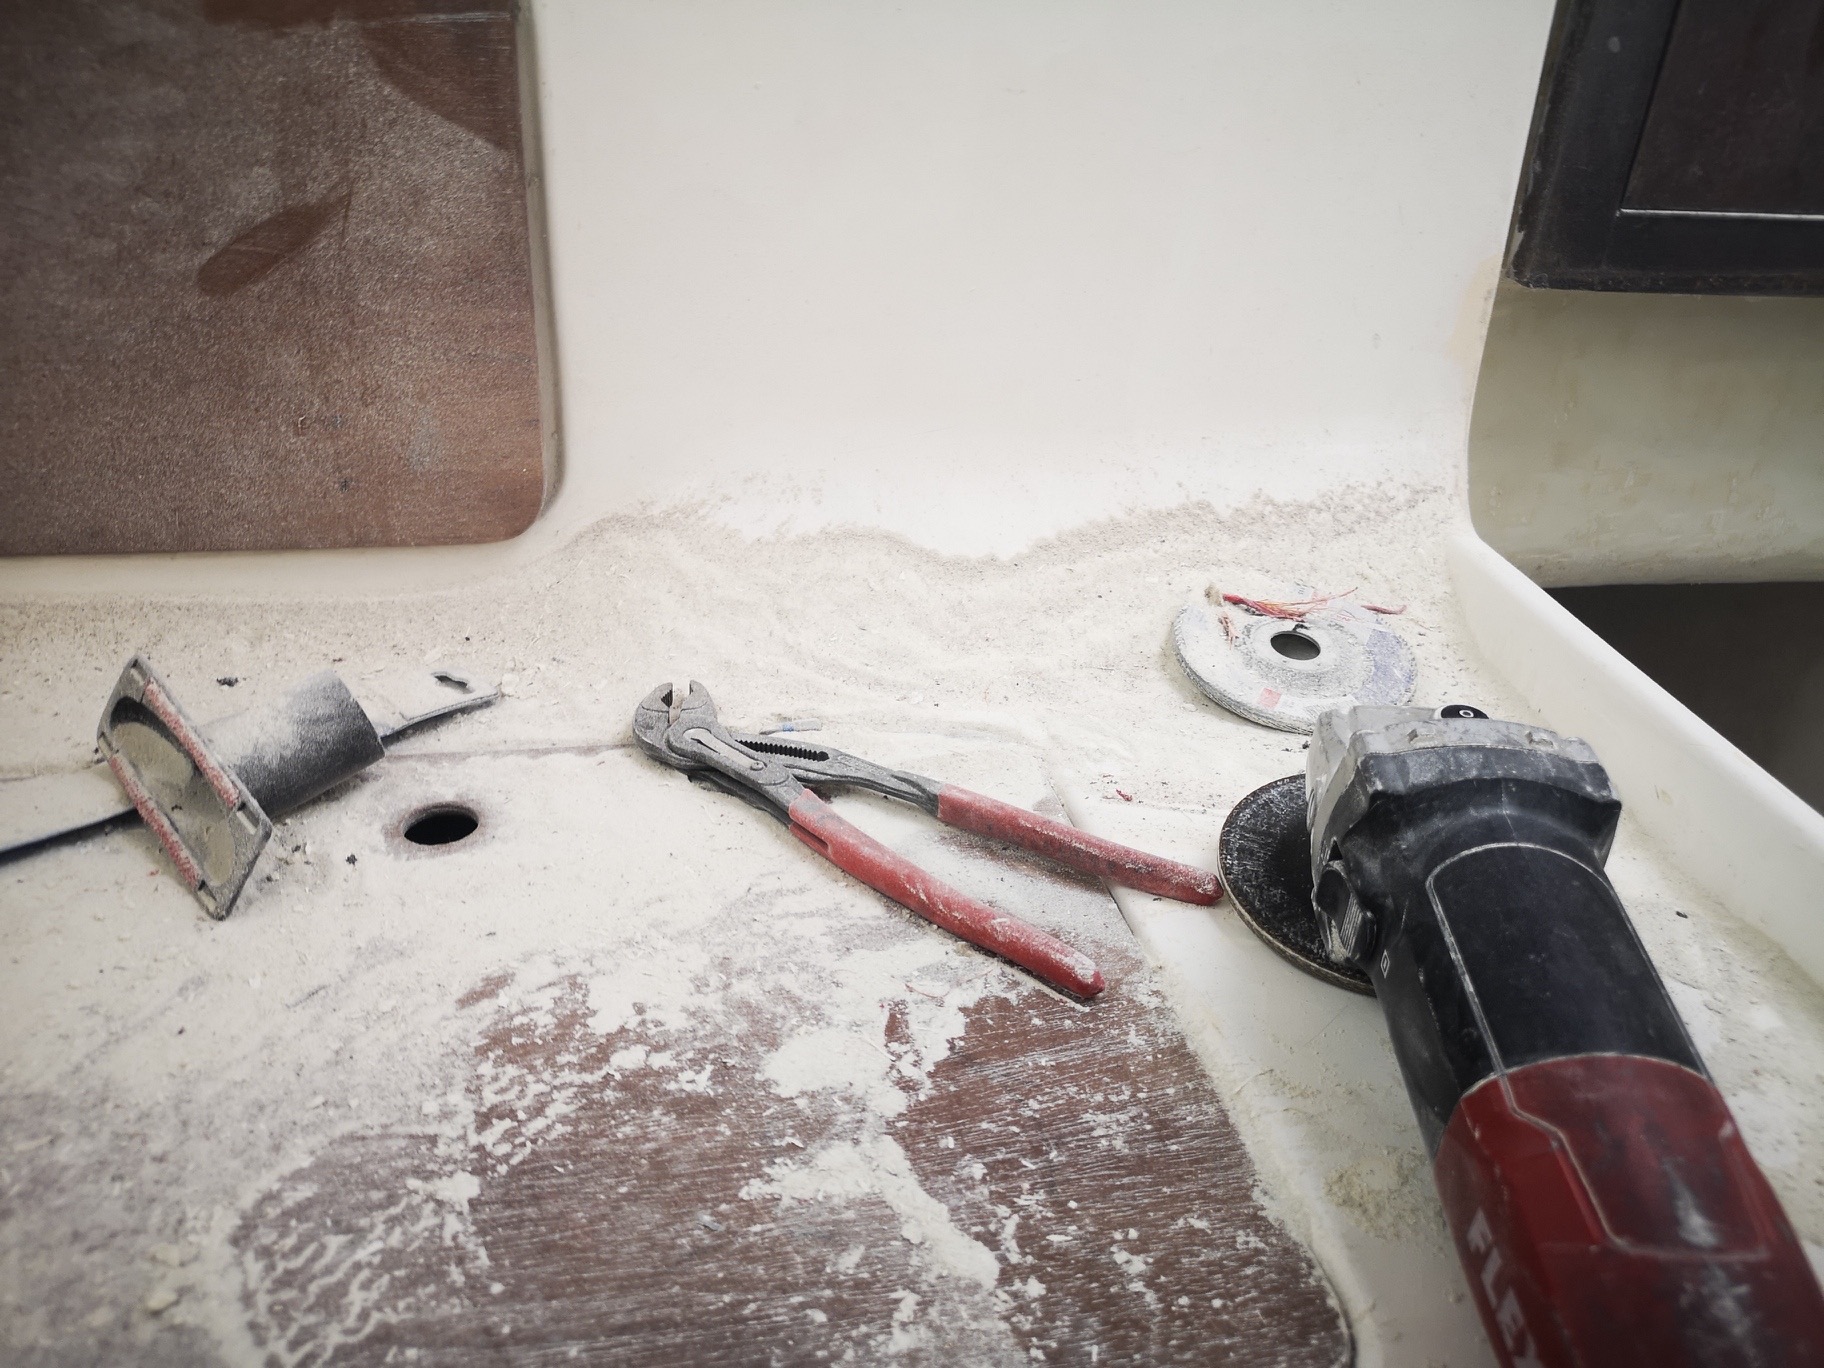
Today I continued to work on the toilet and removed the seacocks since the actual toilet is turned into a compost toilet and no longer needs any connections.
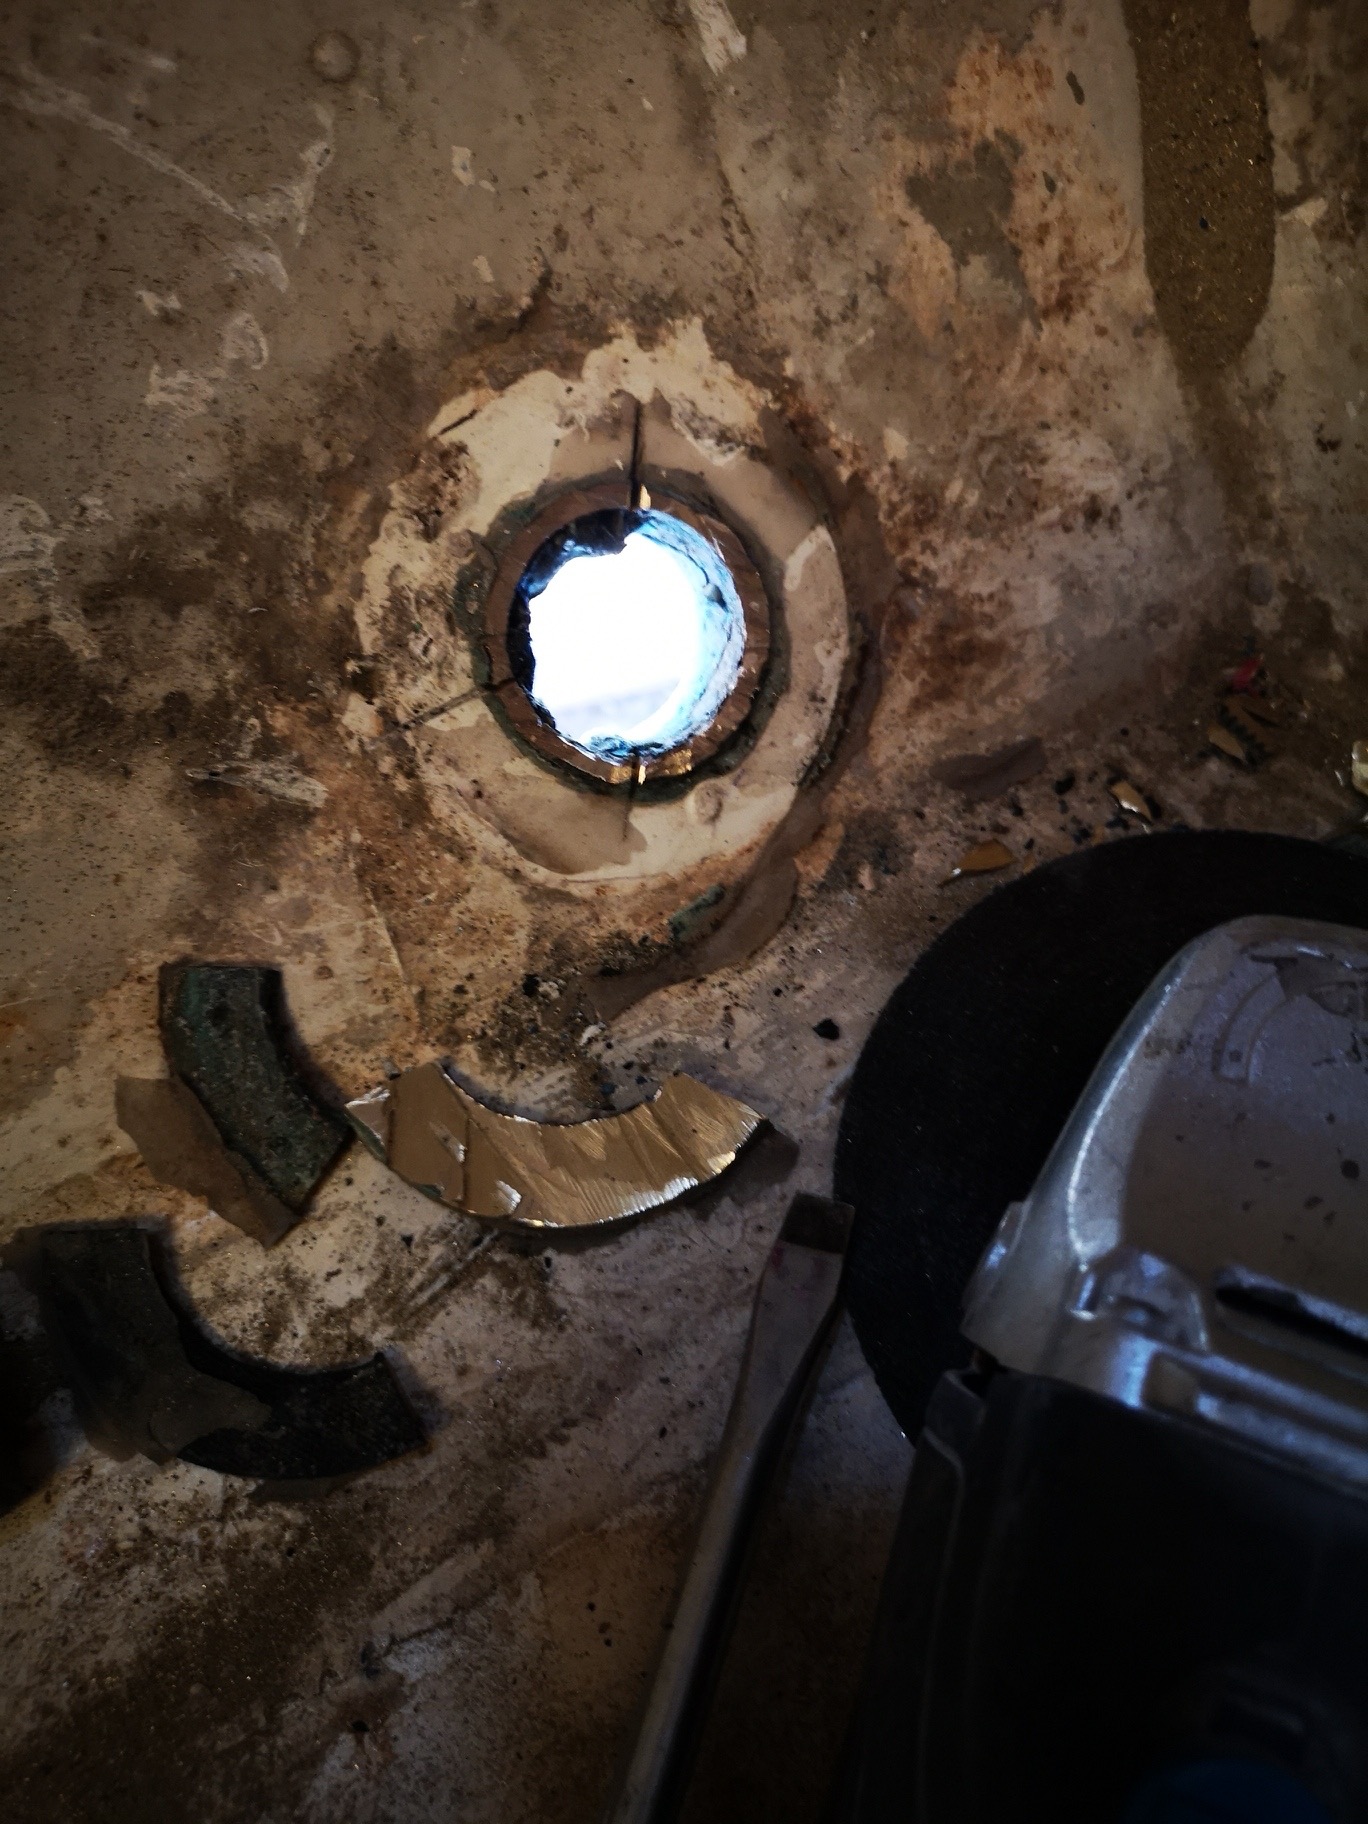
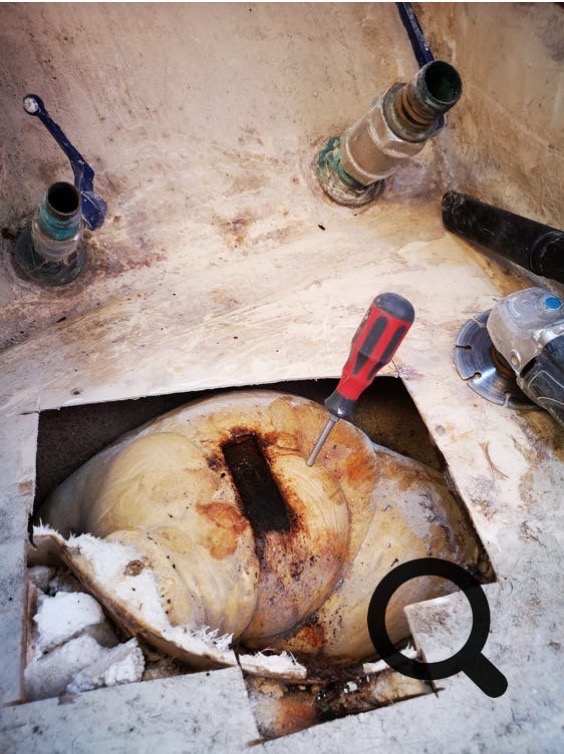
After unsuccessfully trying to unscrew the old valves, I first trimmed the valves with the flex and in the second step, carefully braided the last screw just above the large washer (directly on the hull) severed …
16.10.2019

... The pipe that leads outside can then be forced outside.
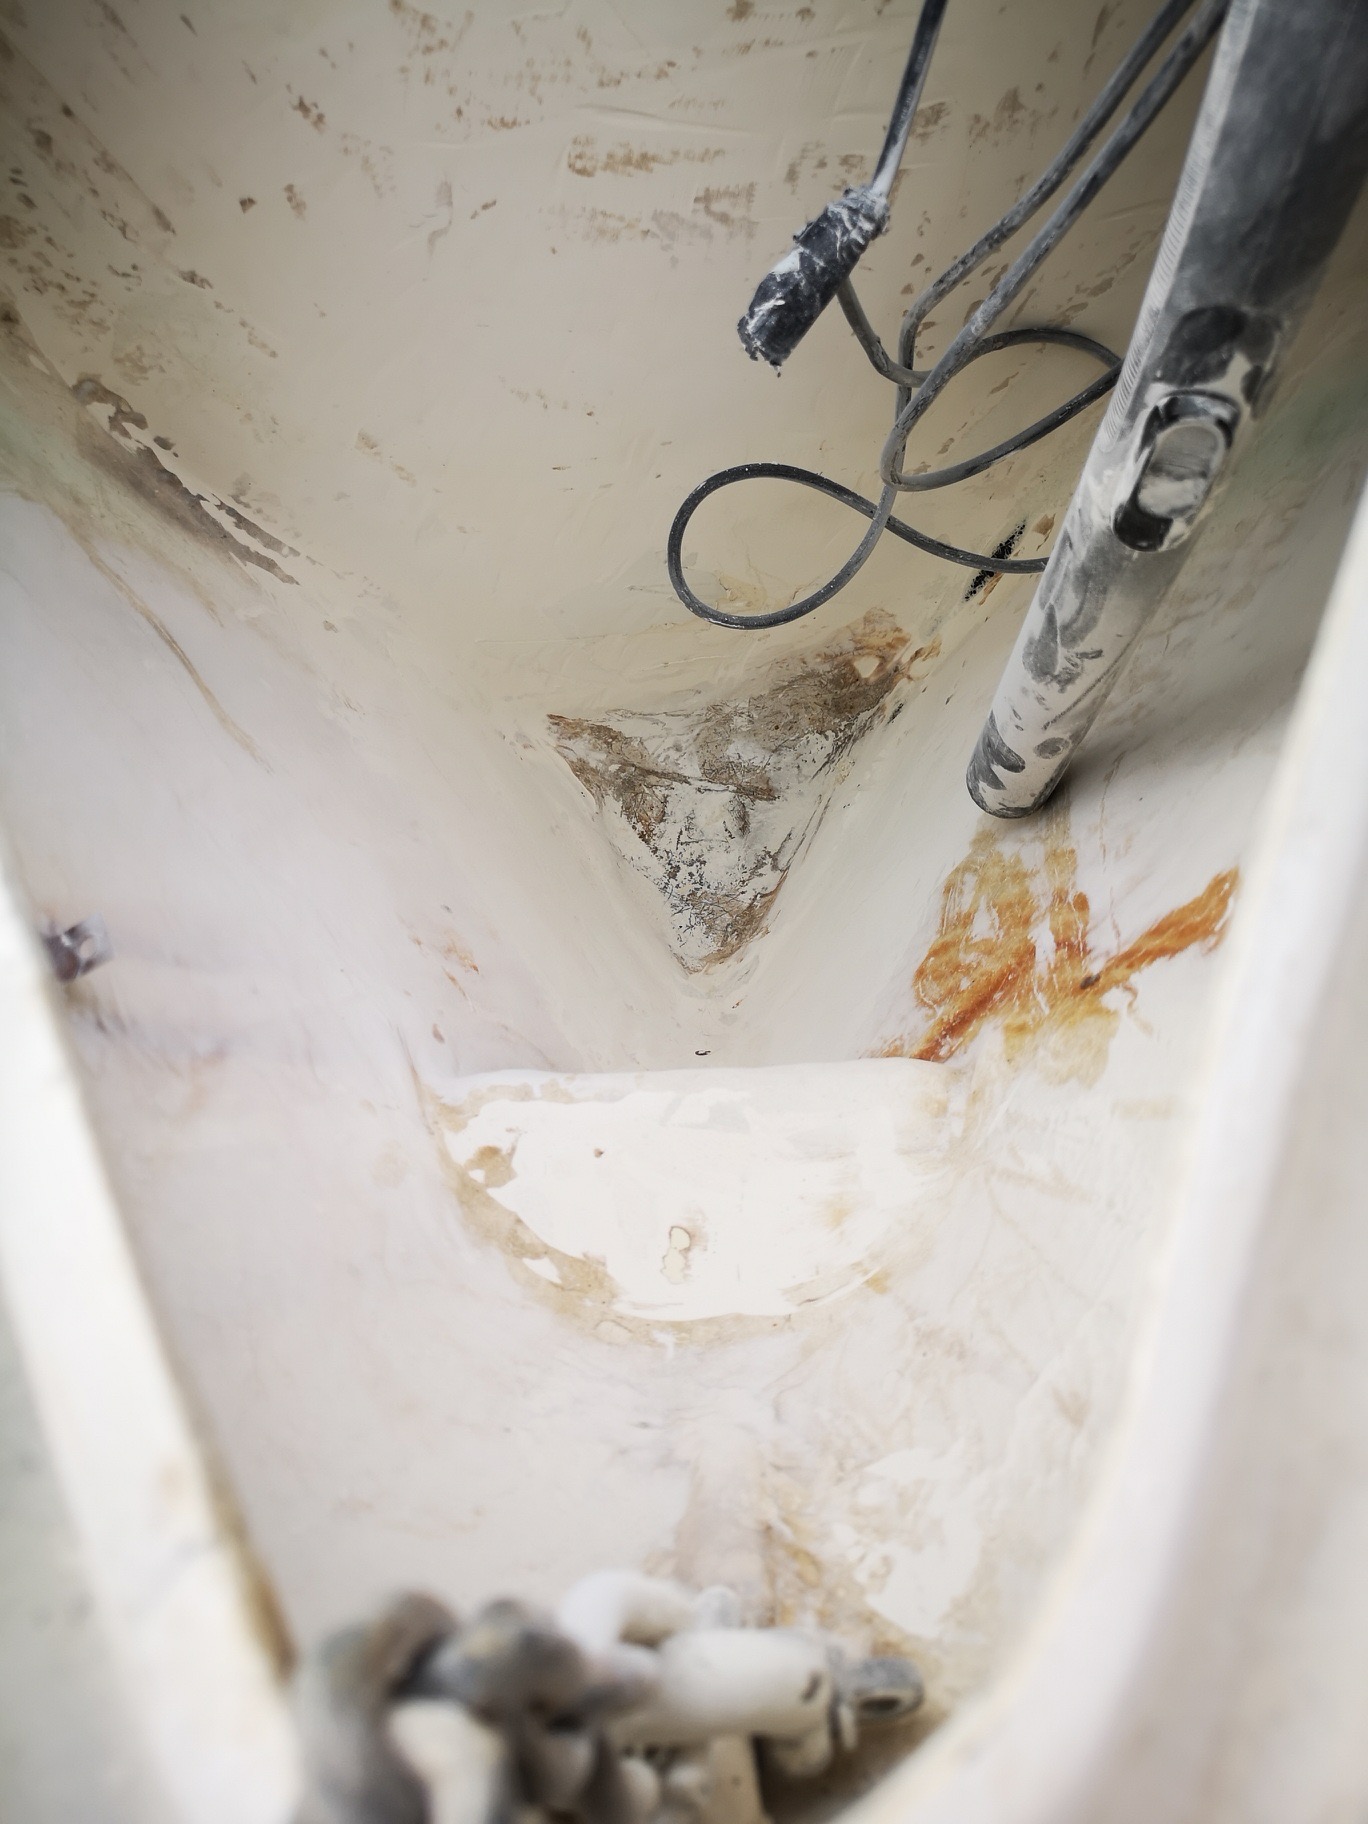
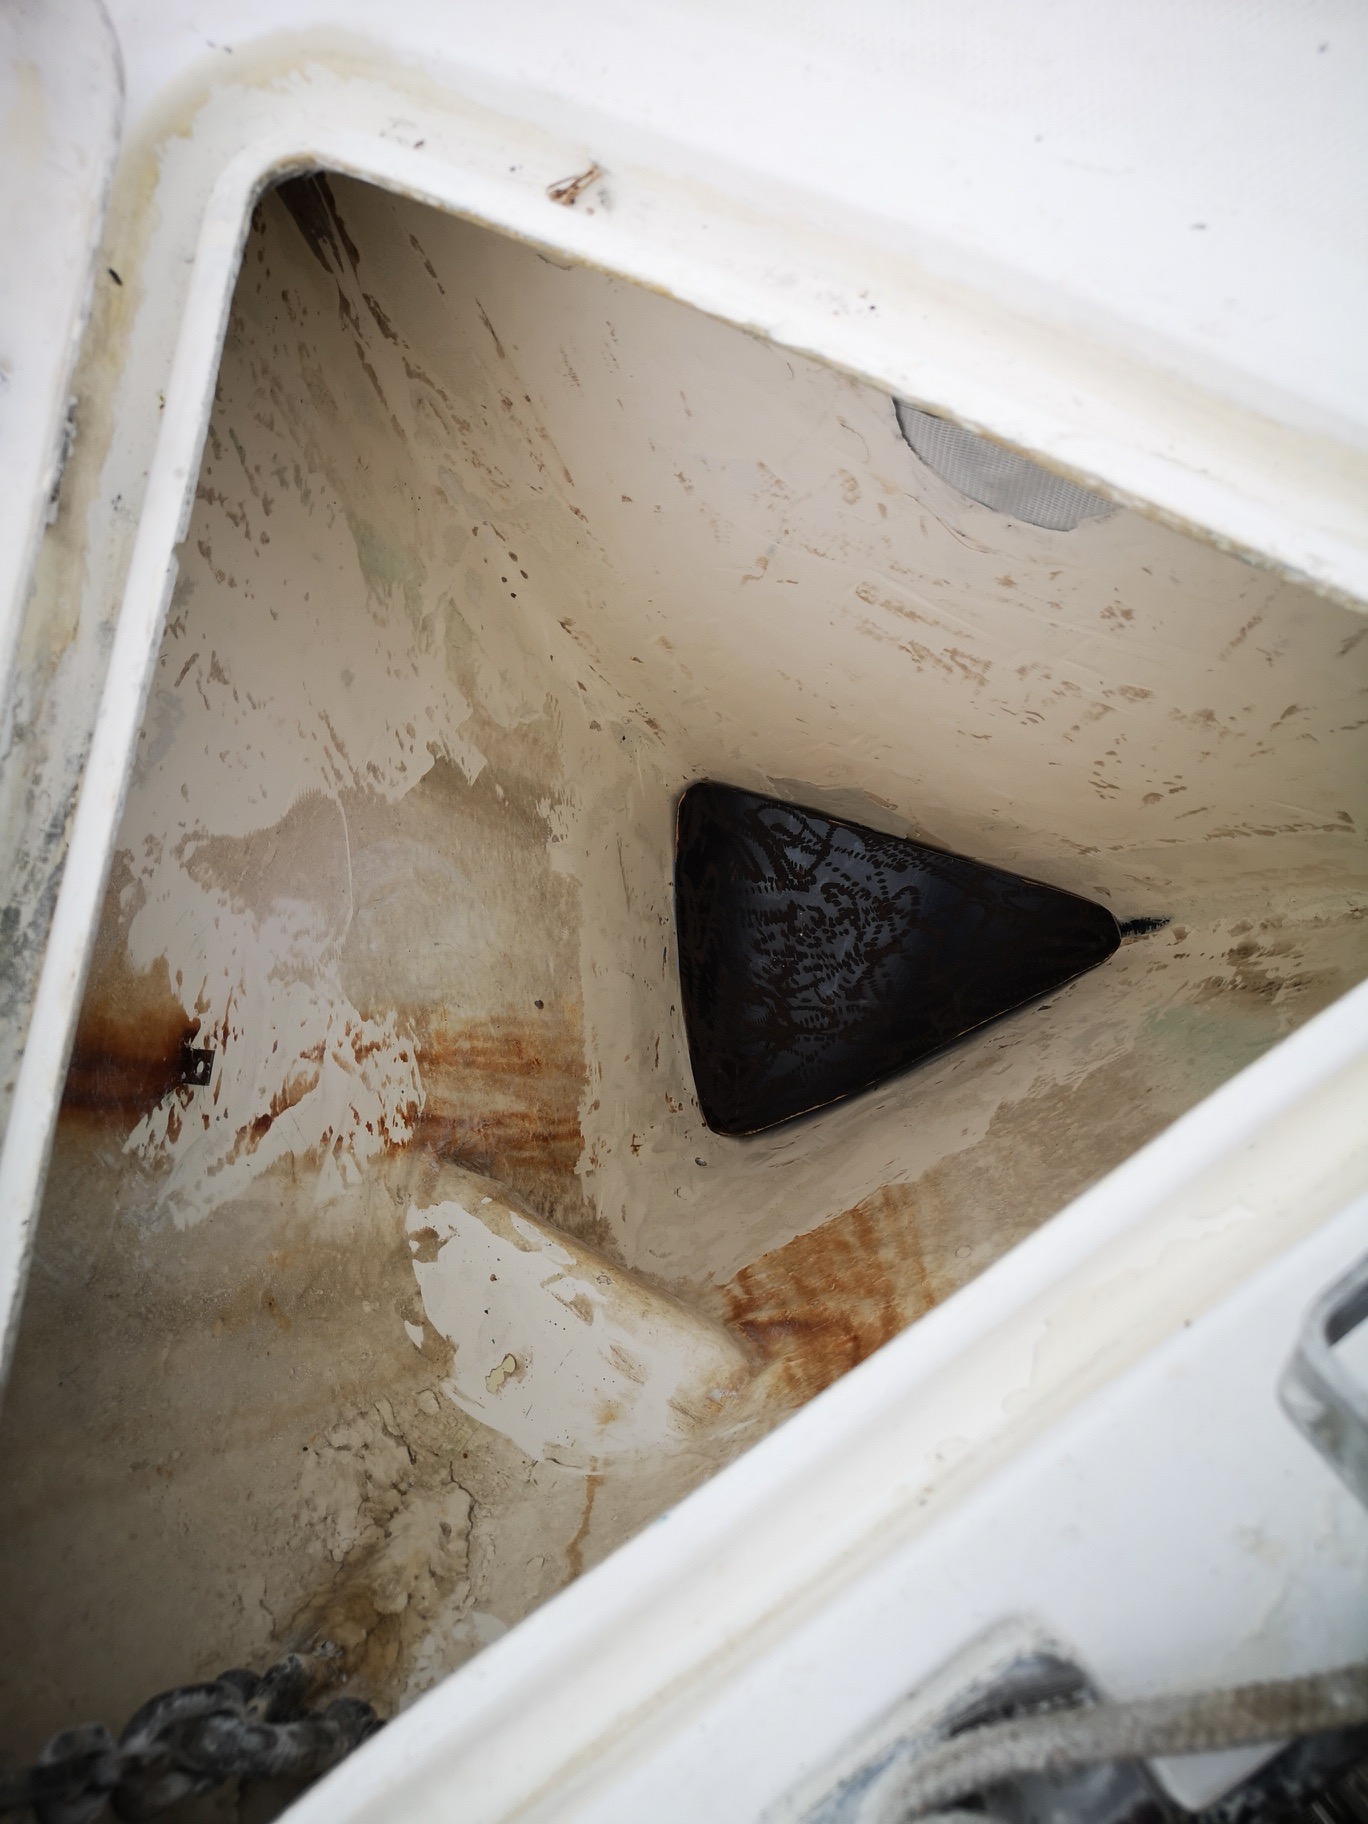
Before it gets even wetter and colder and before the interior work goes on, the ship must be watertight. The anchor box is leaking inwards.
18.10.2019
The anchor box had to be cleaned and sanded before applying epoxy. A board moves the floor upwards.
The epoxy laminate is applied and the anchor box is again waterproof to the inside. Next, I'll sand the box and paint it.
24.10.2019
The time is in my neck and I have resumed the sanding work in the salon, because I still have to do there extensive bonding and laminating.
I hate these extreme grinding jobs. They are very exhausting and there is a lot of overhead to do.
29.10.2019
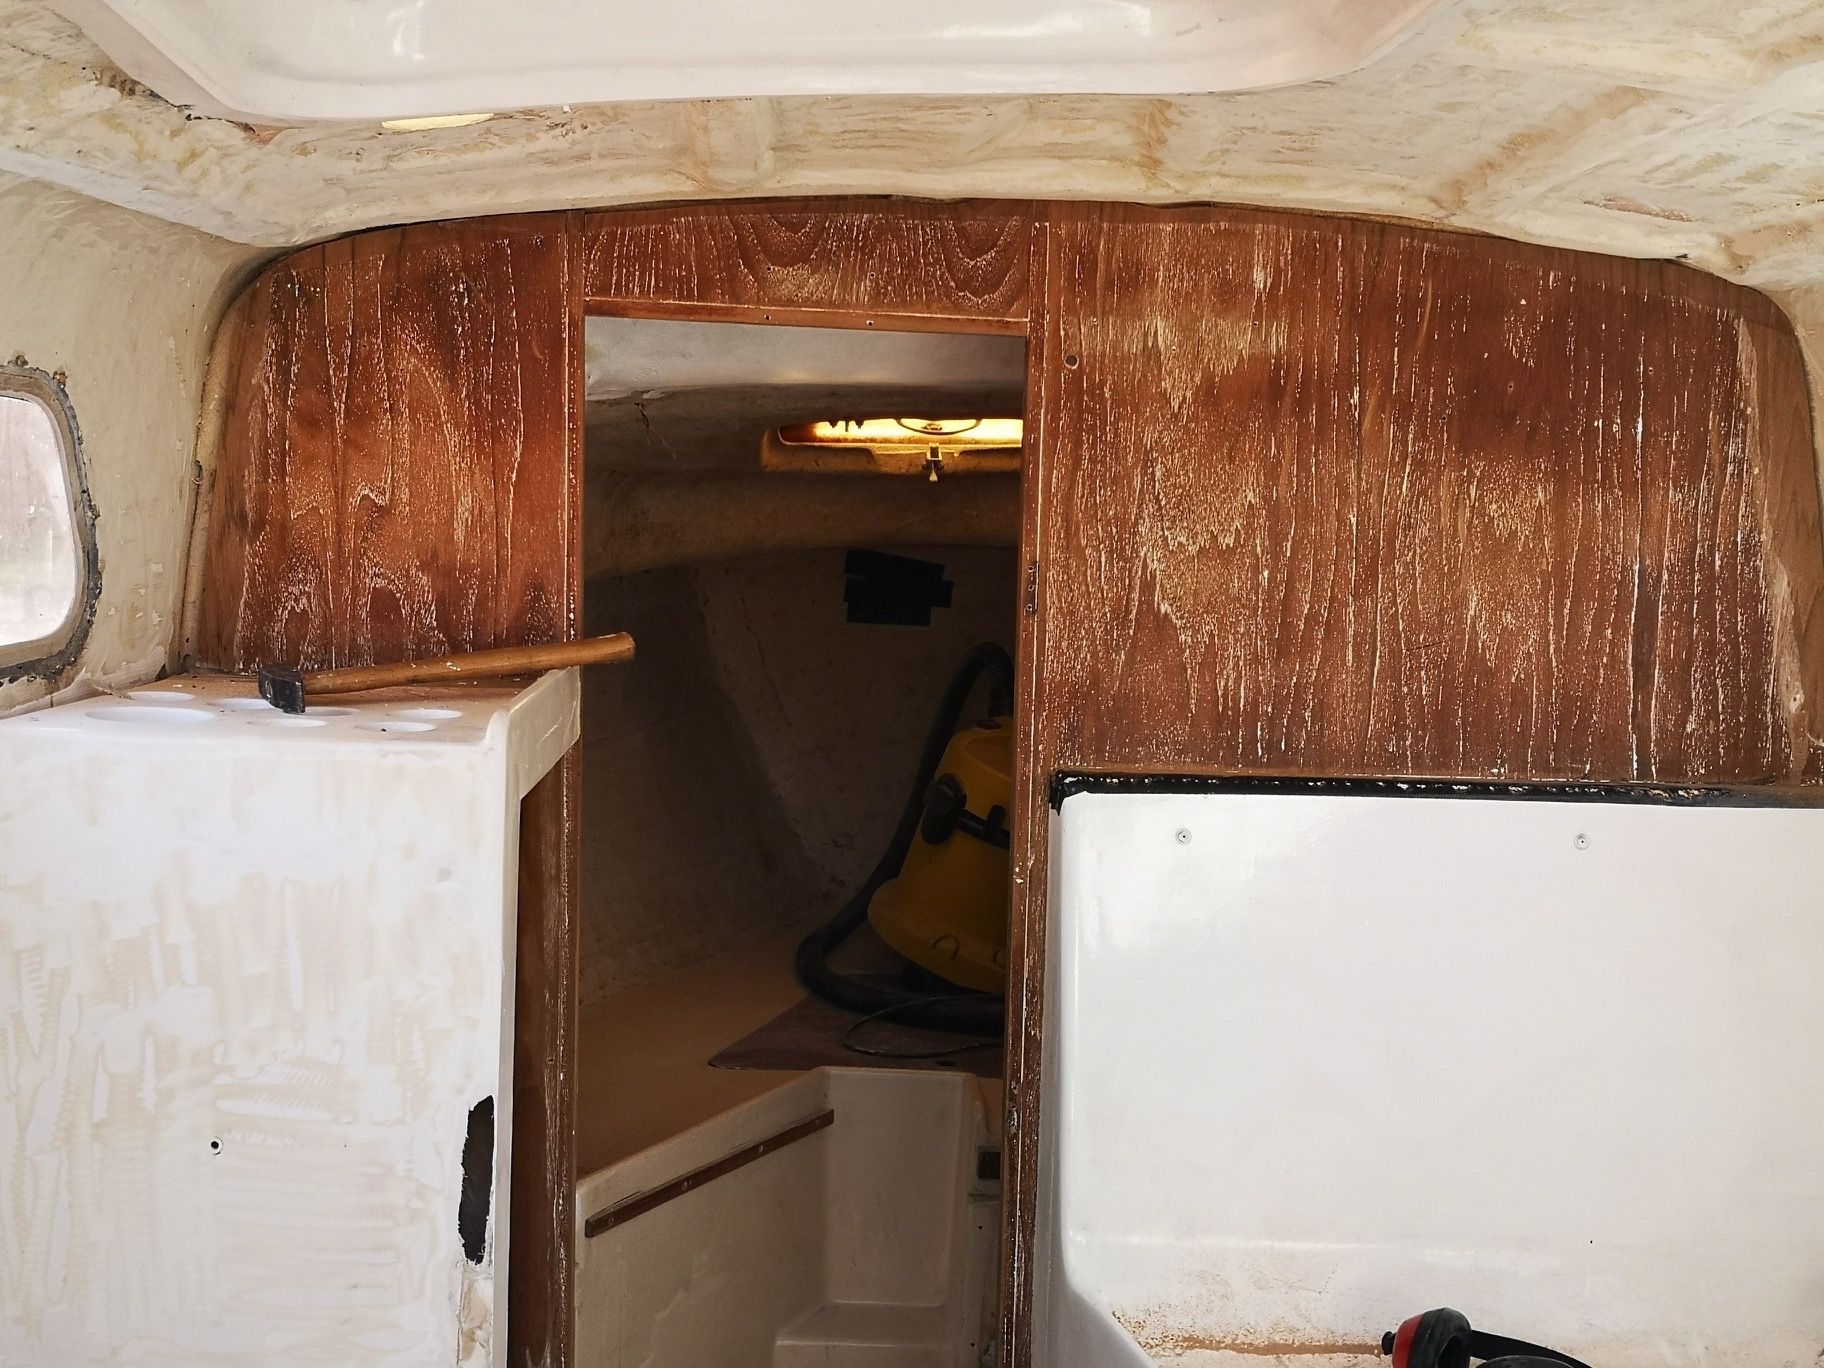
The grinding work continues. Today I sanded the paint from the partition. I was impressed how dark and ugly the old veneer is on me.
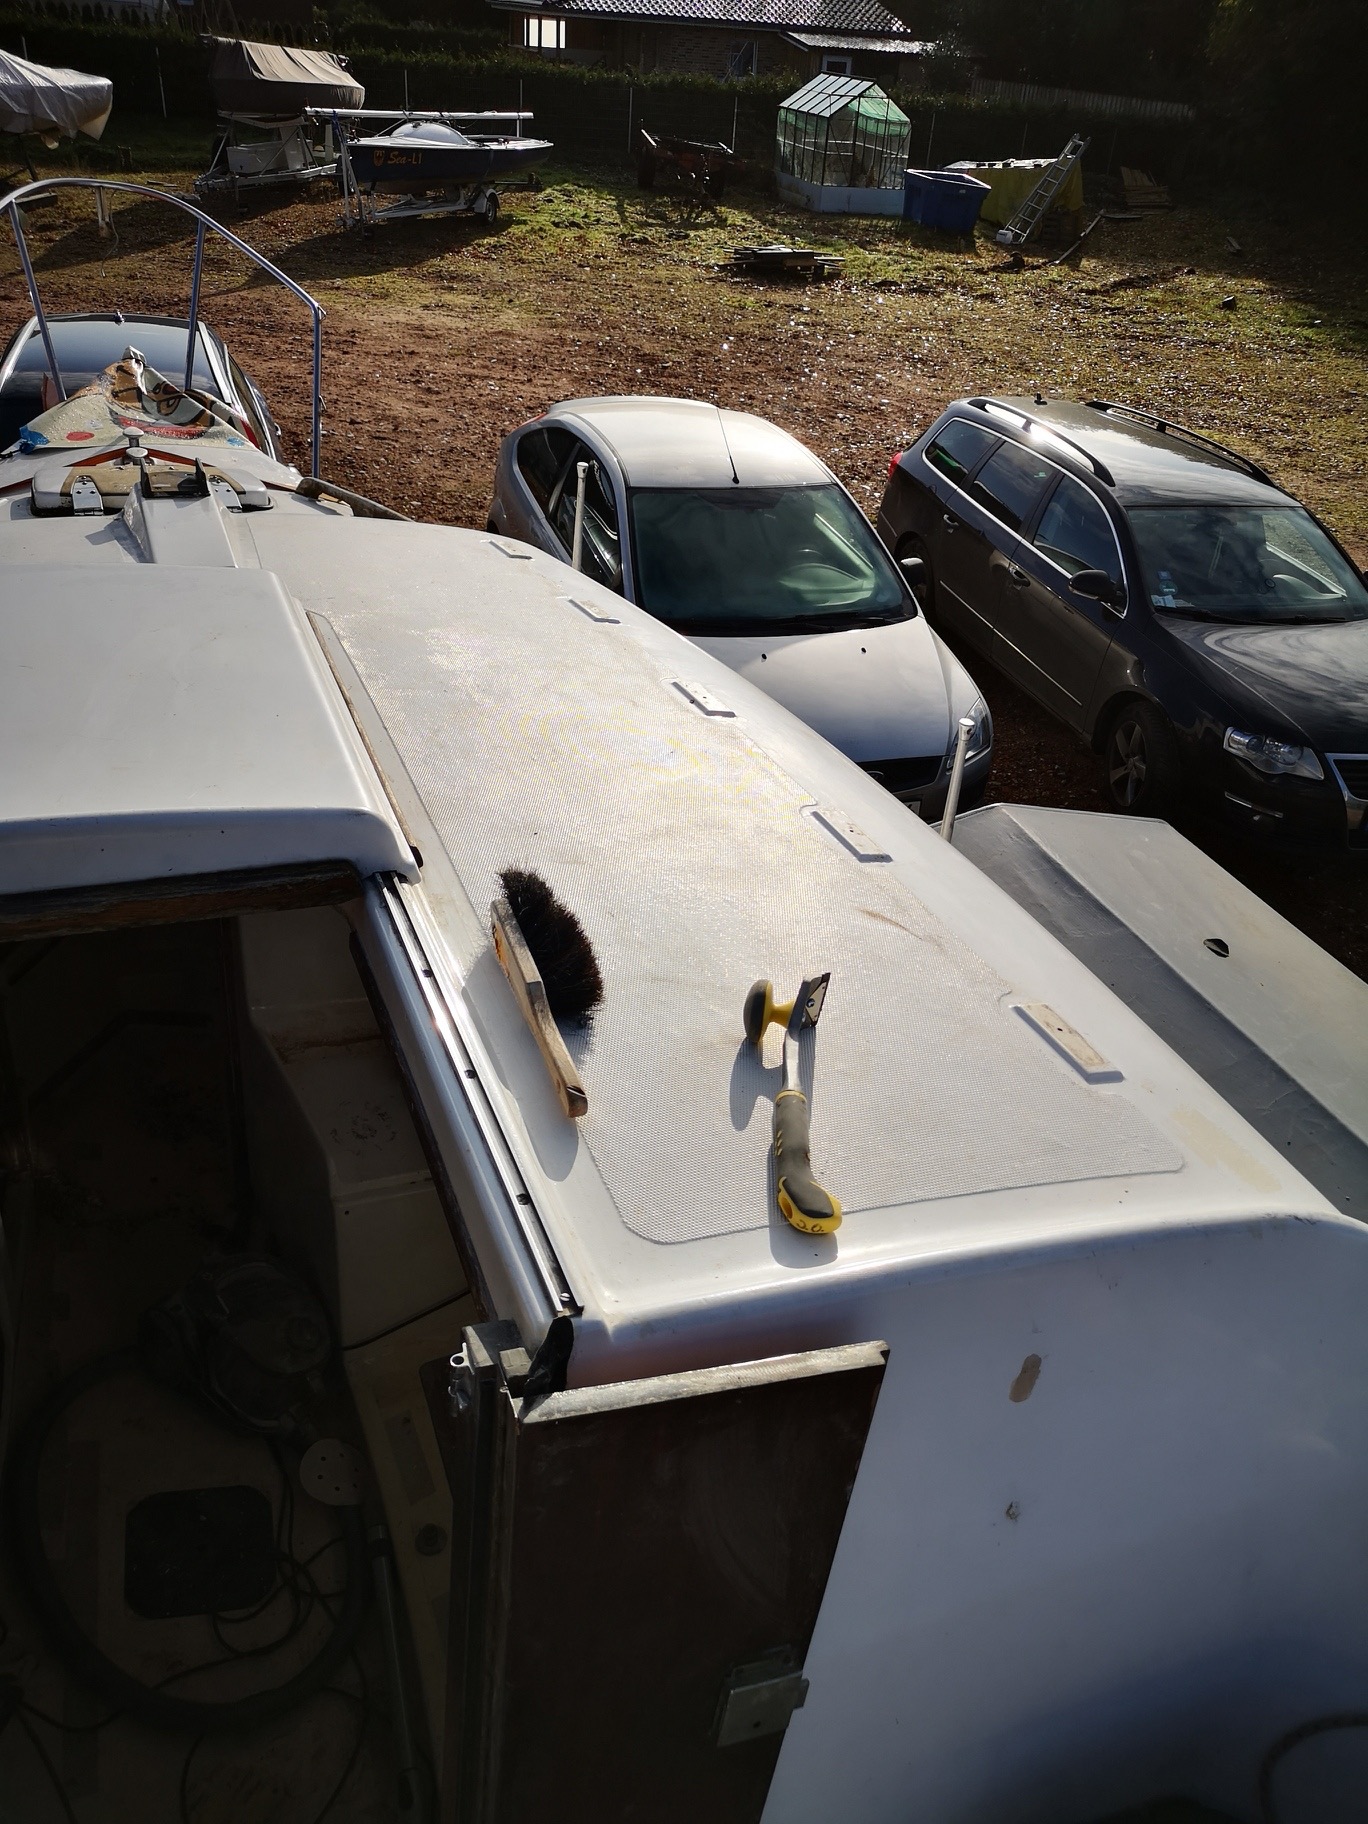
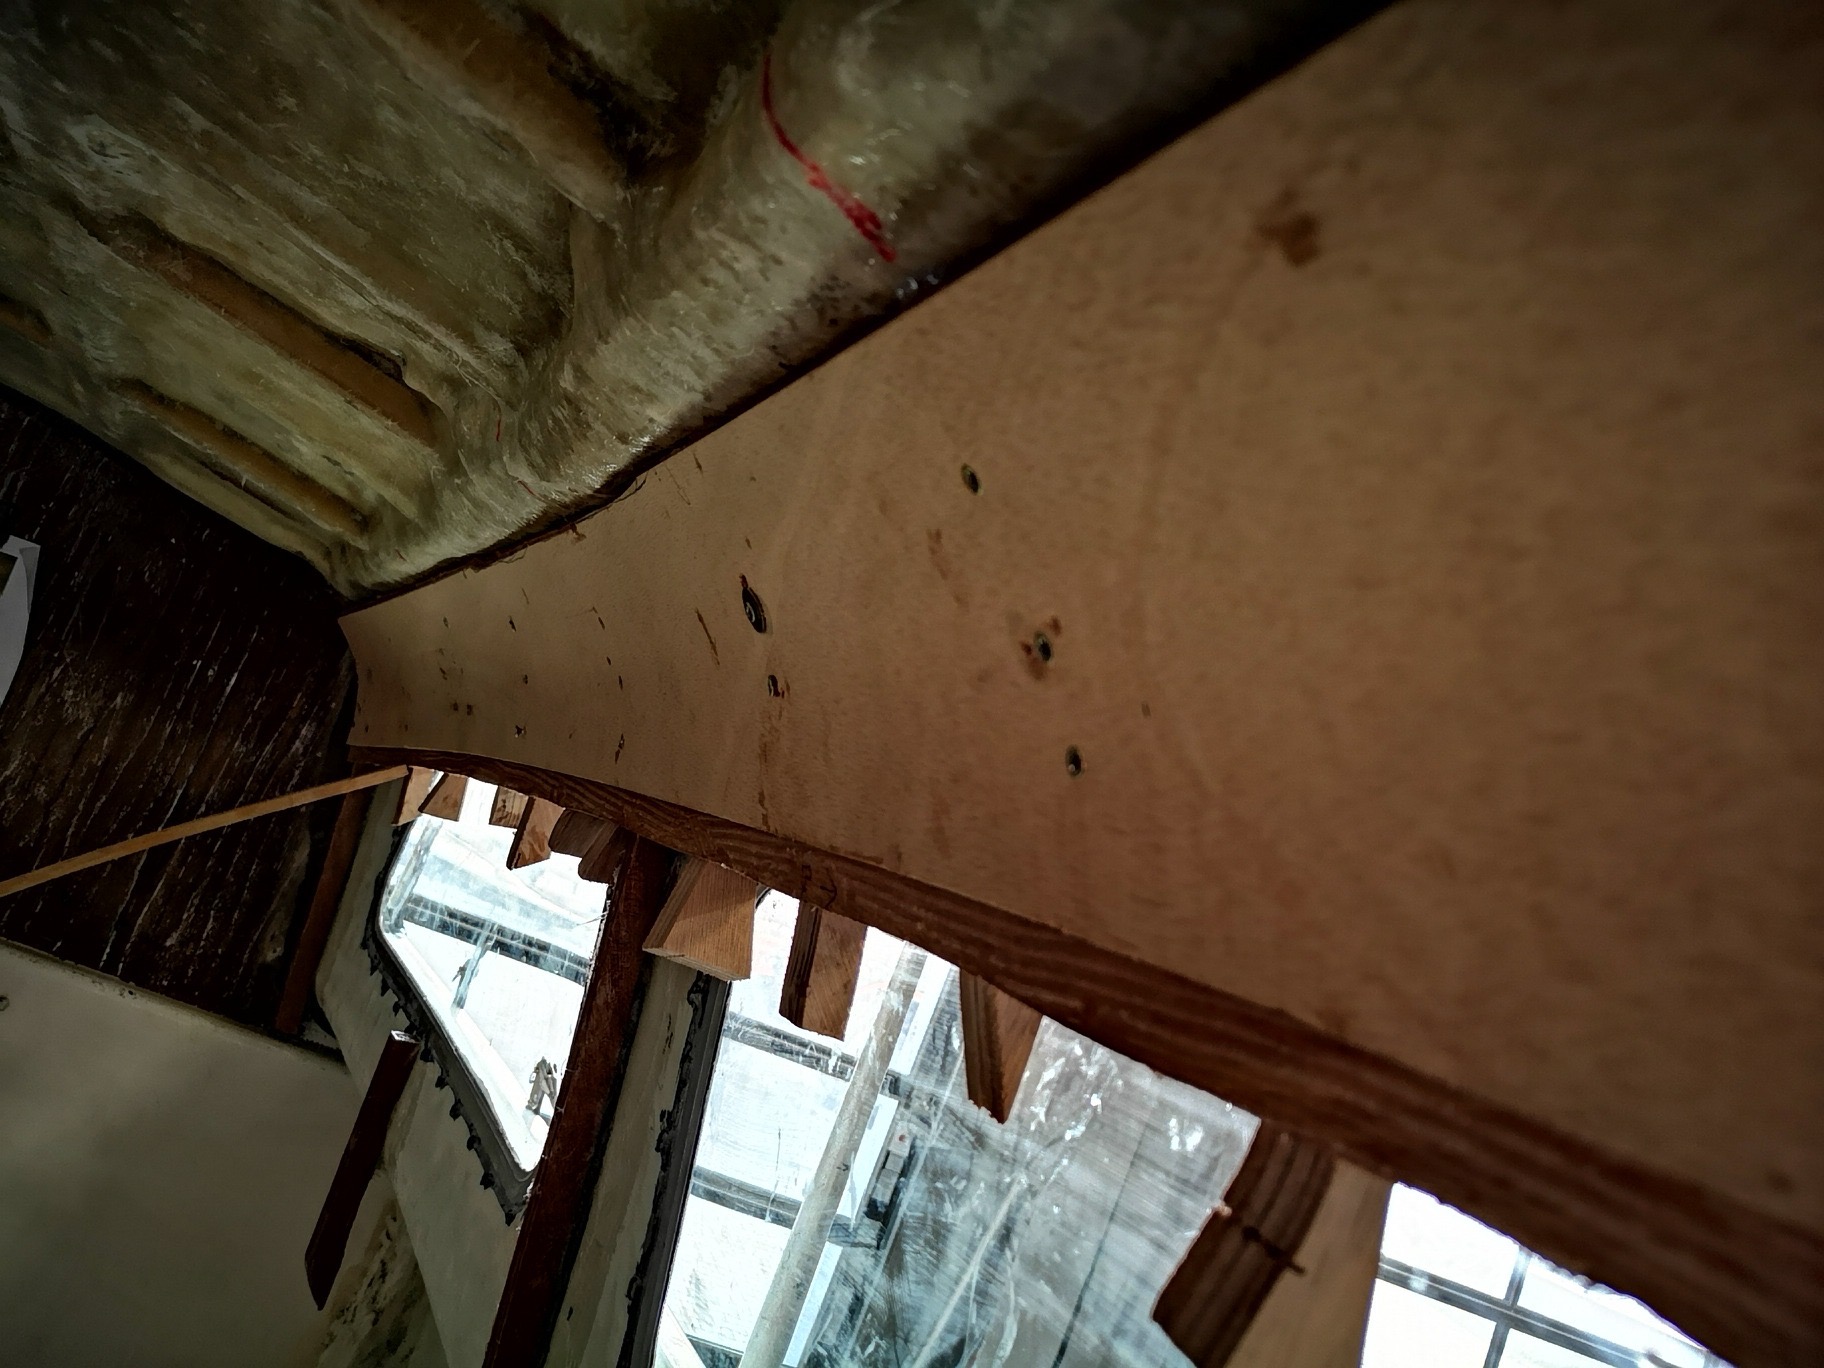
Before I can laminate the inside of the deck, the handrails on the deck must be removed, otherwise the screws heads also will be laminated.
5.11.2019
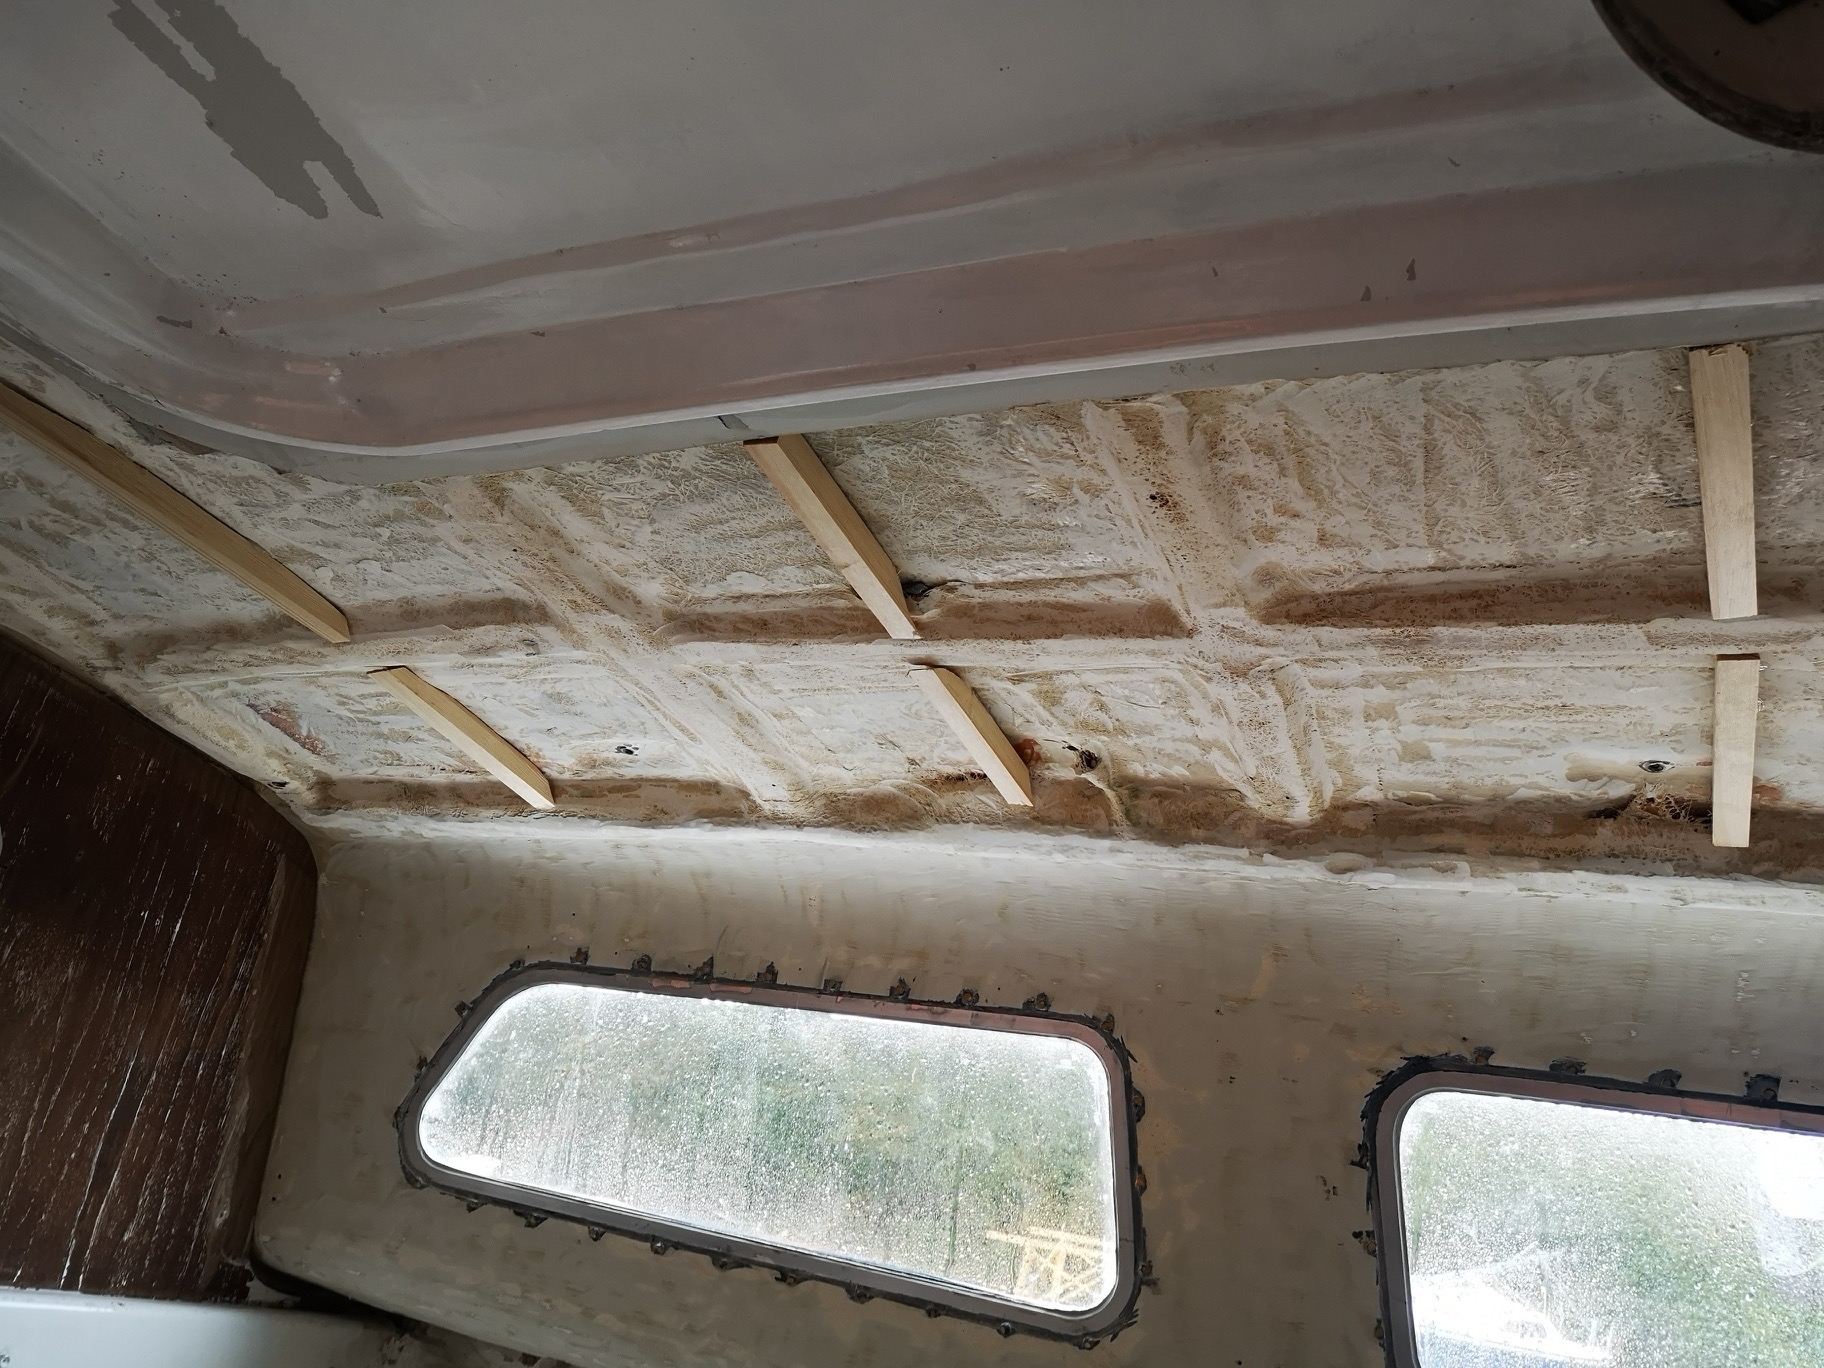
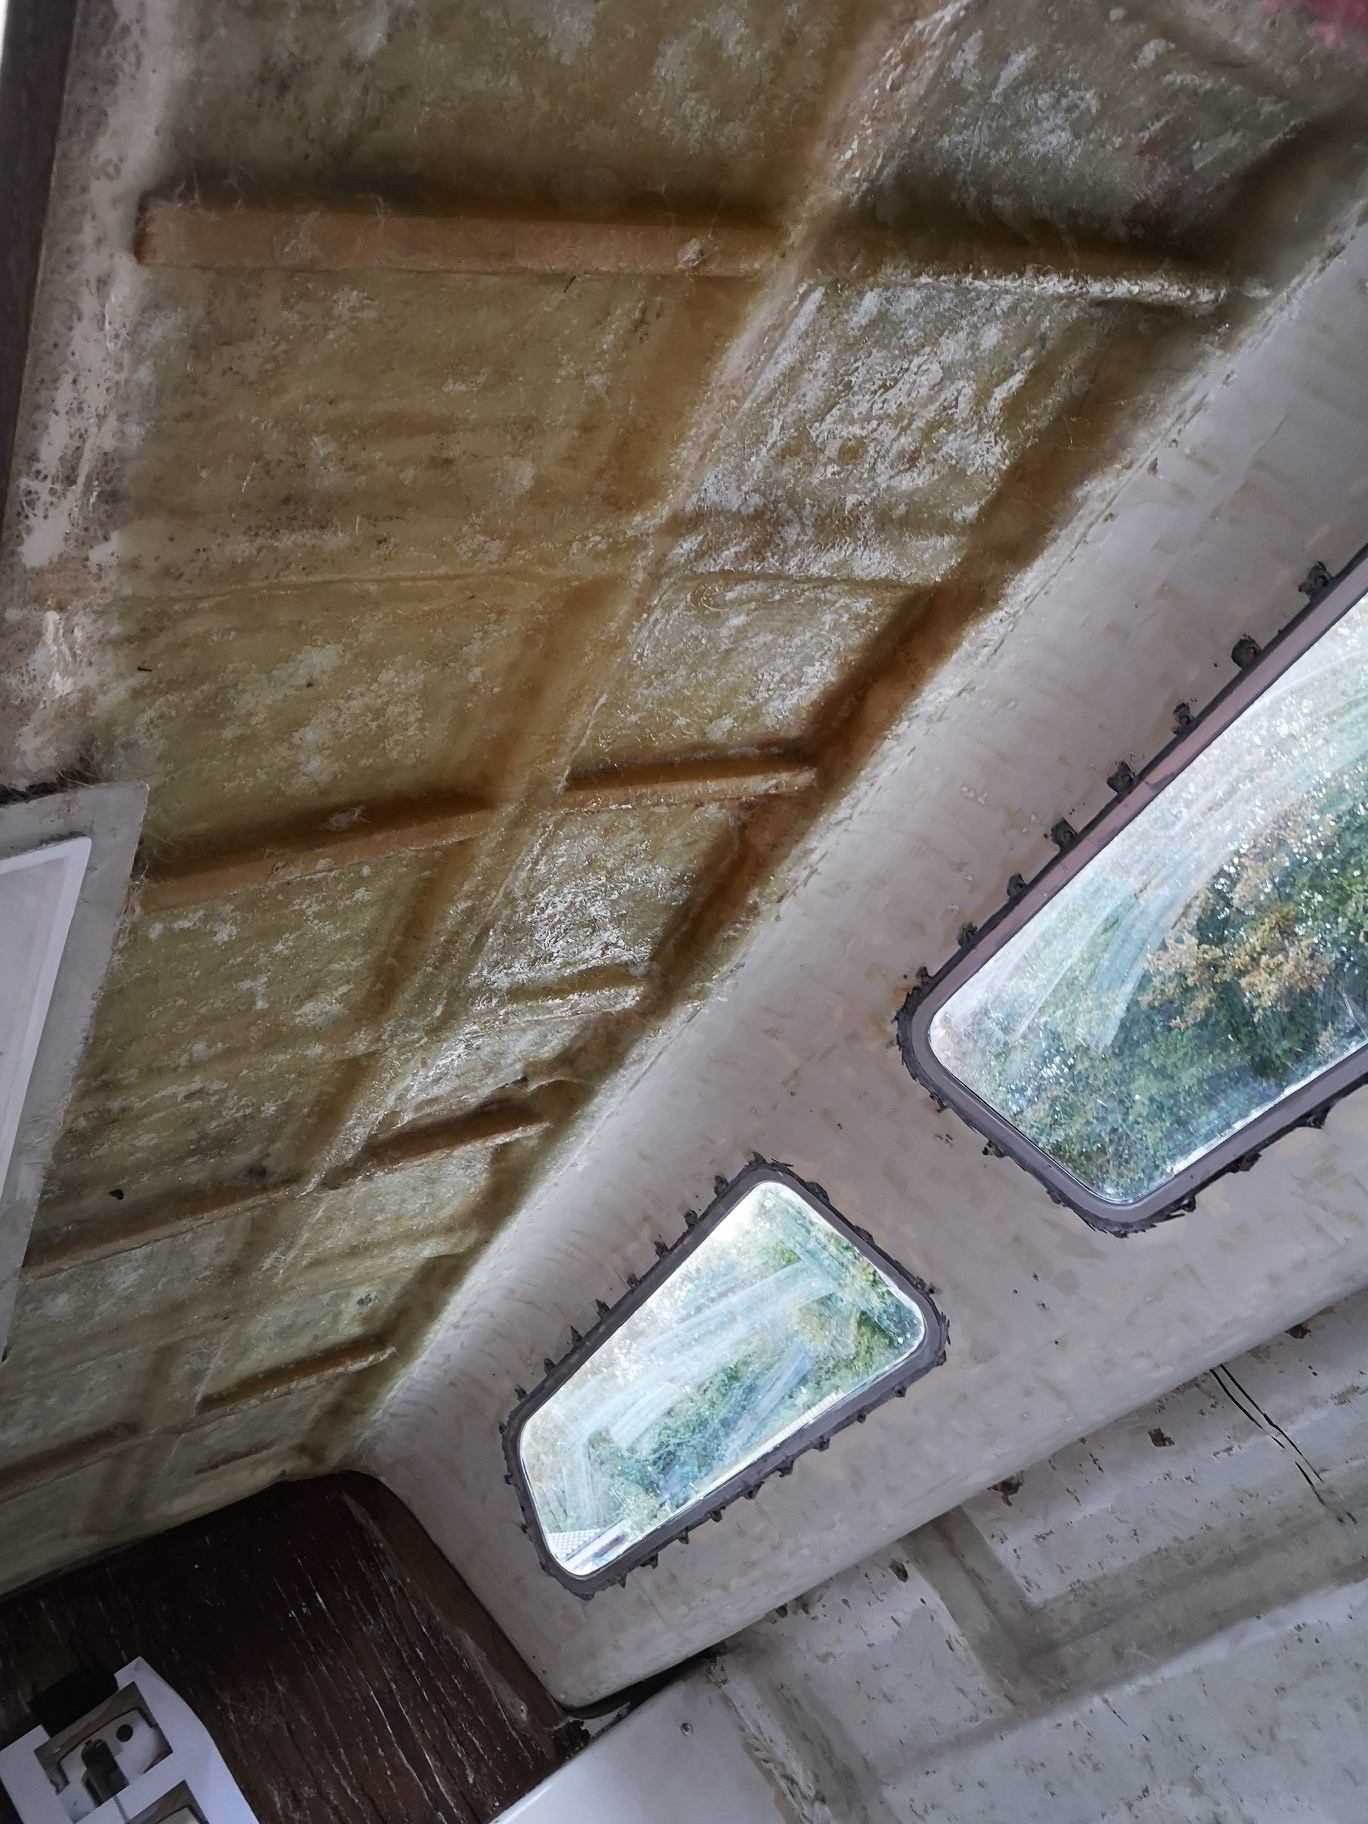
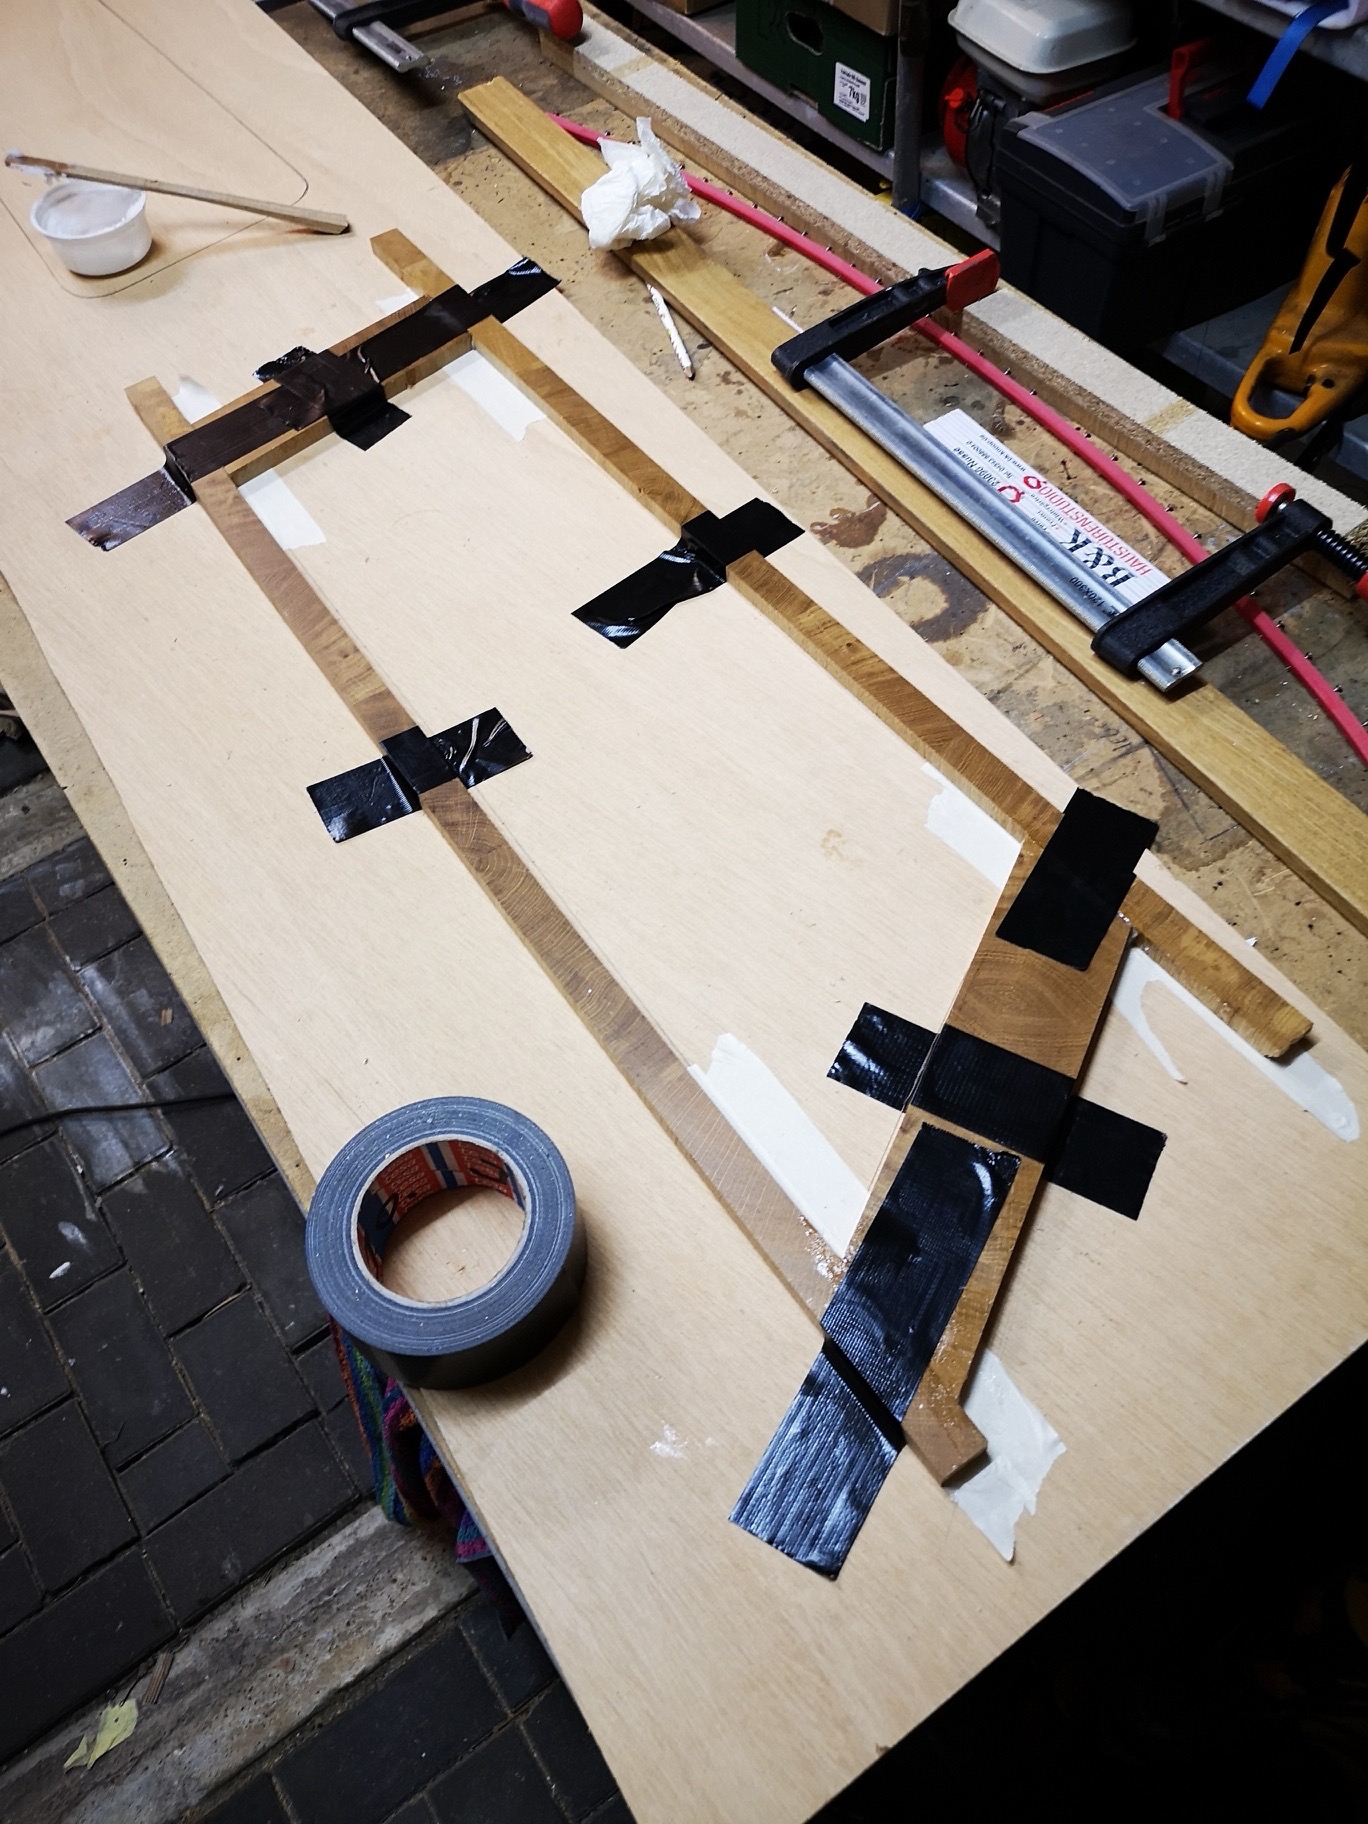
The deck has become soft after 46 years of service. If you go over it gives way easily. Since it is not a sandwich deck I will attach about 5 layers of fiberglass mat with polyester resin from the inside. Wooden slats should increase the stiffness after they have been decently laminated.
The wooden strips I fixed in advance with hot glue. Subsequently, I thickened polyester resin with a groove, so that later the GRP mat is not too kinked around the wood, otherwise it could break under load.
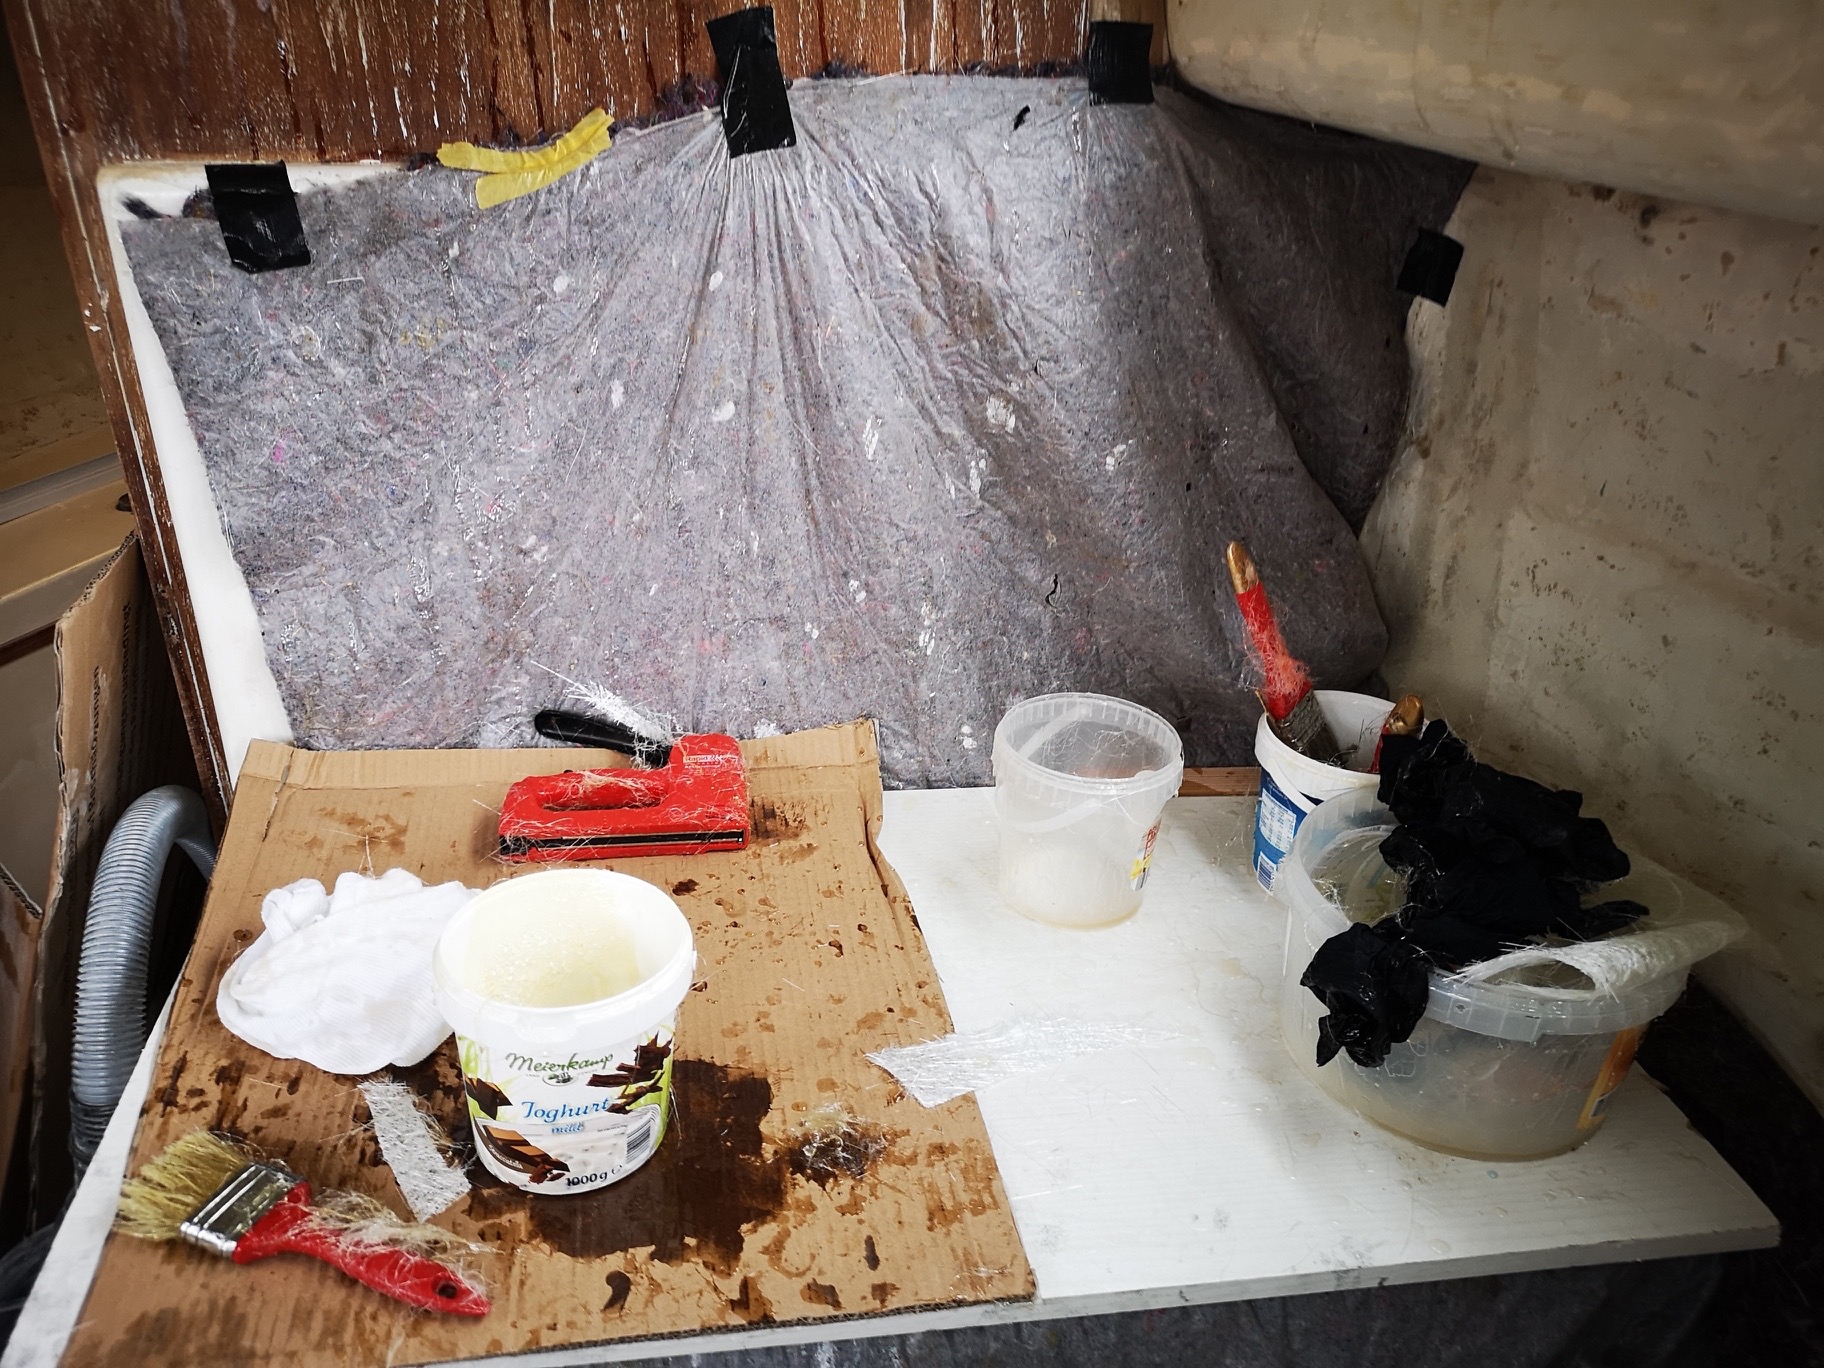
6.11.2019
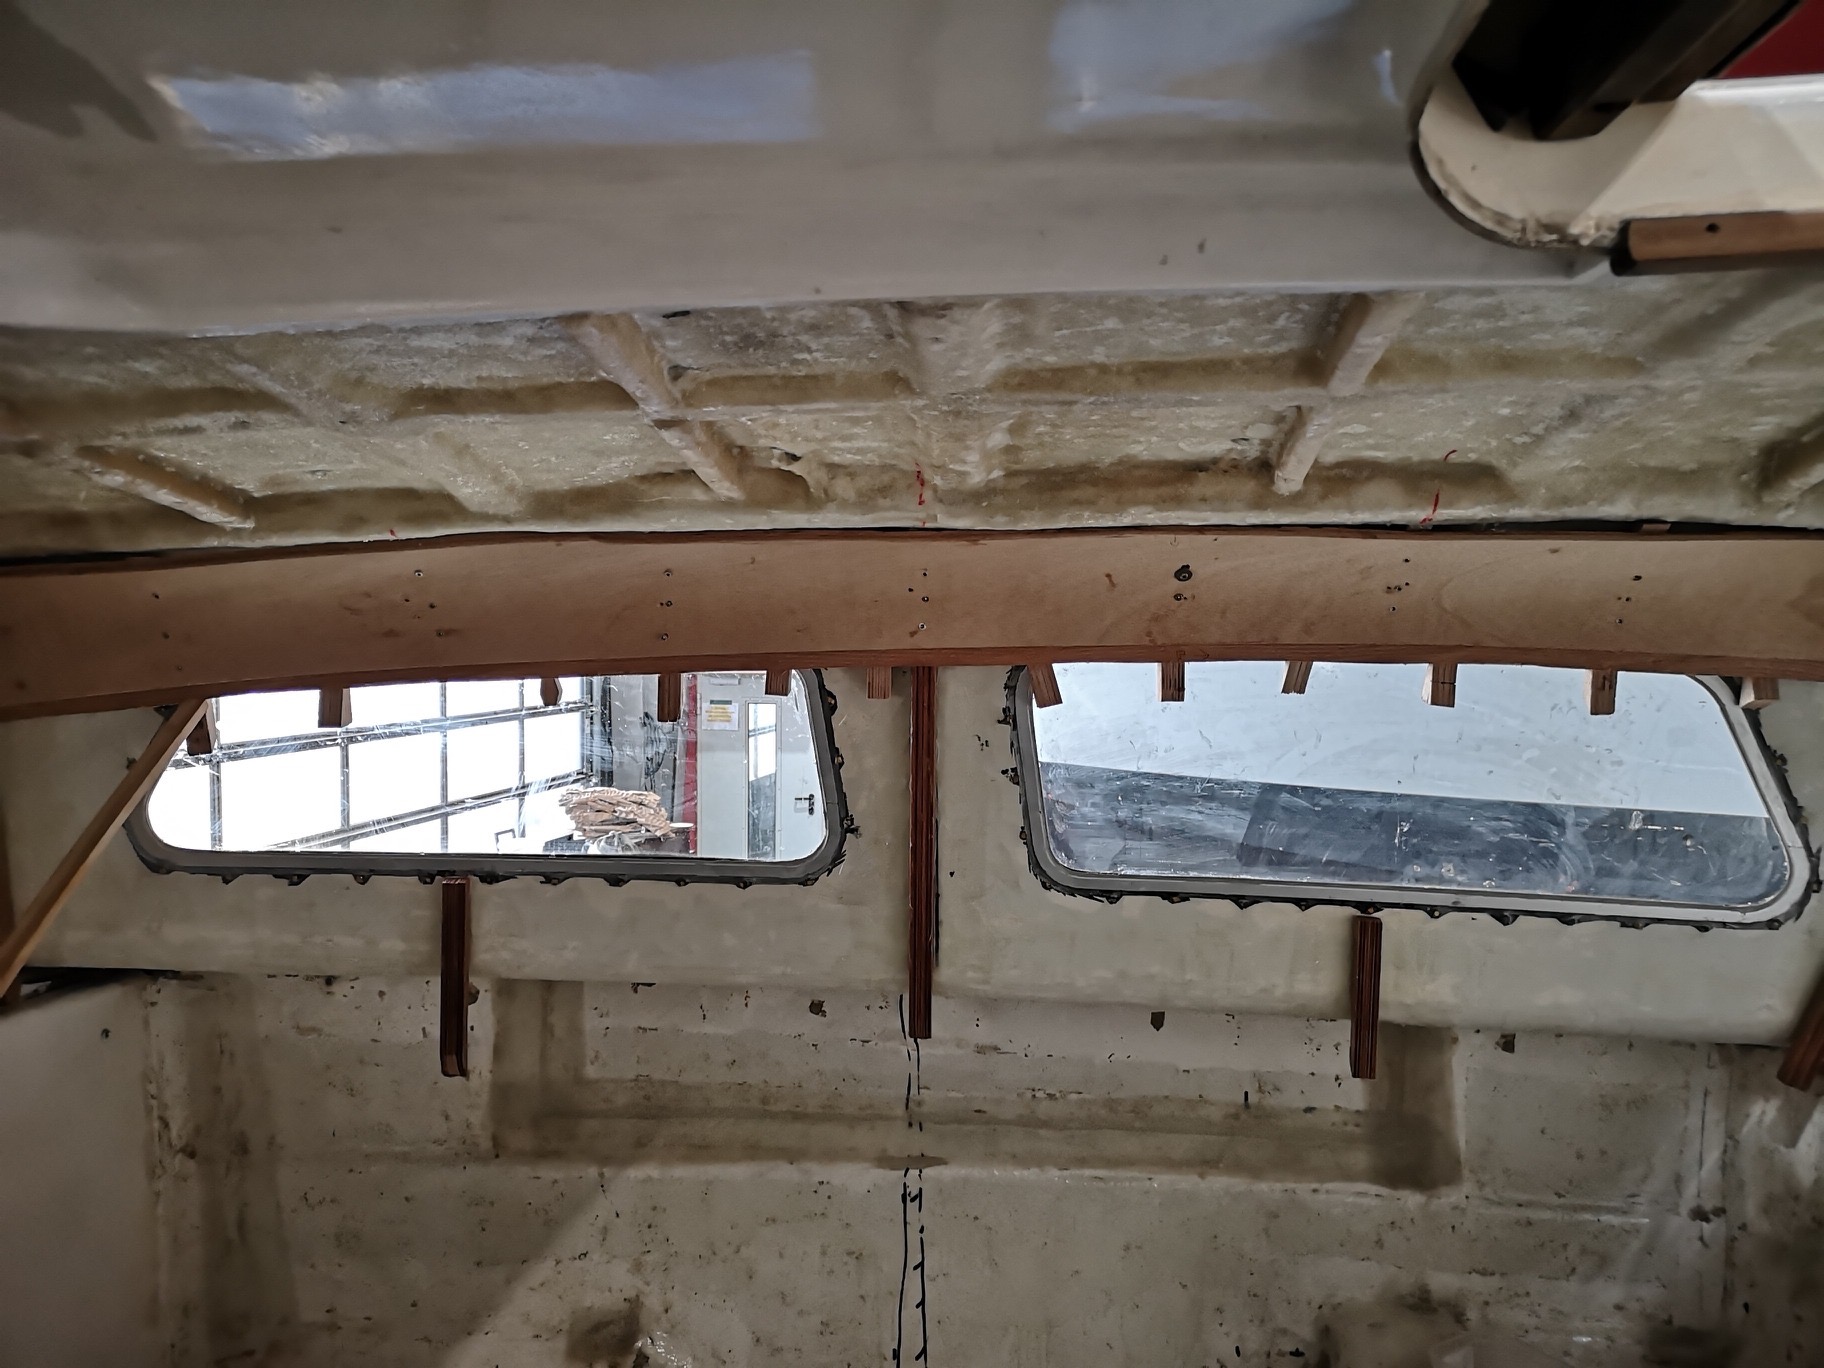
If you are not used to it, laminating overhead is very tiring, because you constantly fight against gravity and the 3 layers 450g / qm GRP mats only with a lot of patience and my stapler wanted to stay on the ceiling. The polyester resin drips during processing on everything that stands in the way. My jeans has now become laminate too. ;-) ... All in all, it is a strenuous Sauarbeit.
ATTENTION: The resin must not get in the eye !! The resin burns very unpleasantly on the skin.
… After 2 days work almost ready ;-) At a later time here comes a paneling over it.
7.11.2019
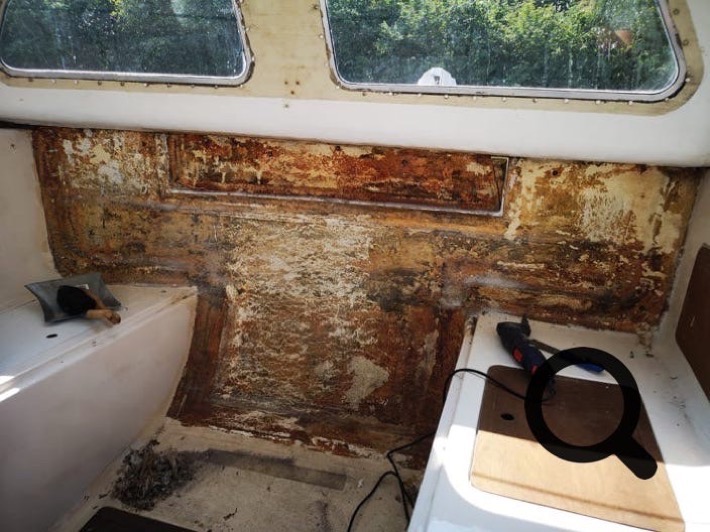
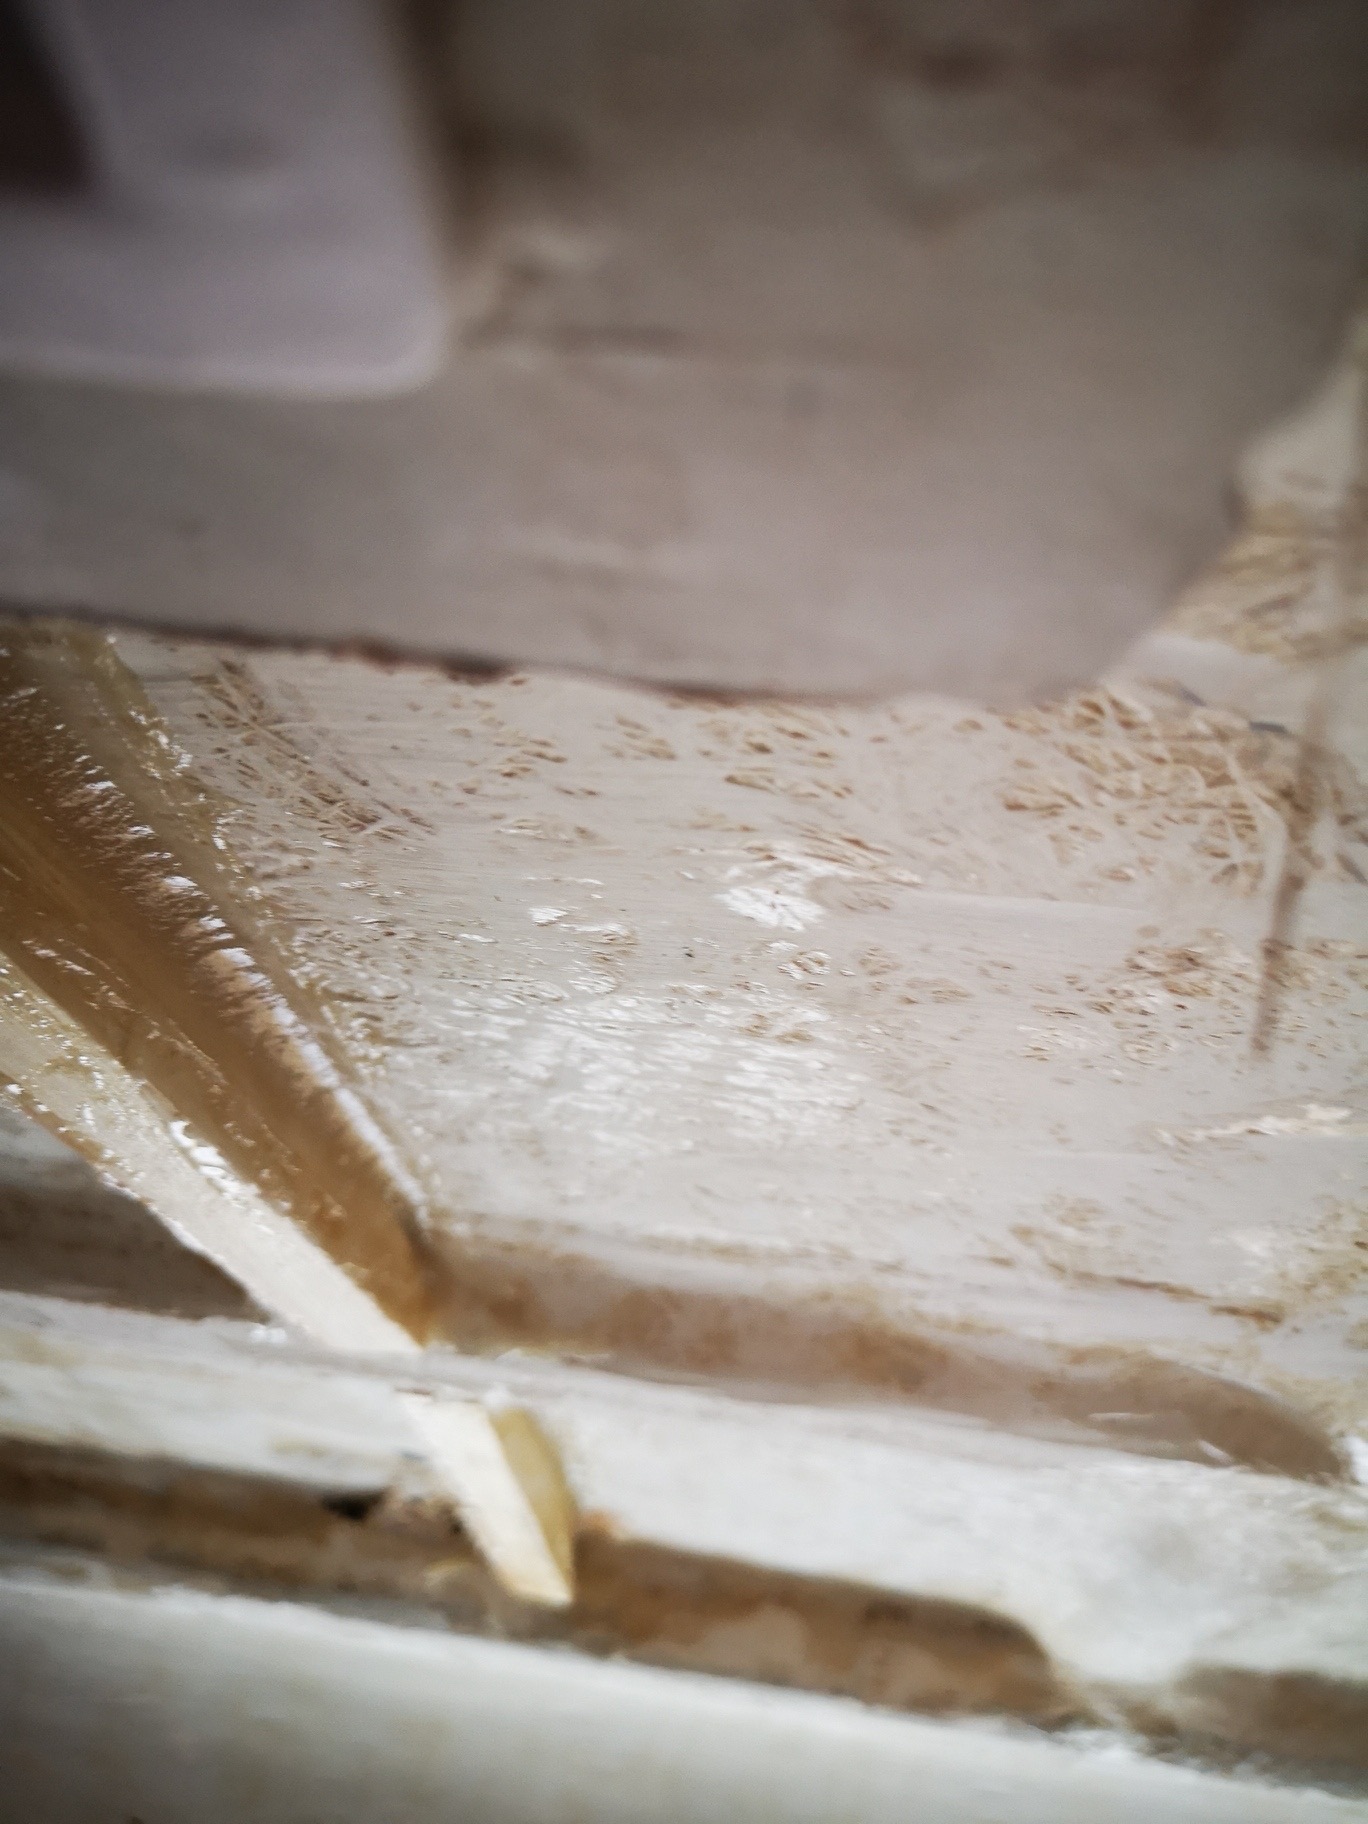
Soft and rotten wood

Moisture has risen high over the years. Mold and moldy odor were the result.
To get to the rotten wood, the passage must be sawn a little bit.
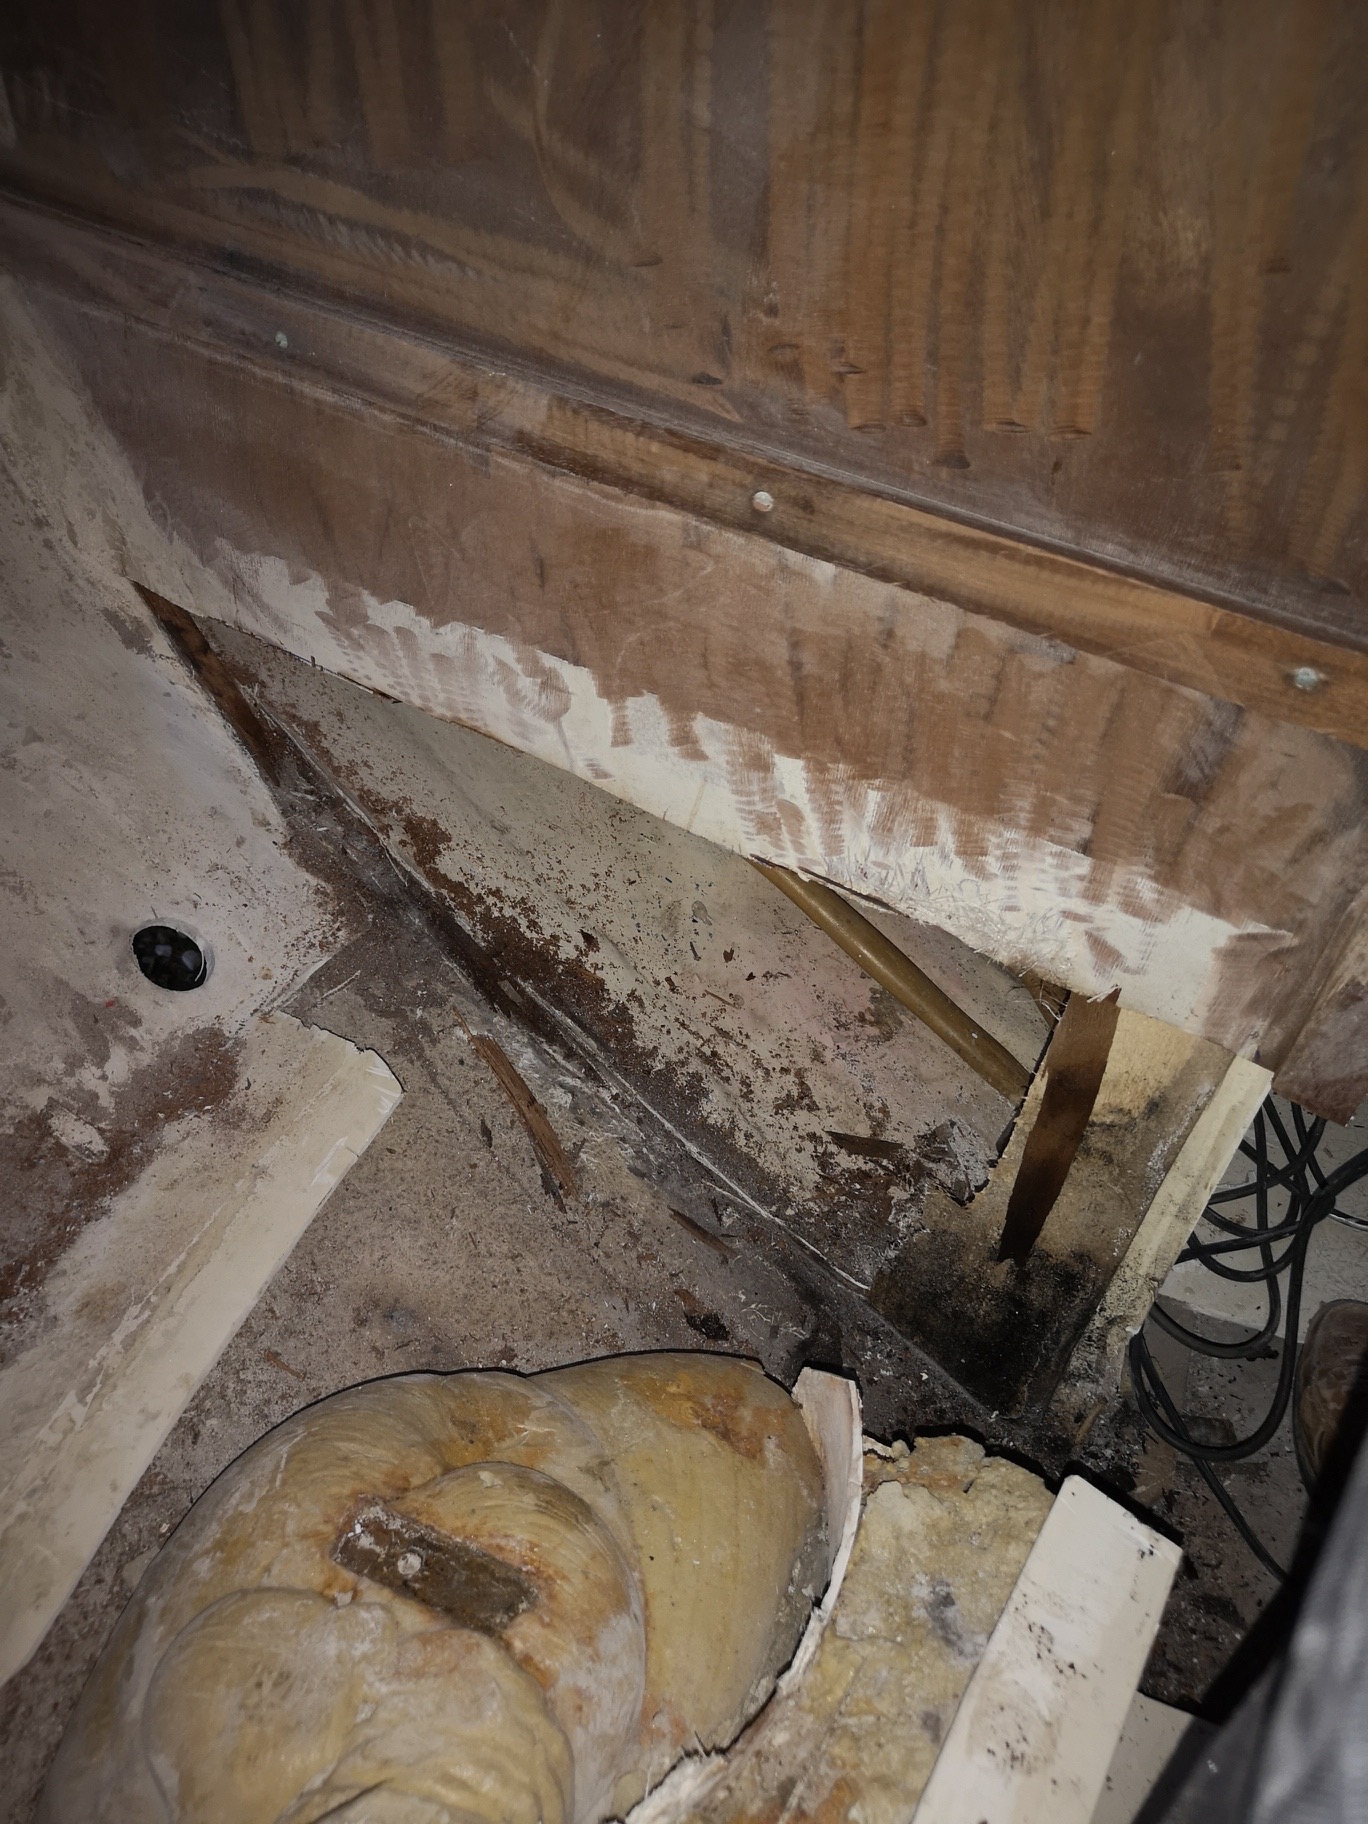
I sawed out the rotten wood far and wide.
... A picture is worth a thousand words.
15.11.2019
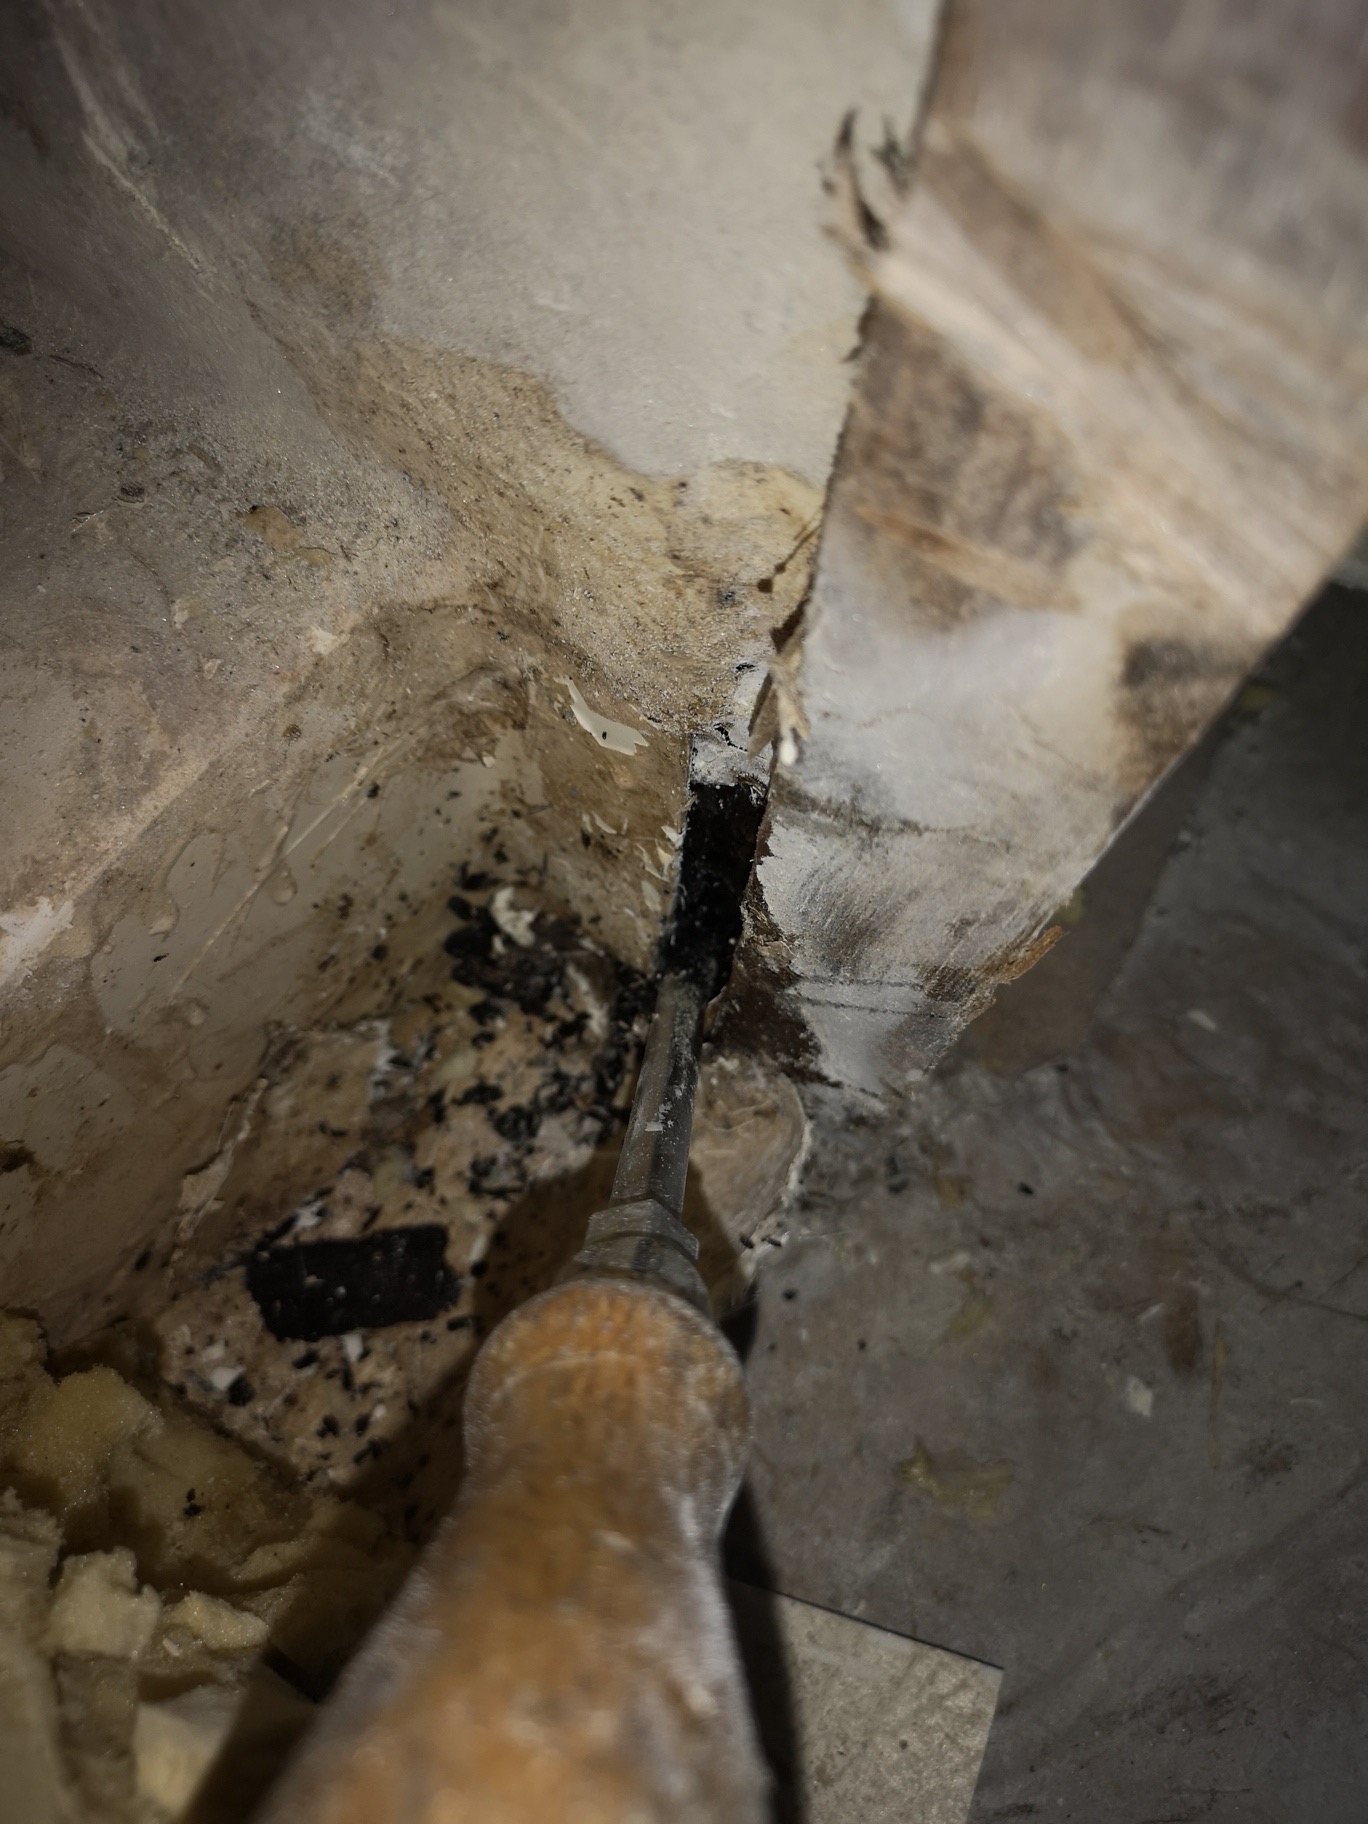
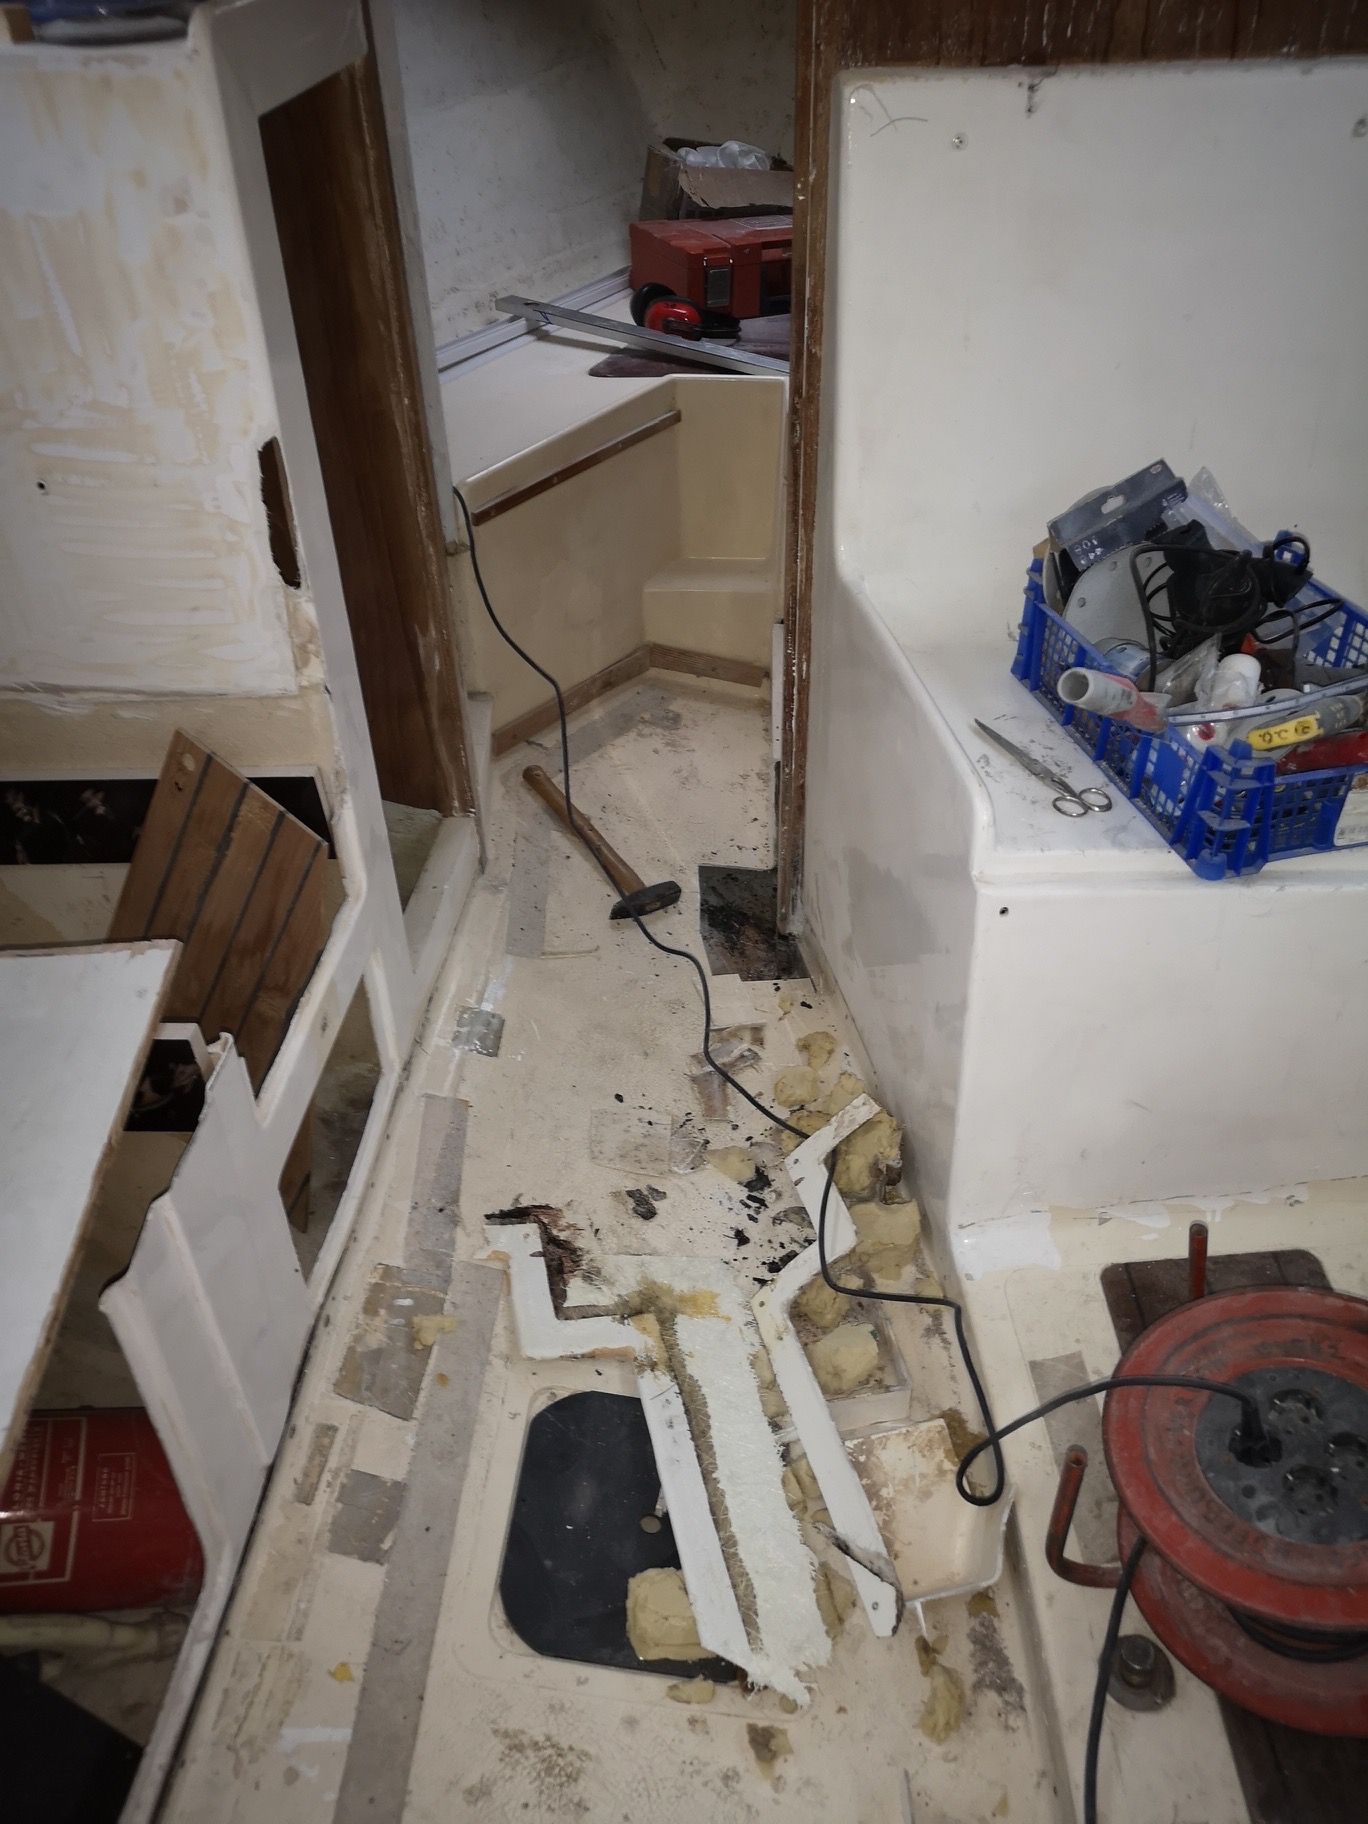
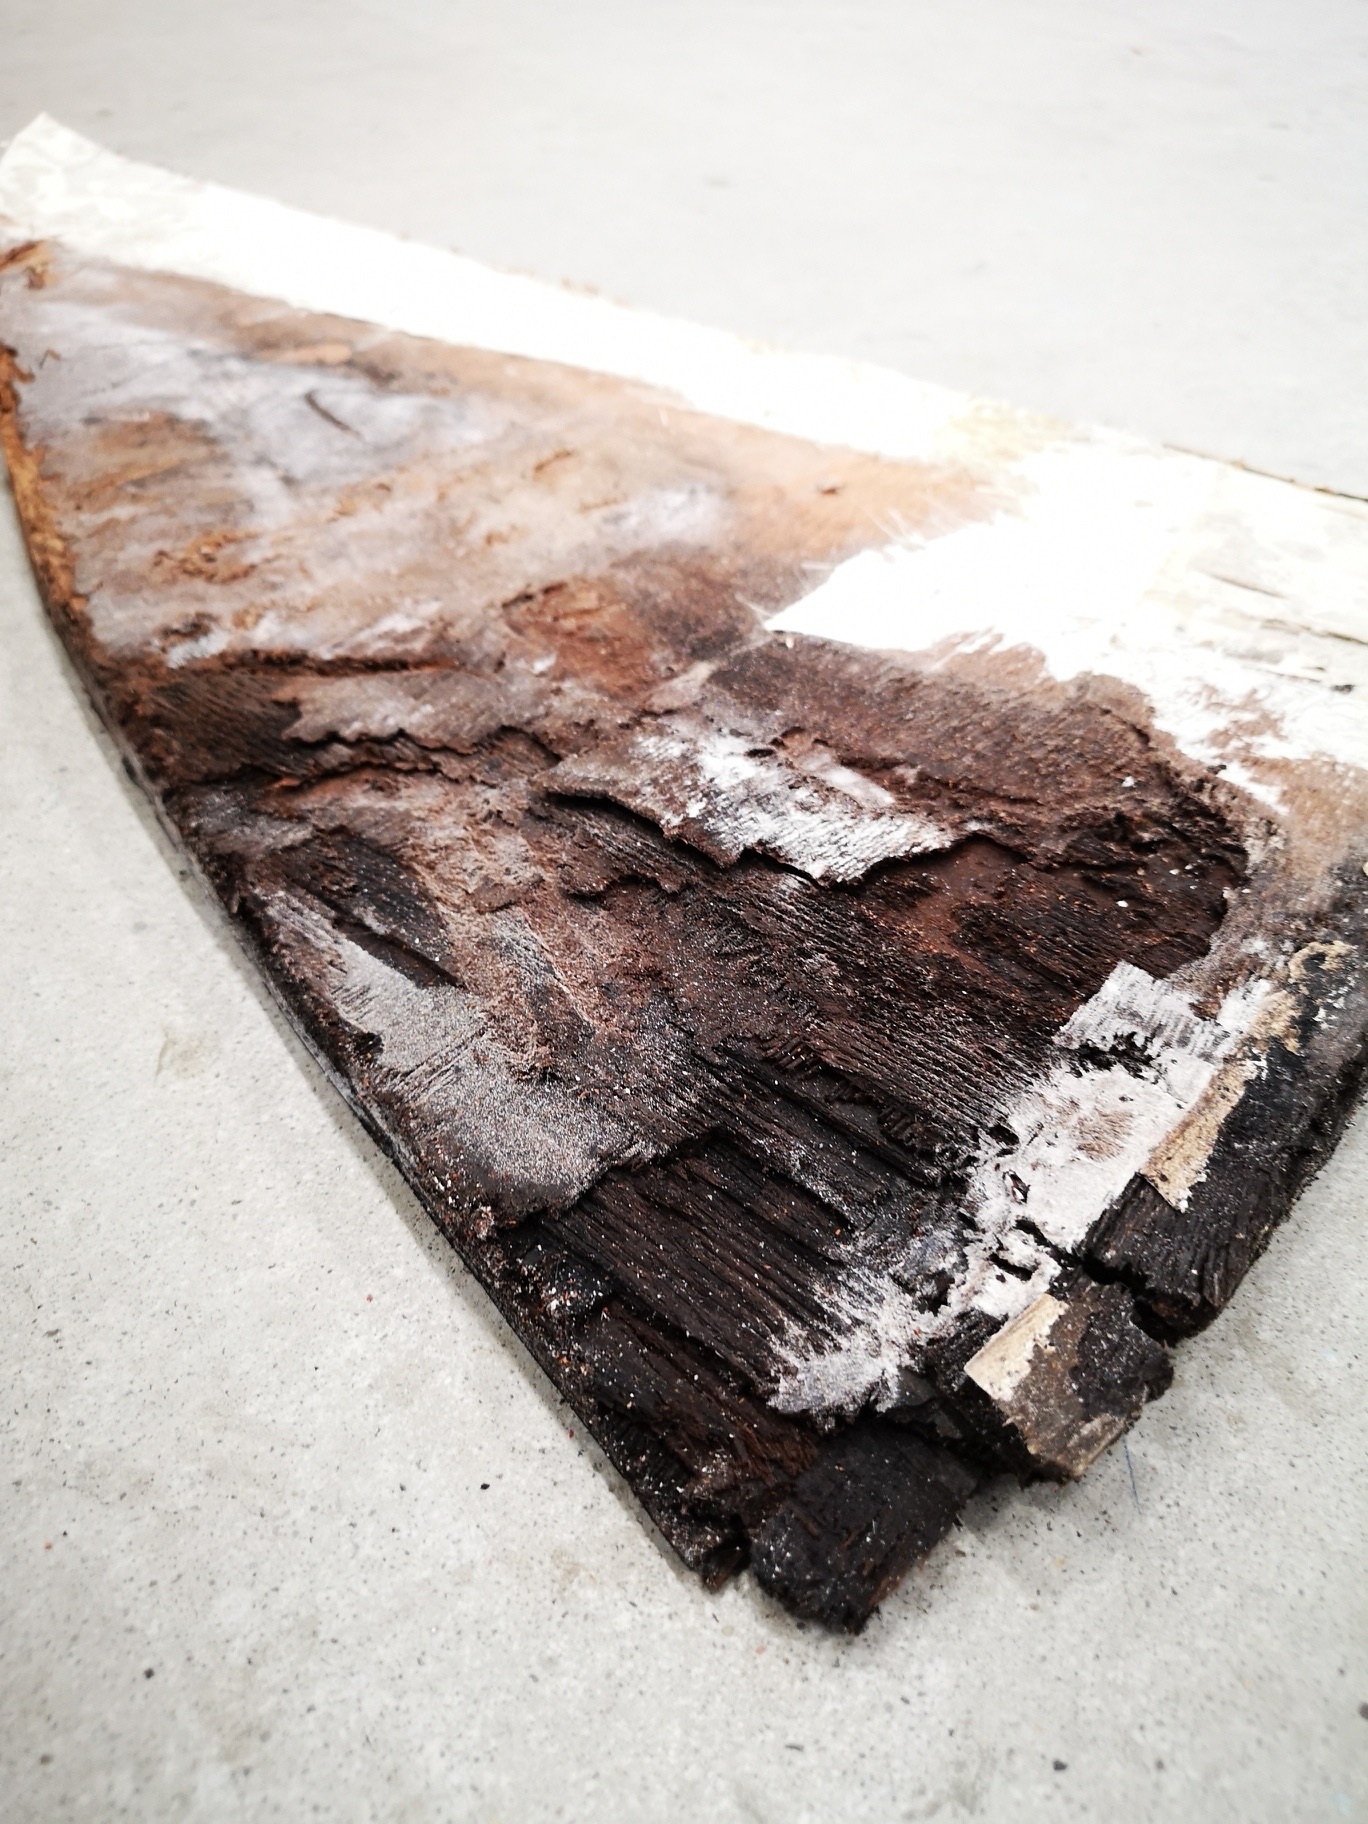
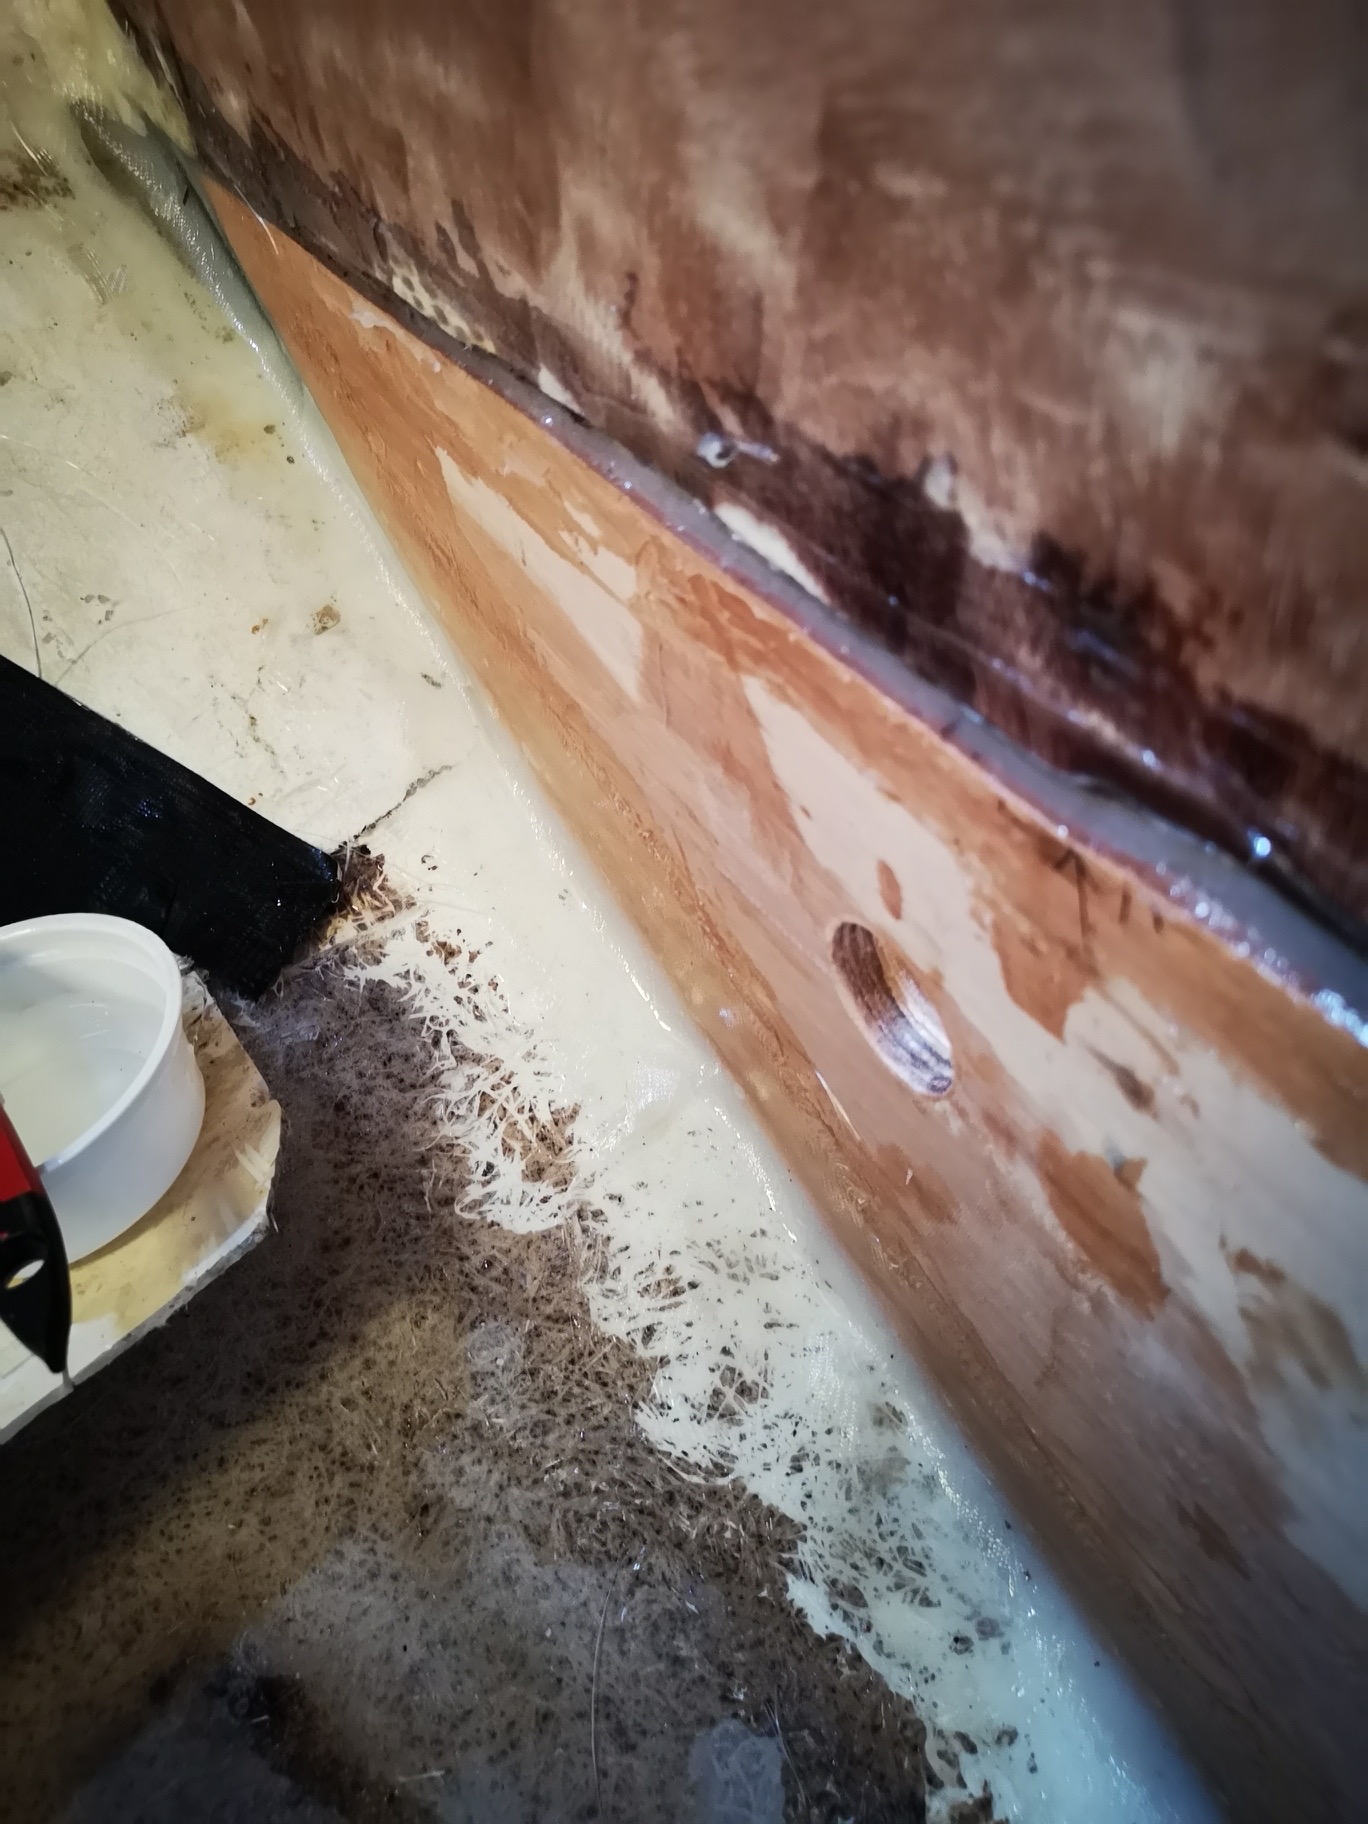
Today, I have had to cut out the lower part of the wooden partition, between the saloon and the room in the bow, on the starboard side, as the wood has become soft and rotten over the years due to permanent water in the bilge. I first had to split the ground to get at the wood that is down on the hull bottom.
With the screwdriver you can sting a large area in the soft wood. With a multitool and a jigsaw, I have separated the rotten wood over a large area. On the piece of wood that has been cut out, it is easy to see how necessary this transplantation was.
In the next step, I will replace the separated piece of wood with new wood and laminate it clean.
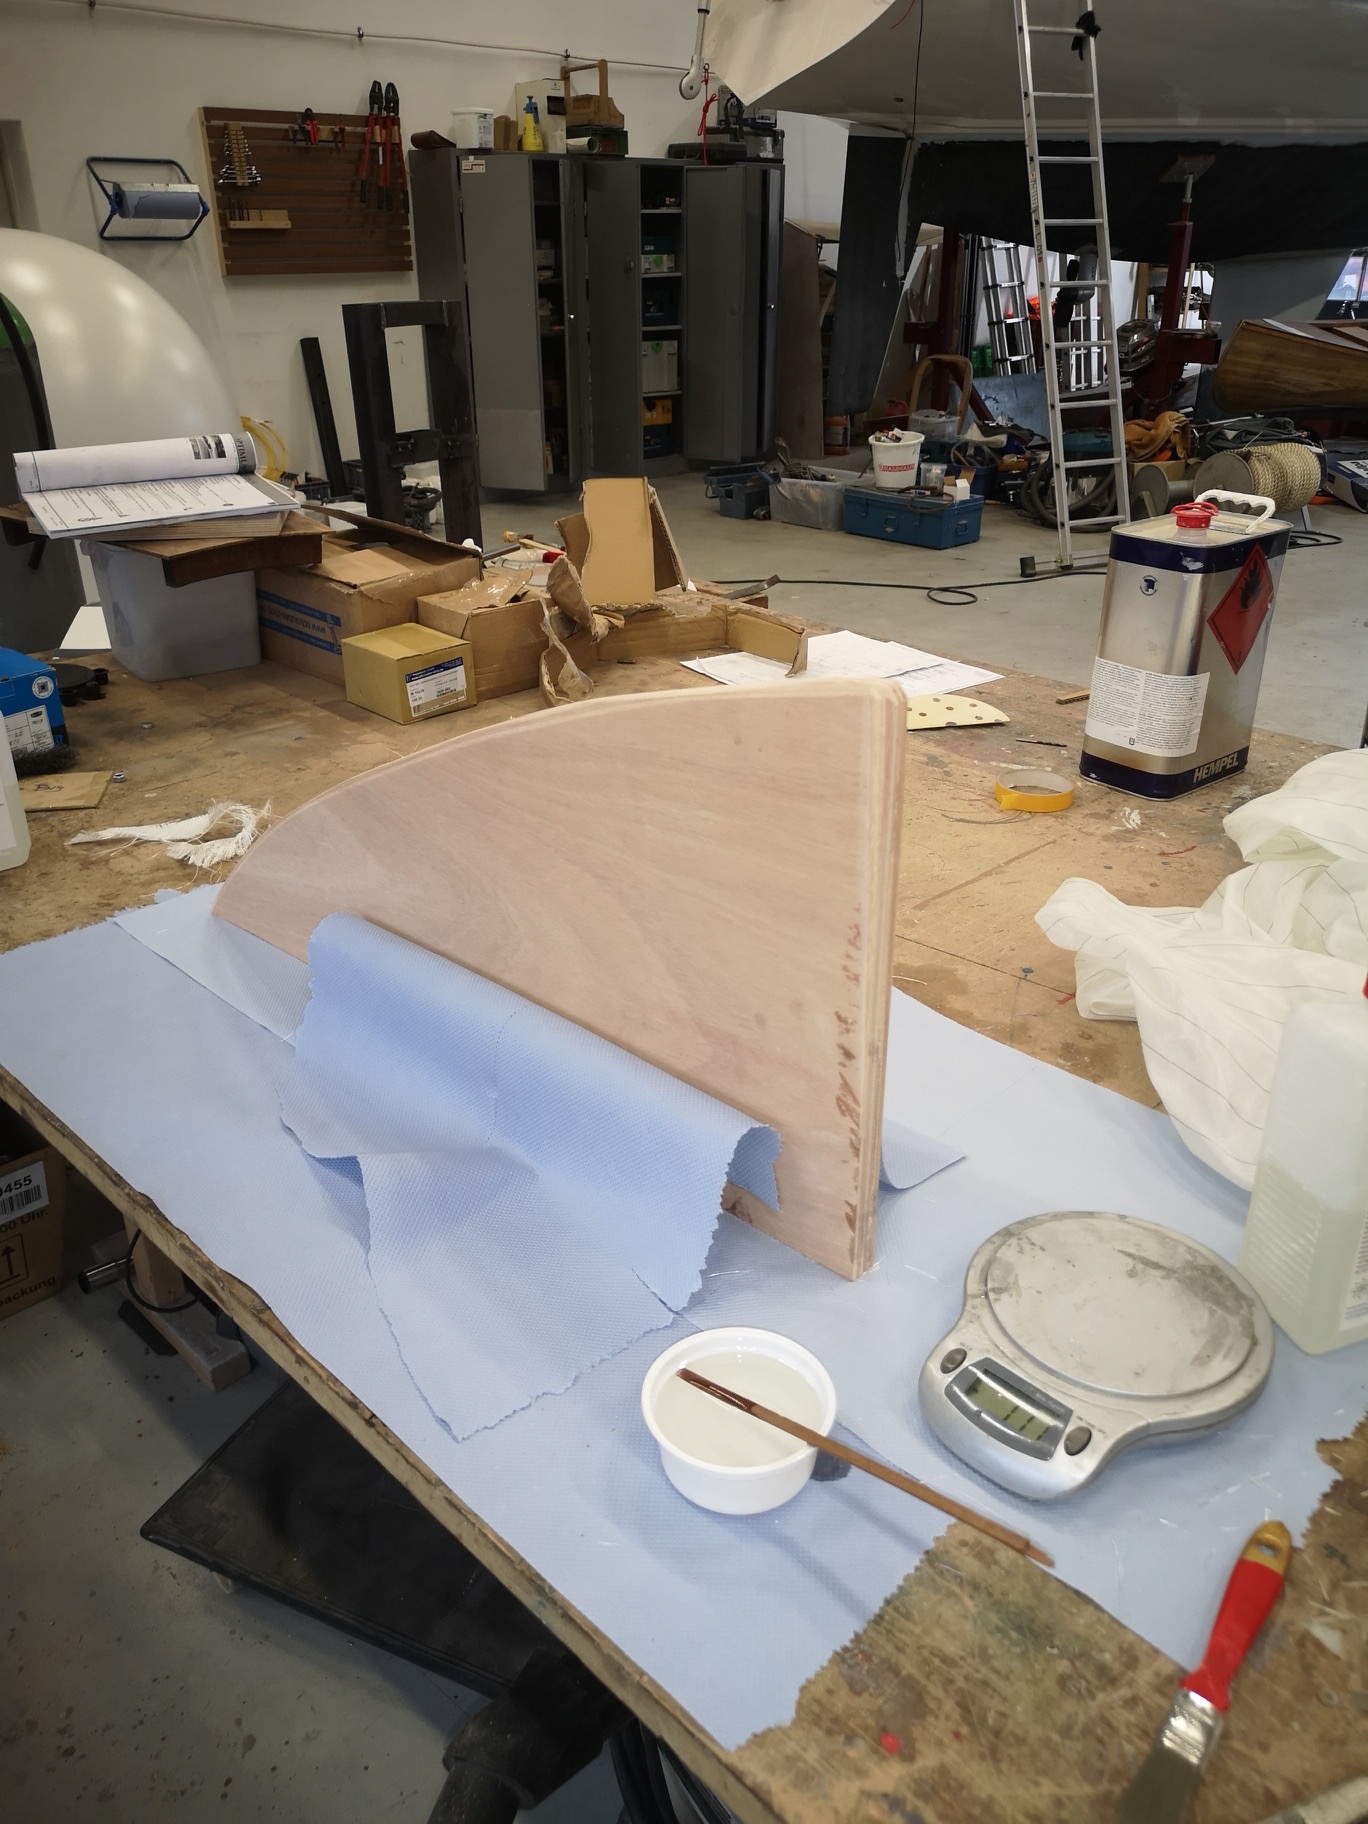
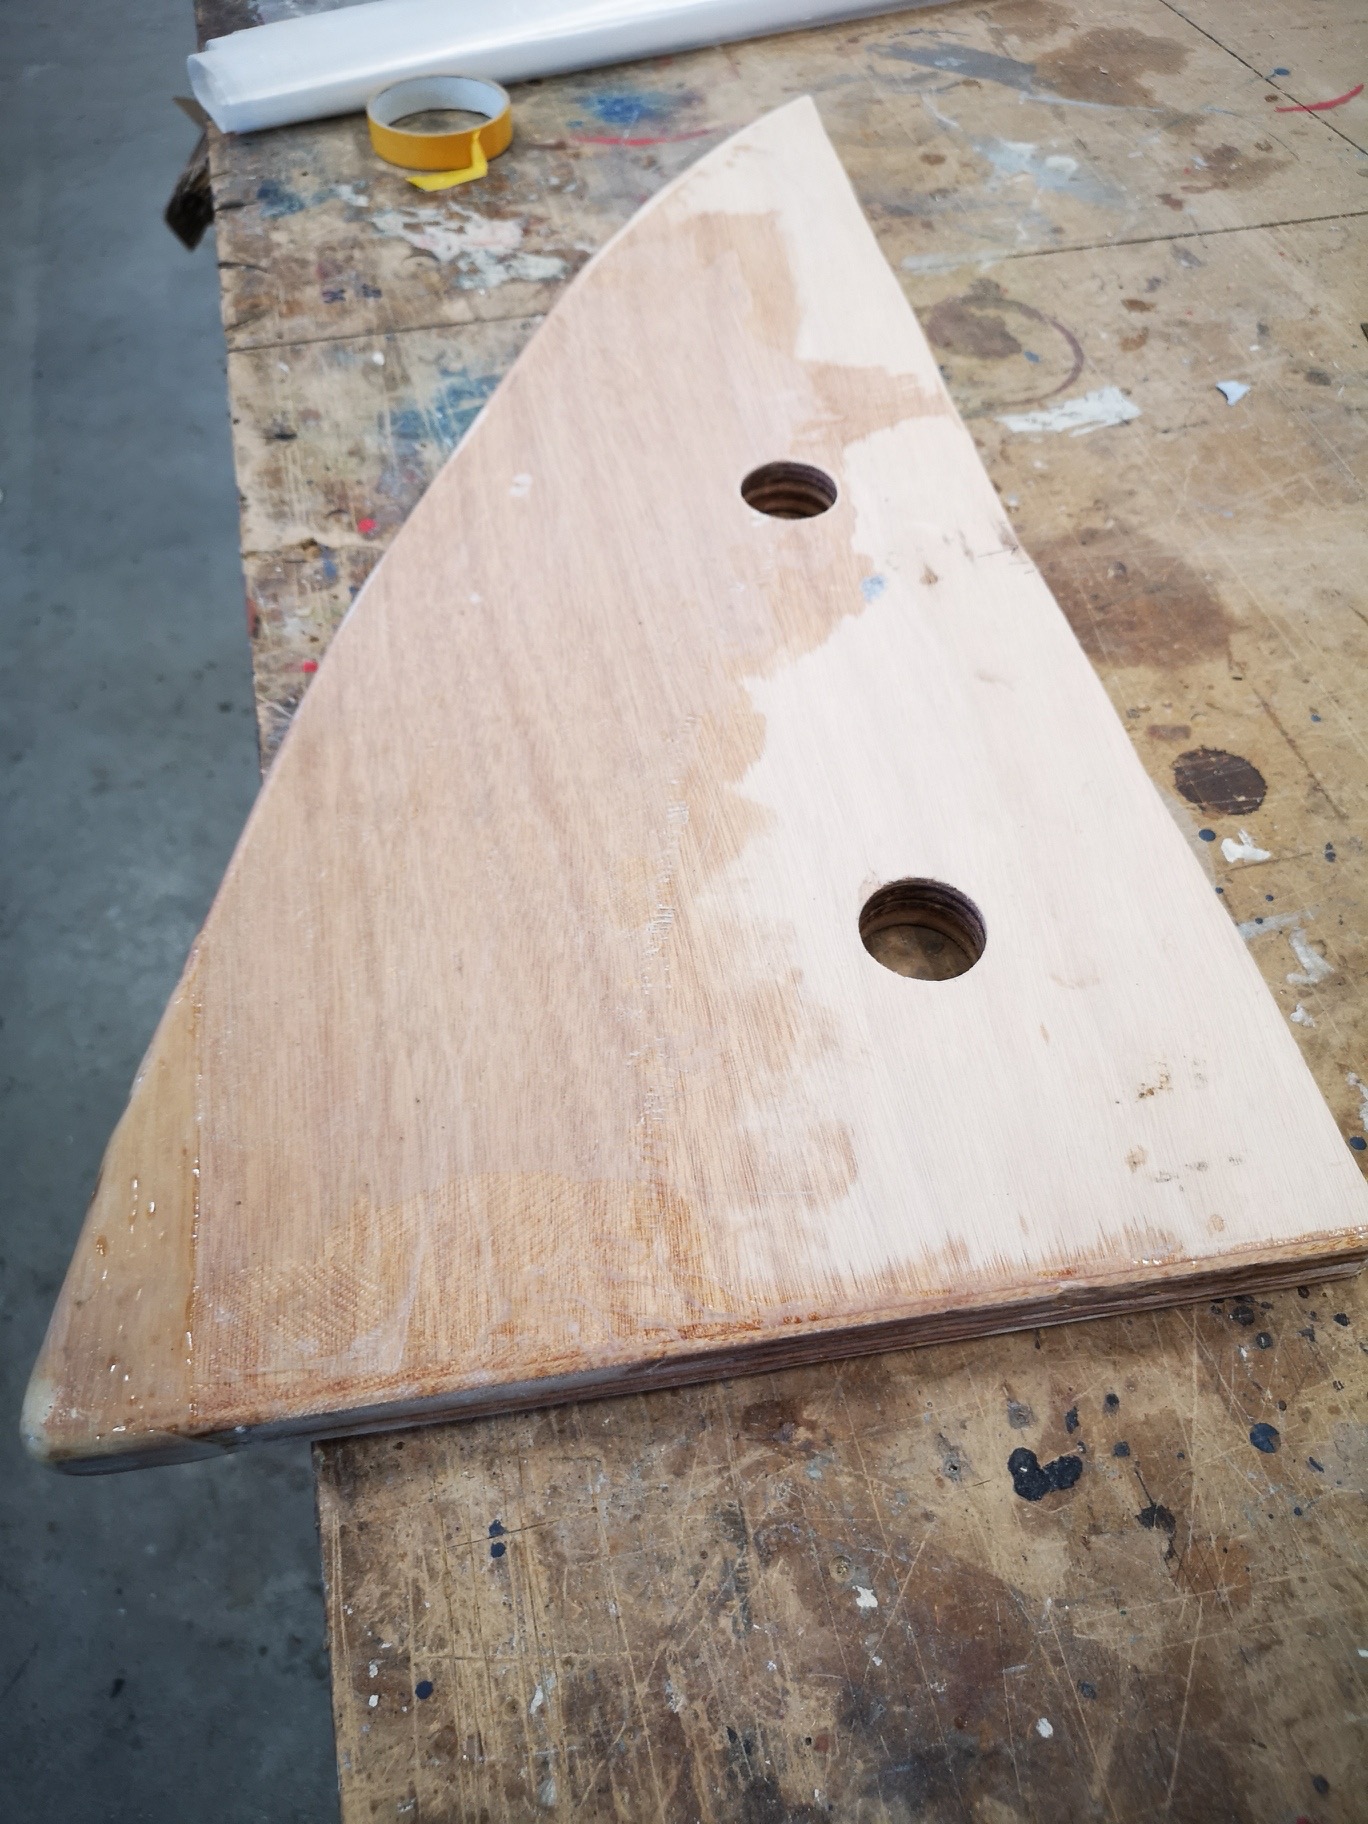
I used the cut out, rotten wood piece as a template for the new plywood.
Before the new wood is used next week, I laminate the underside of the plywood so that bilge water can not harm the wood.
16.11.2019
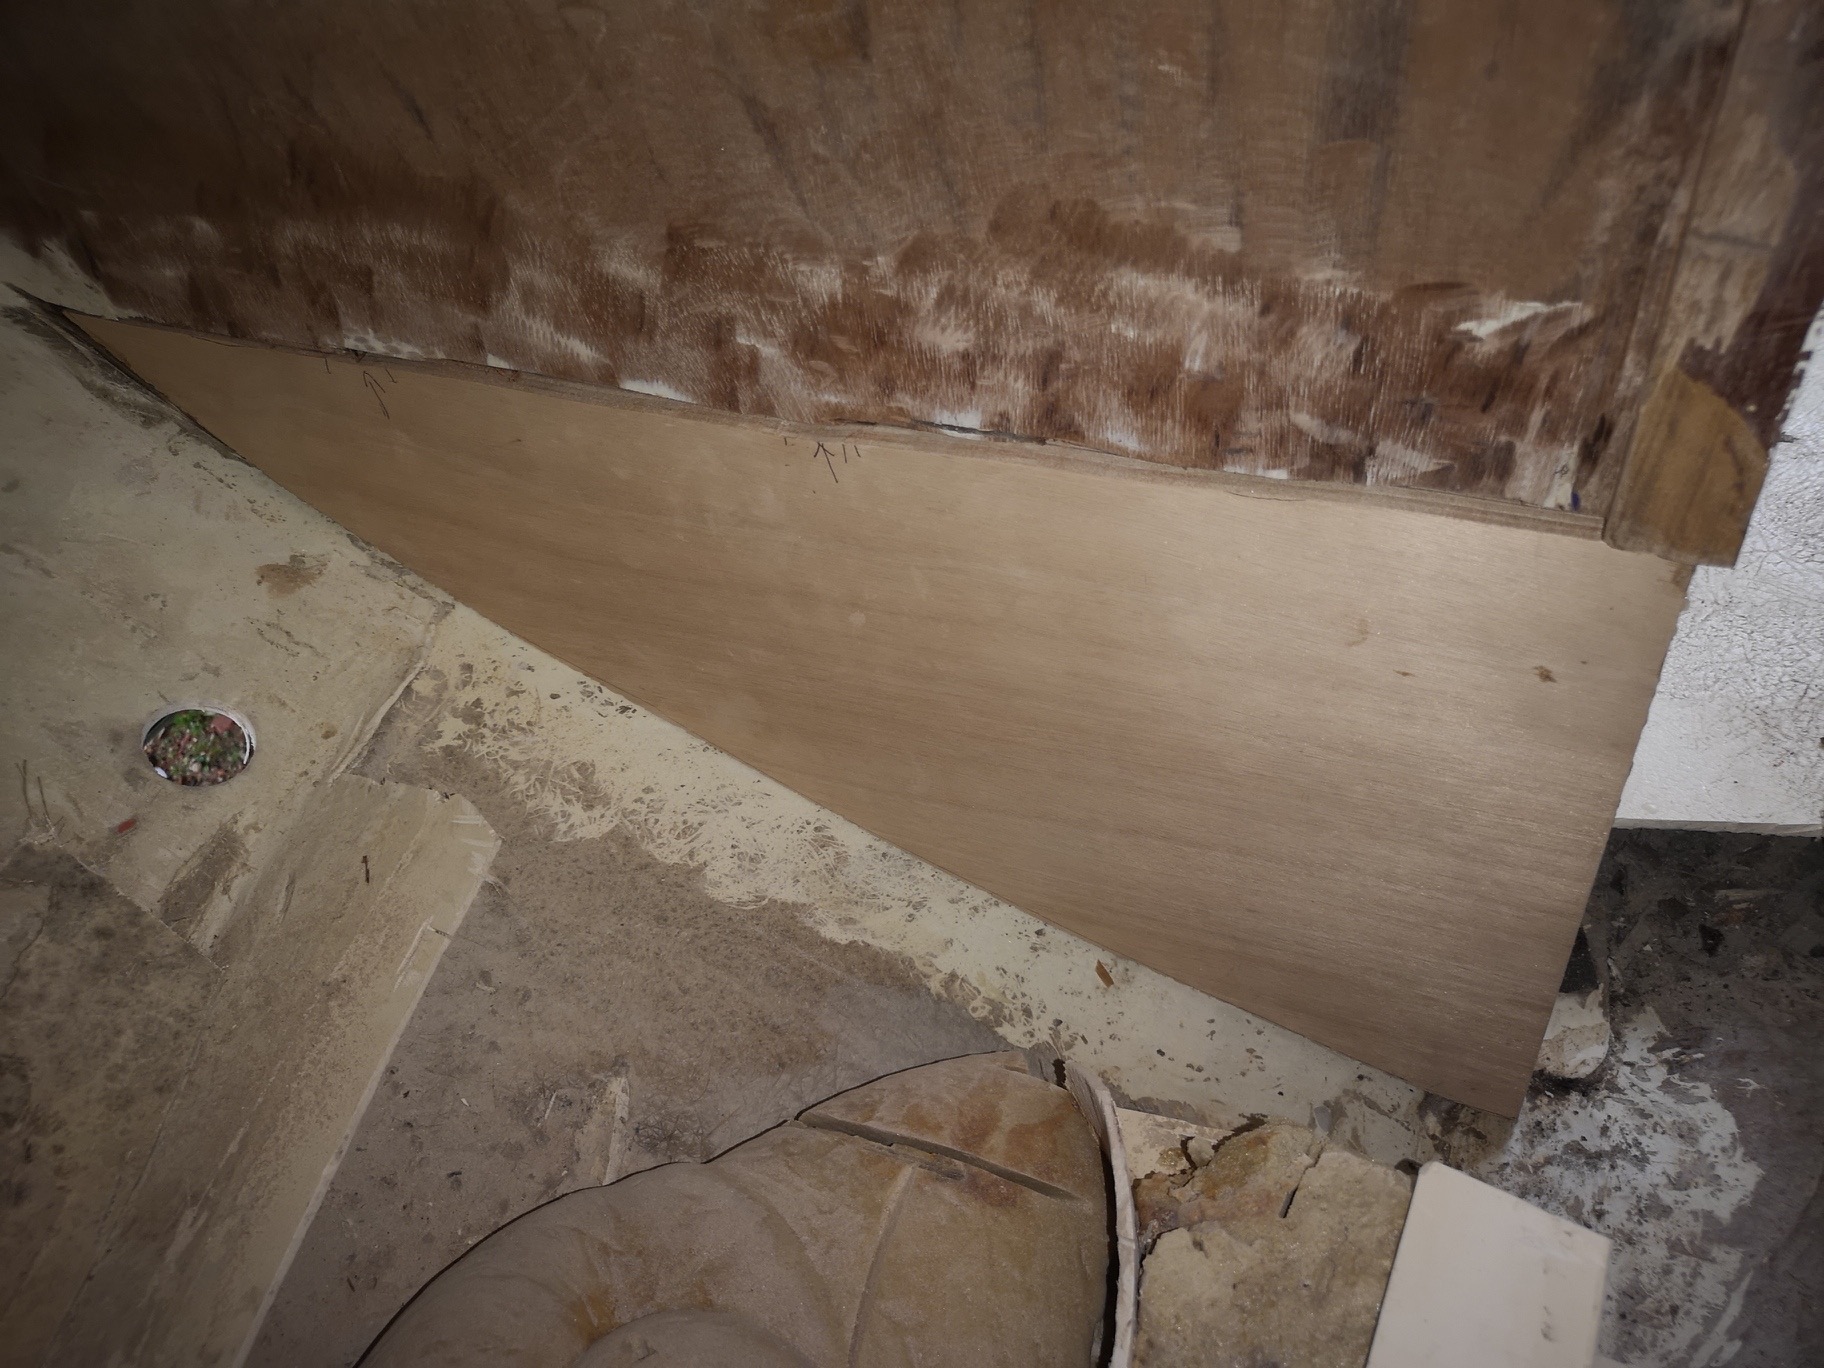
First fitting ;-)
17. & 18.11.2019
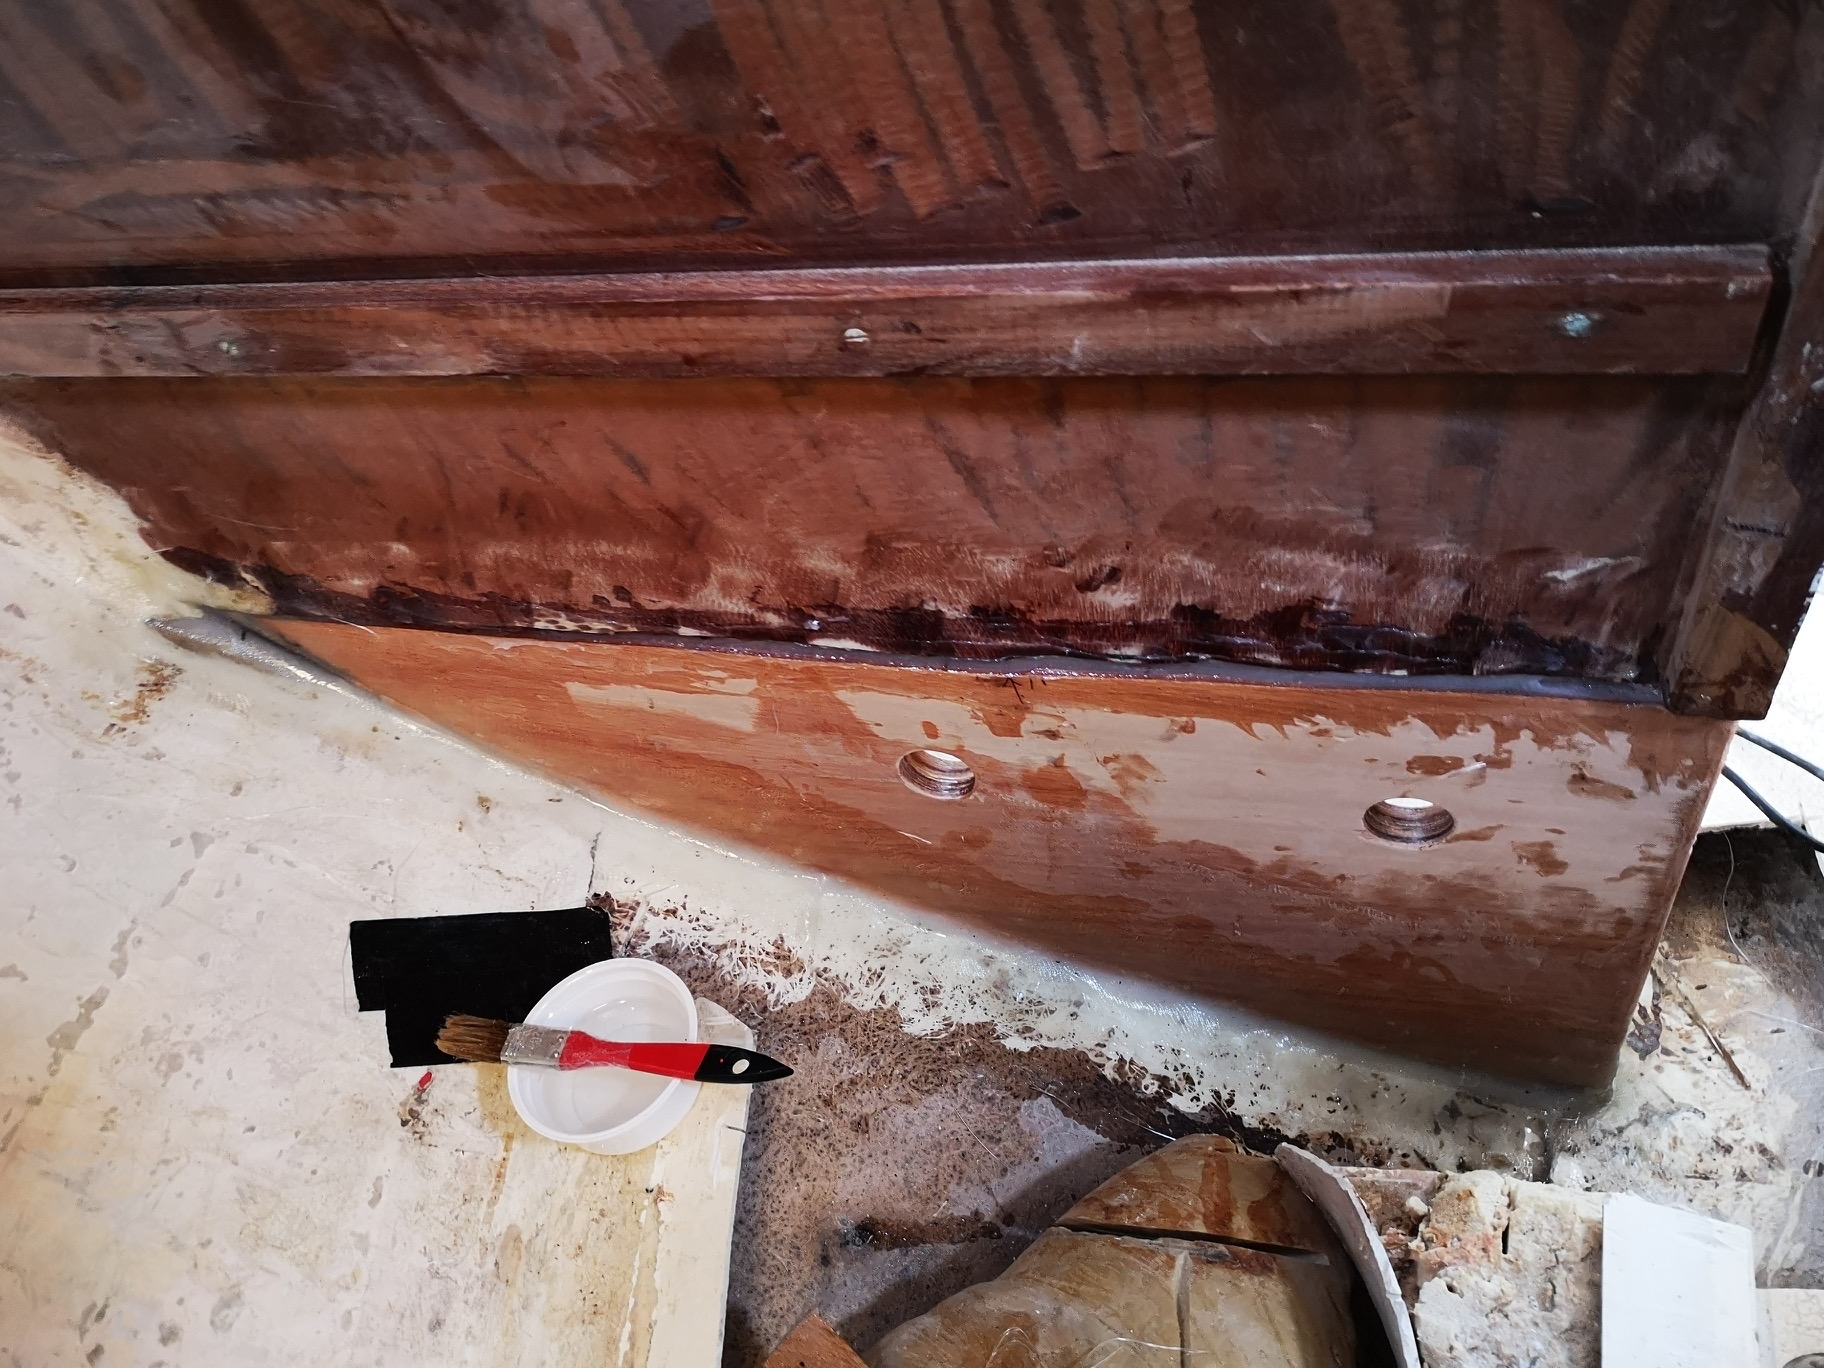
Laminated neatly on the underside of the wood and then laminated into the boat after sanding, which at these temperatures will only do well with the fan heater. Again, it is important at the transitions wood and fuselage before the actual lamination, with resin and fiberglass mat to attach a groove of thickened epoxy. The repaired bulkhead will be clad in a later operation.
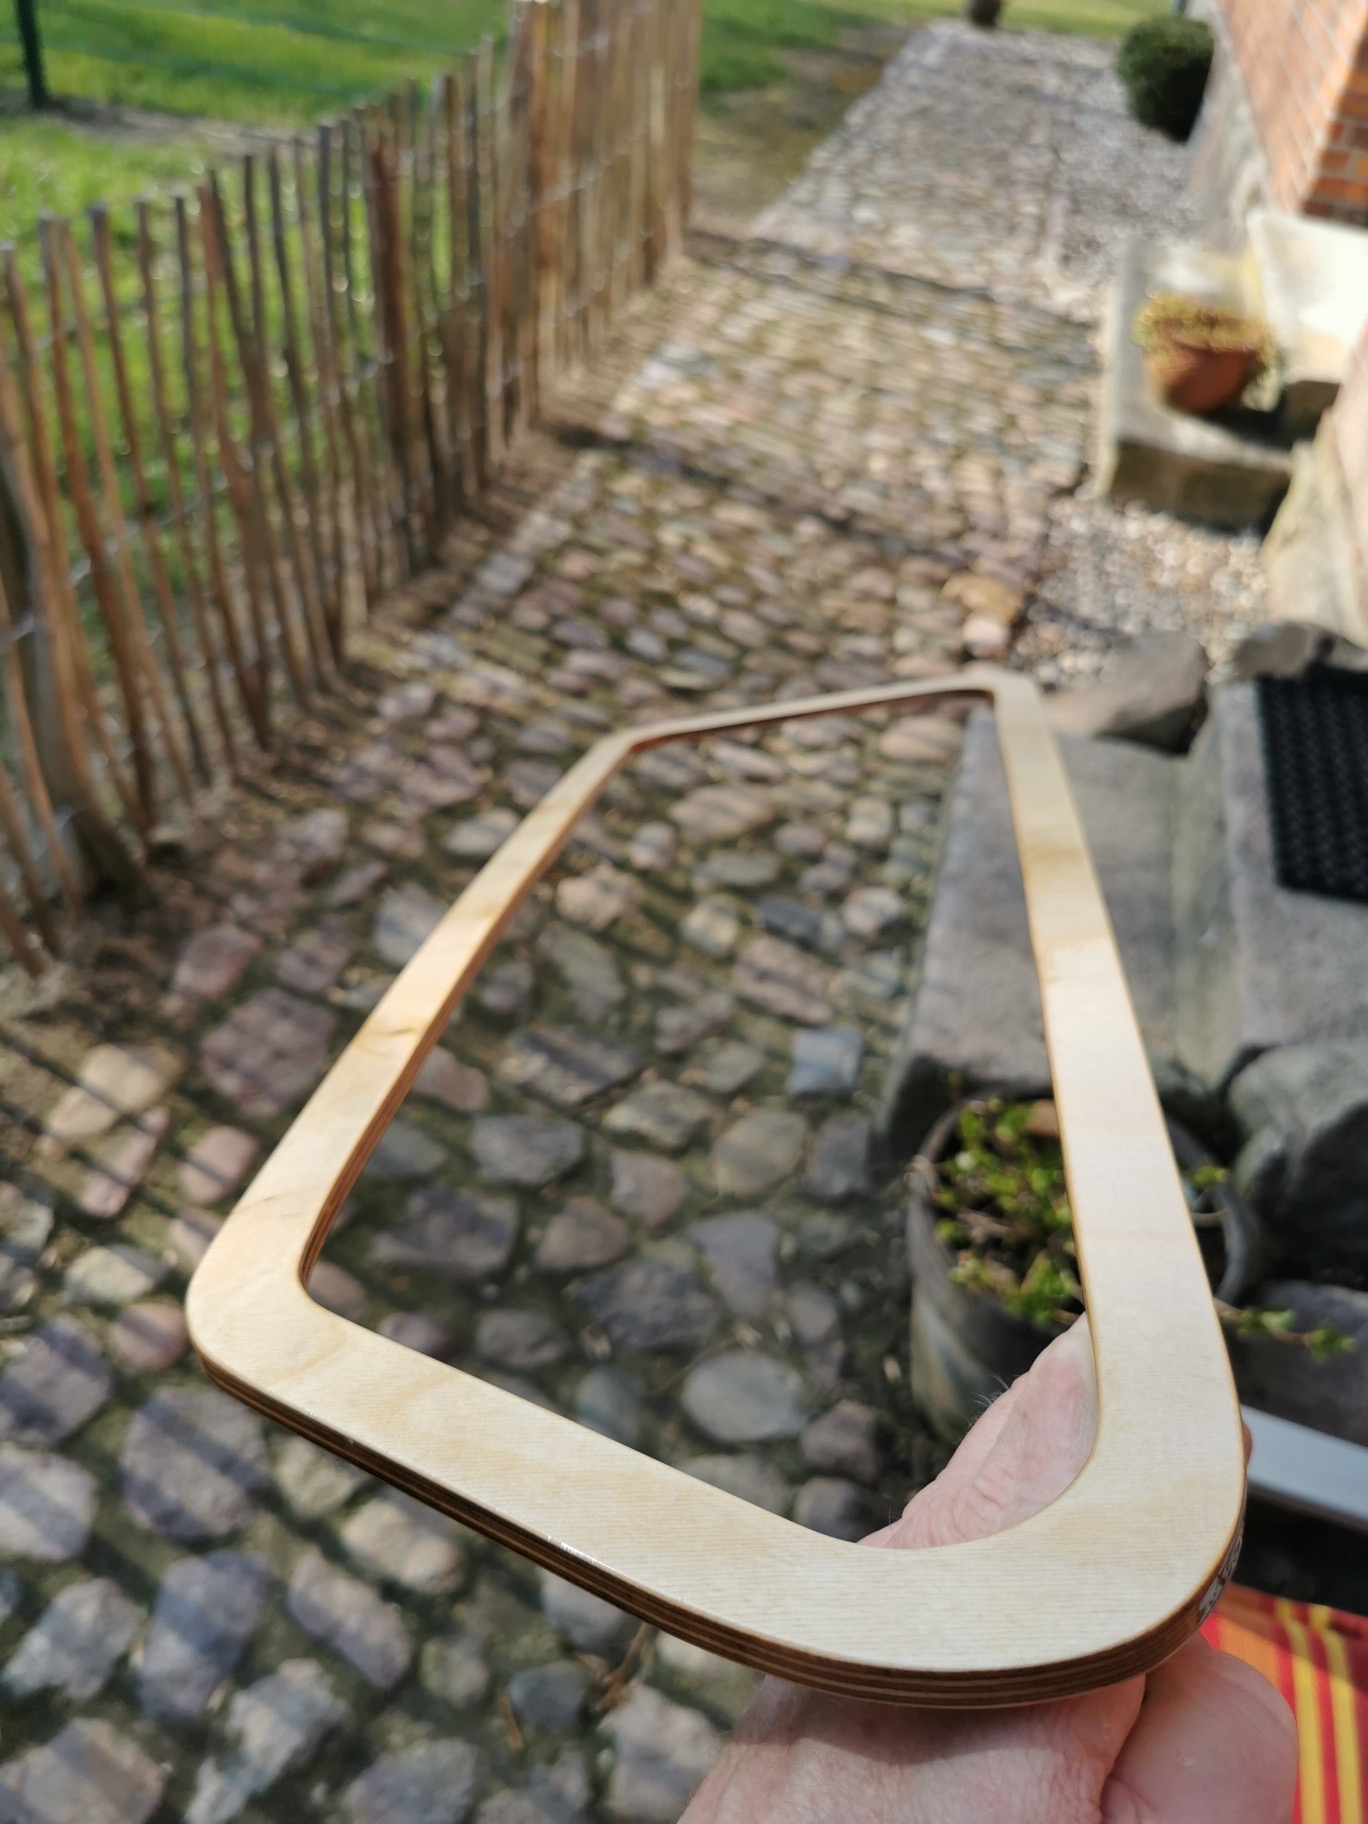
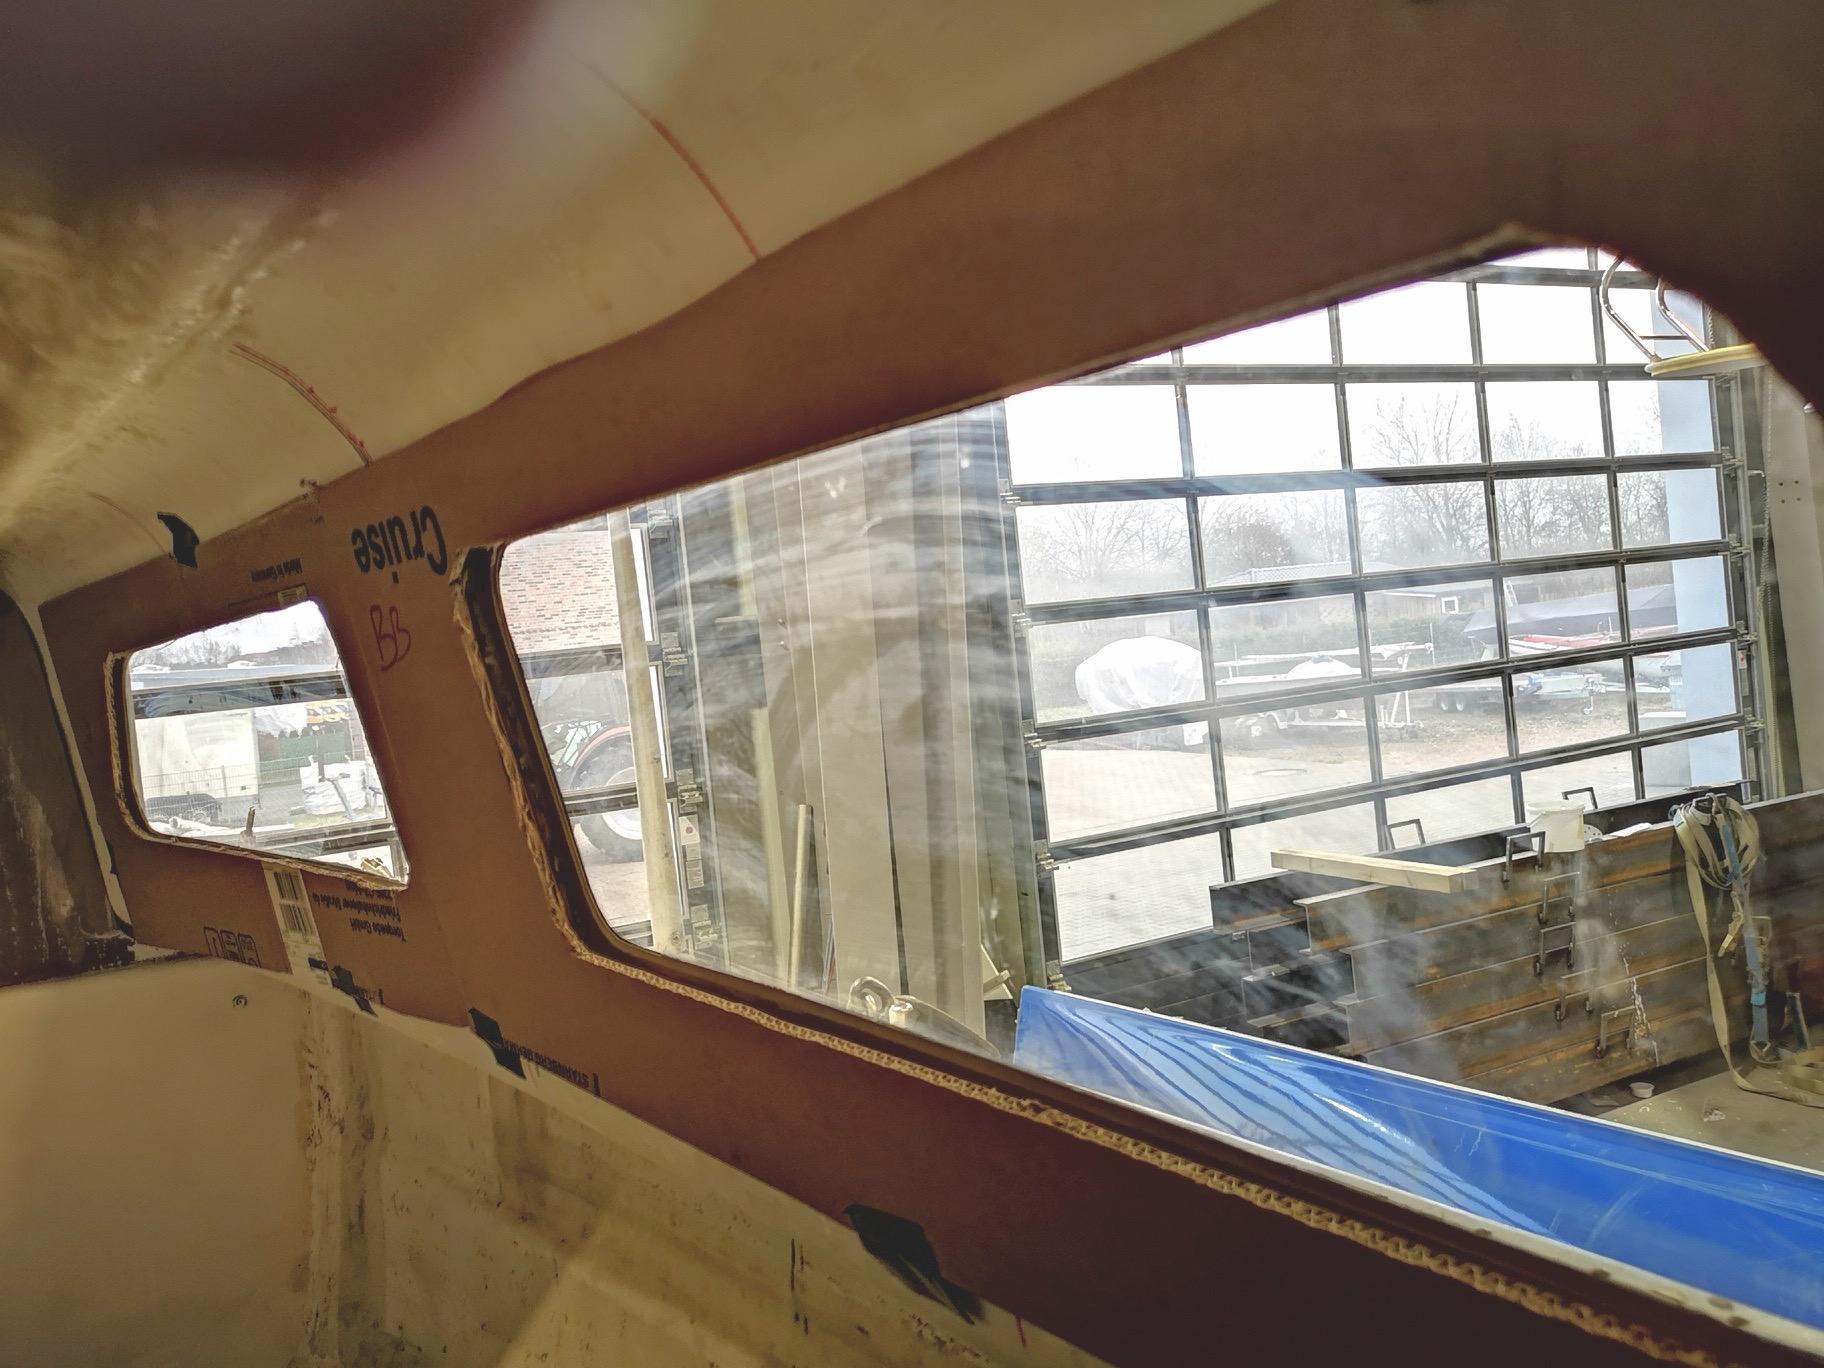
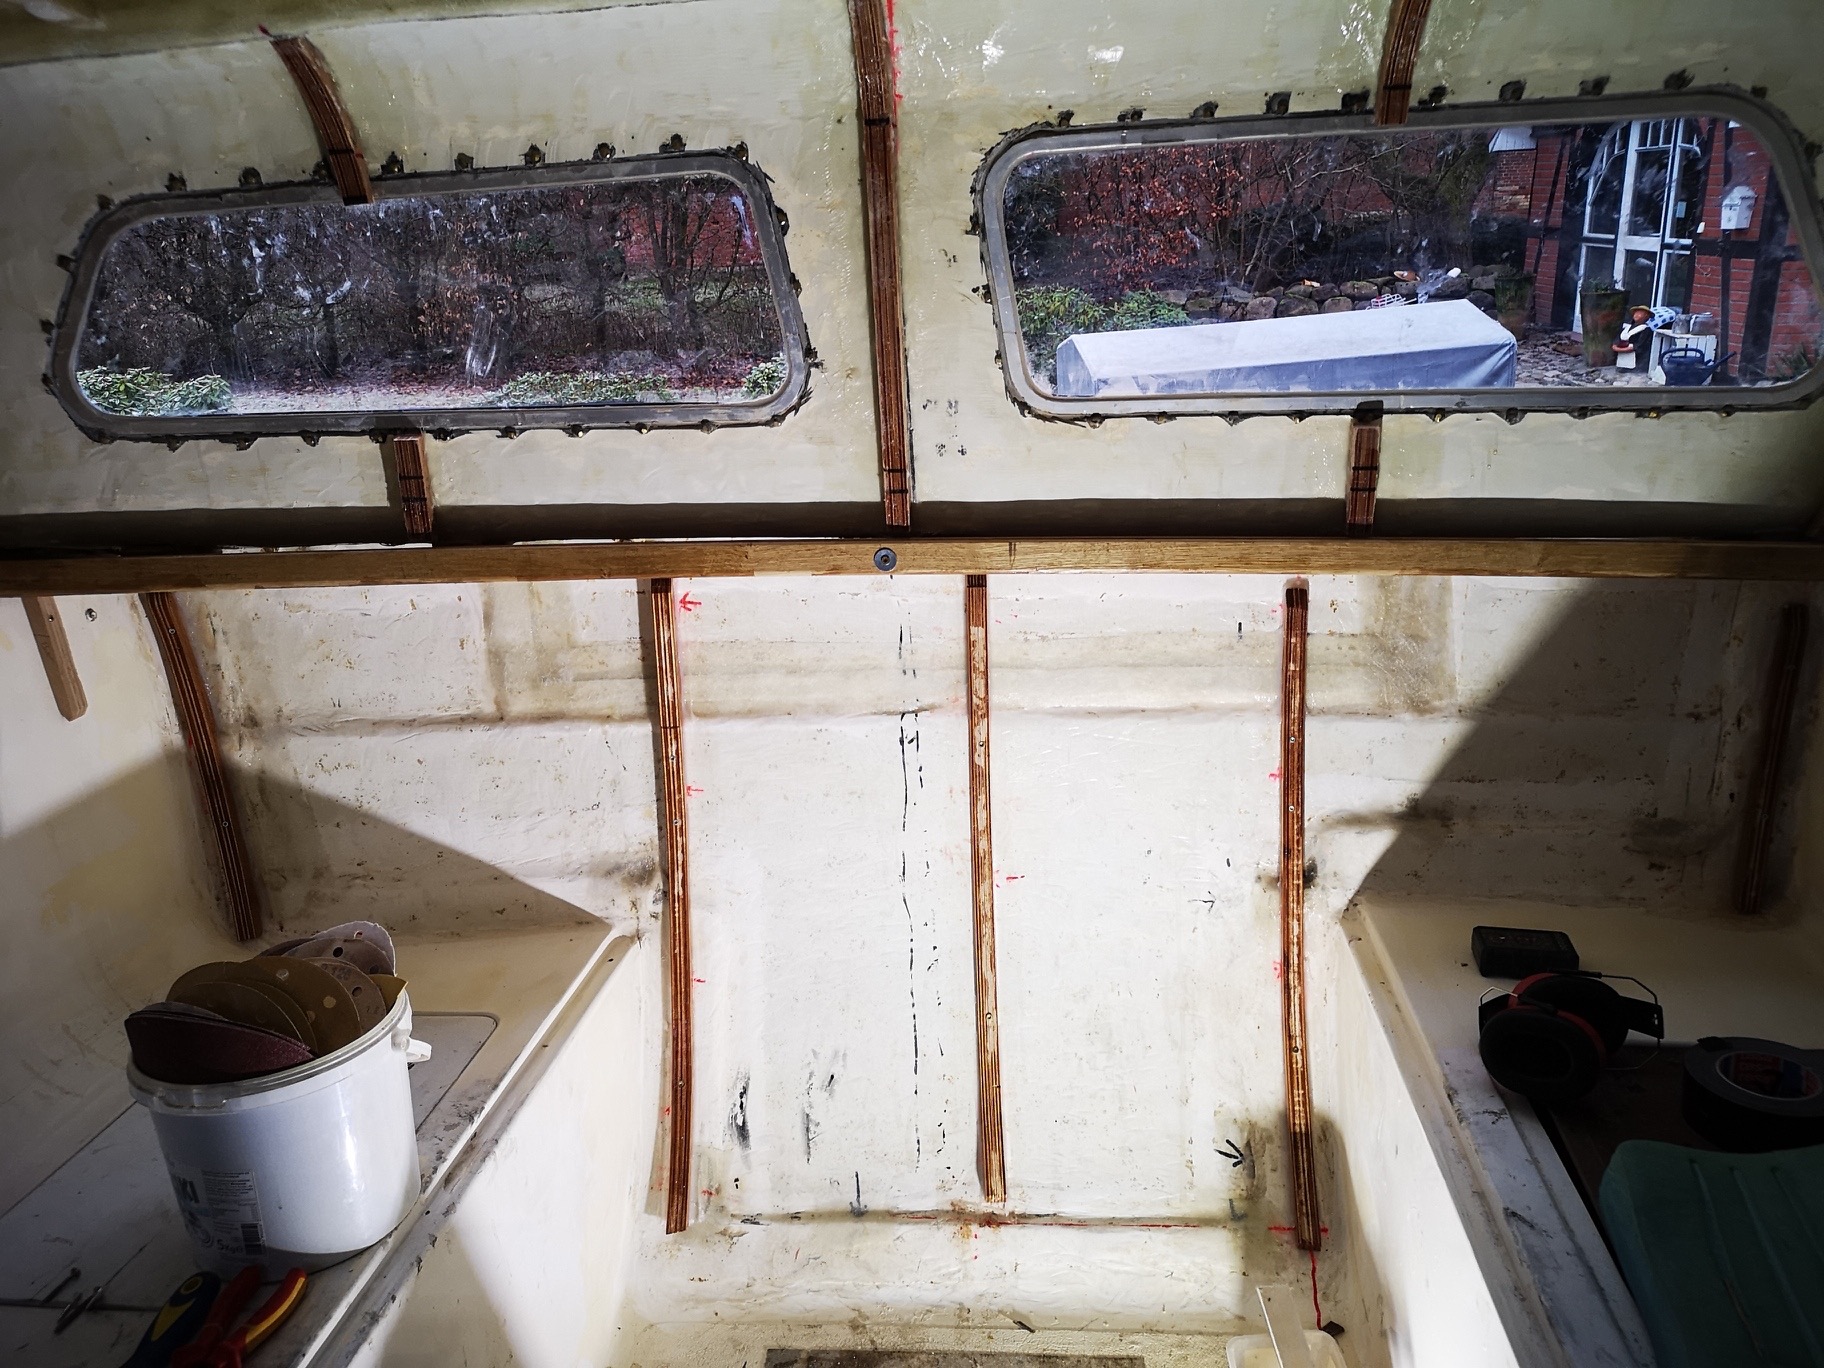
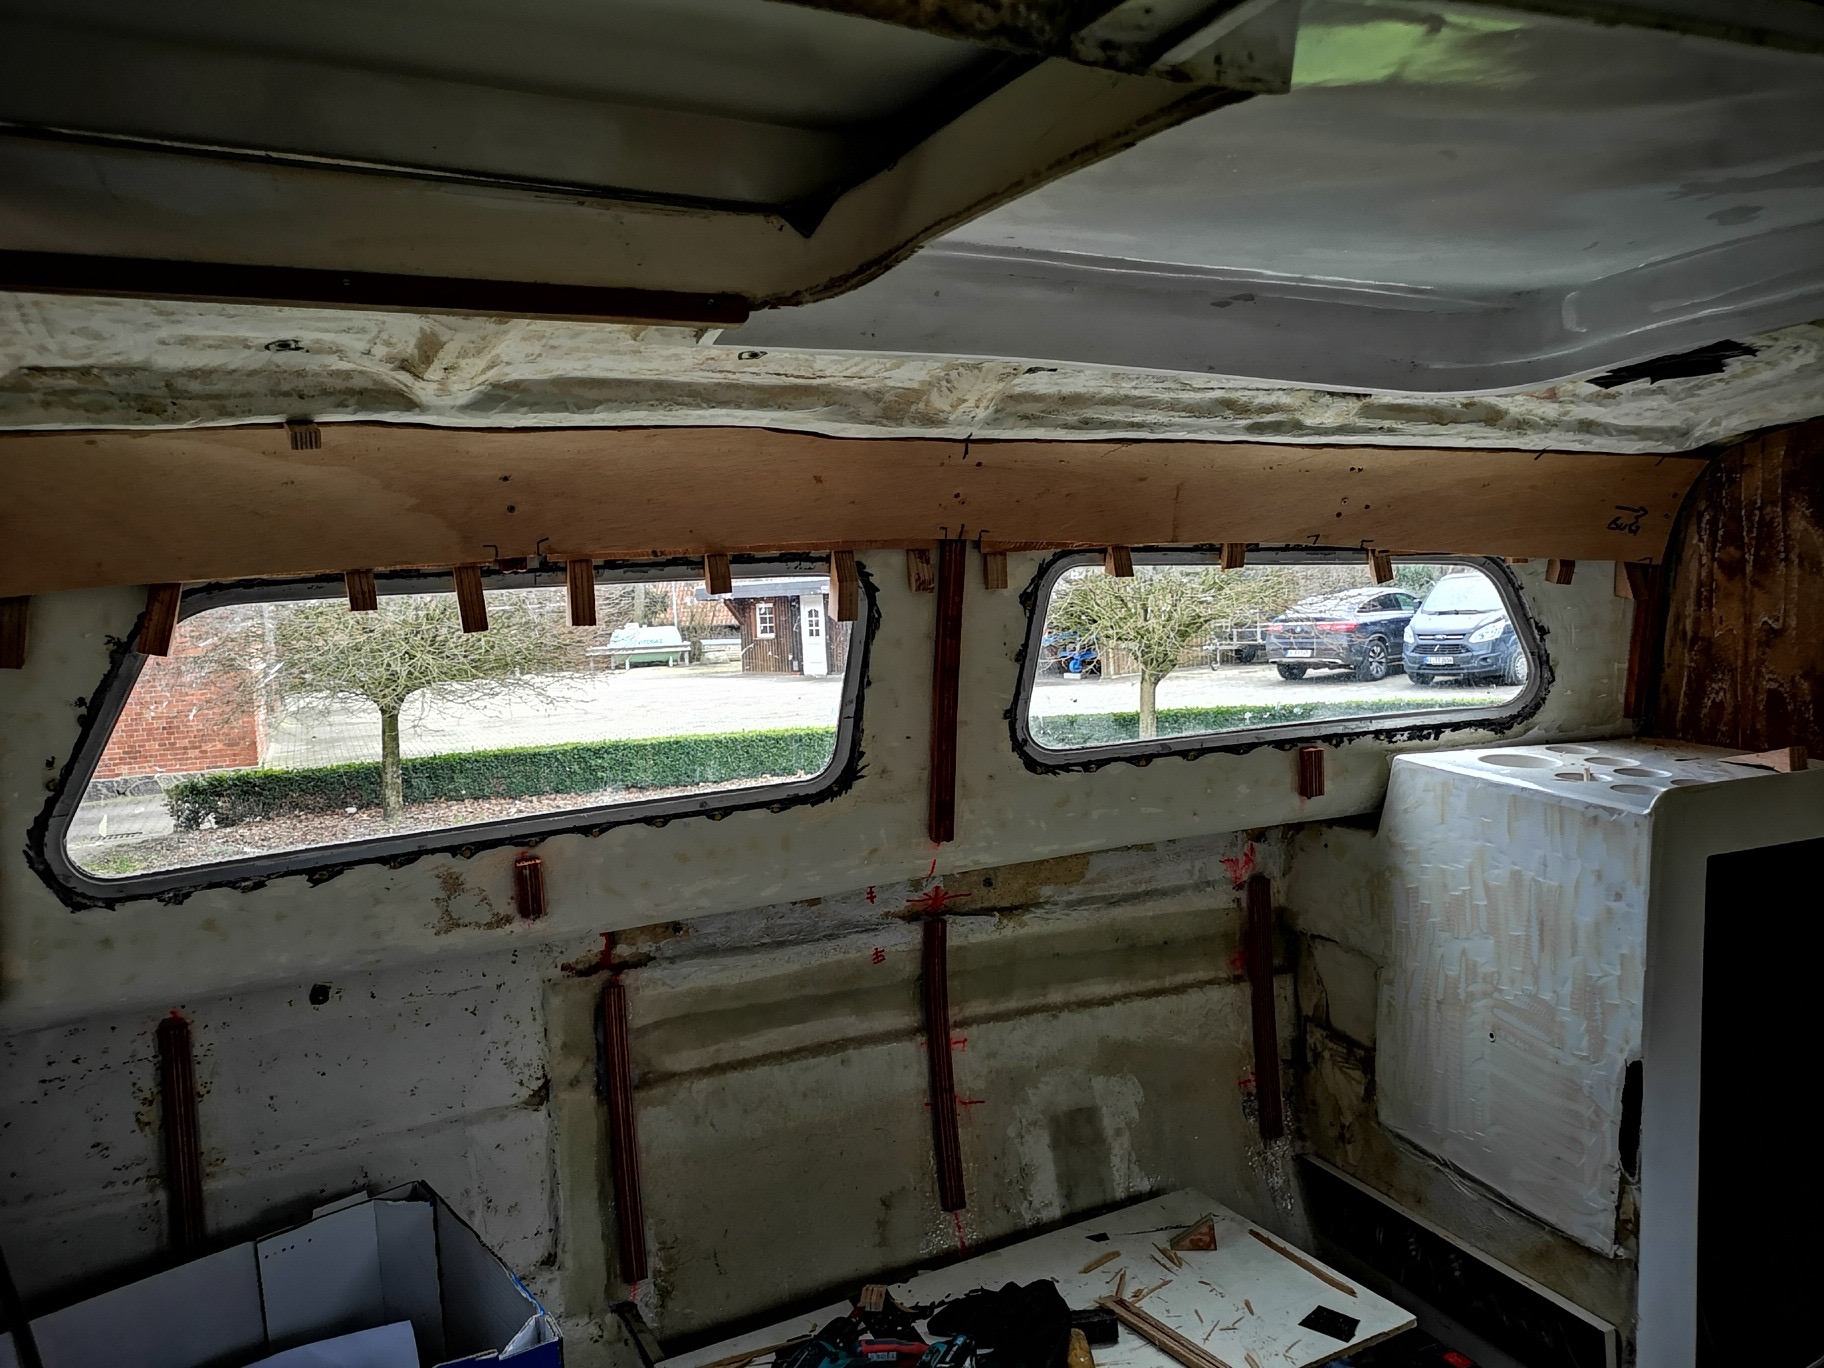
Before the frames can be attached to the inner wall, a template for the window recess must be created.

3.12.2019

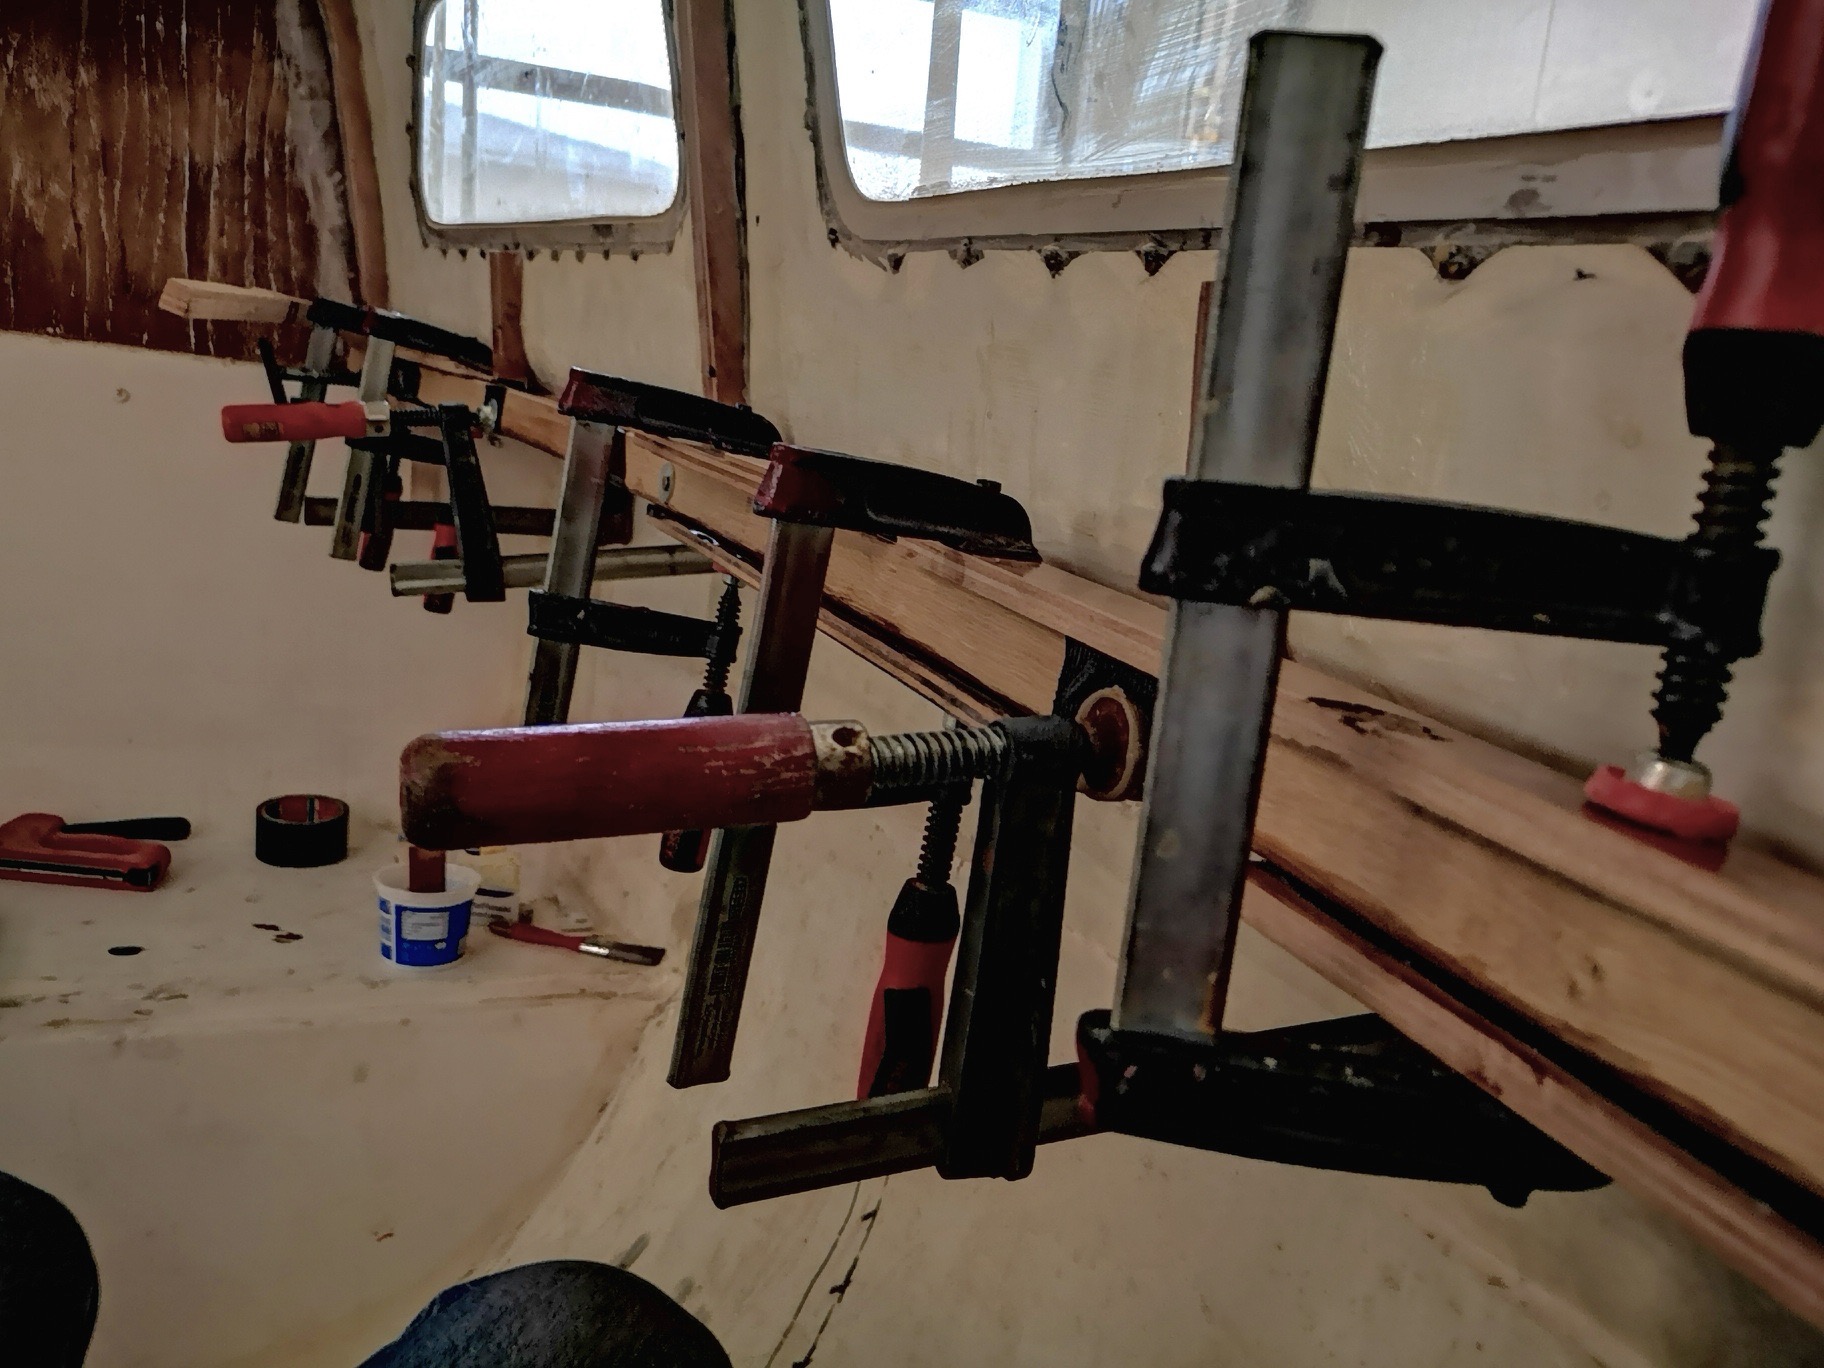
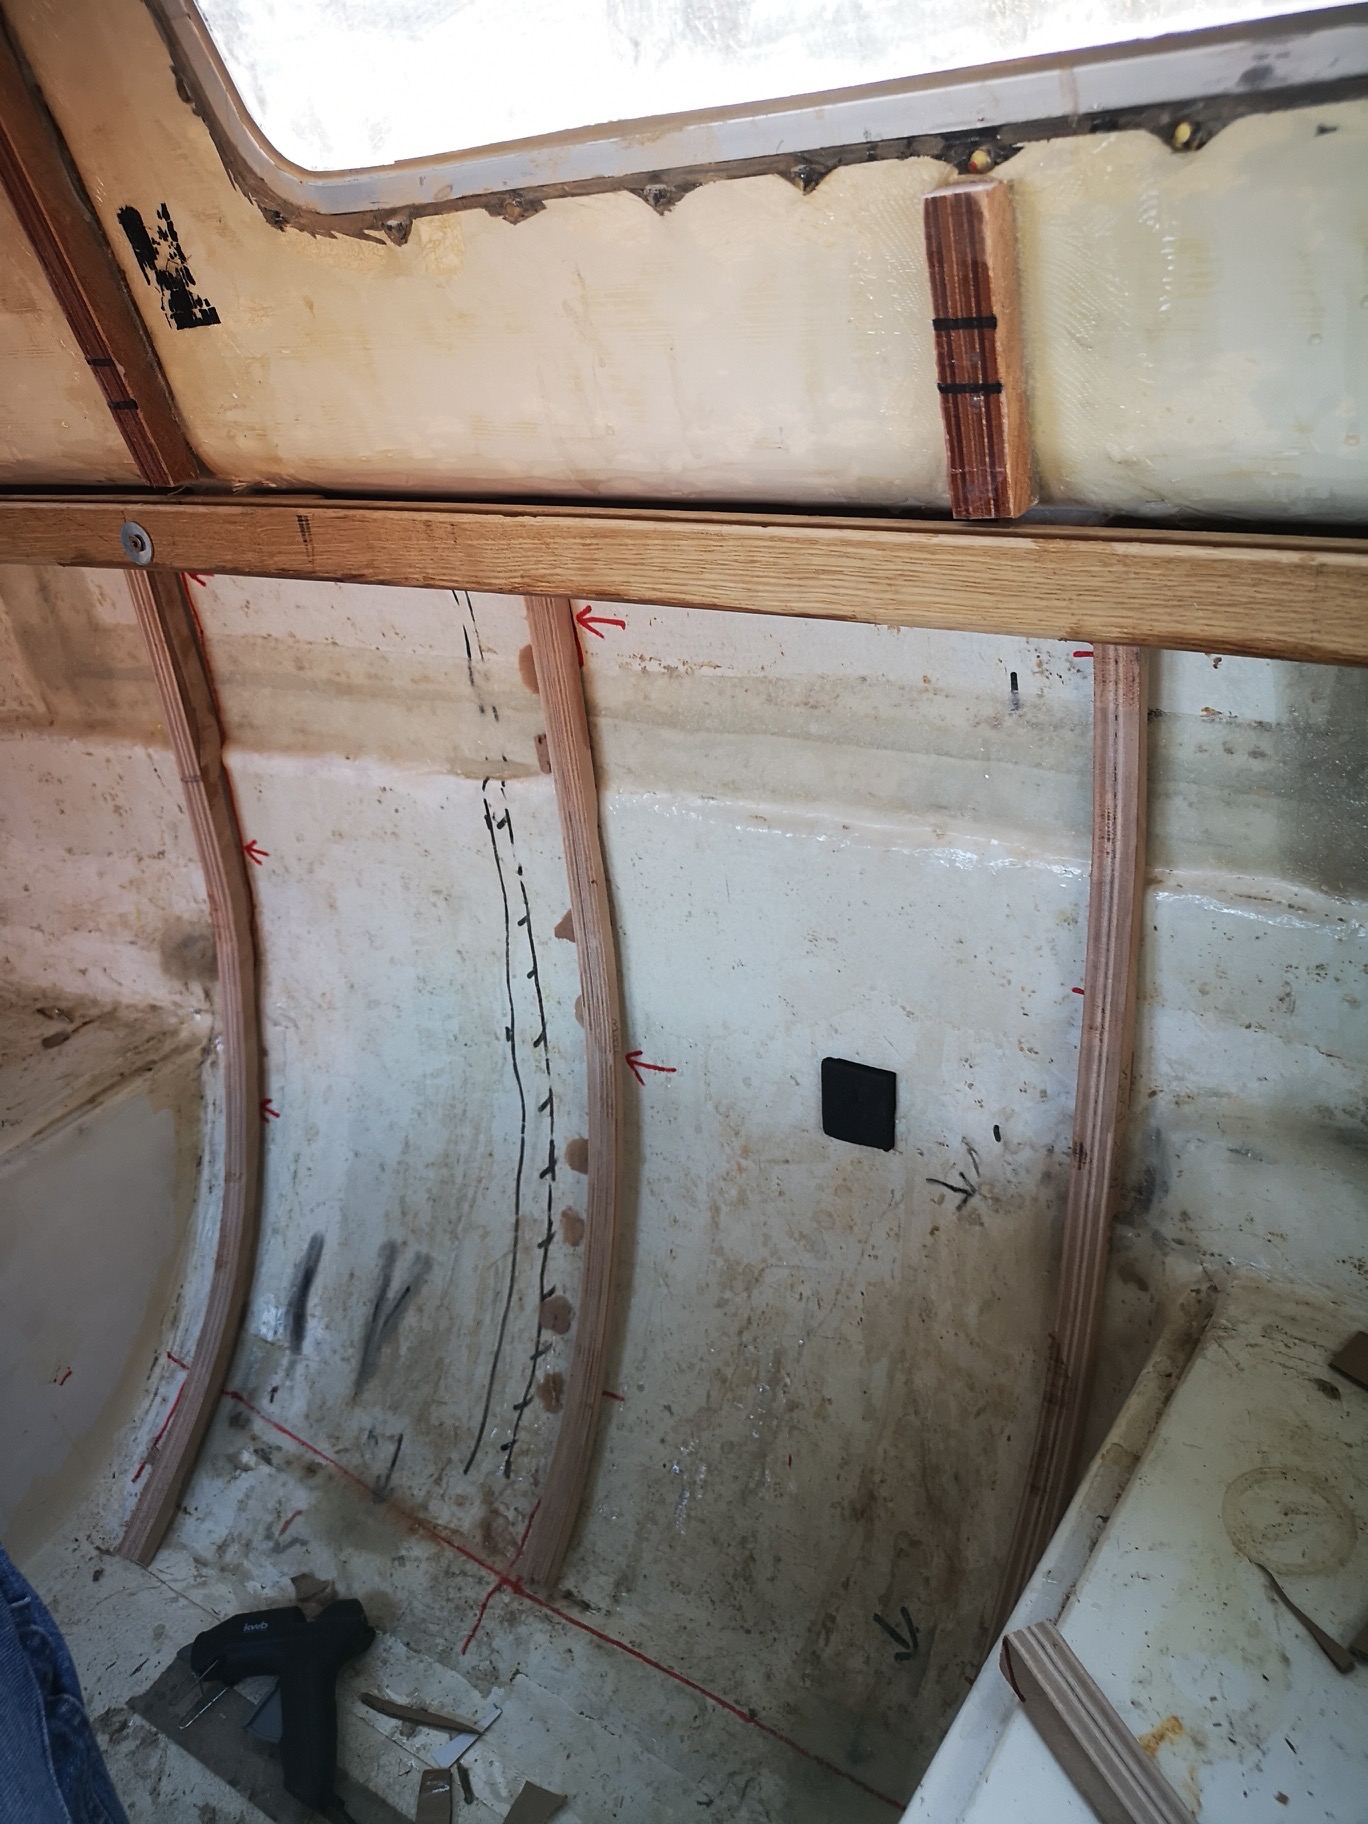
Here the frames are already glued with epoxy resin and laminated on the sides.
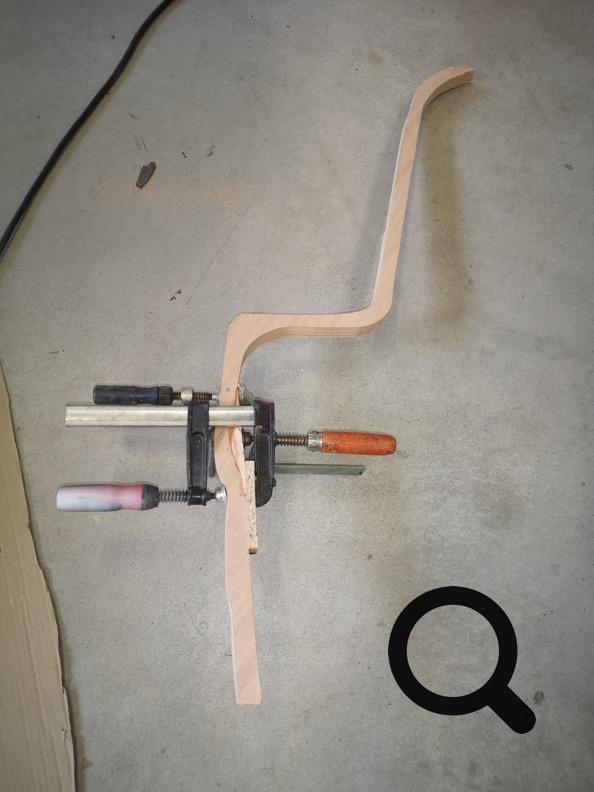
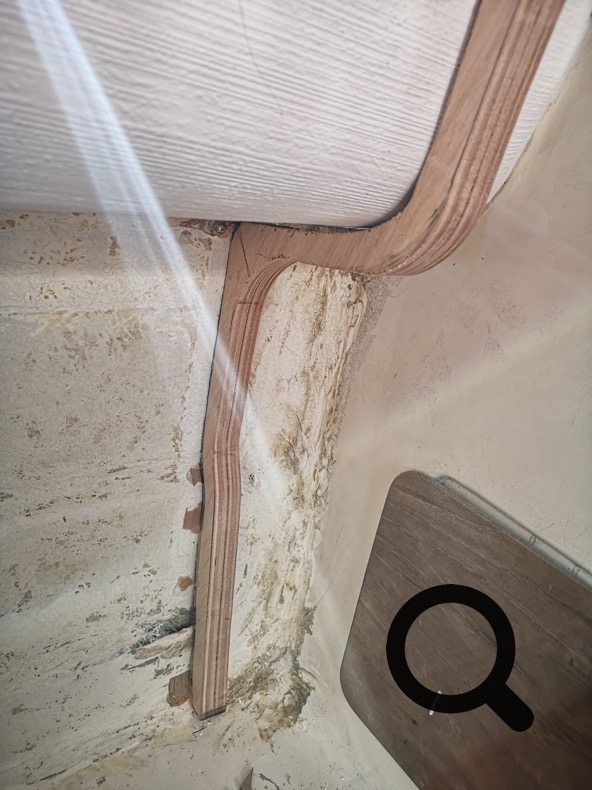
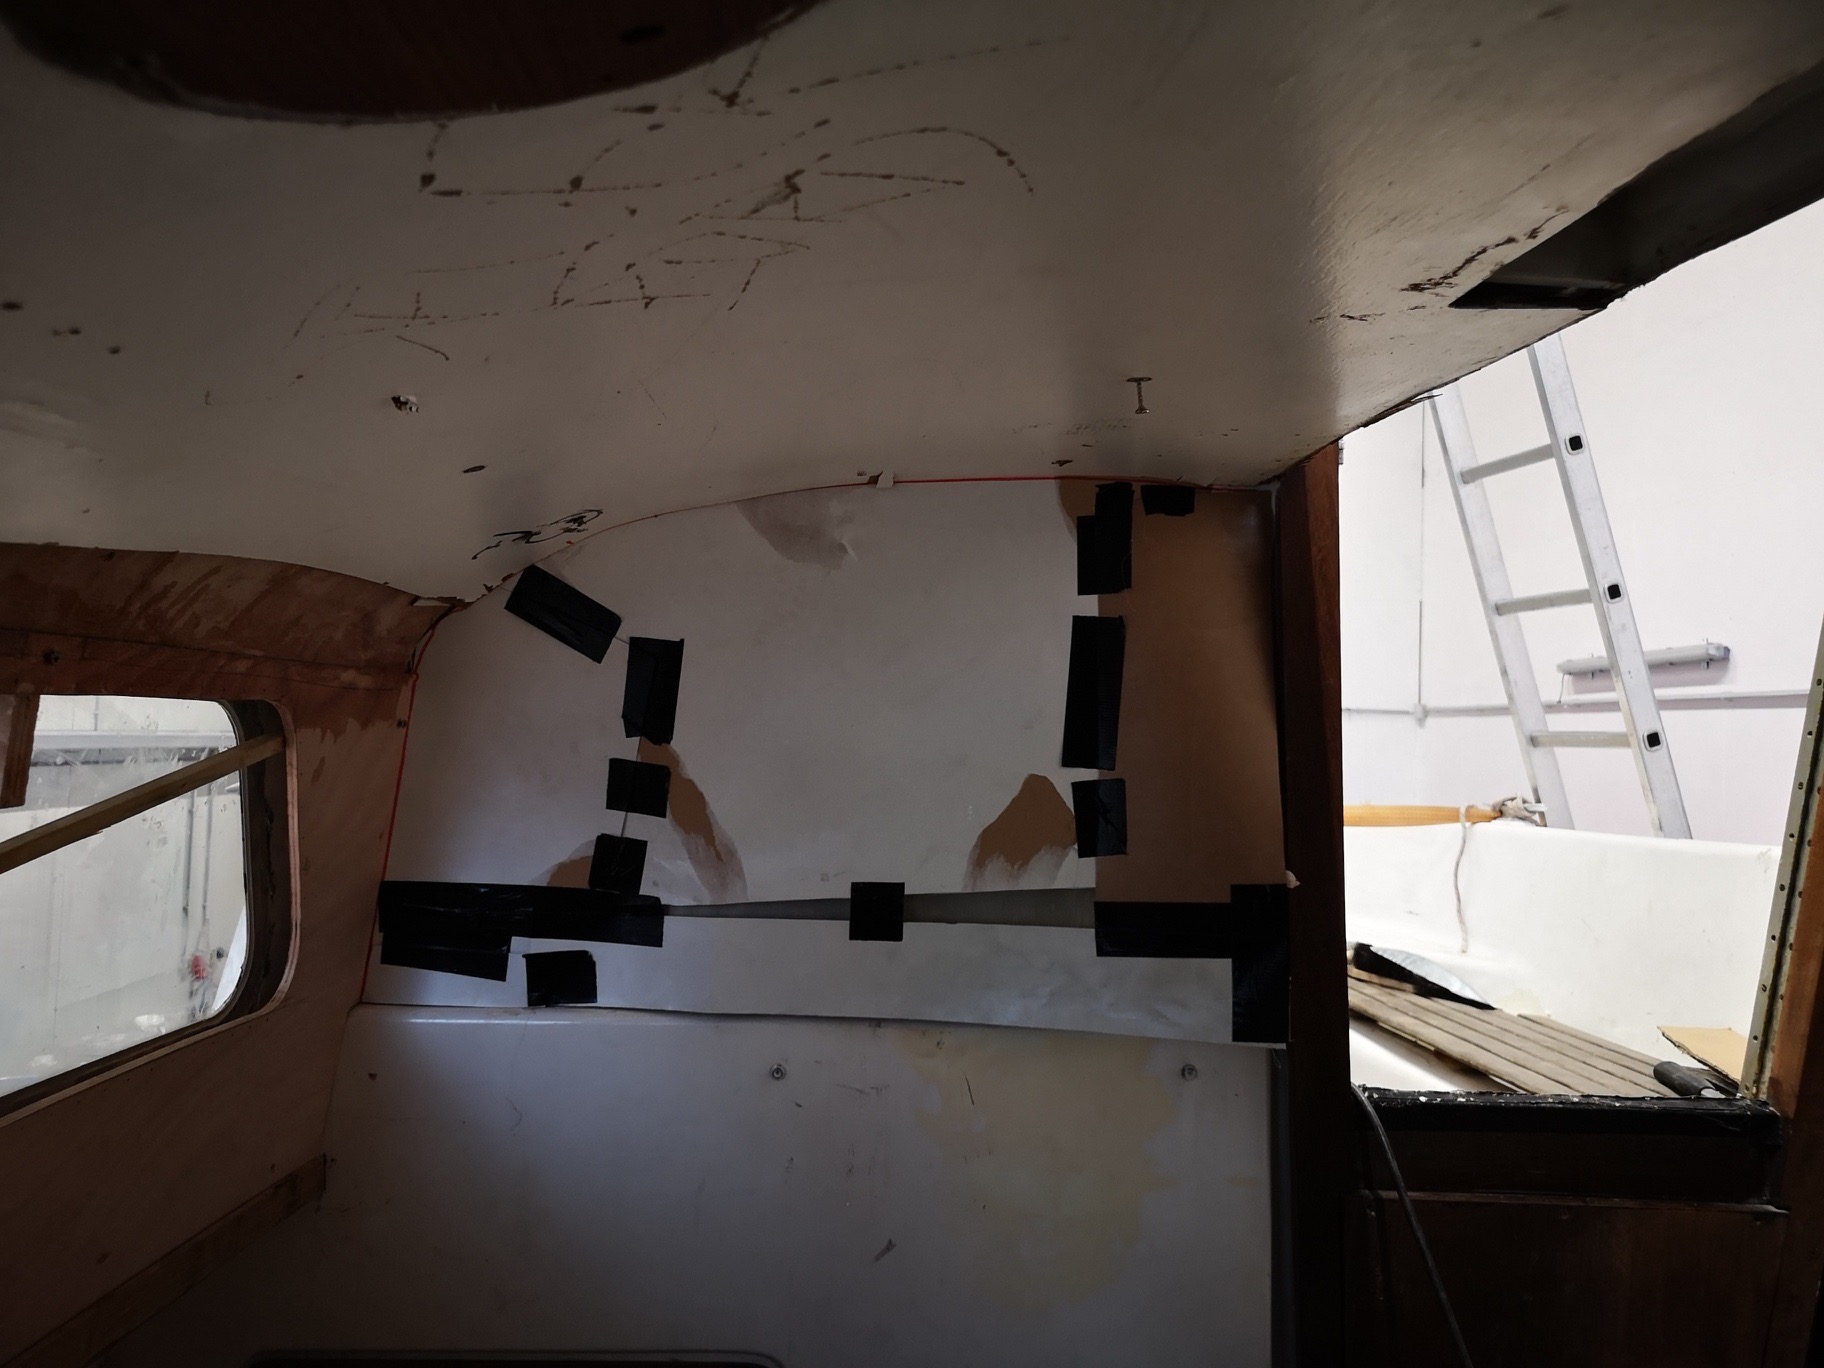
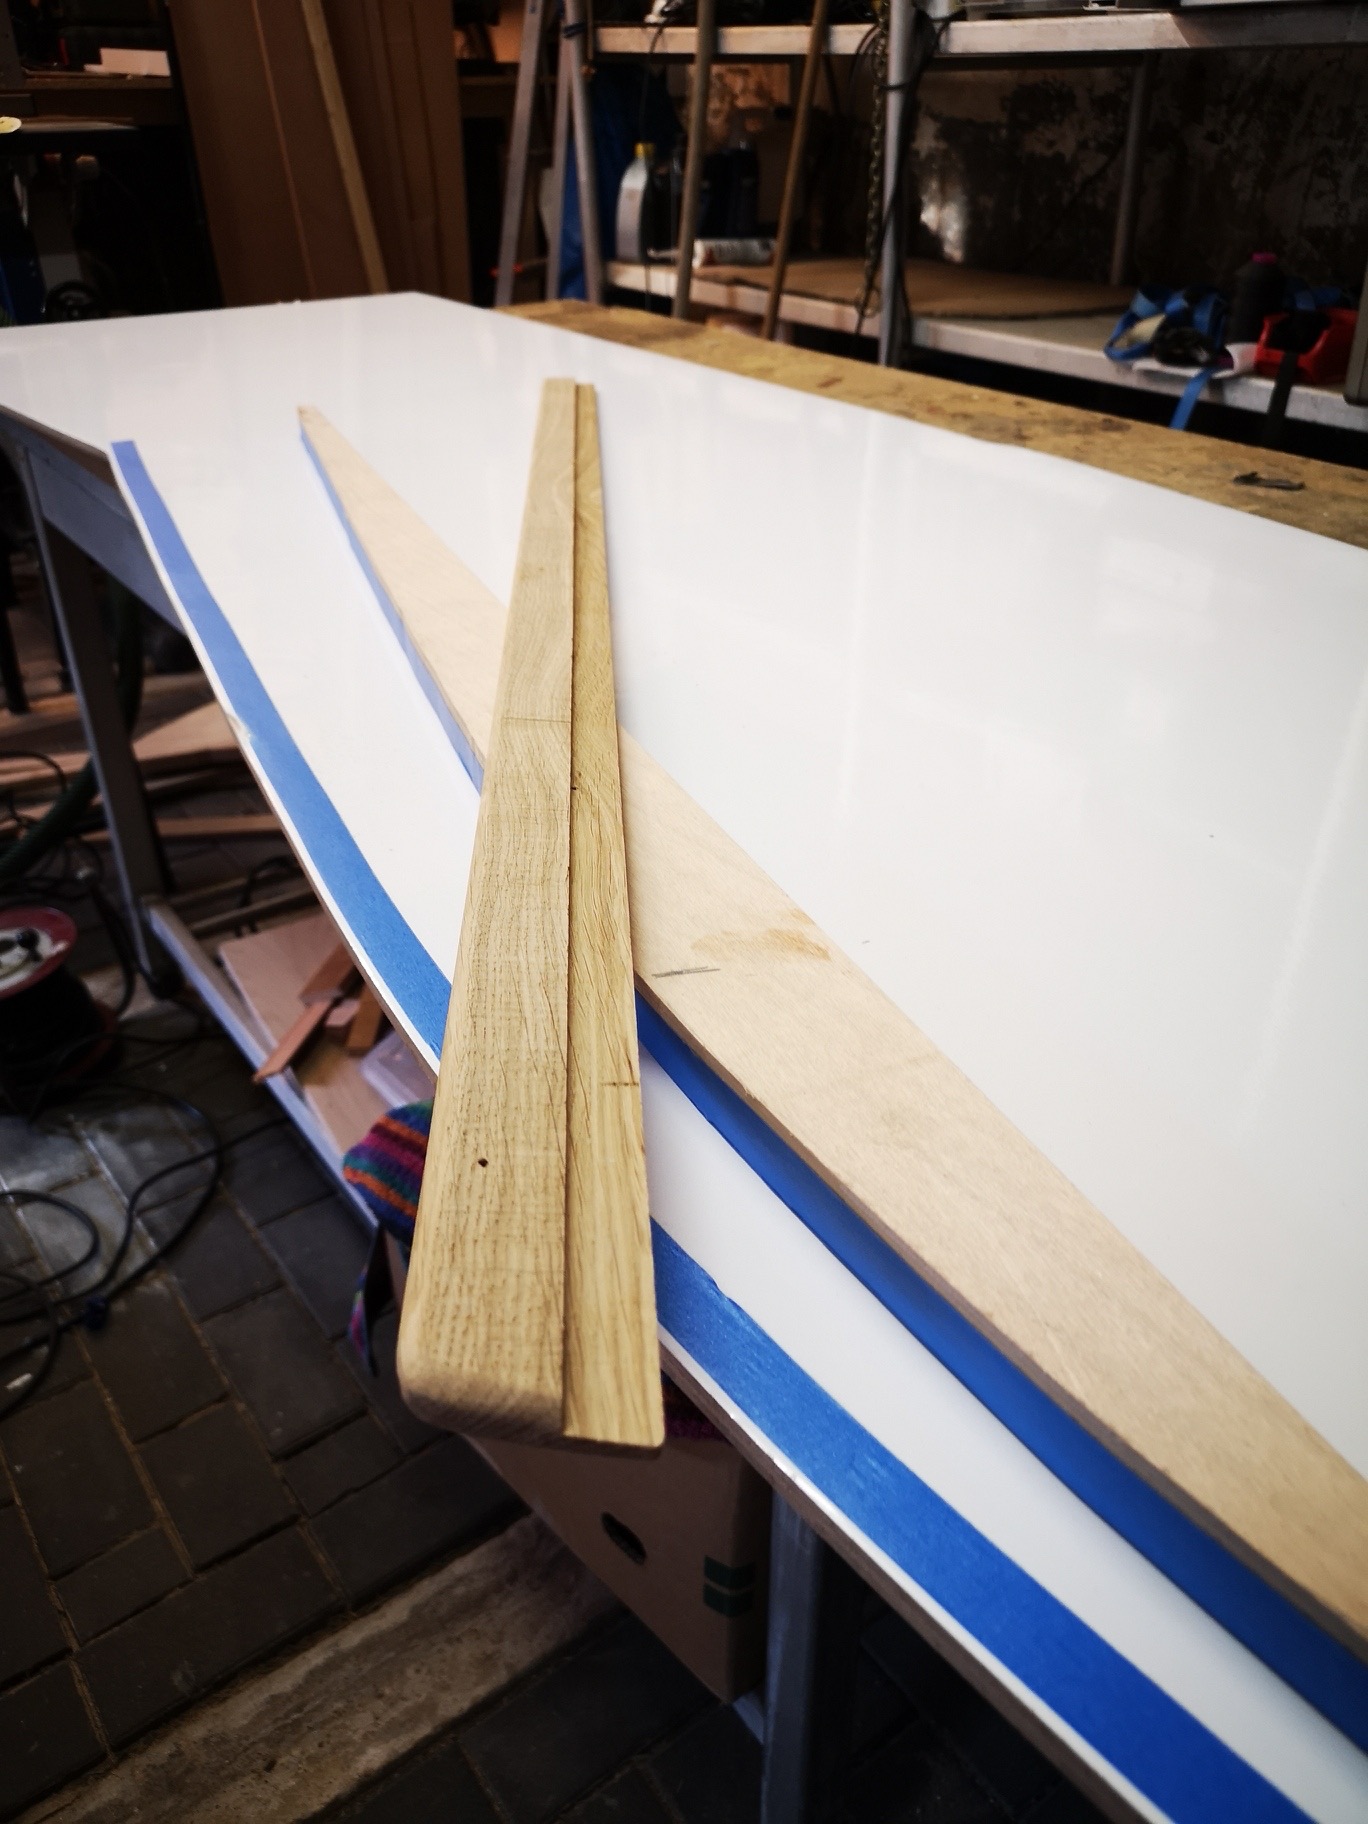
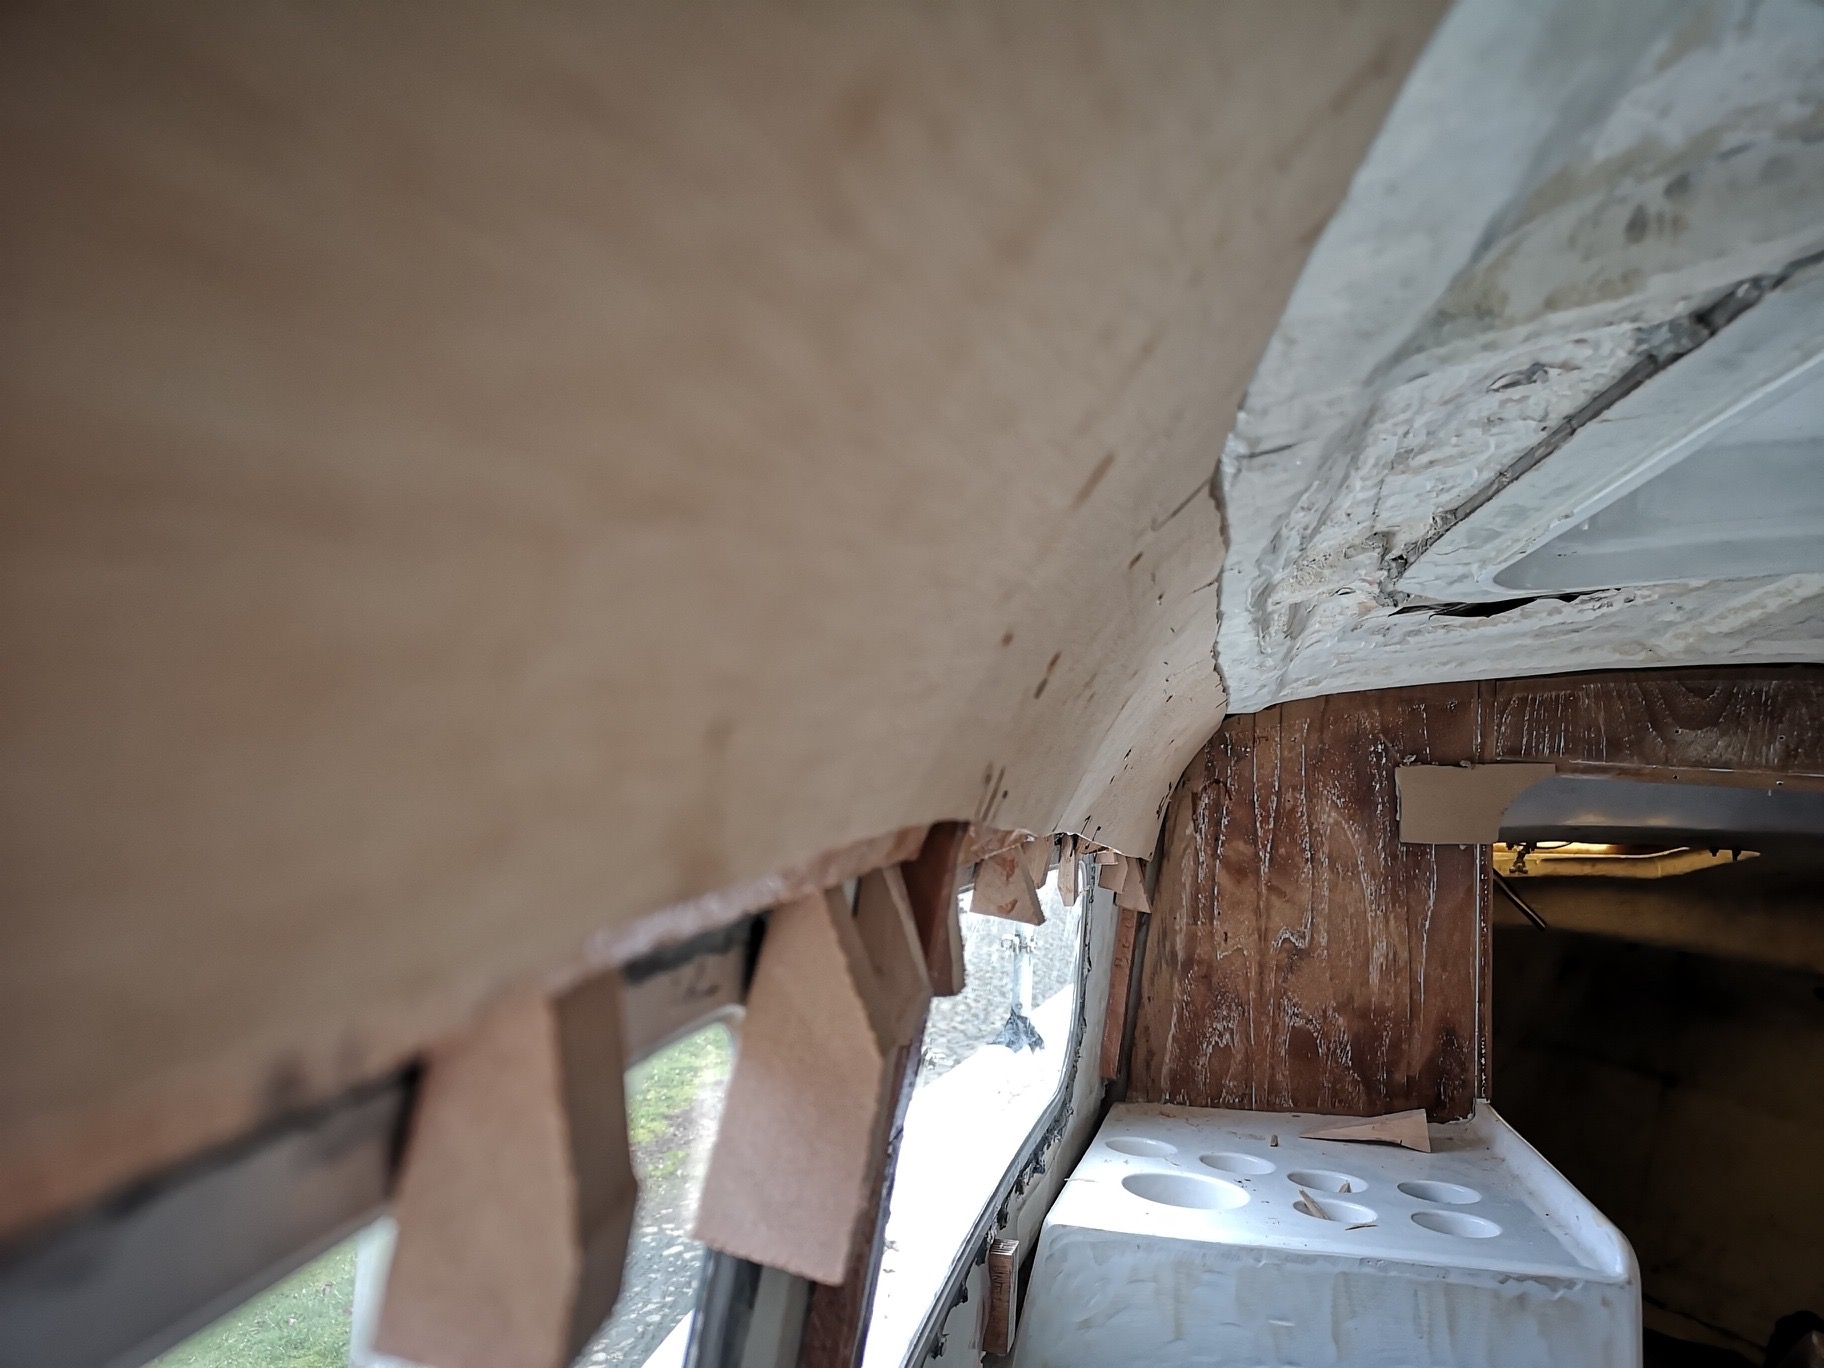
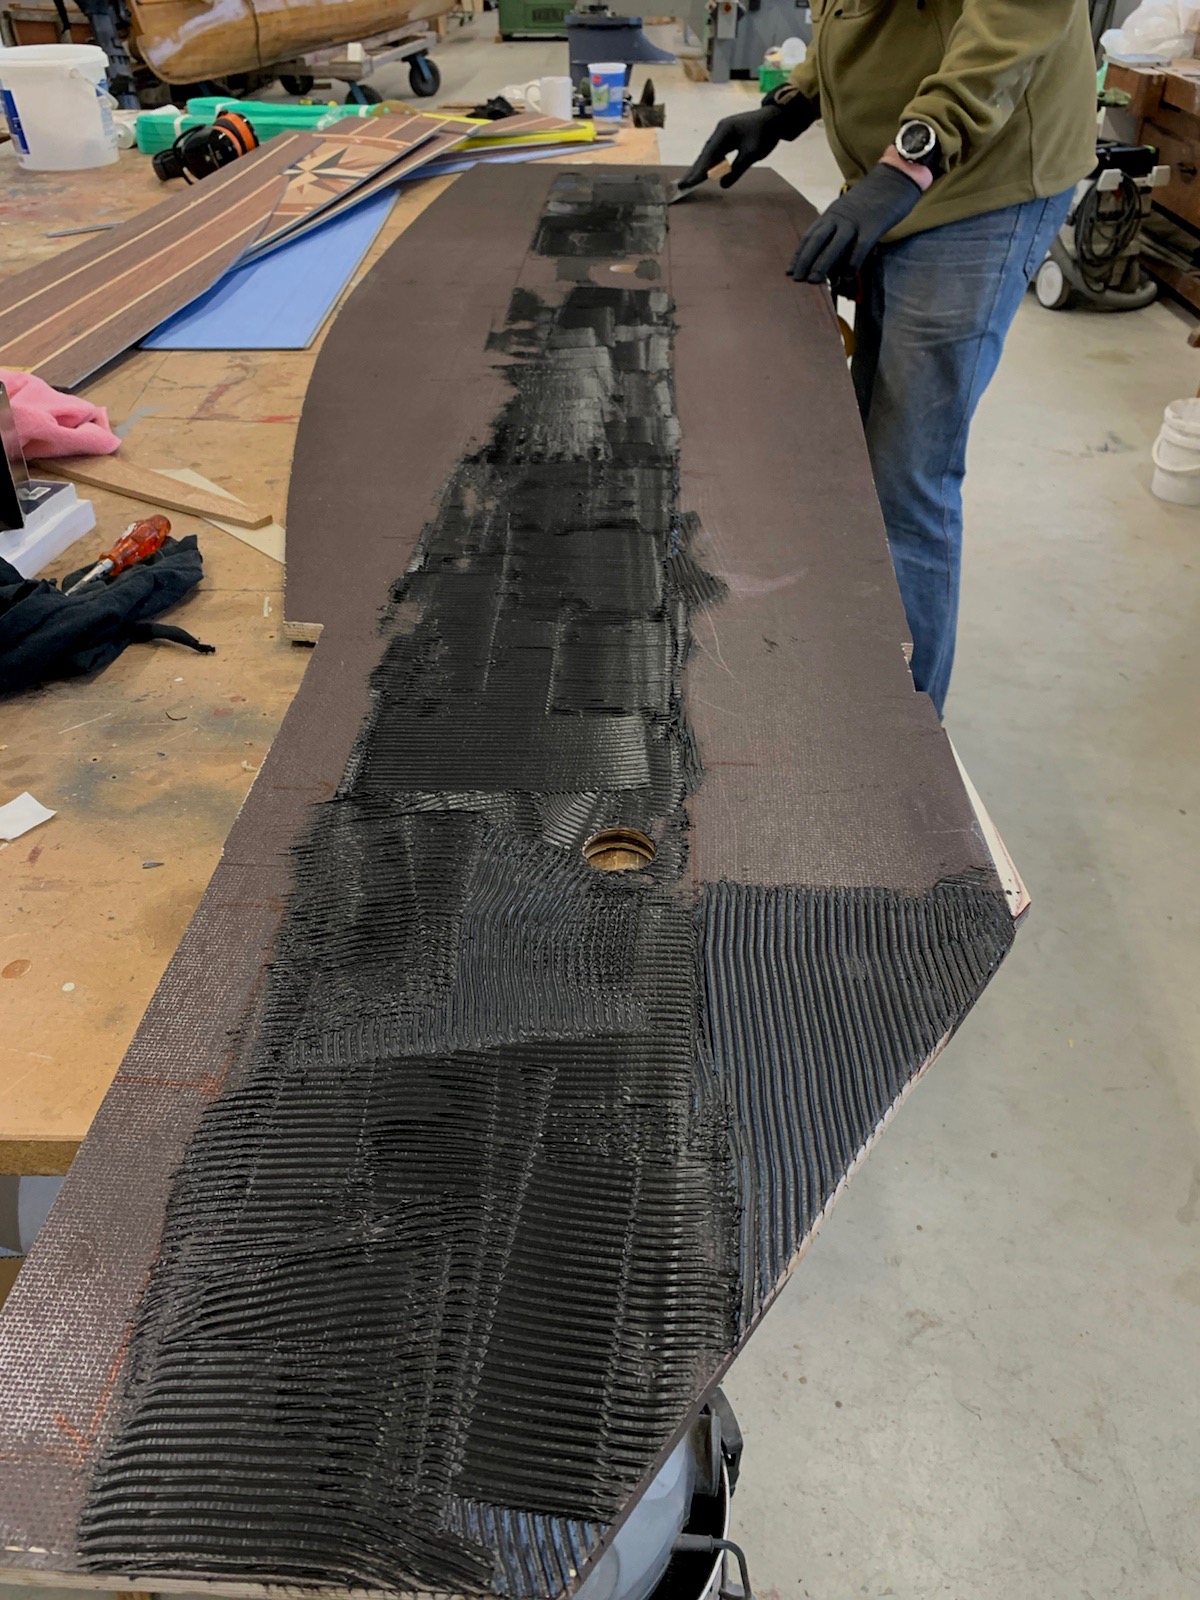
To make a roundish transition between the side wall and the deck, I have screwed two 6mm thick bending plywood into the curves of the upper side trim and screwed them onto the previously attached spans. Previously I touched an epoxy putty and applied between the two plywood boards with a 3mm notched trowel, so that they remain in shape after the setting of the adhesive.
This is a lot of work and you need a lot of patience with these many roundings.
4.12.2019
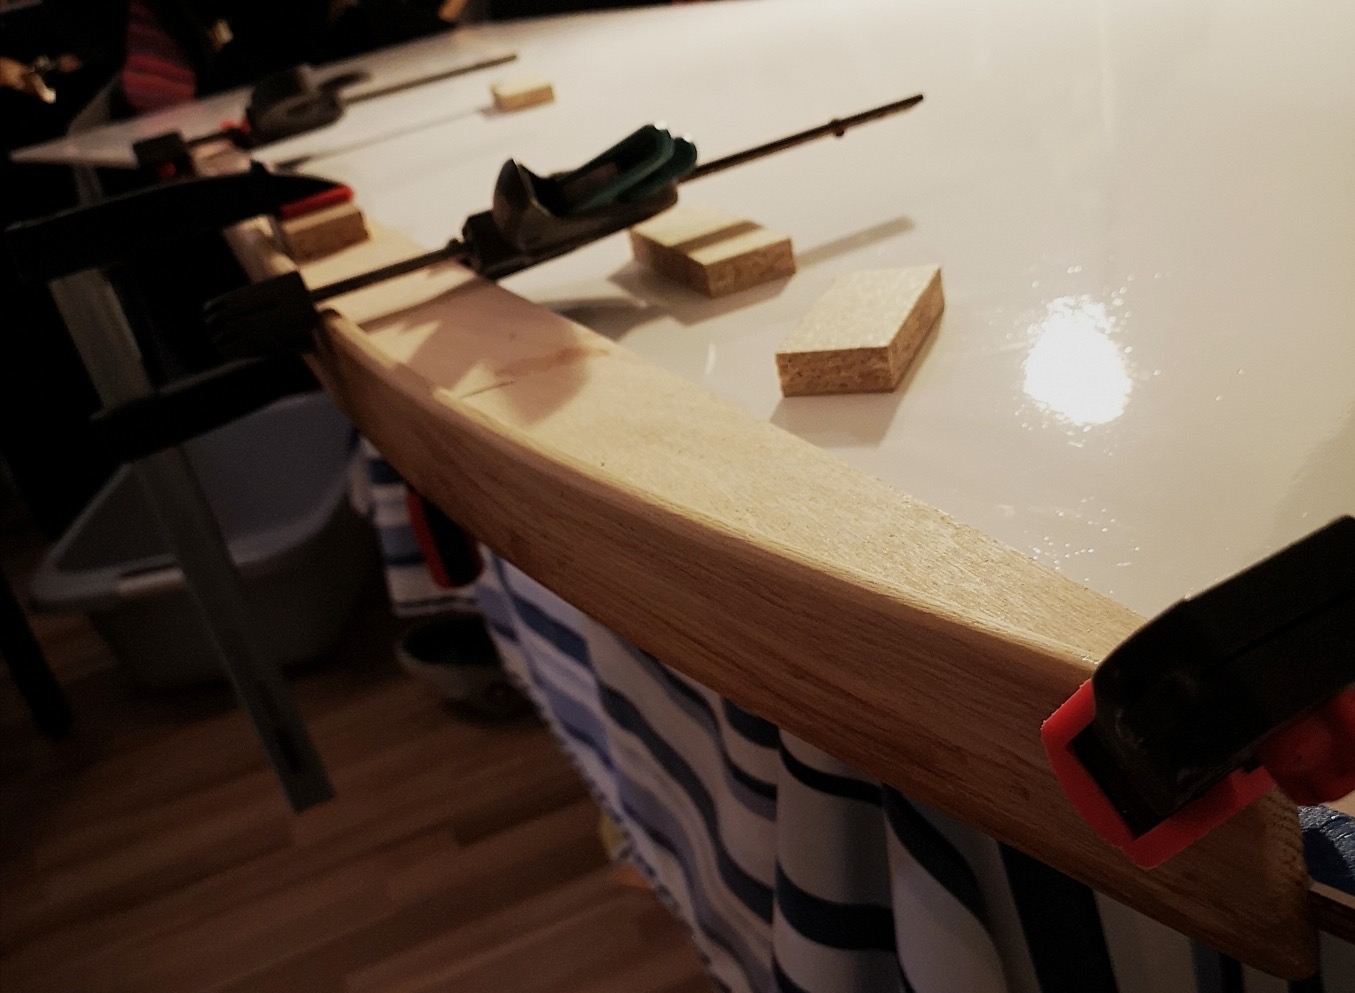
Here is the top view. With additional wedges I bring my board in shape before the epoxy gets stuck.
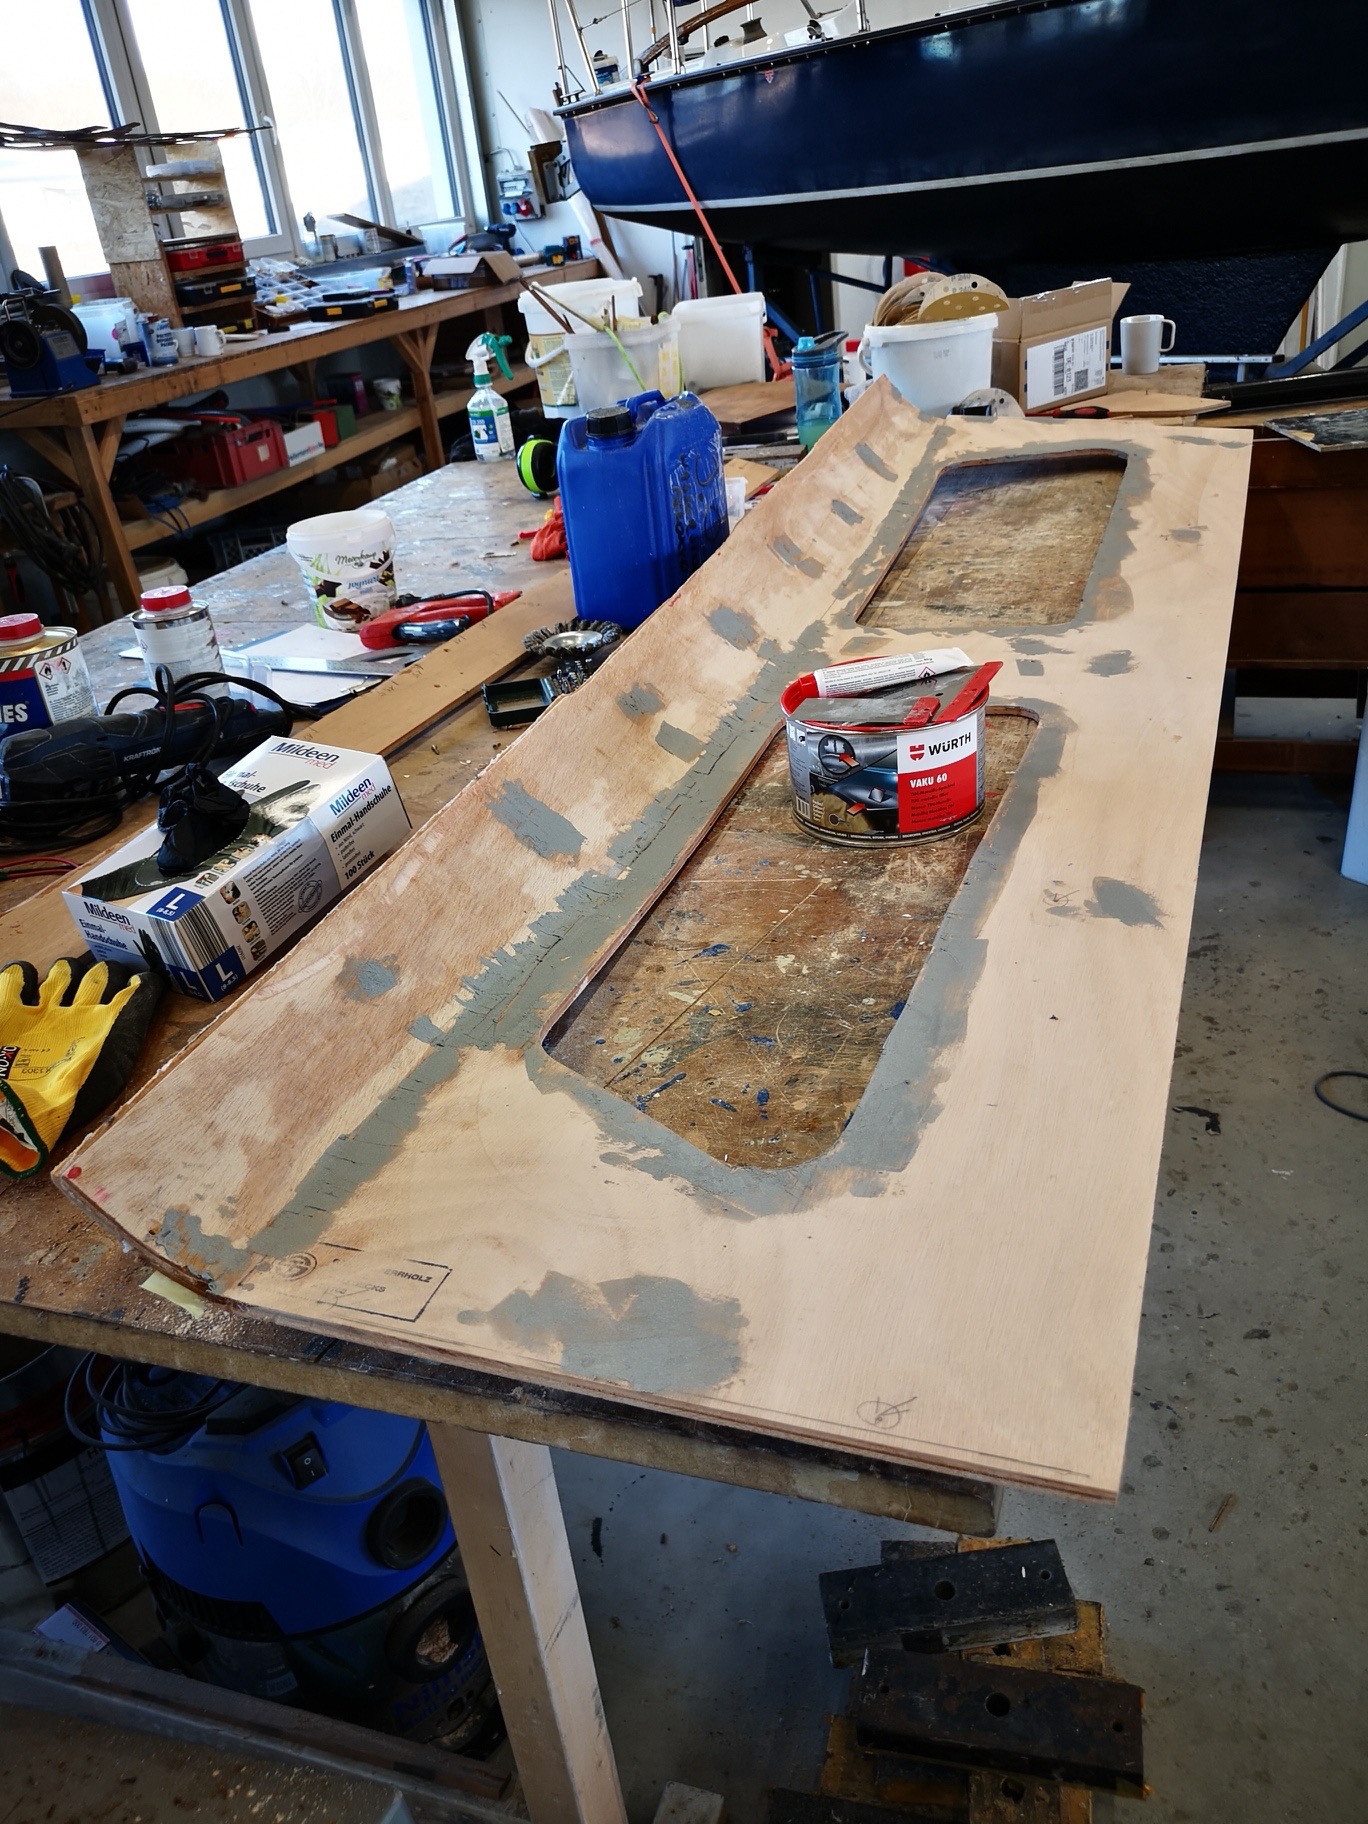
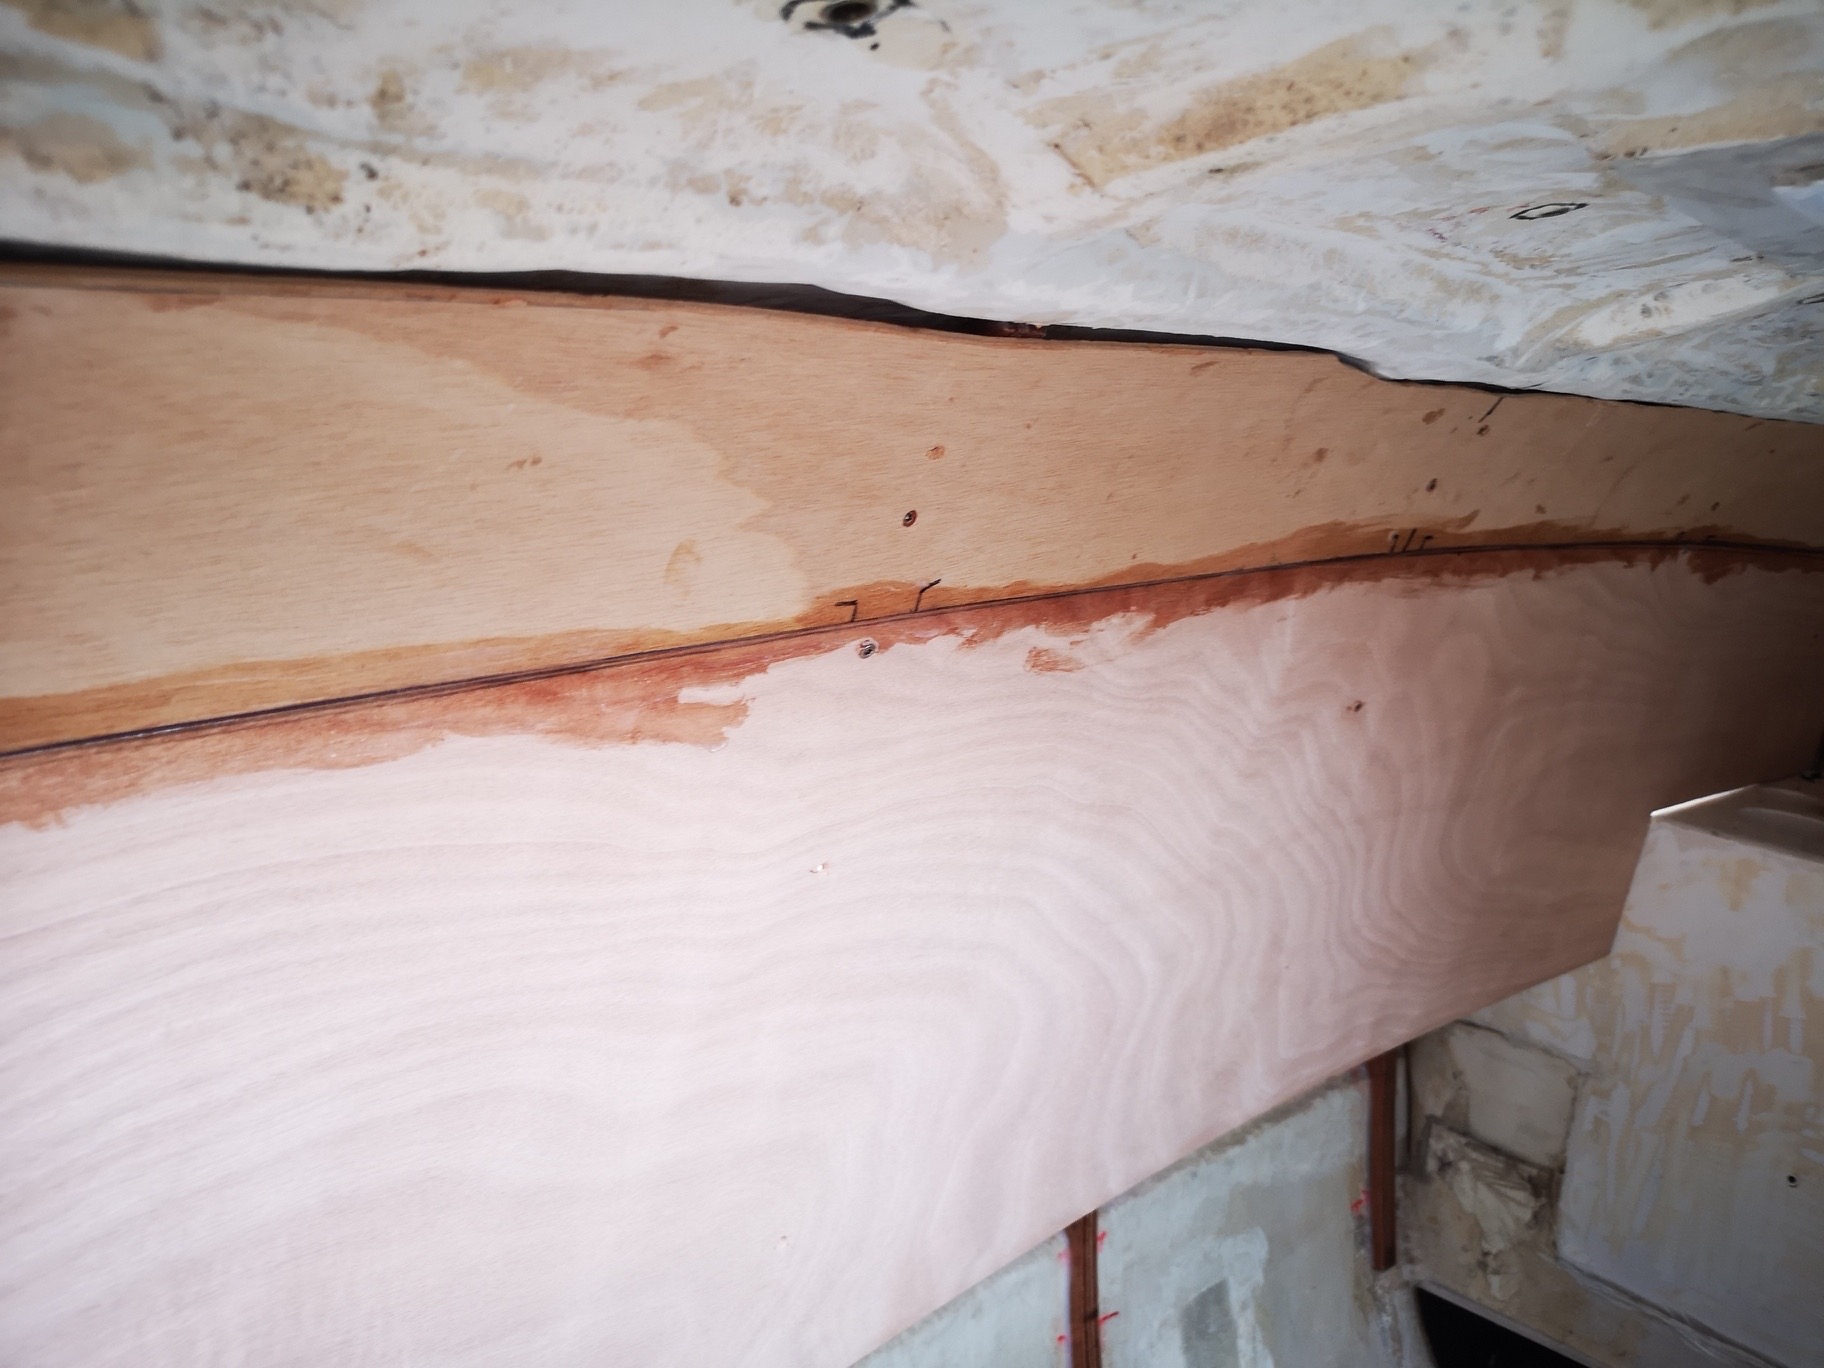
After the epoxy was dried, I removed the plywood cladding, grouted the drilled holes in the plywood, laminated a layer of glassmat onto it, and finally covered it with peel ply.
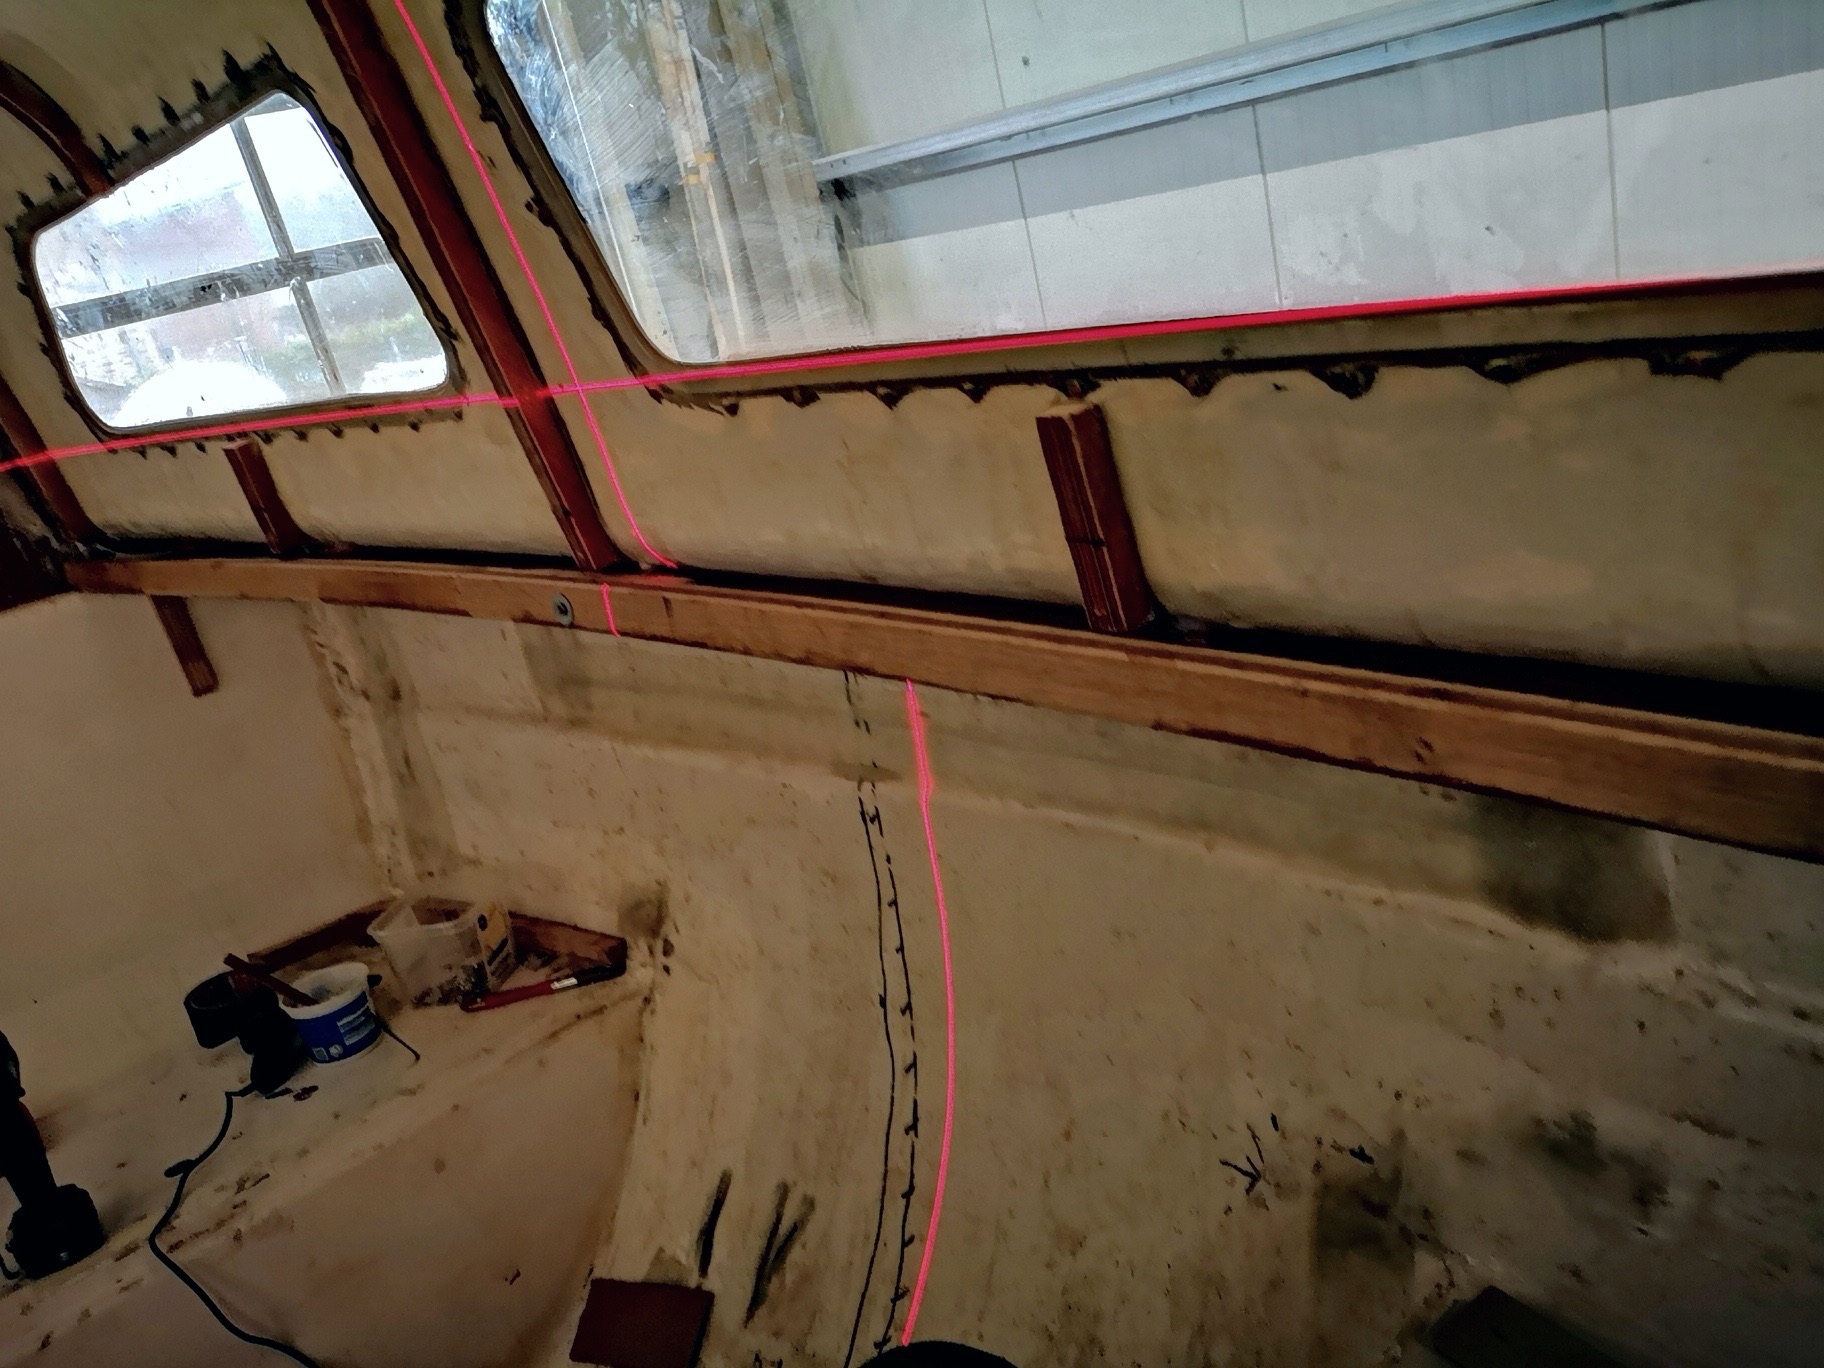
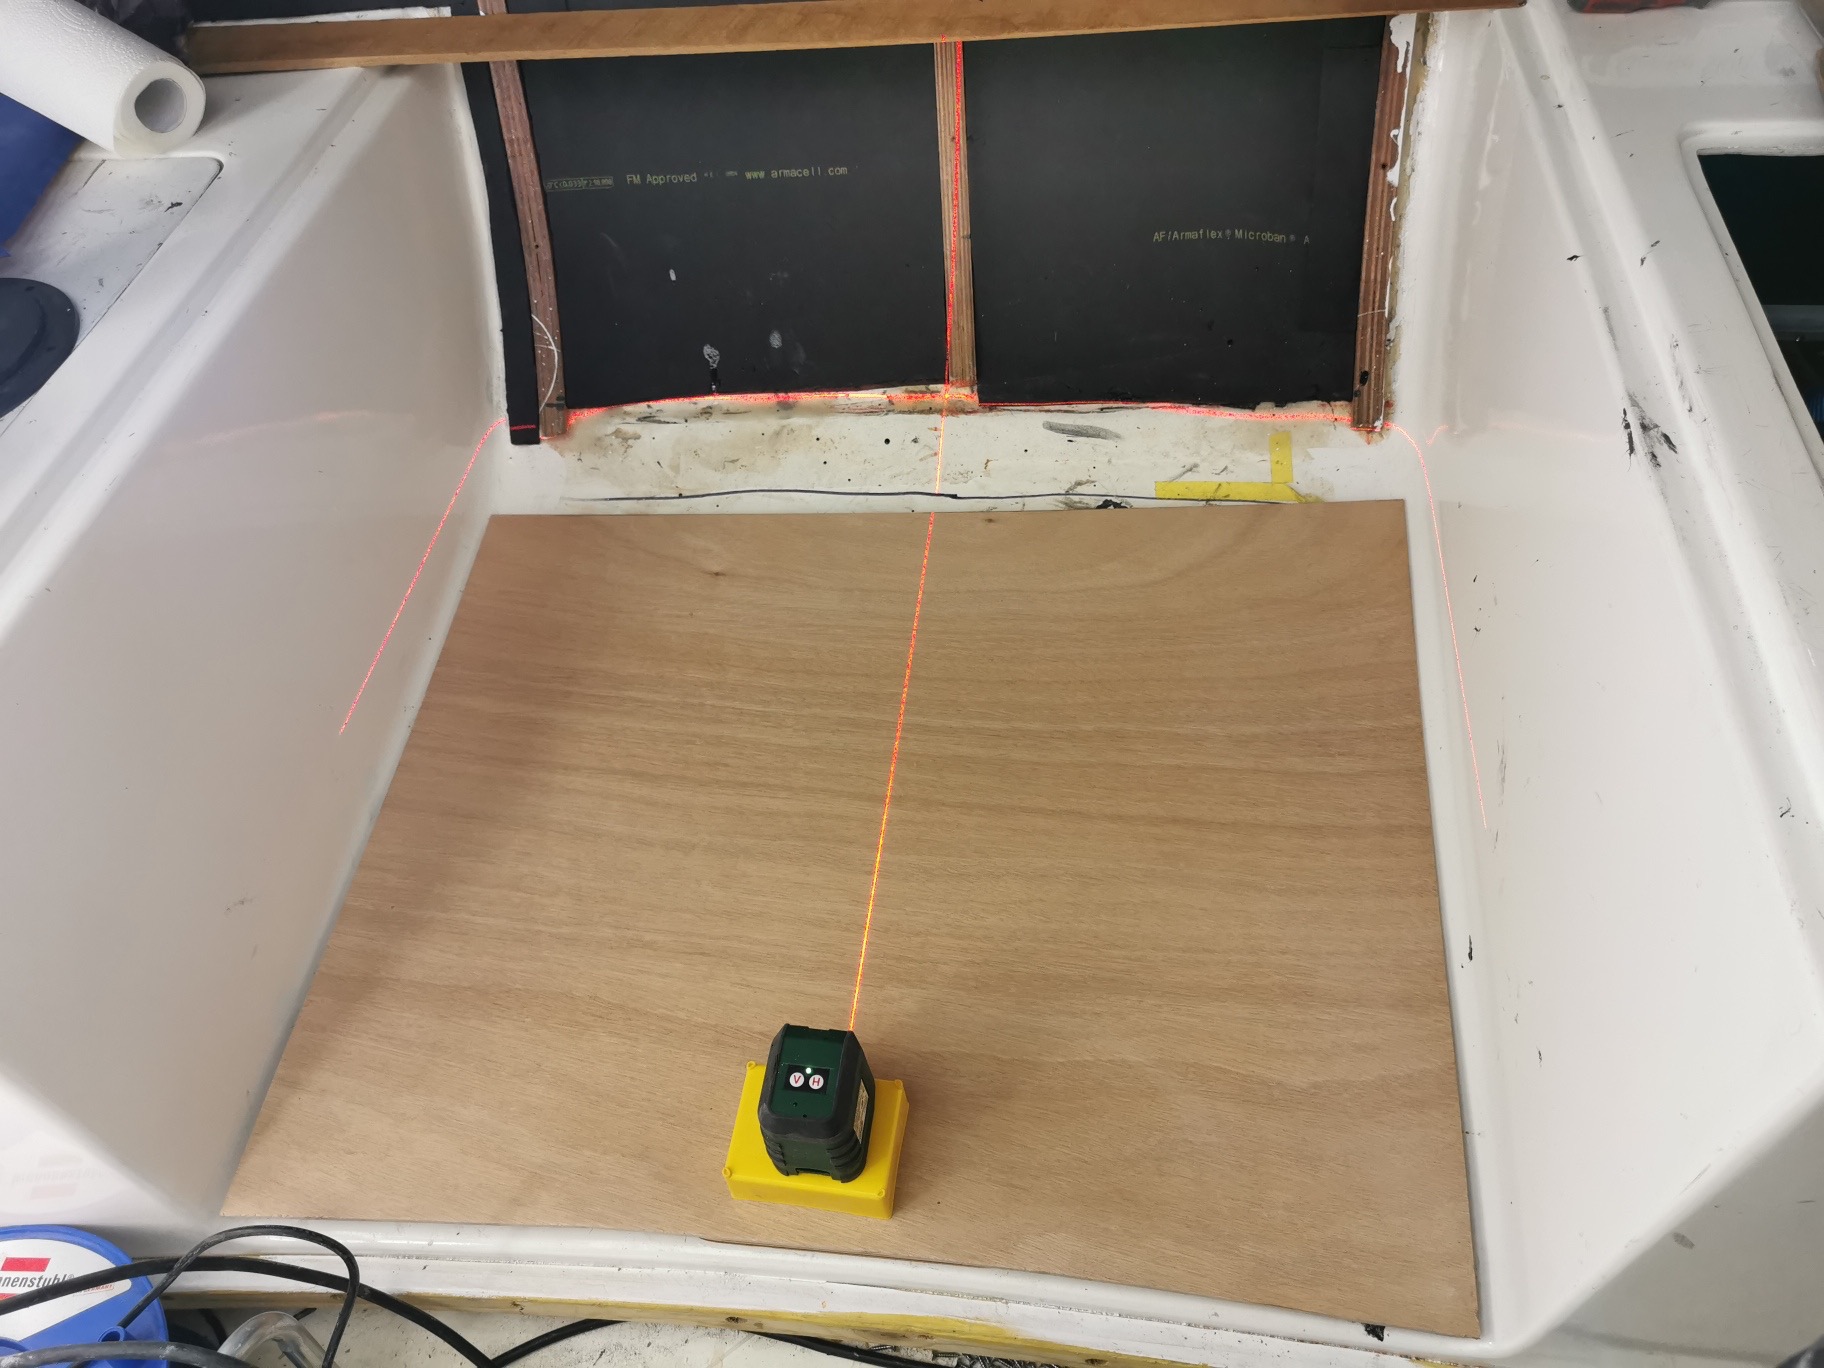
A laser is very helpful at work.
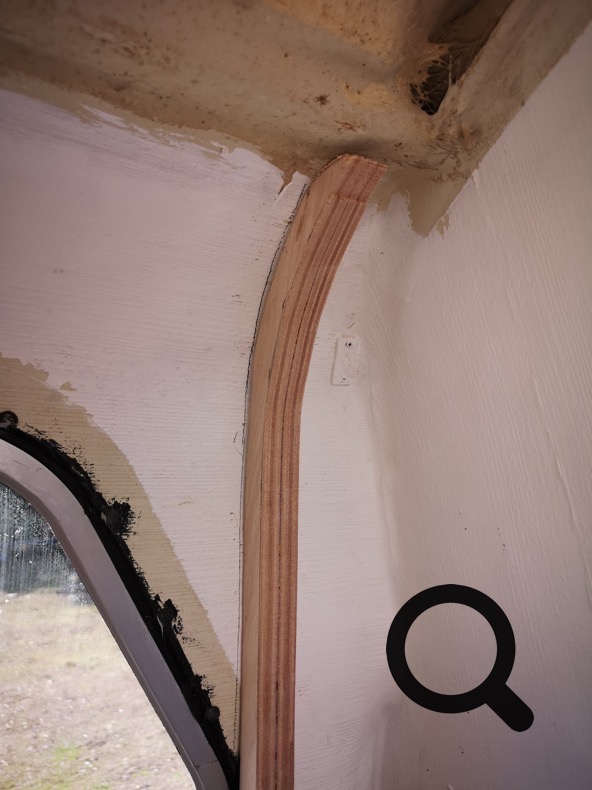
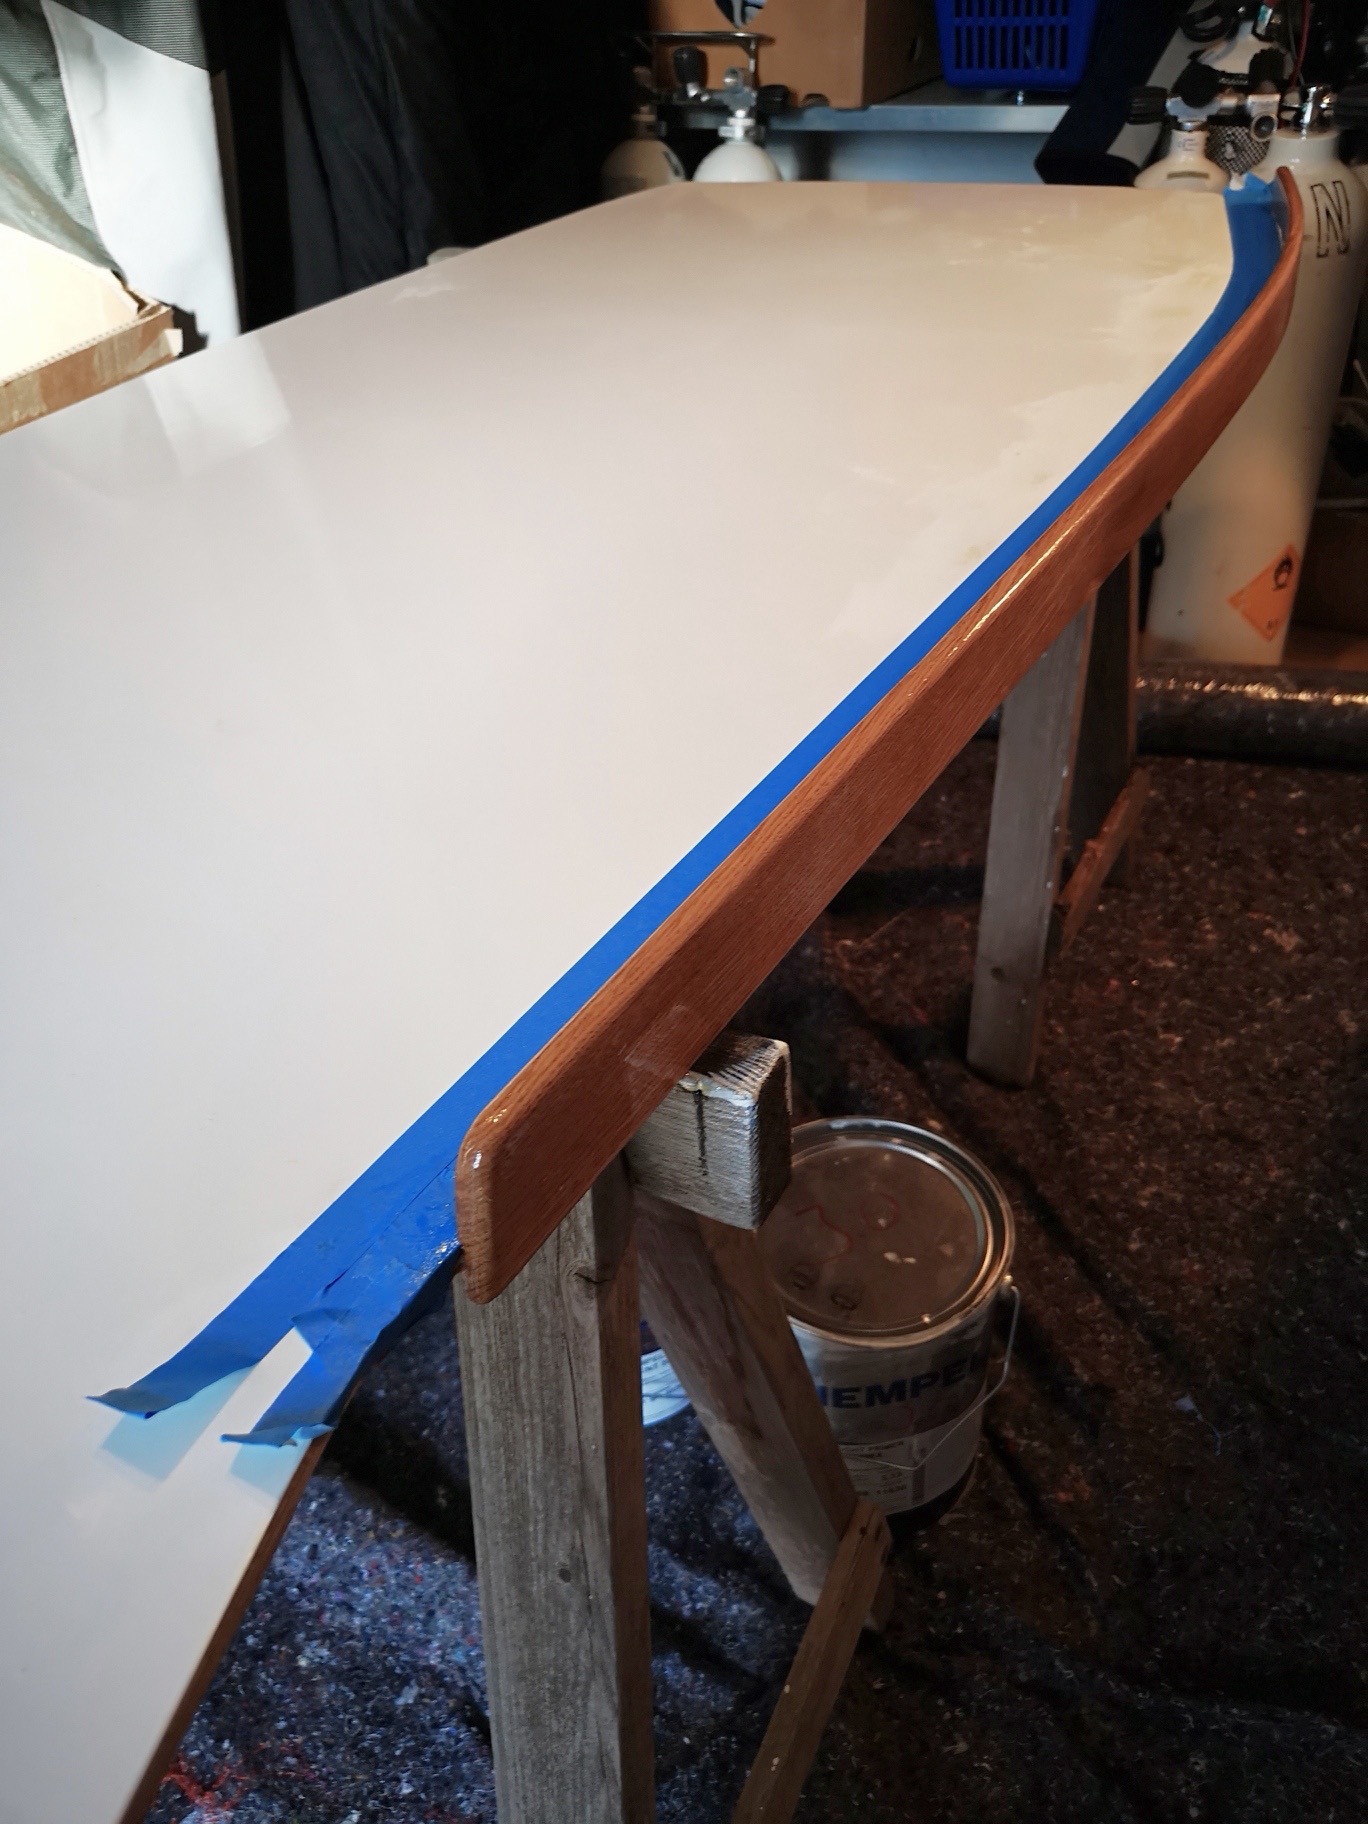
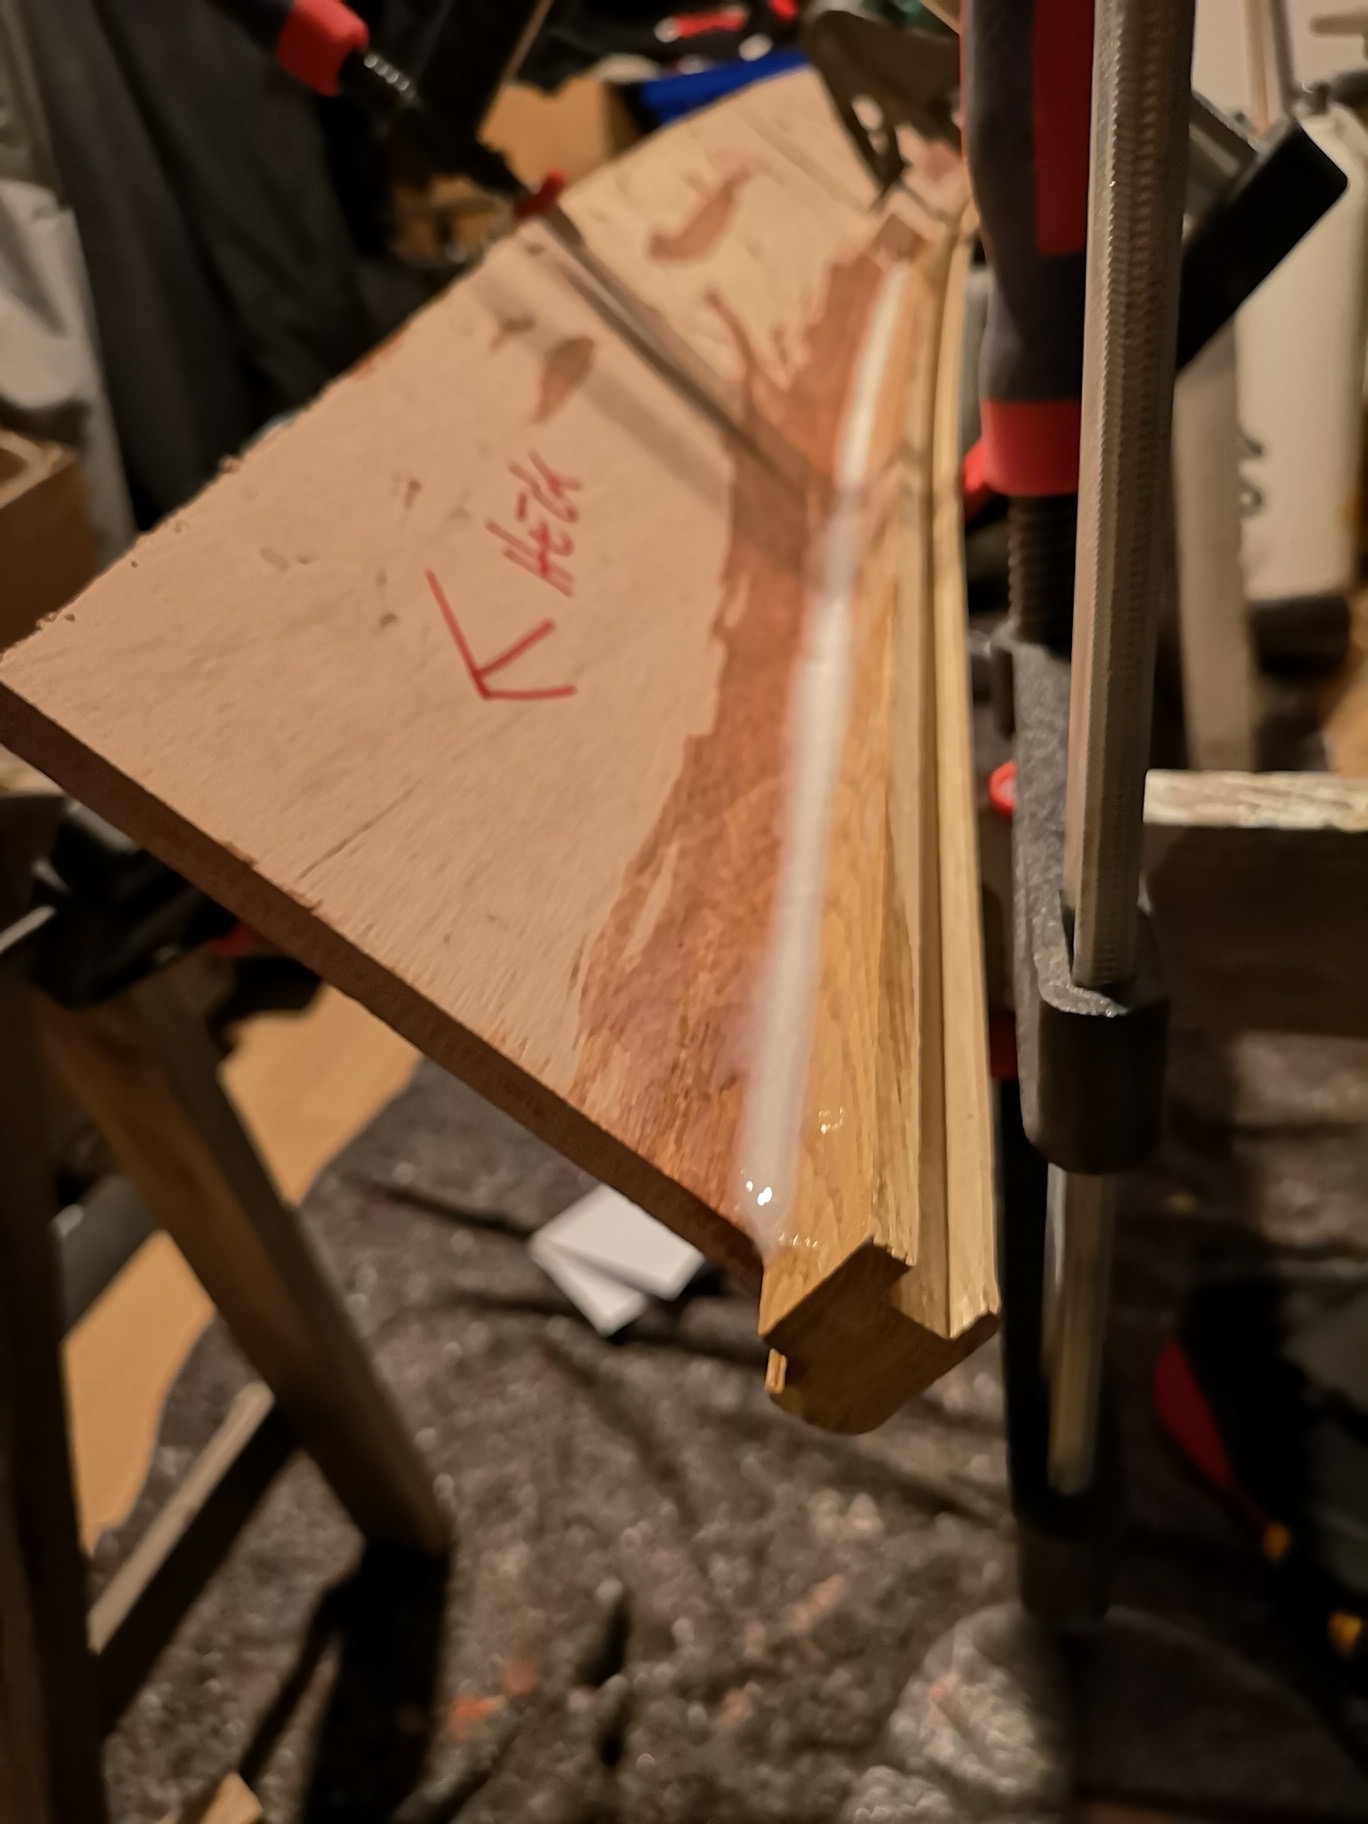
An oak slat forms the end at the lower end of the window covering. I glued them in with epoxy filler..
13.12.2019
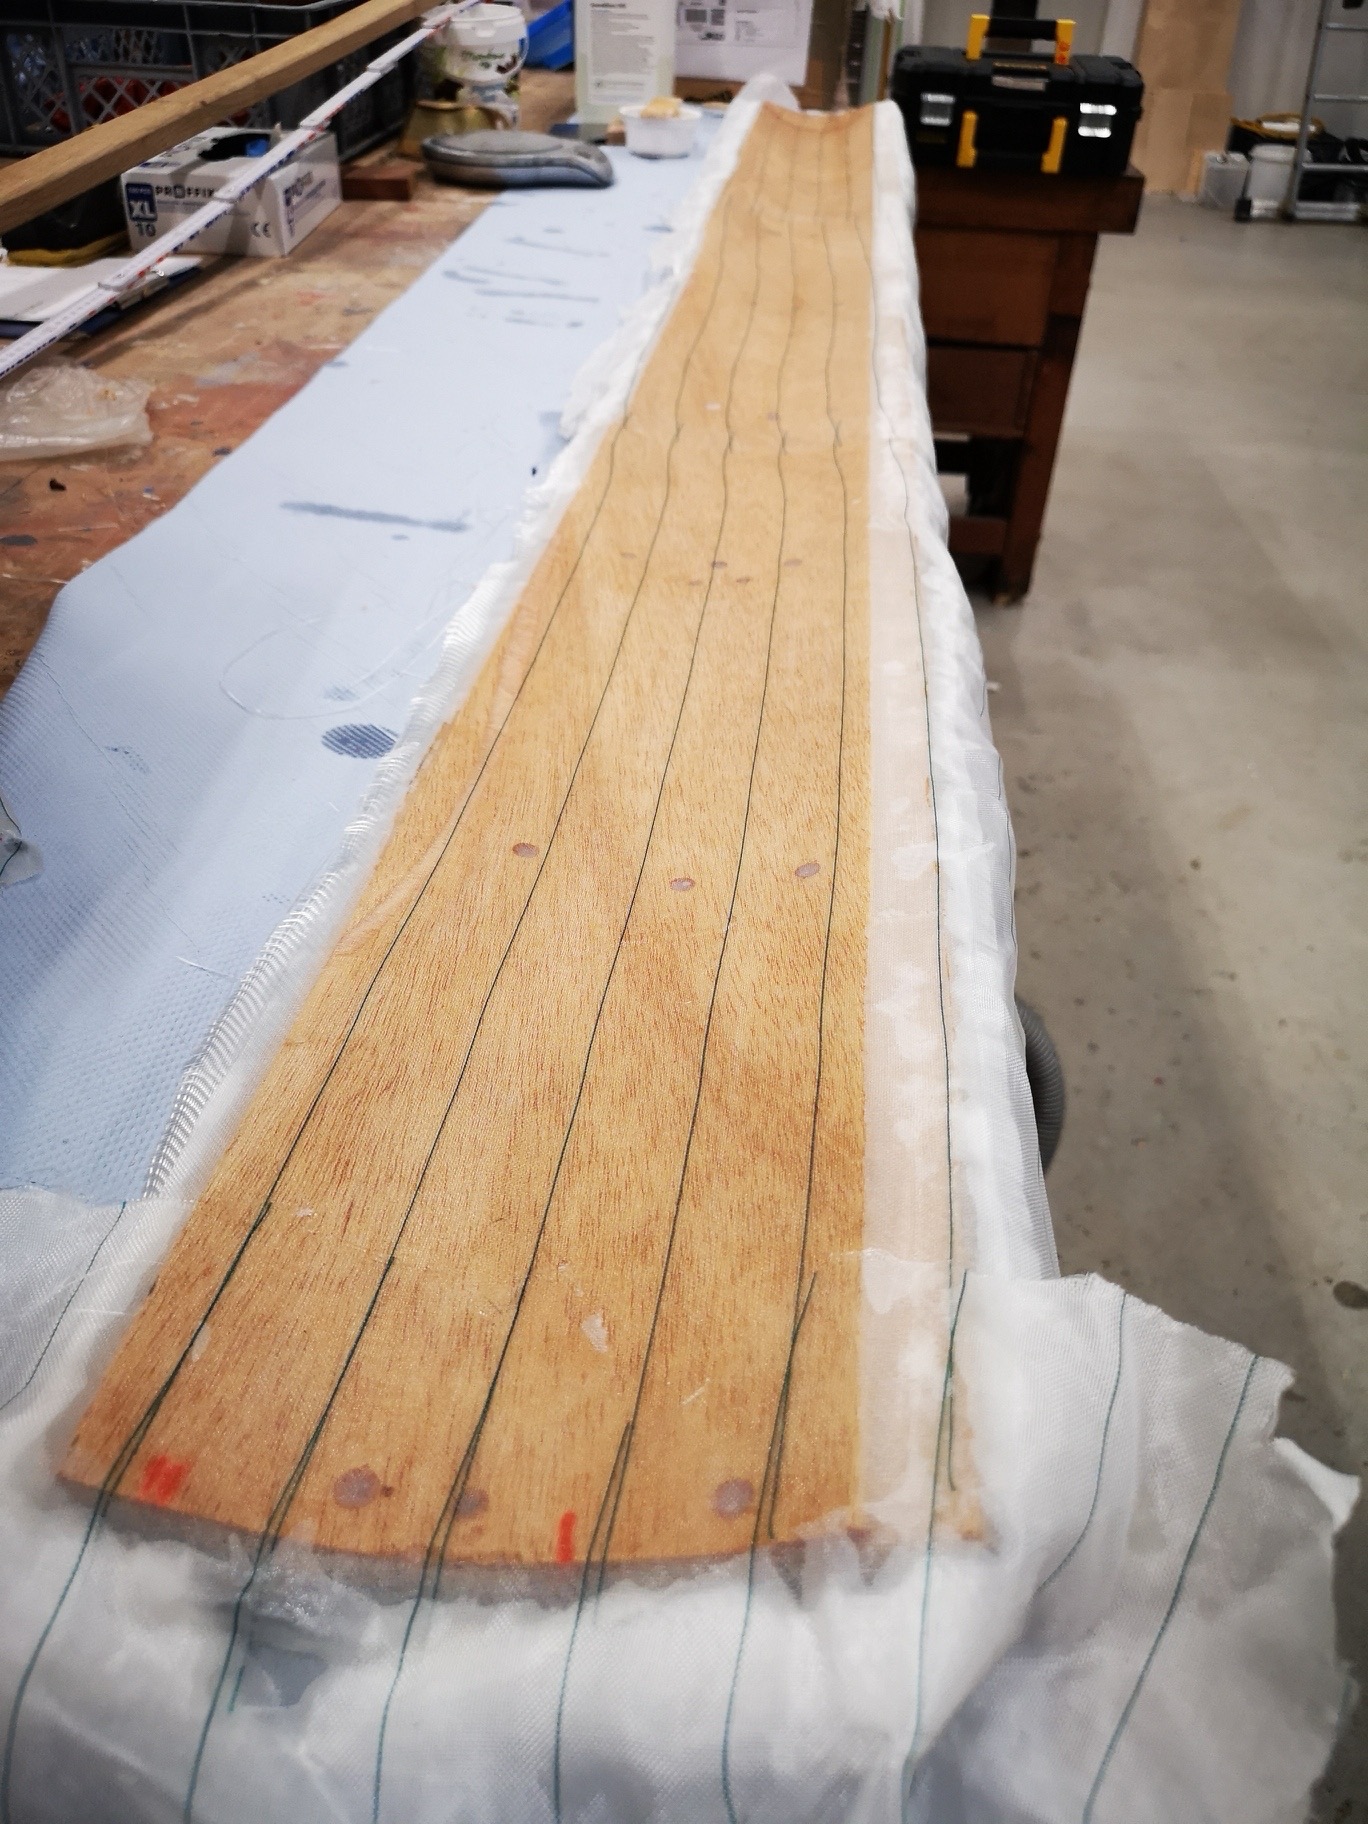
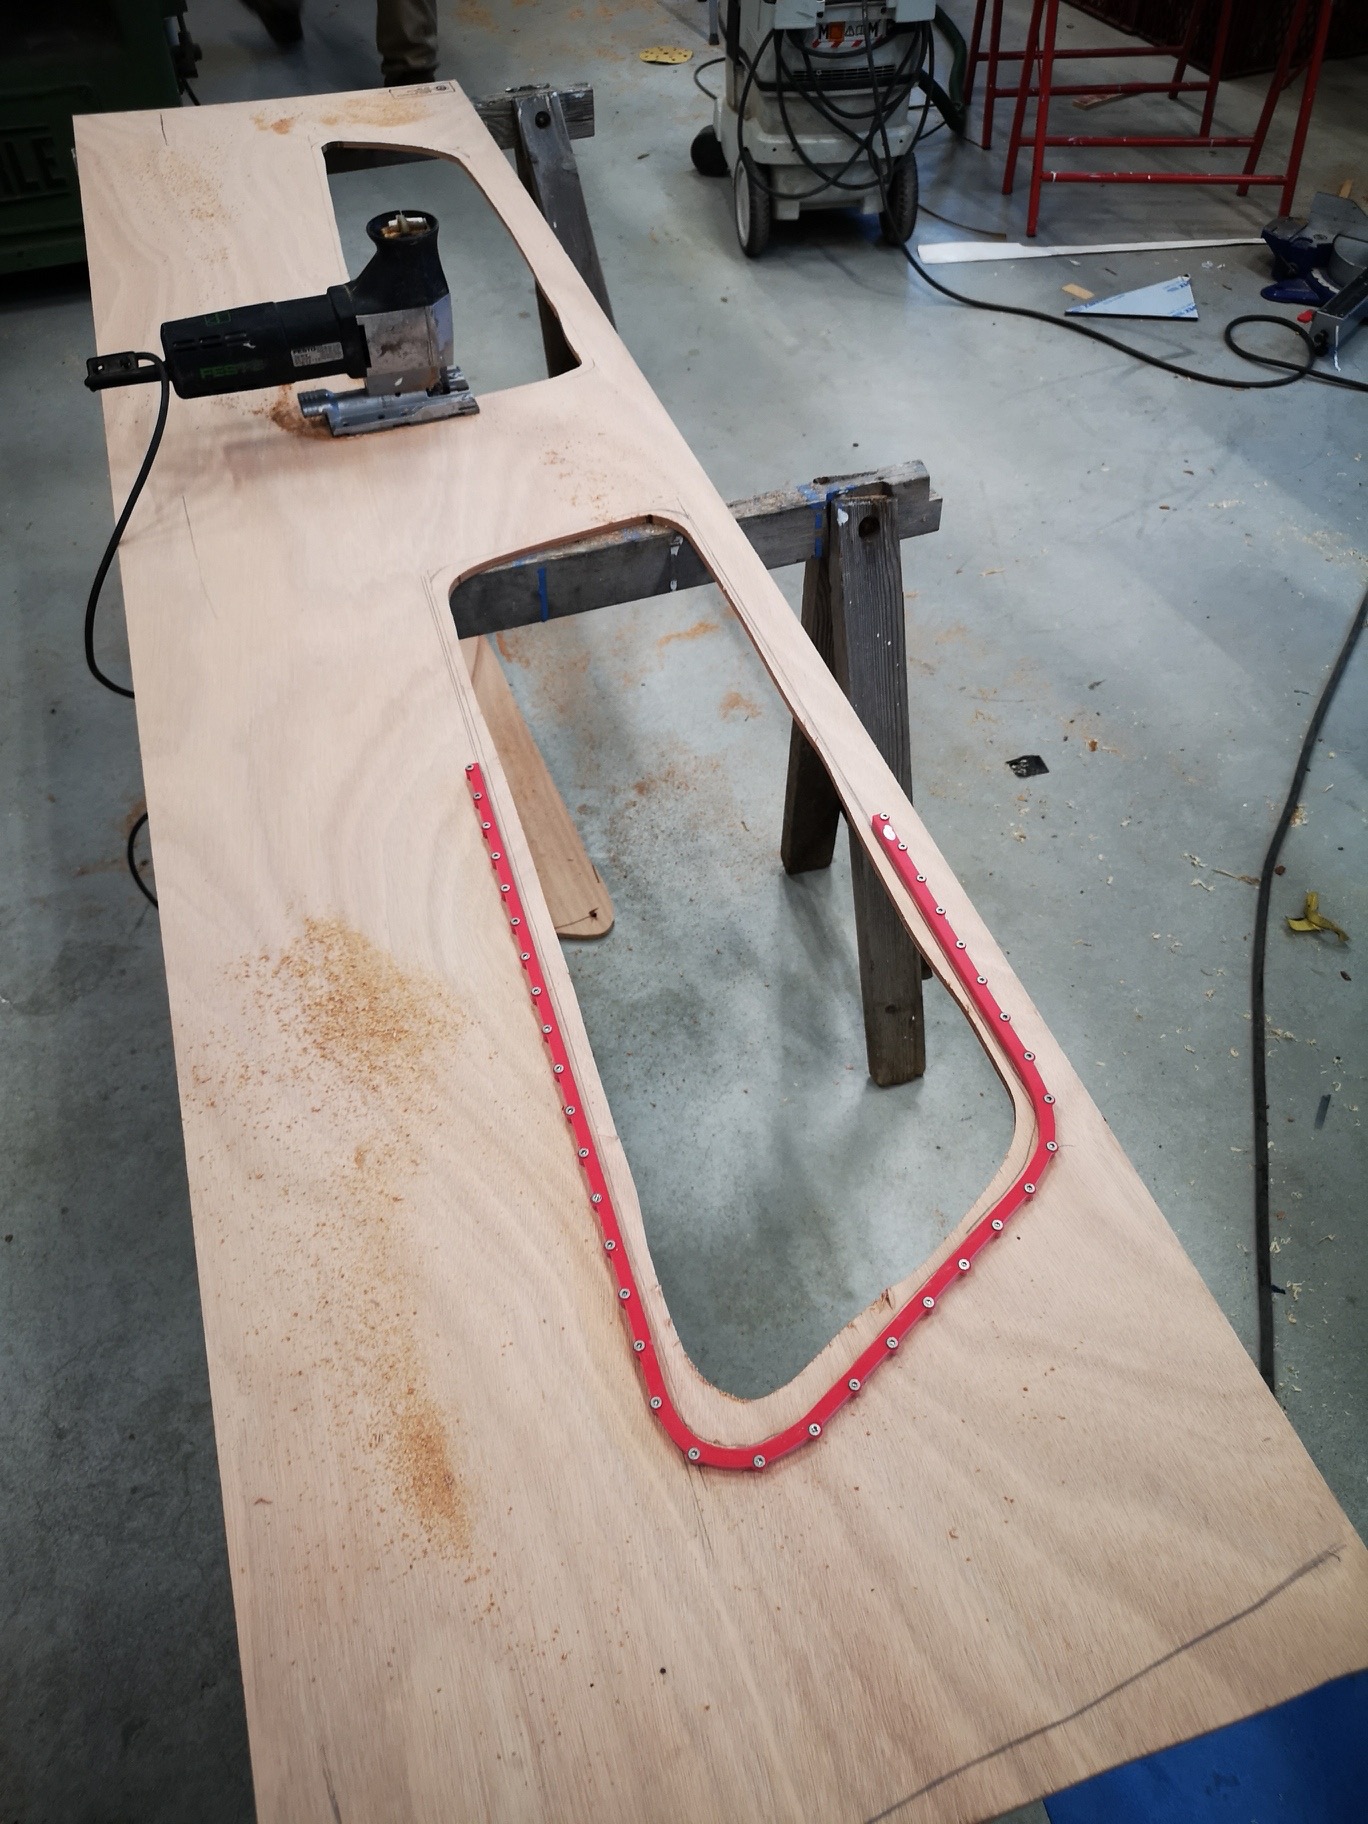
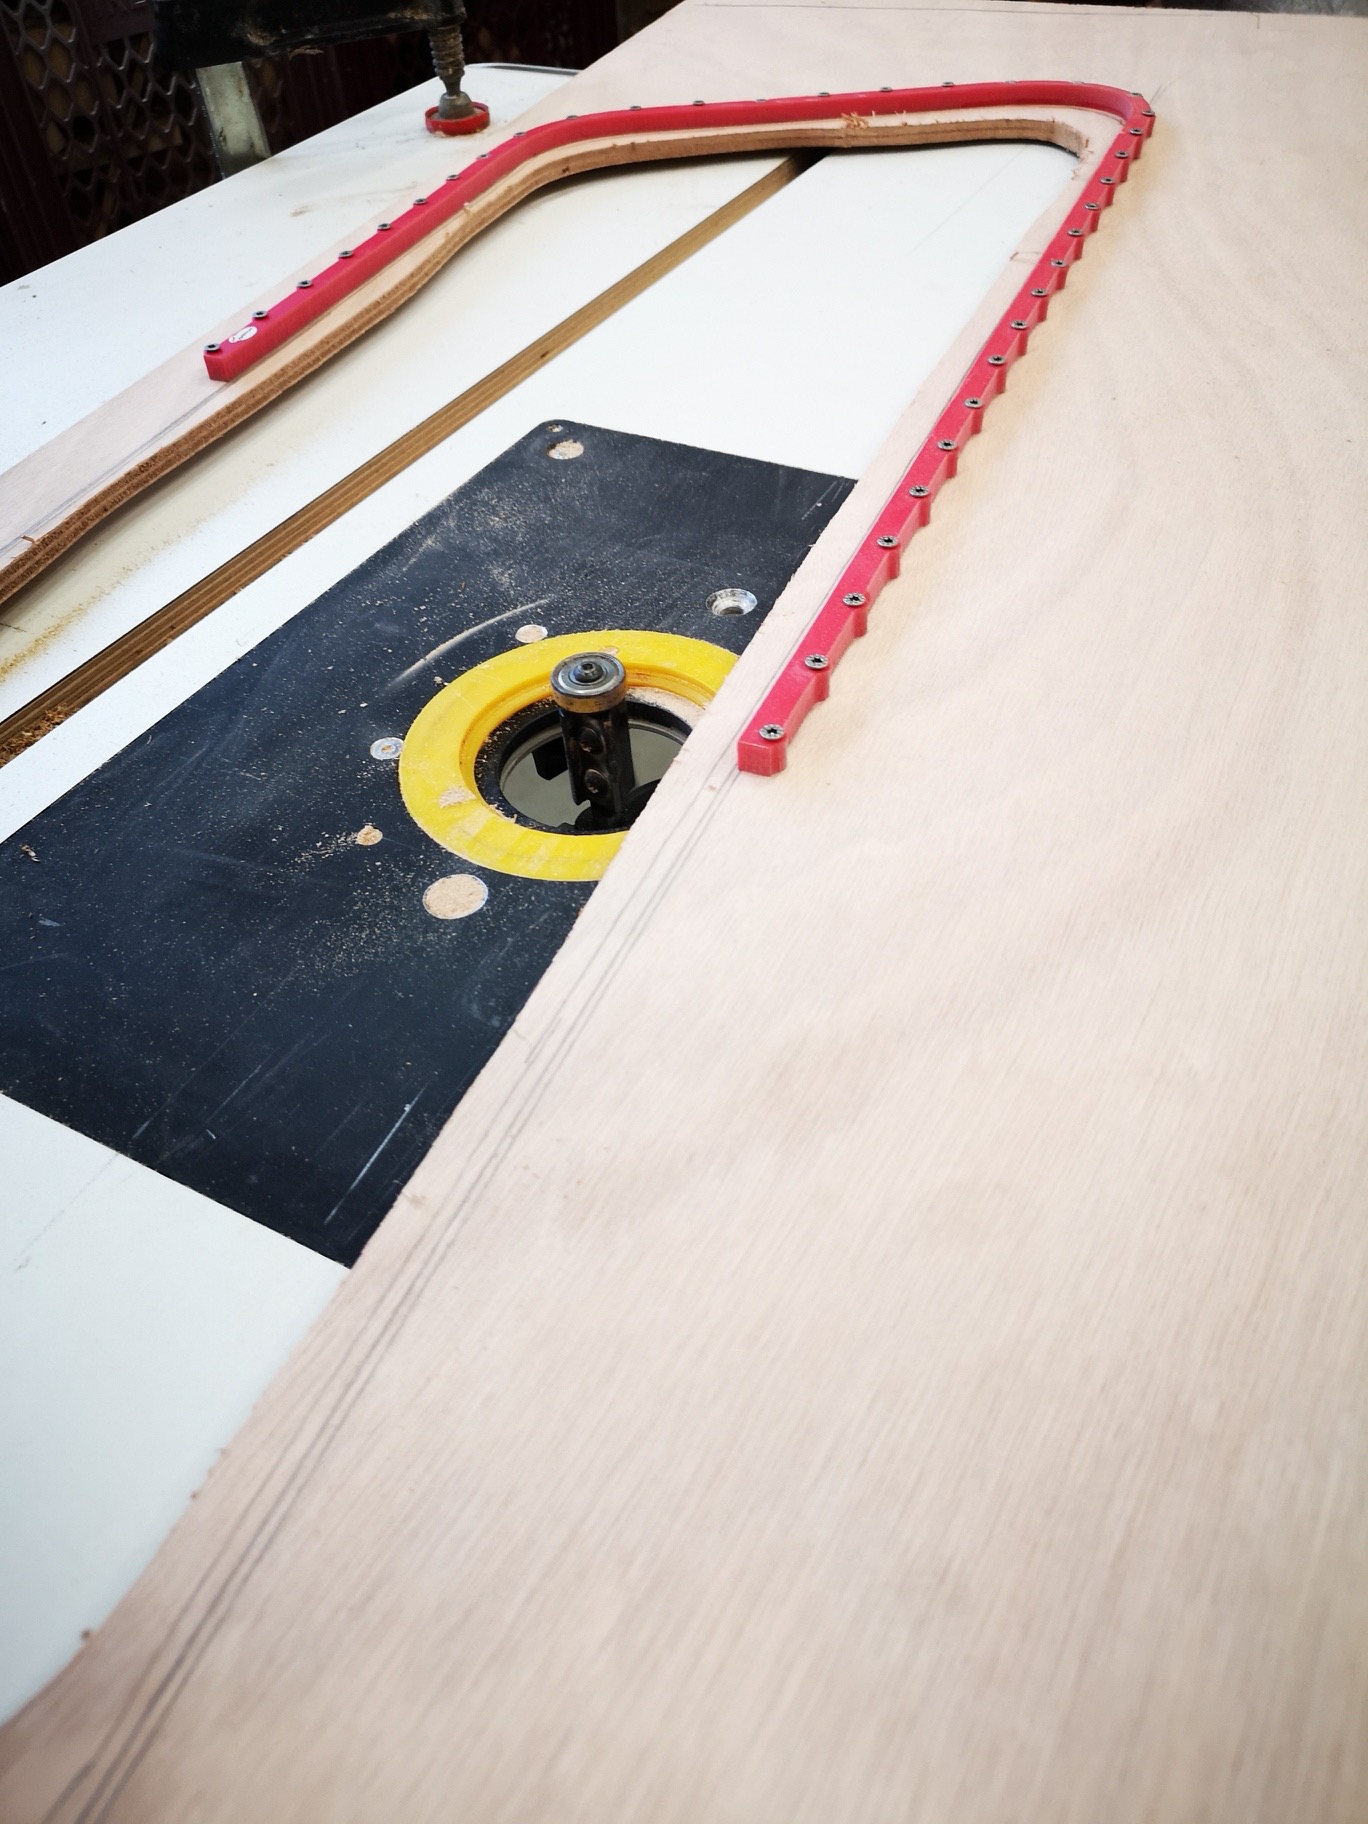
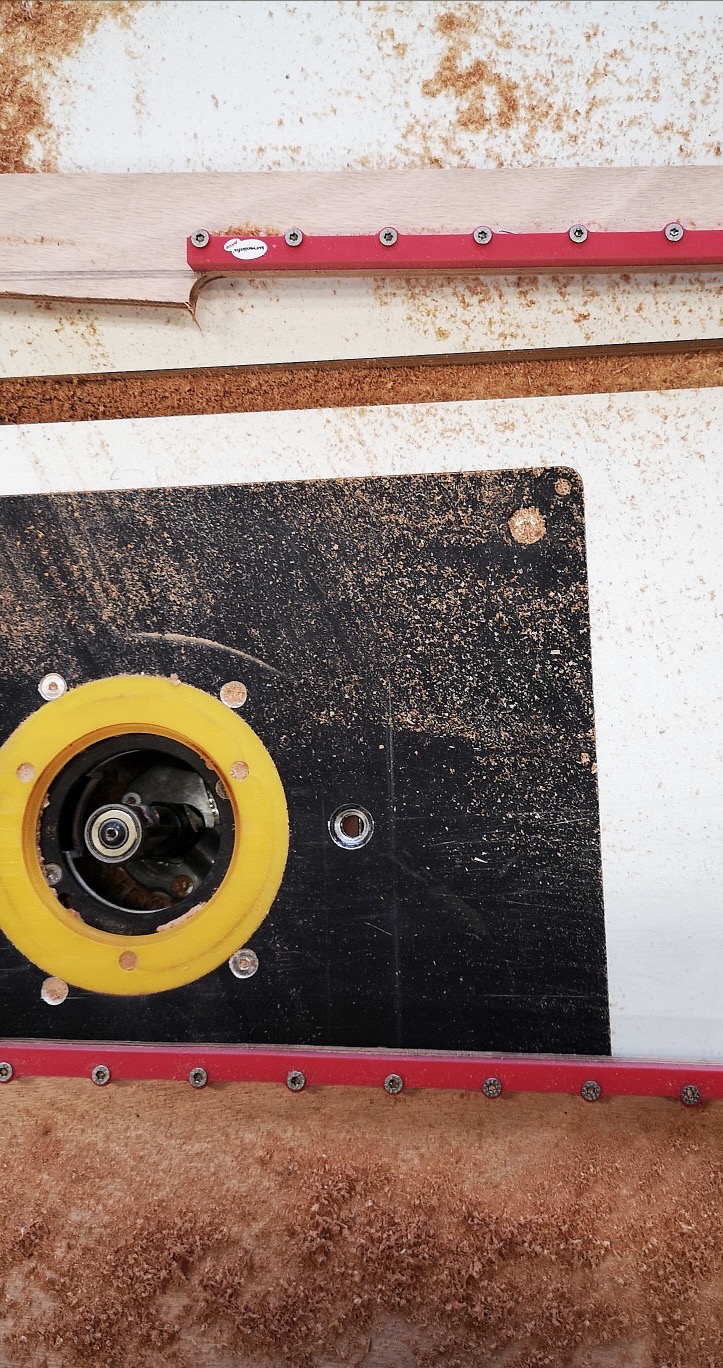
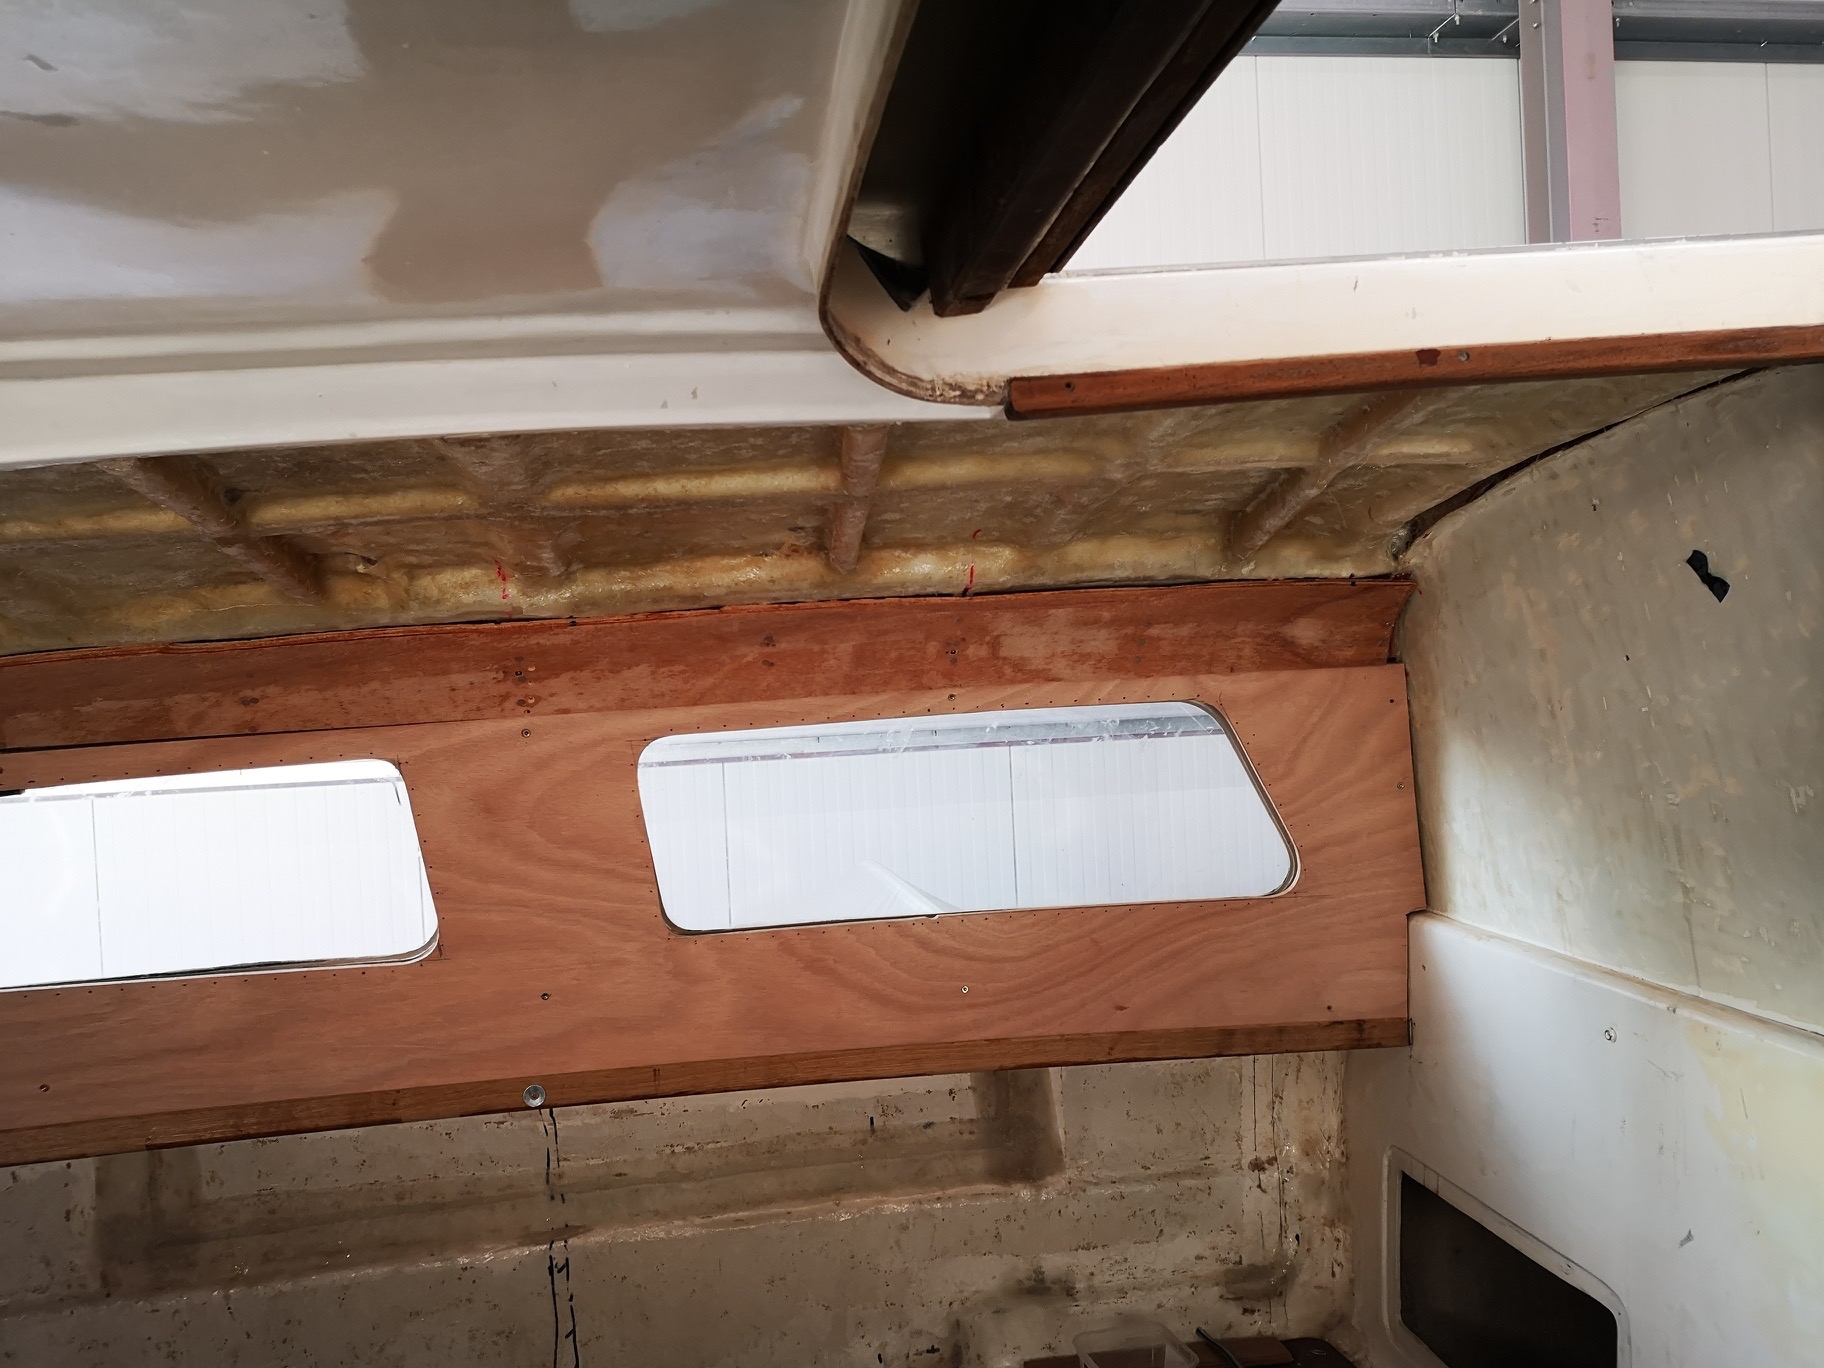
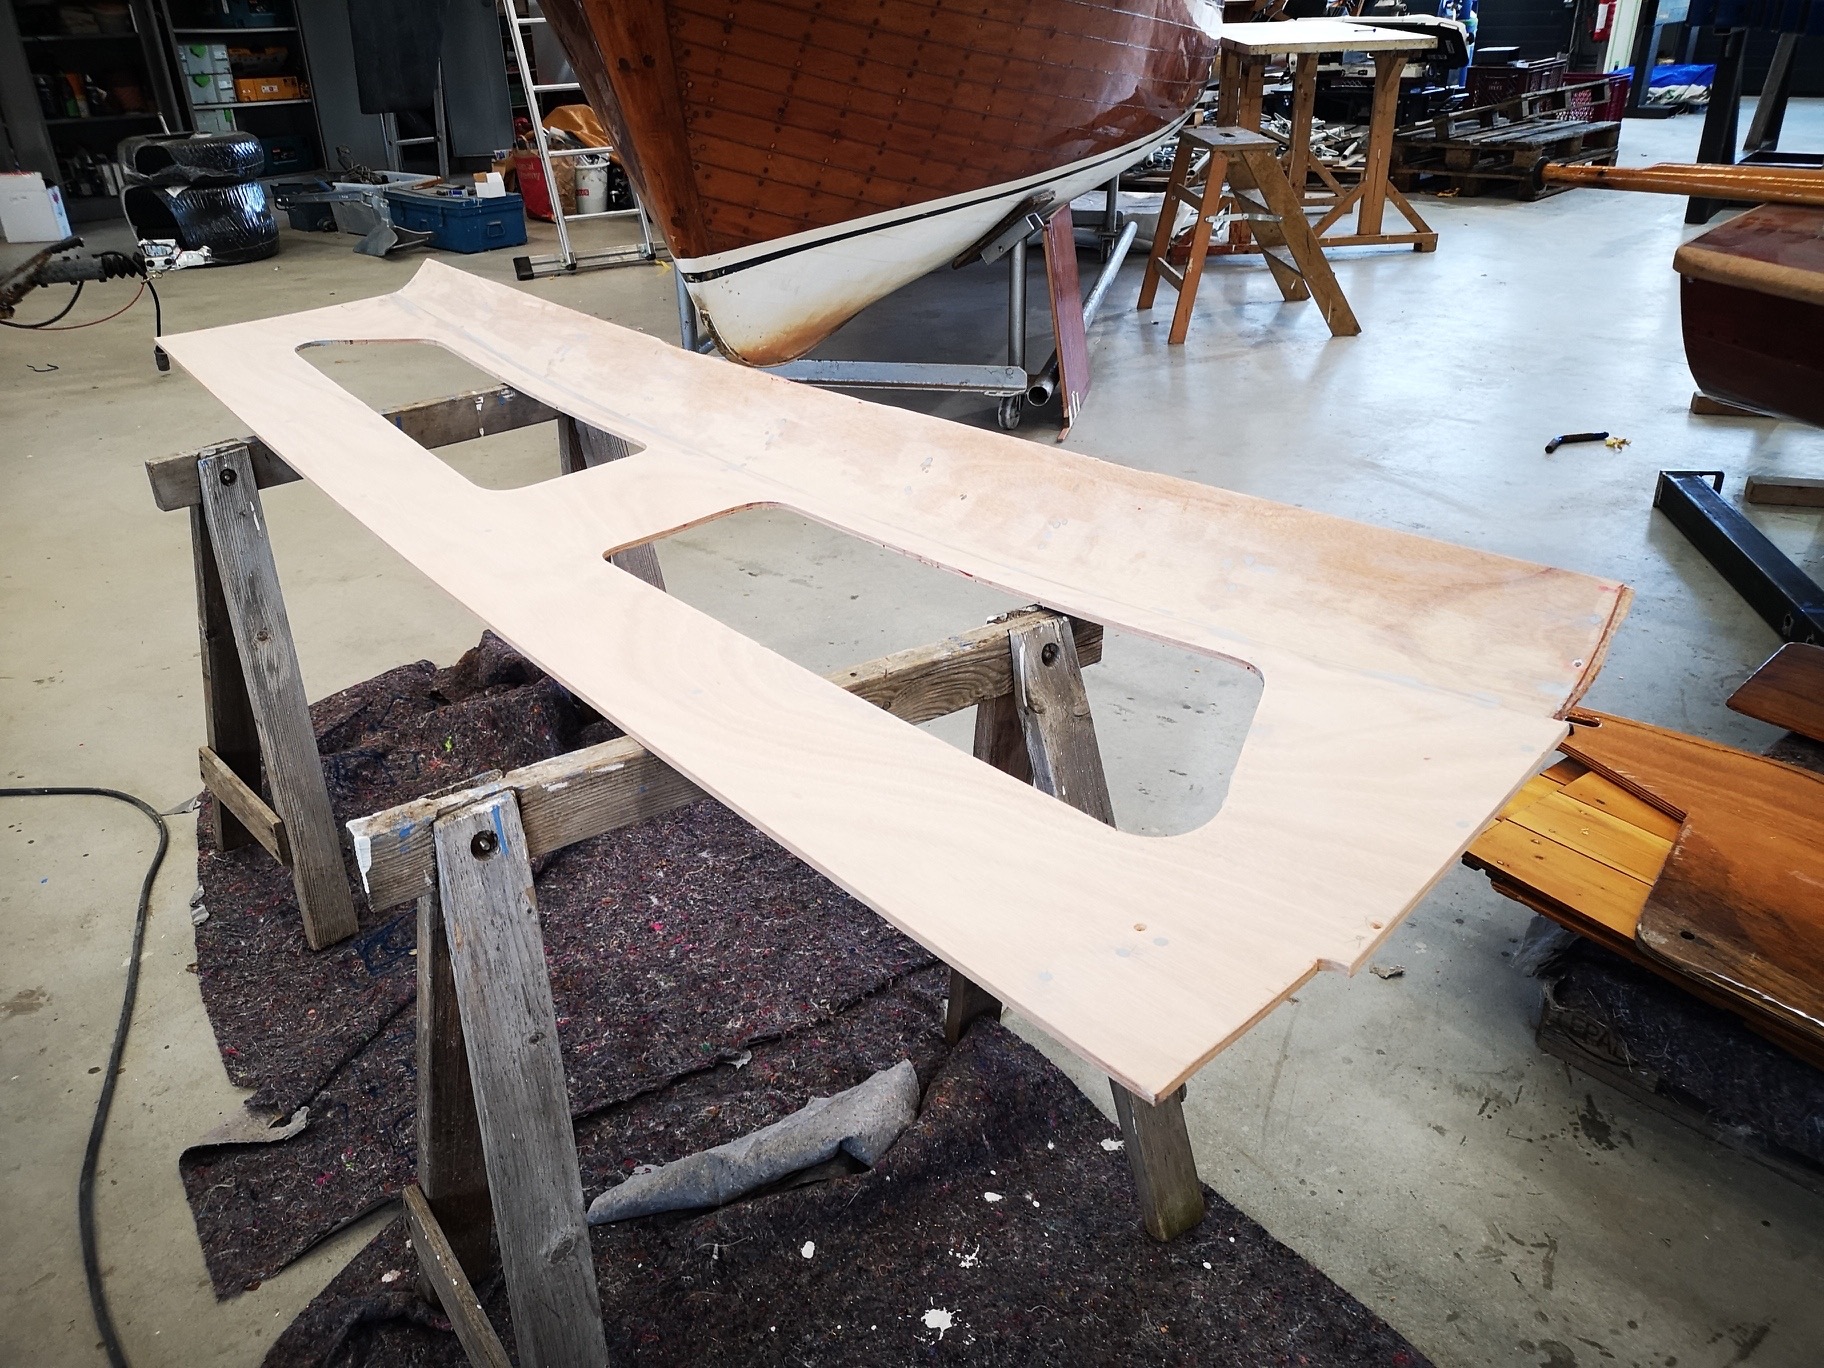
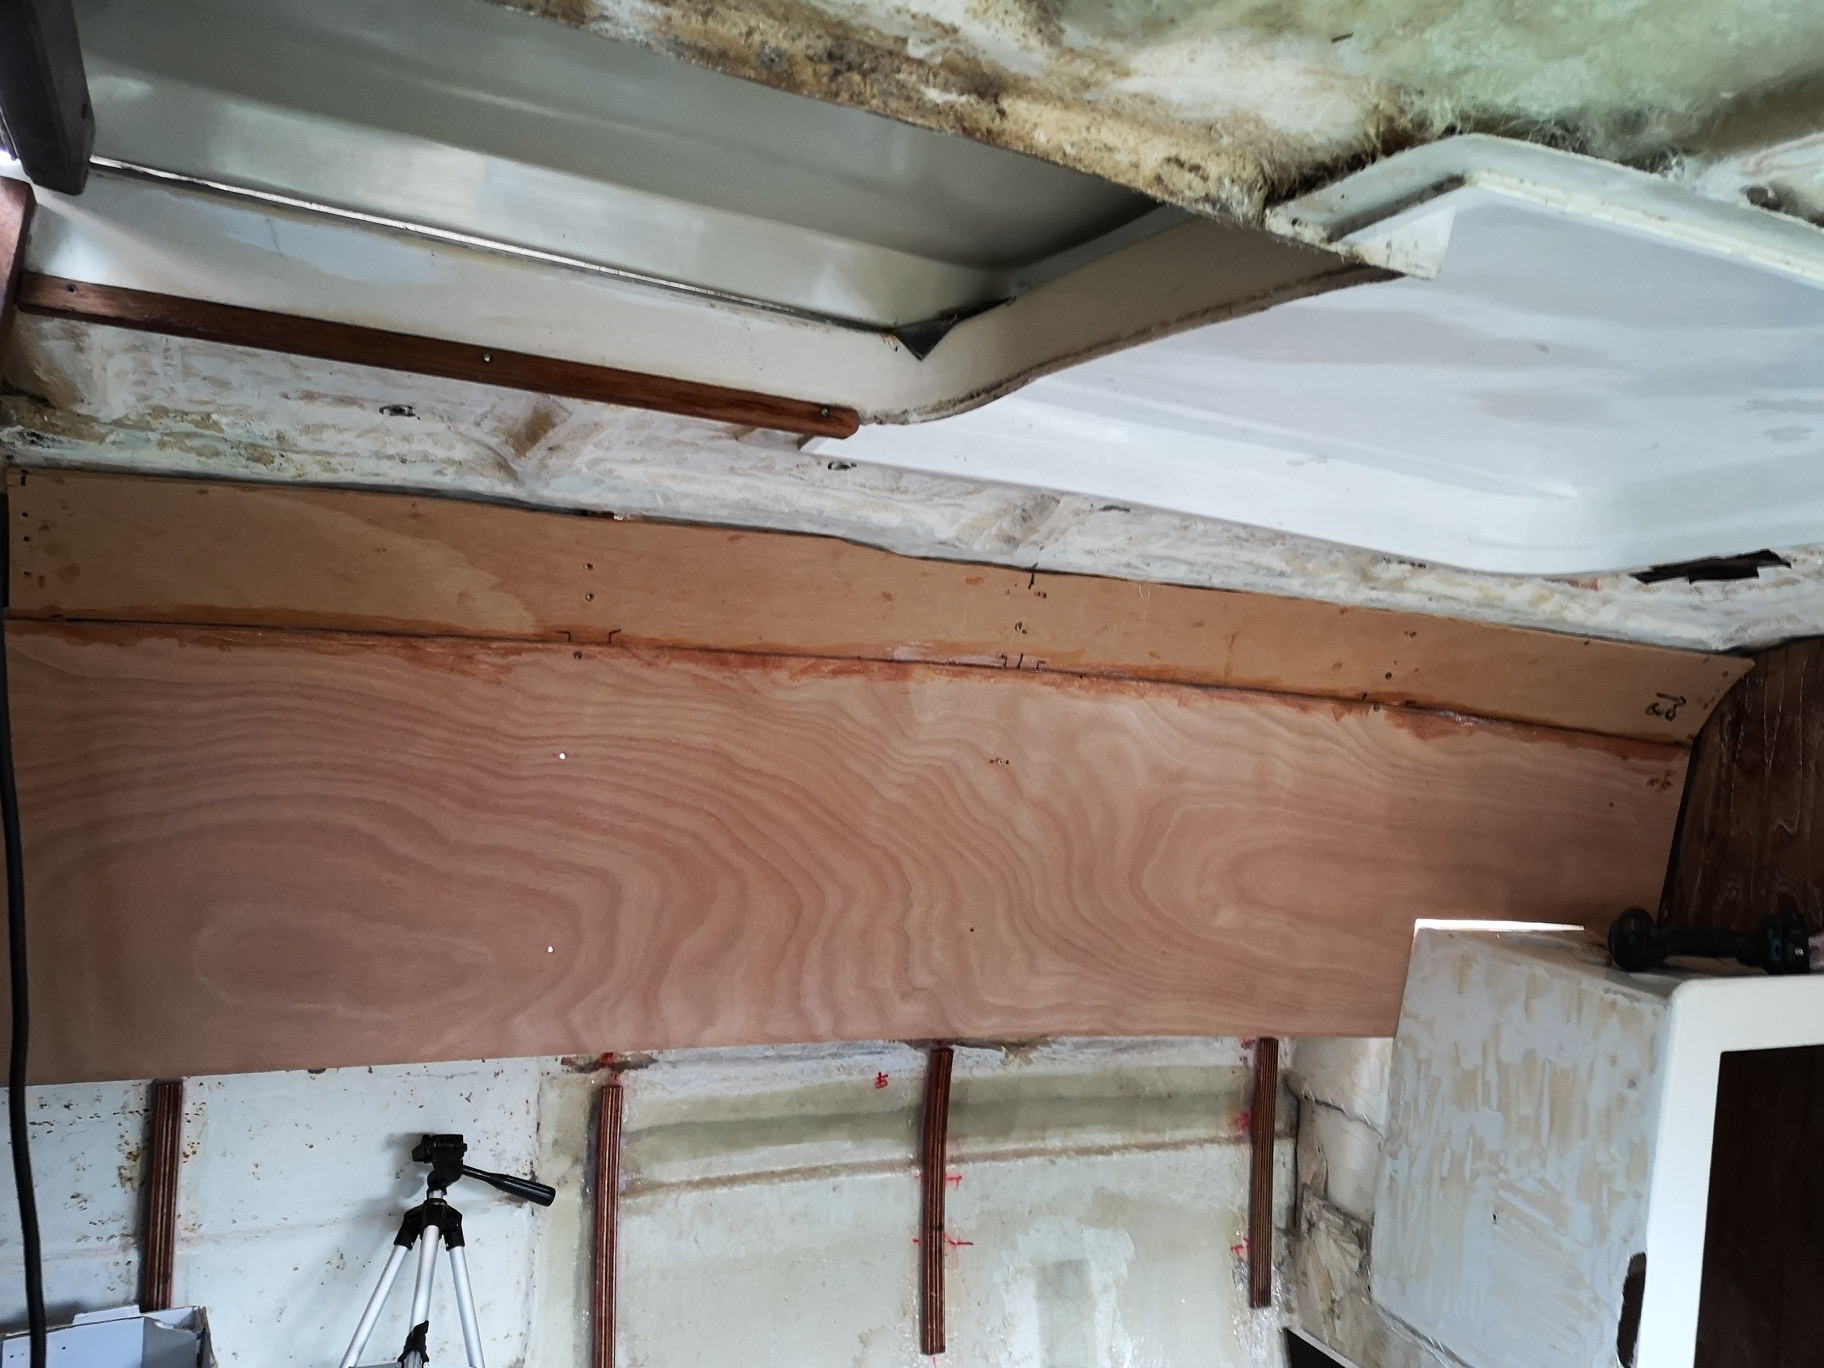
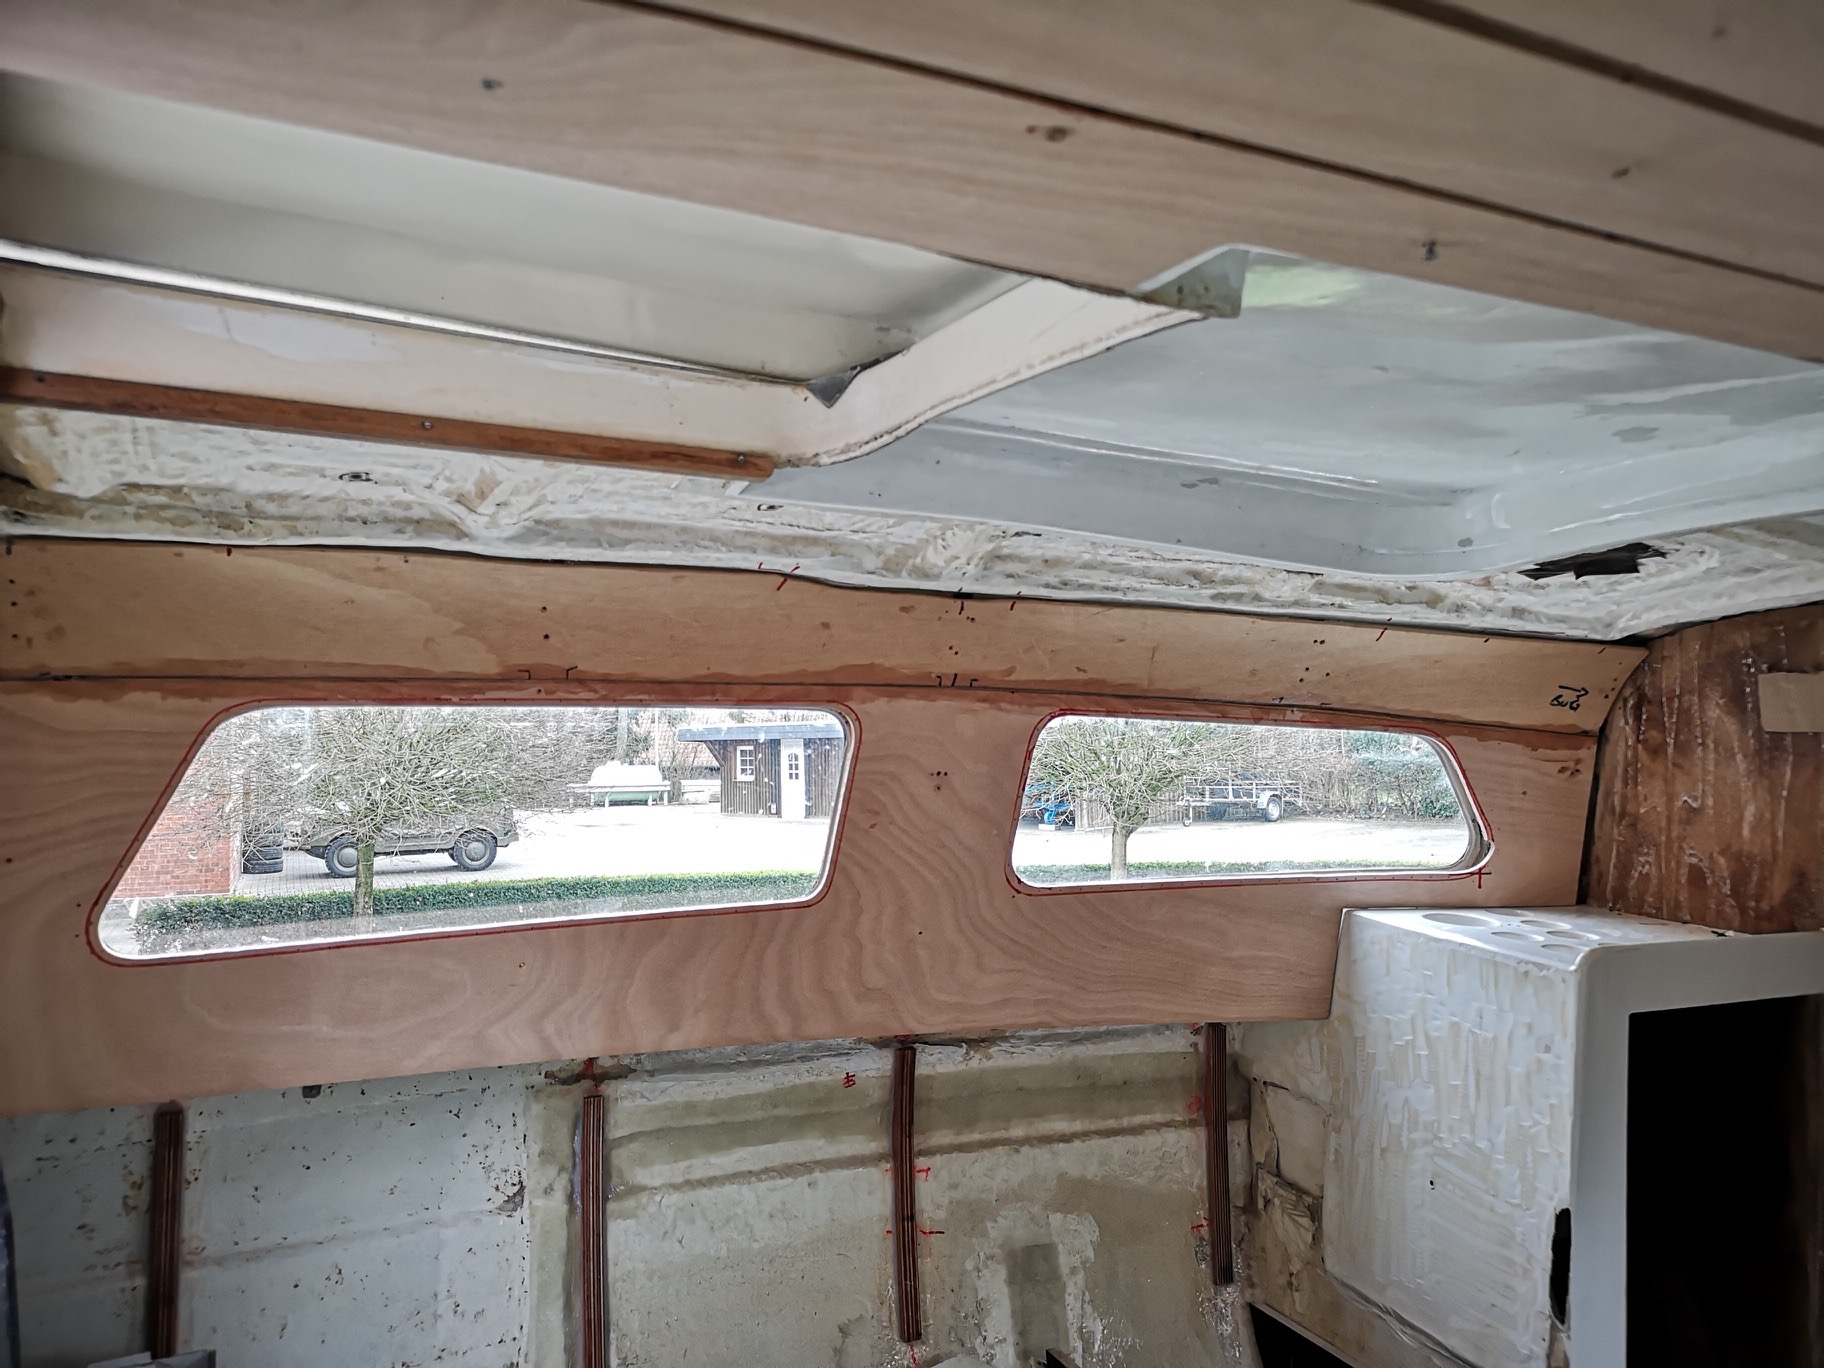
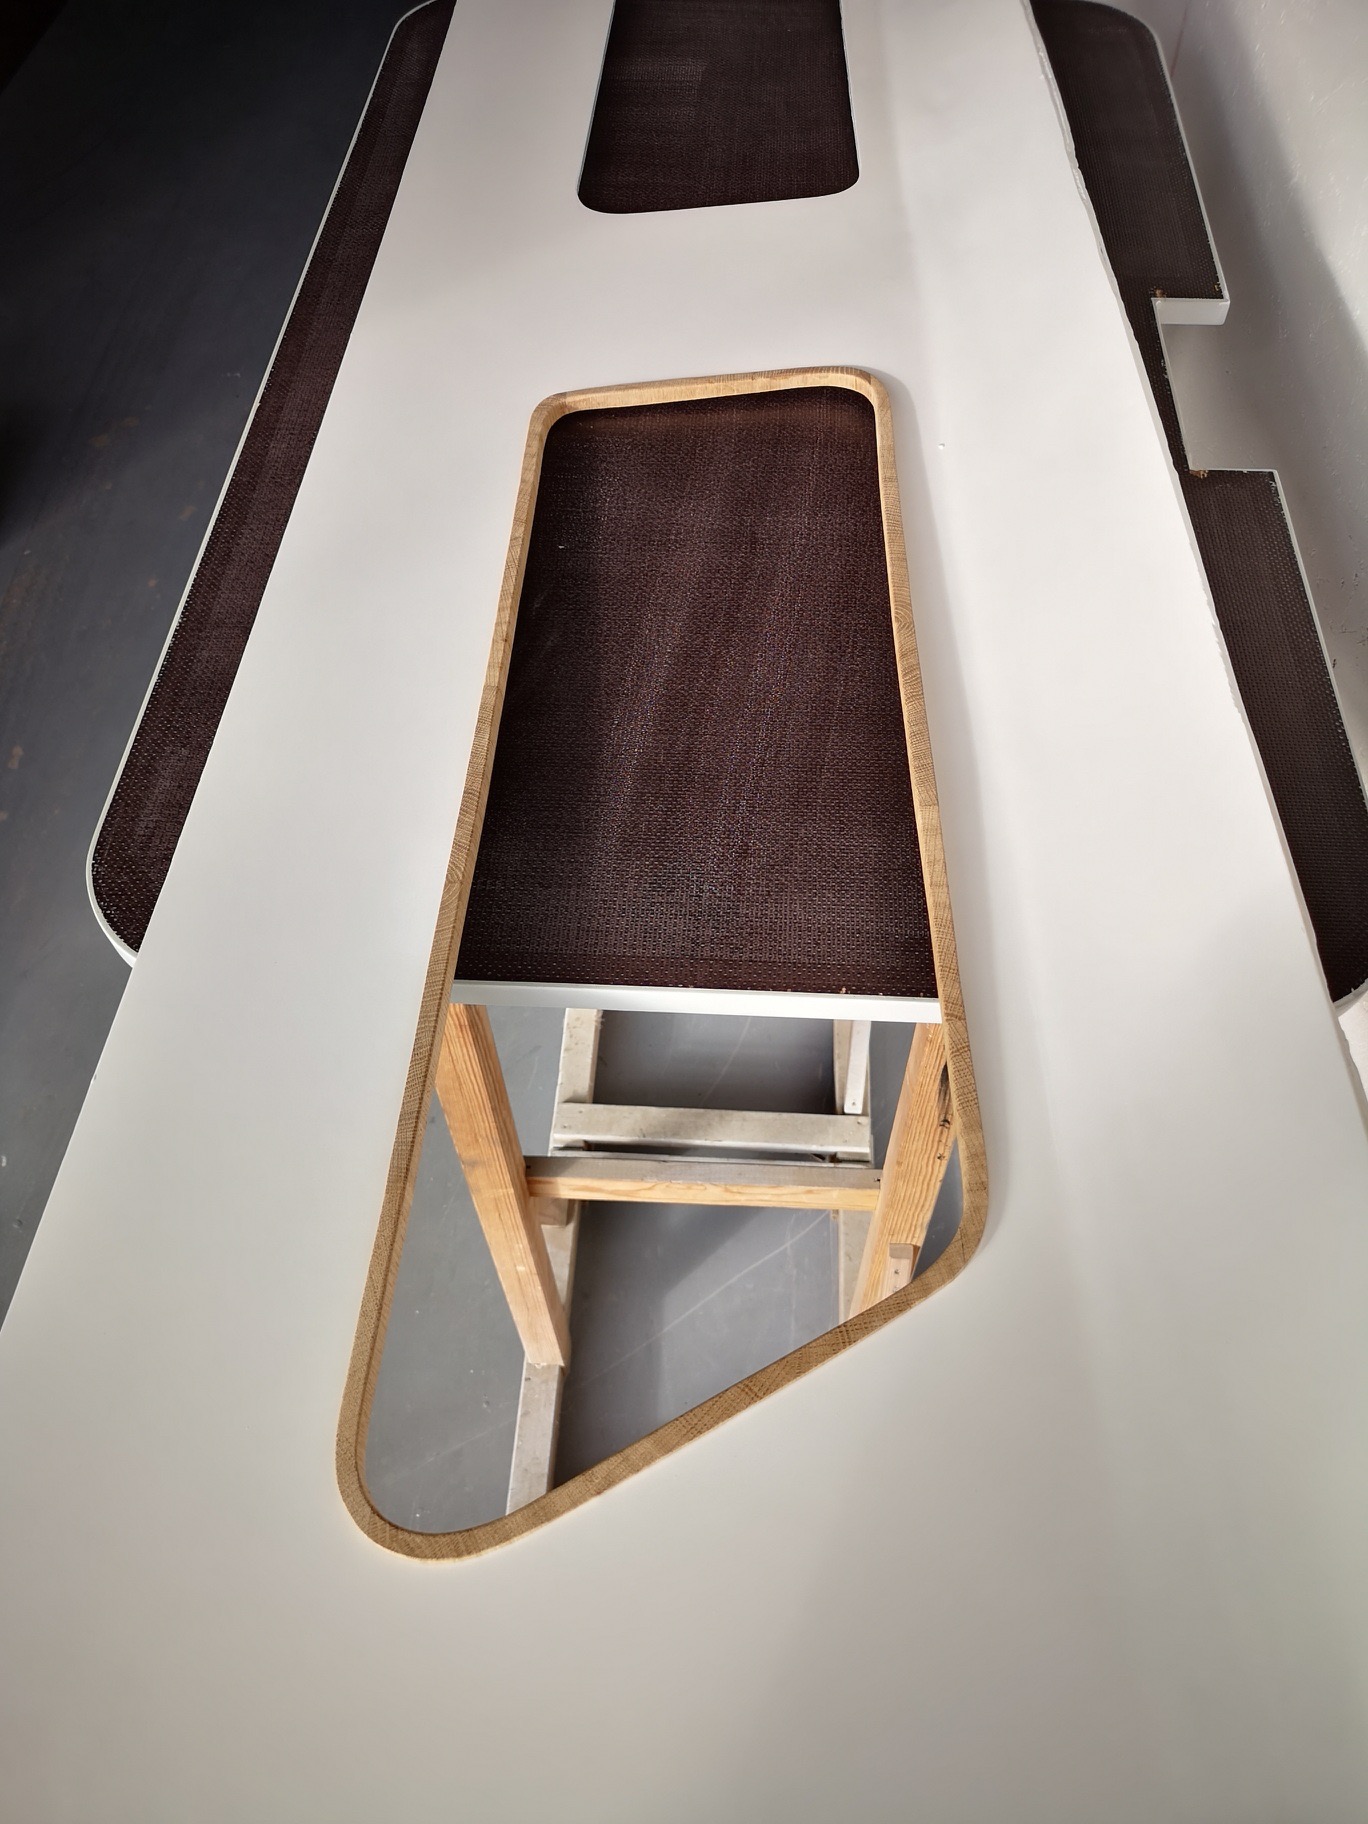
I milled out the windows with the help of a special bending ruler. The ruler can be screwed onto the plywood board and then offers the router a guide. When all the elements were sawn, I screwed them onto the frames and glued the top and bottom window panels together using epoxy filler.
14.12.2019
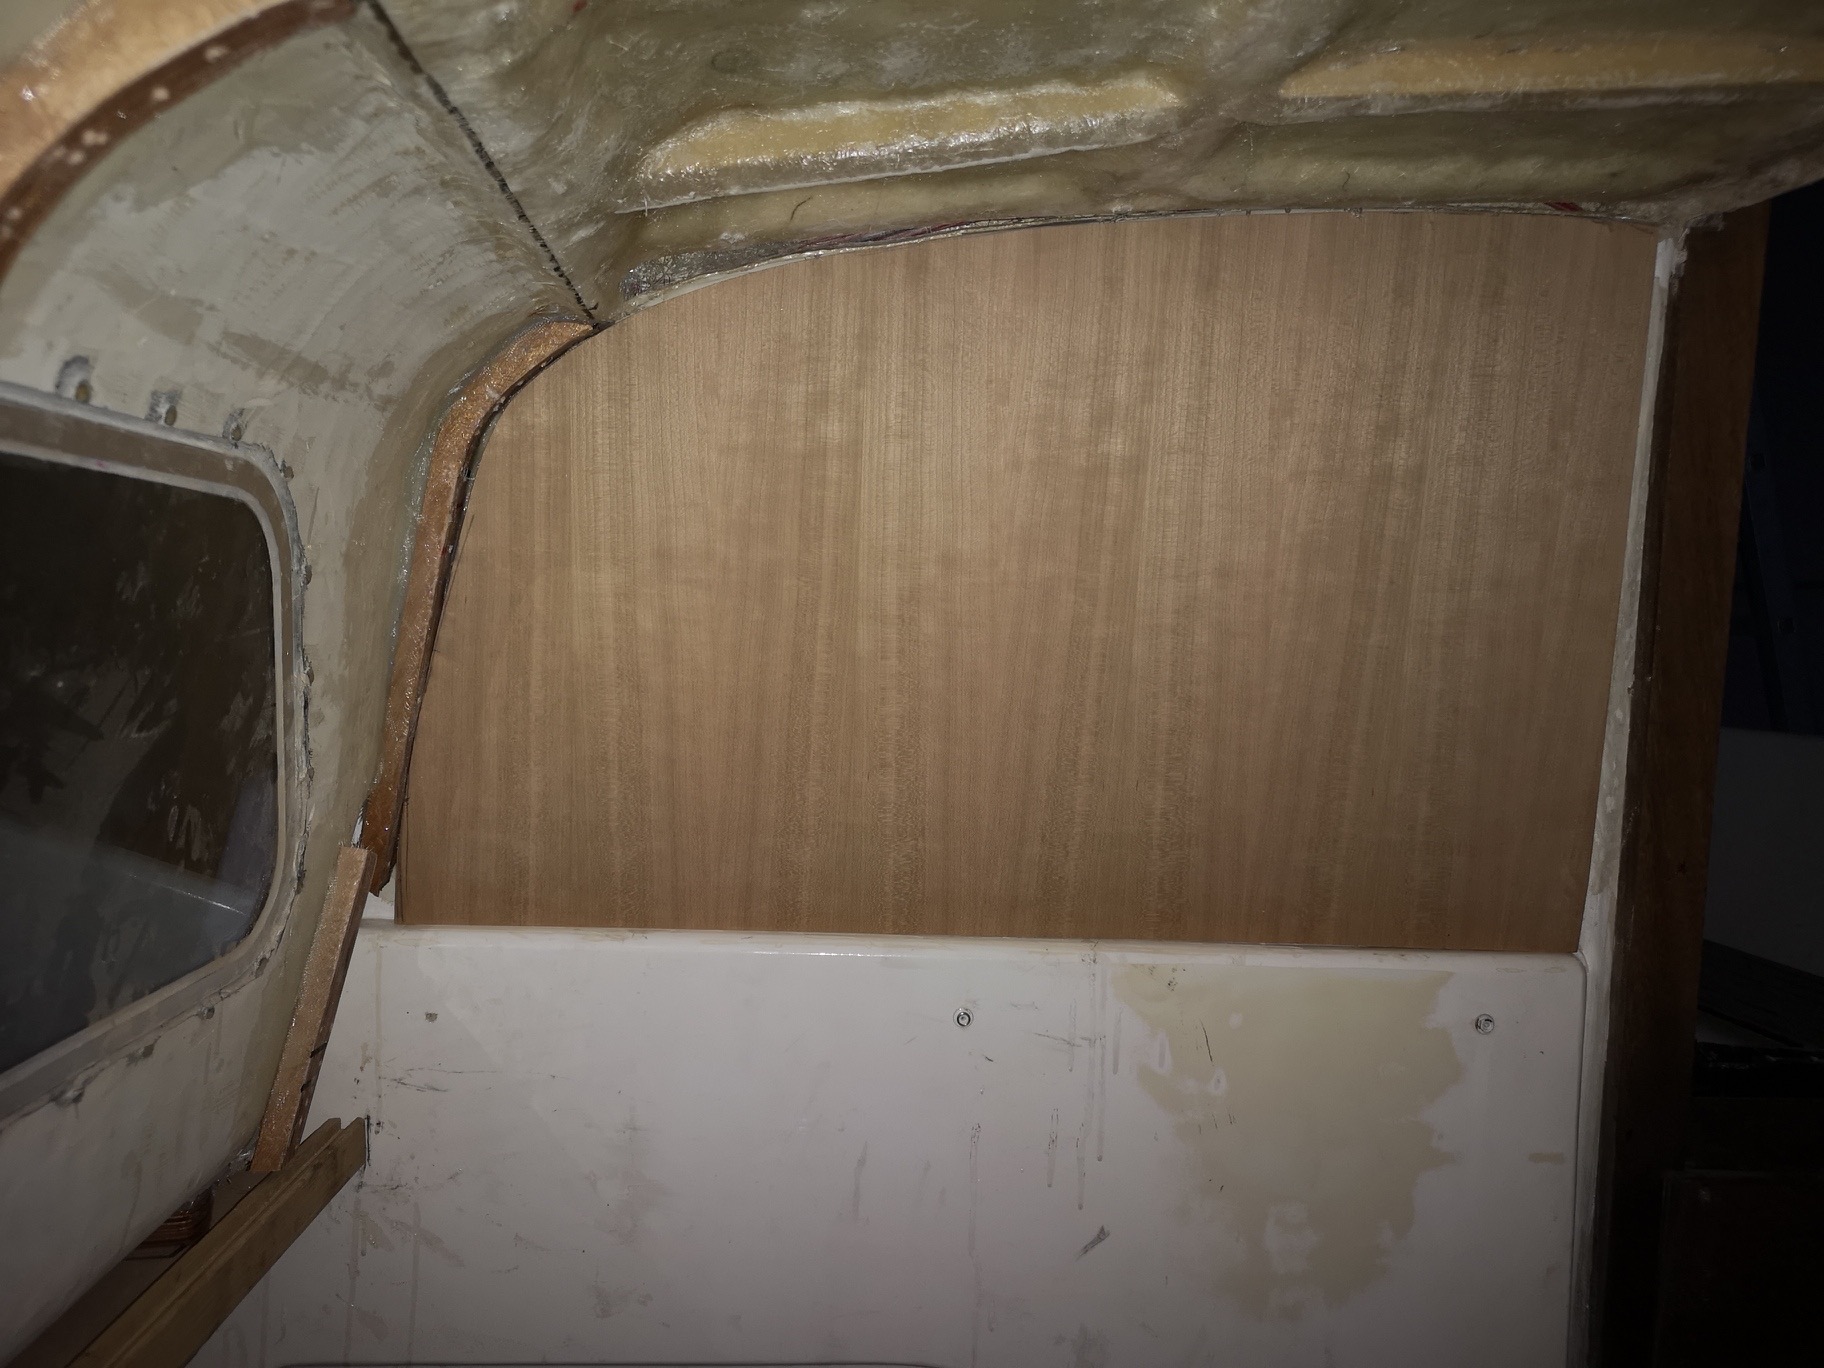
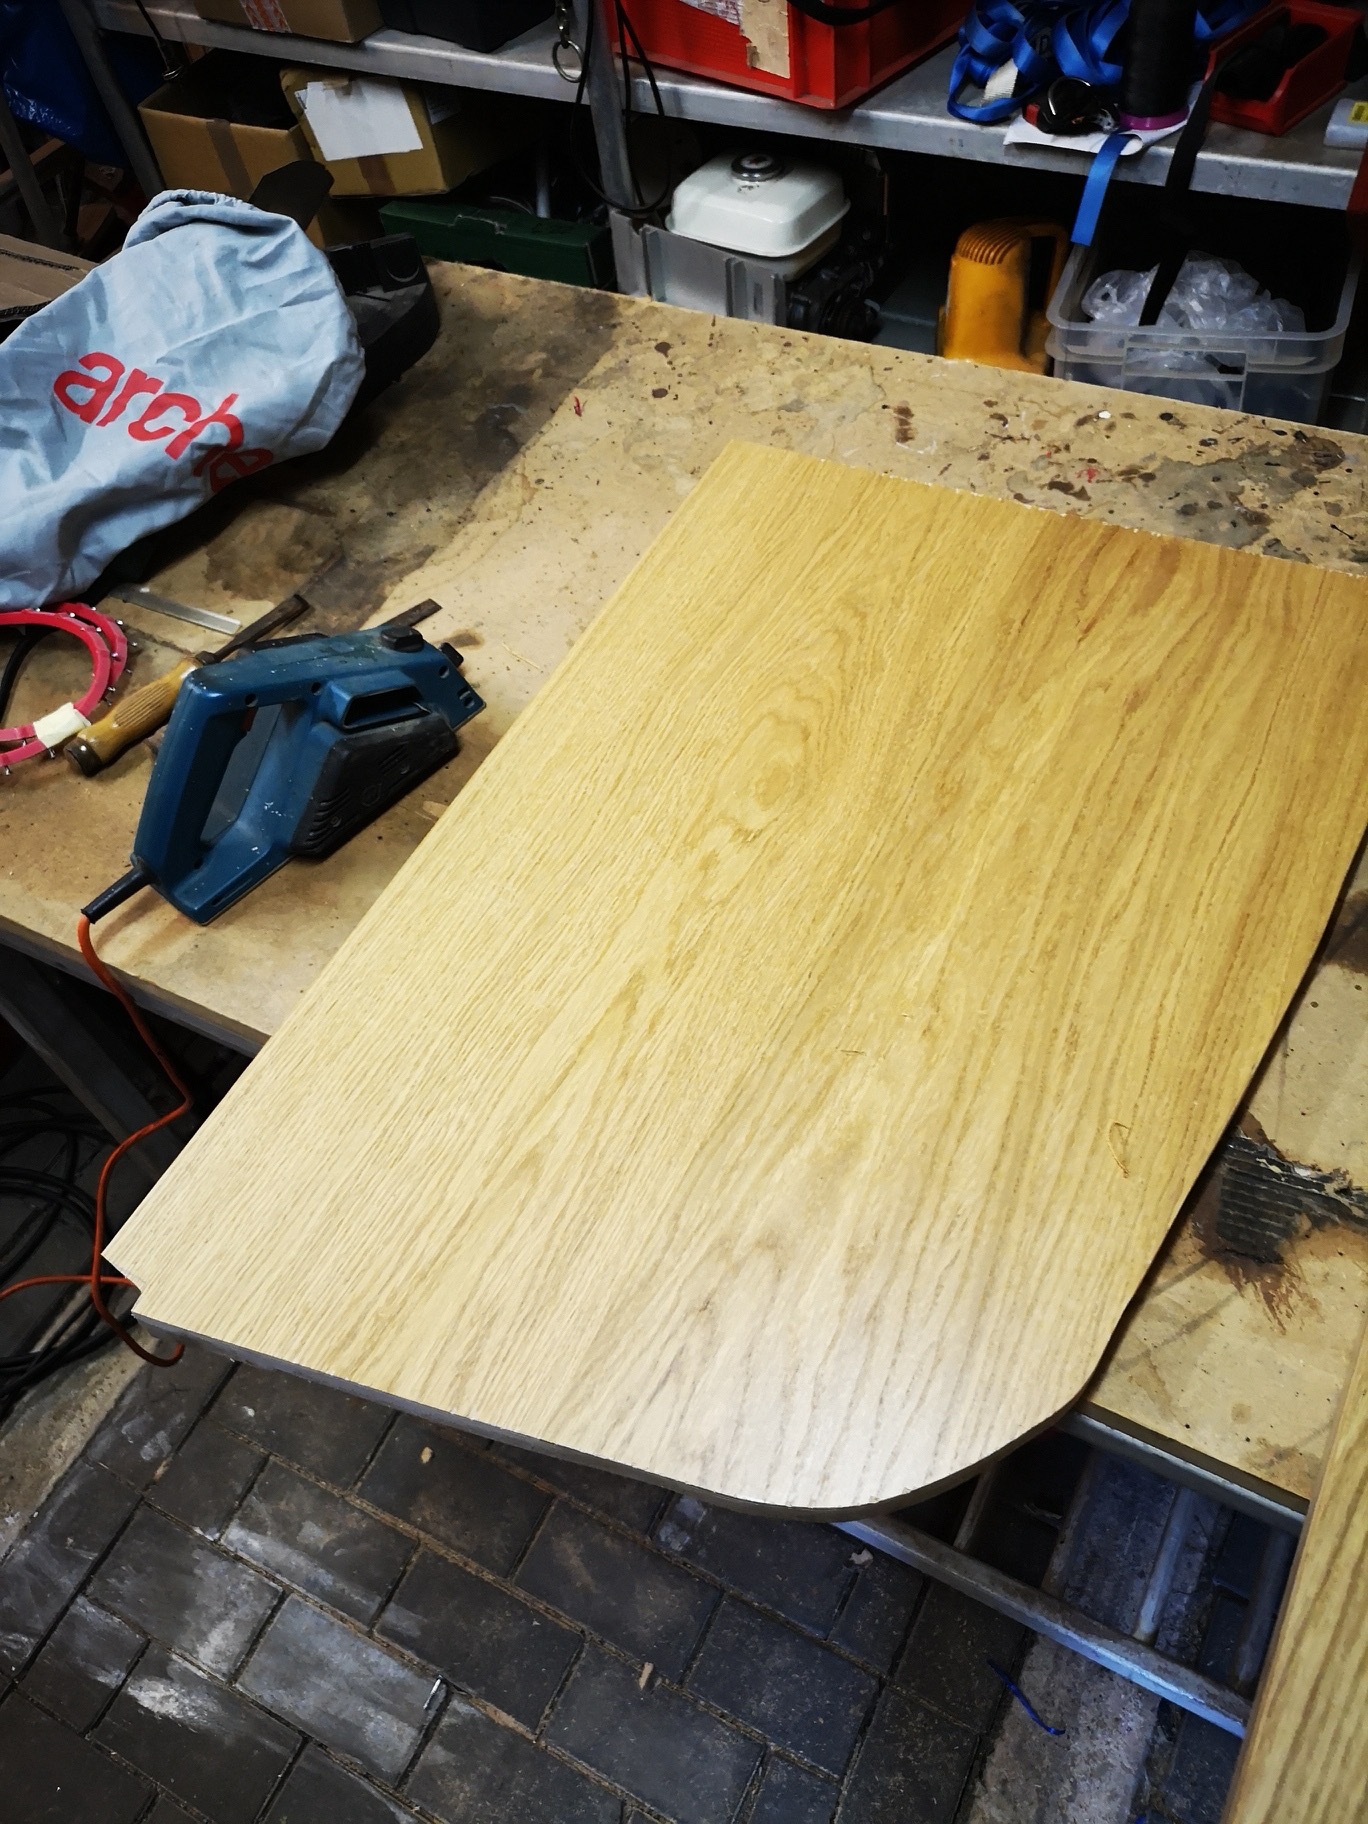
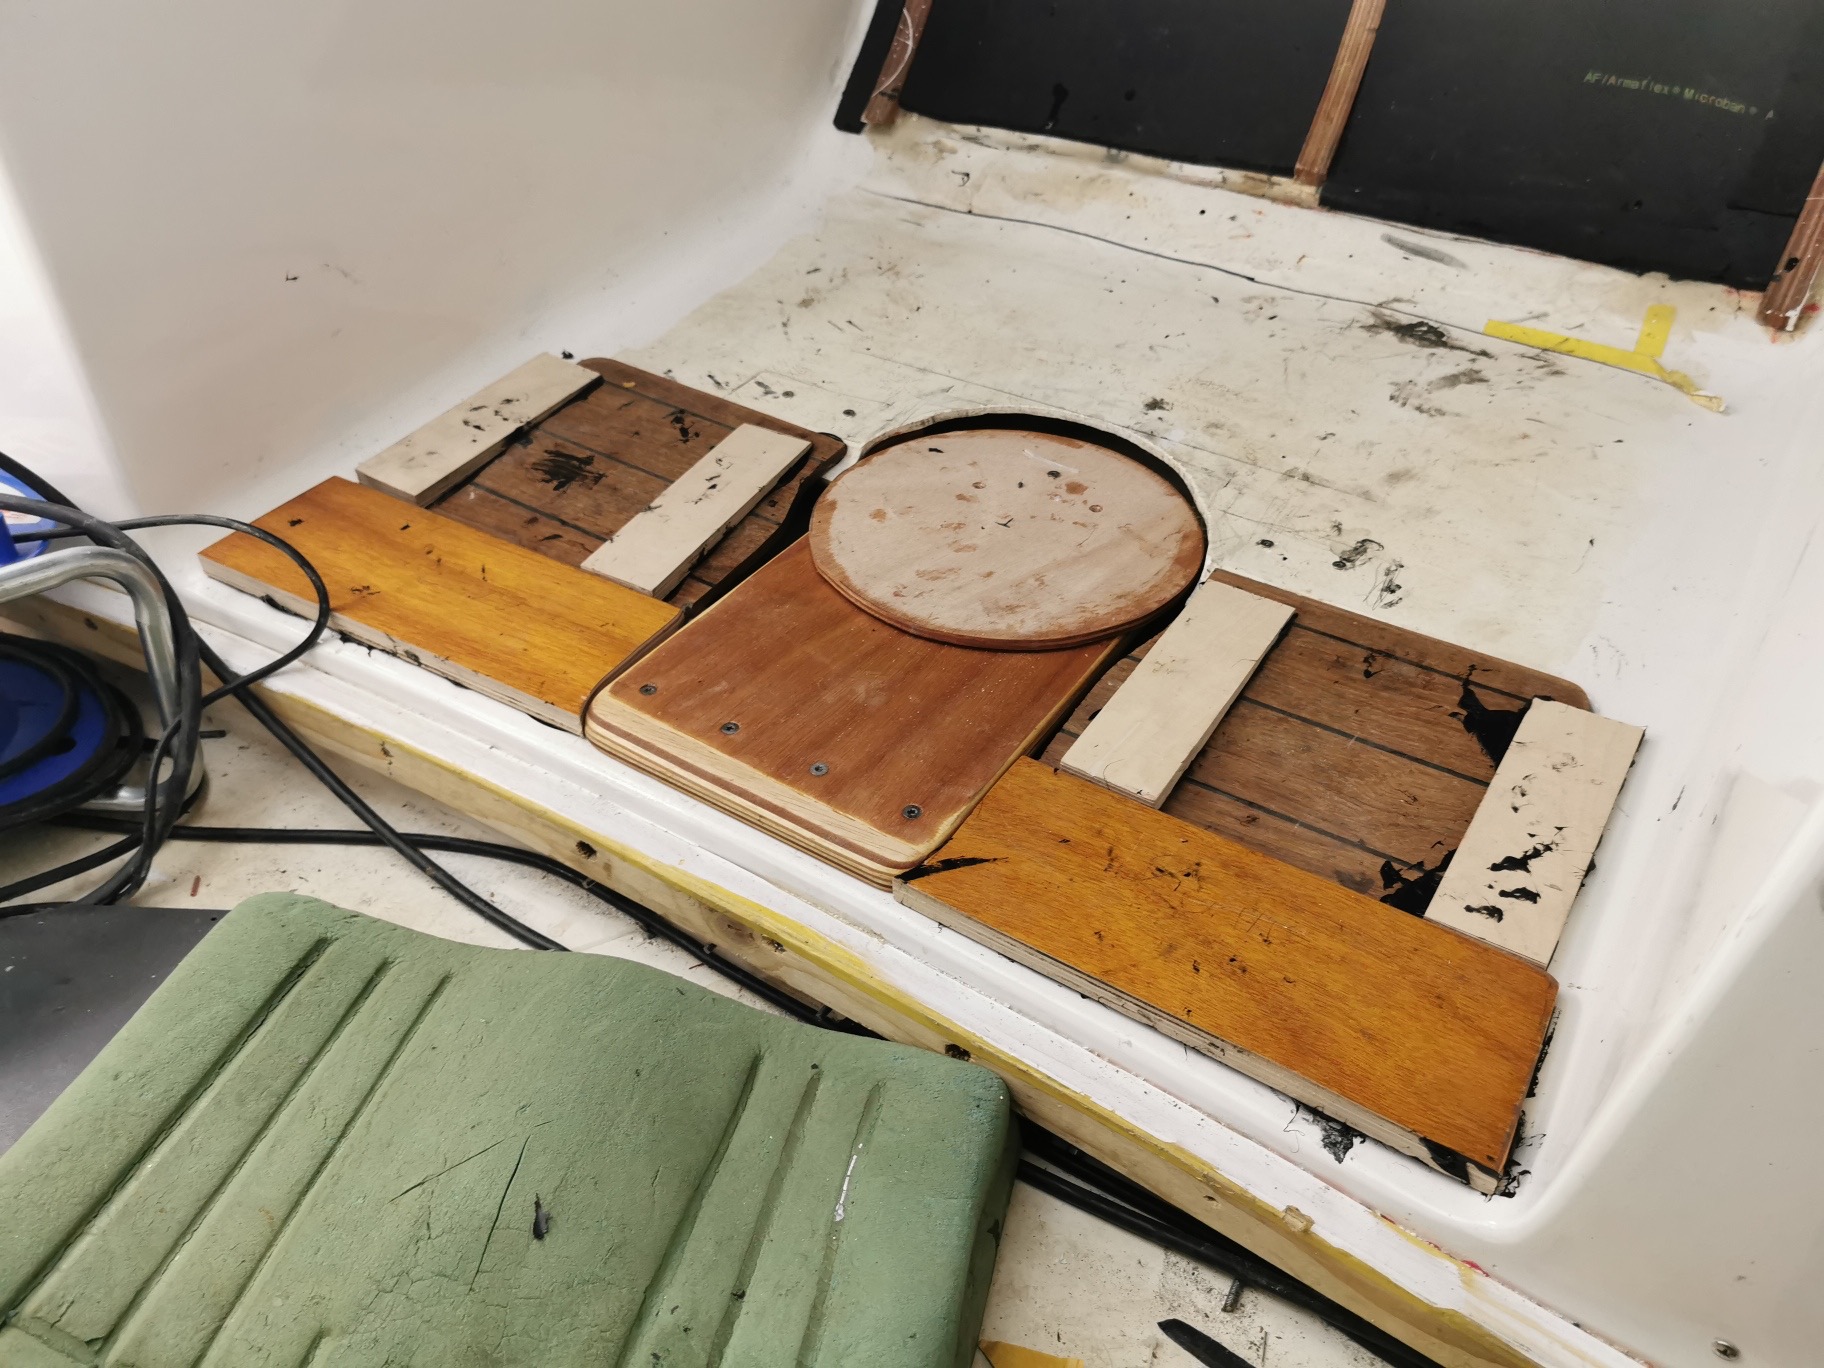
While the new side panels still have to rest, I put the old ceiling panel back on to take measurements for the new ceiling panel.
... Then I sawed and adjusted the plywood veneered with cherry wood.
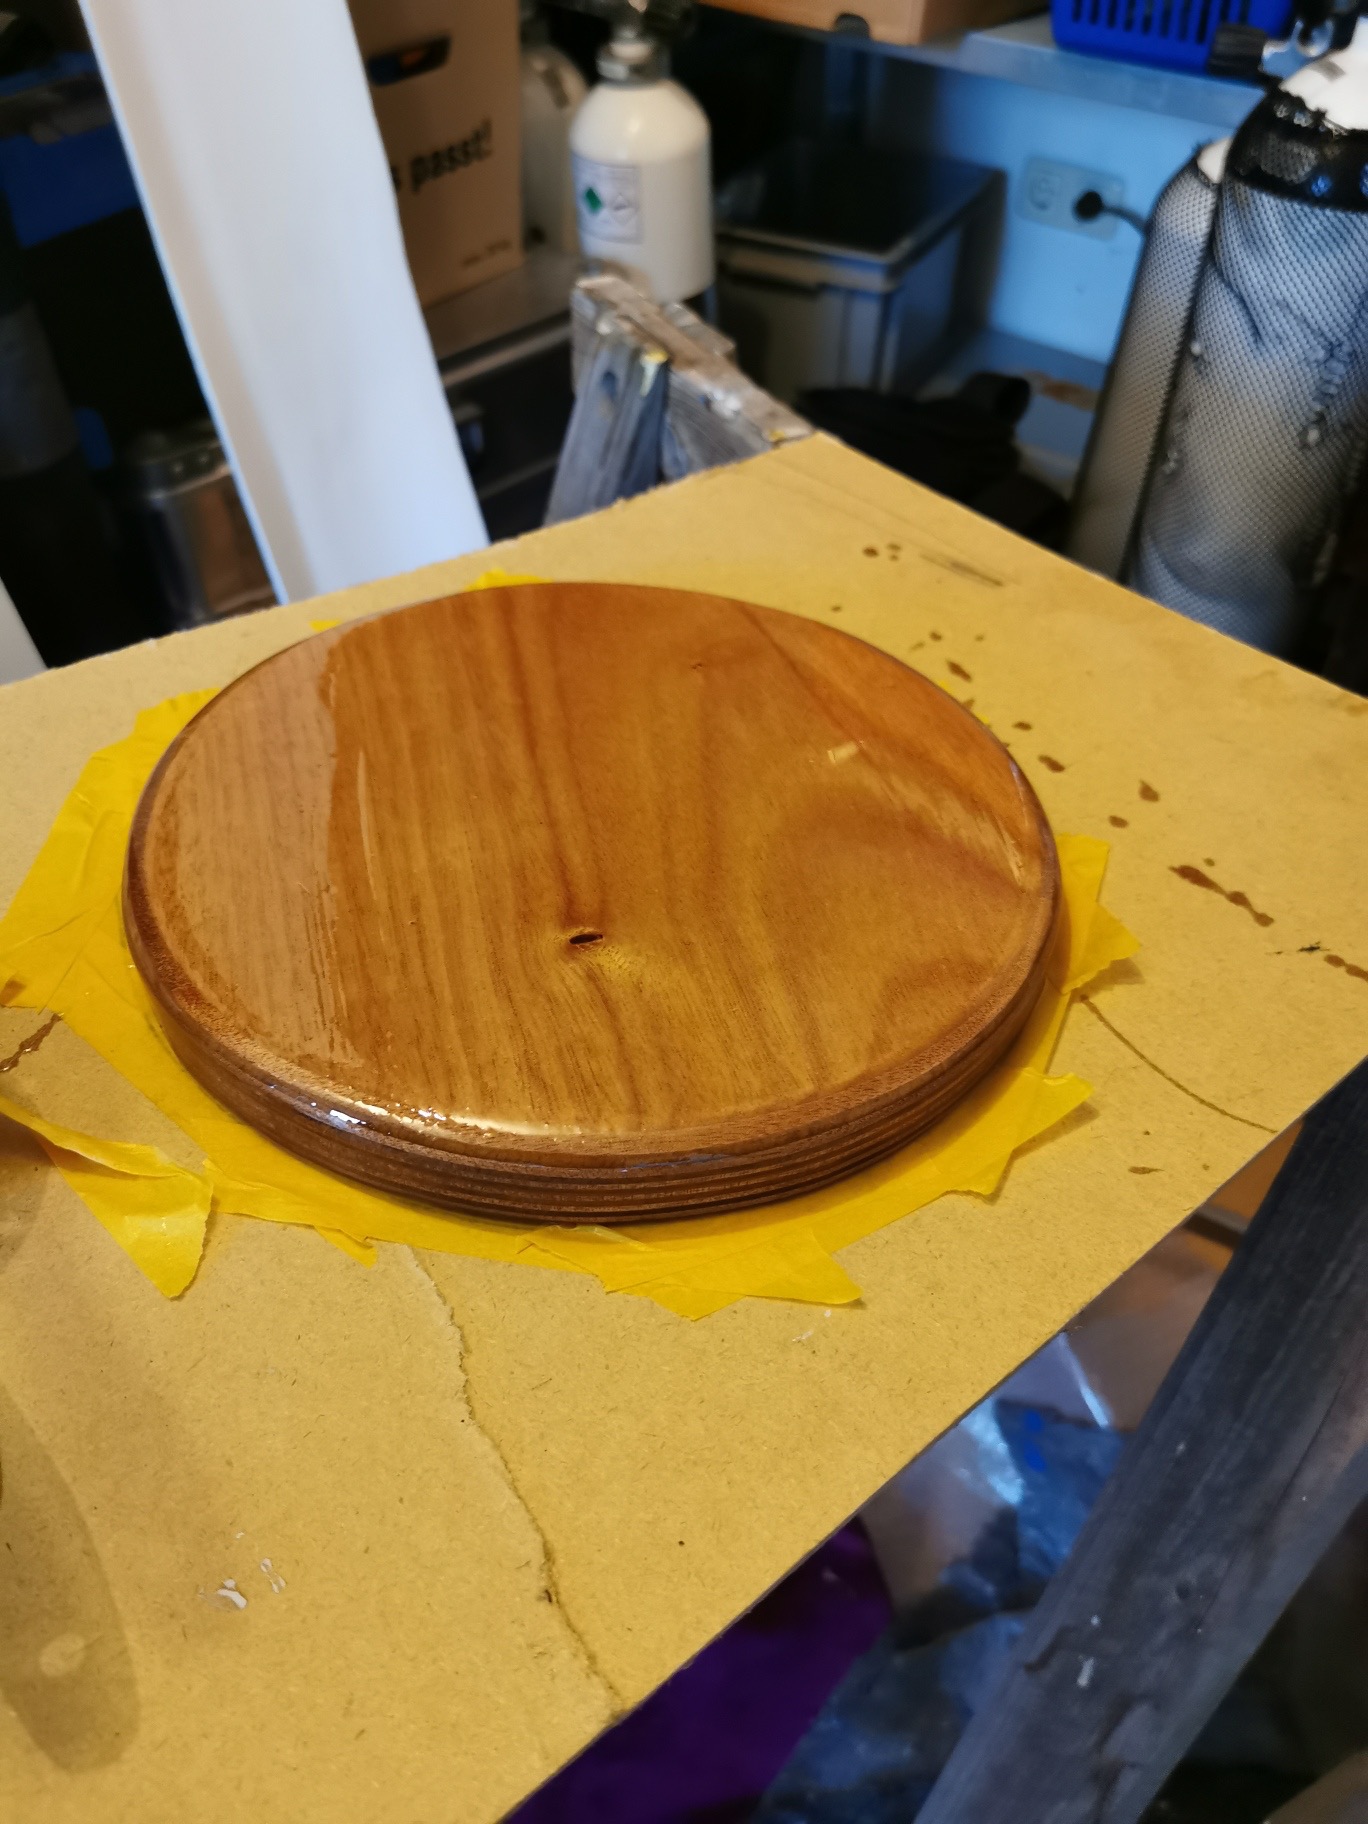
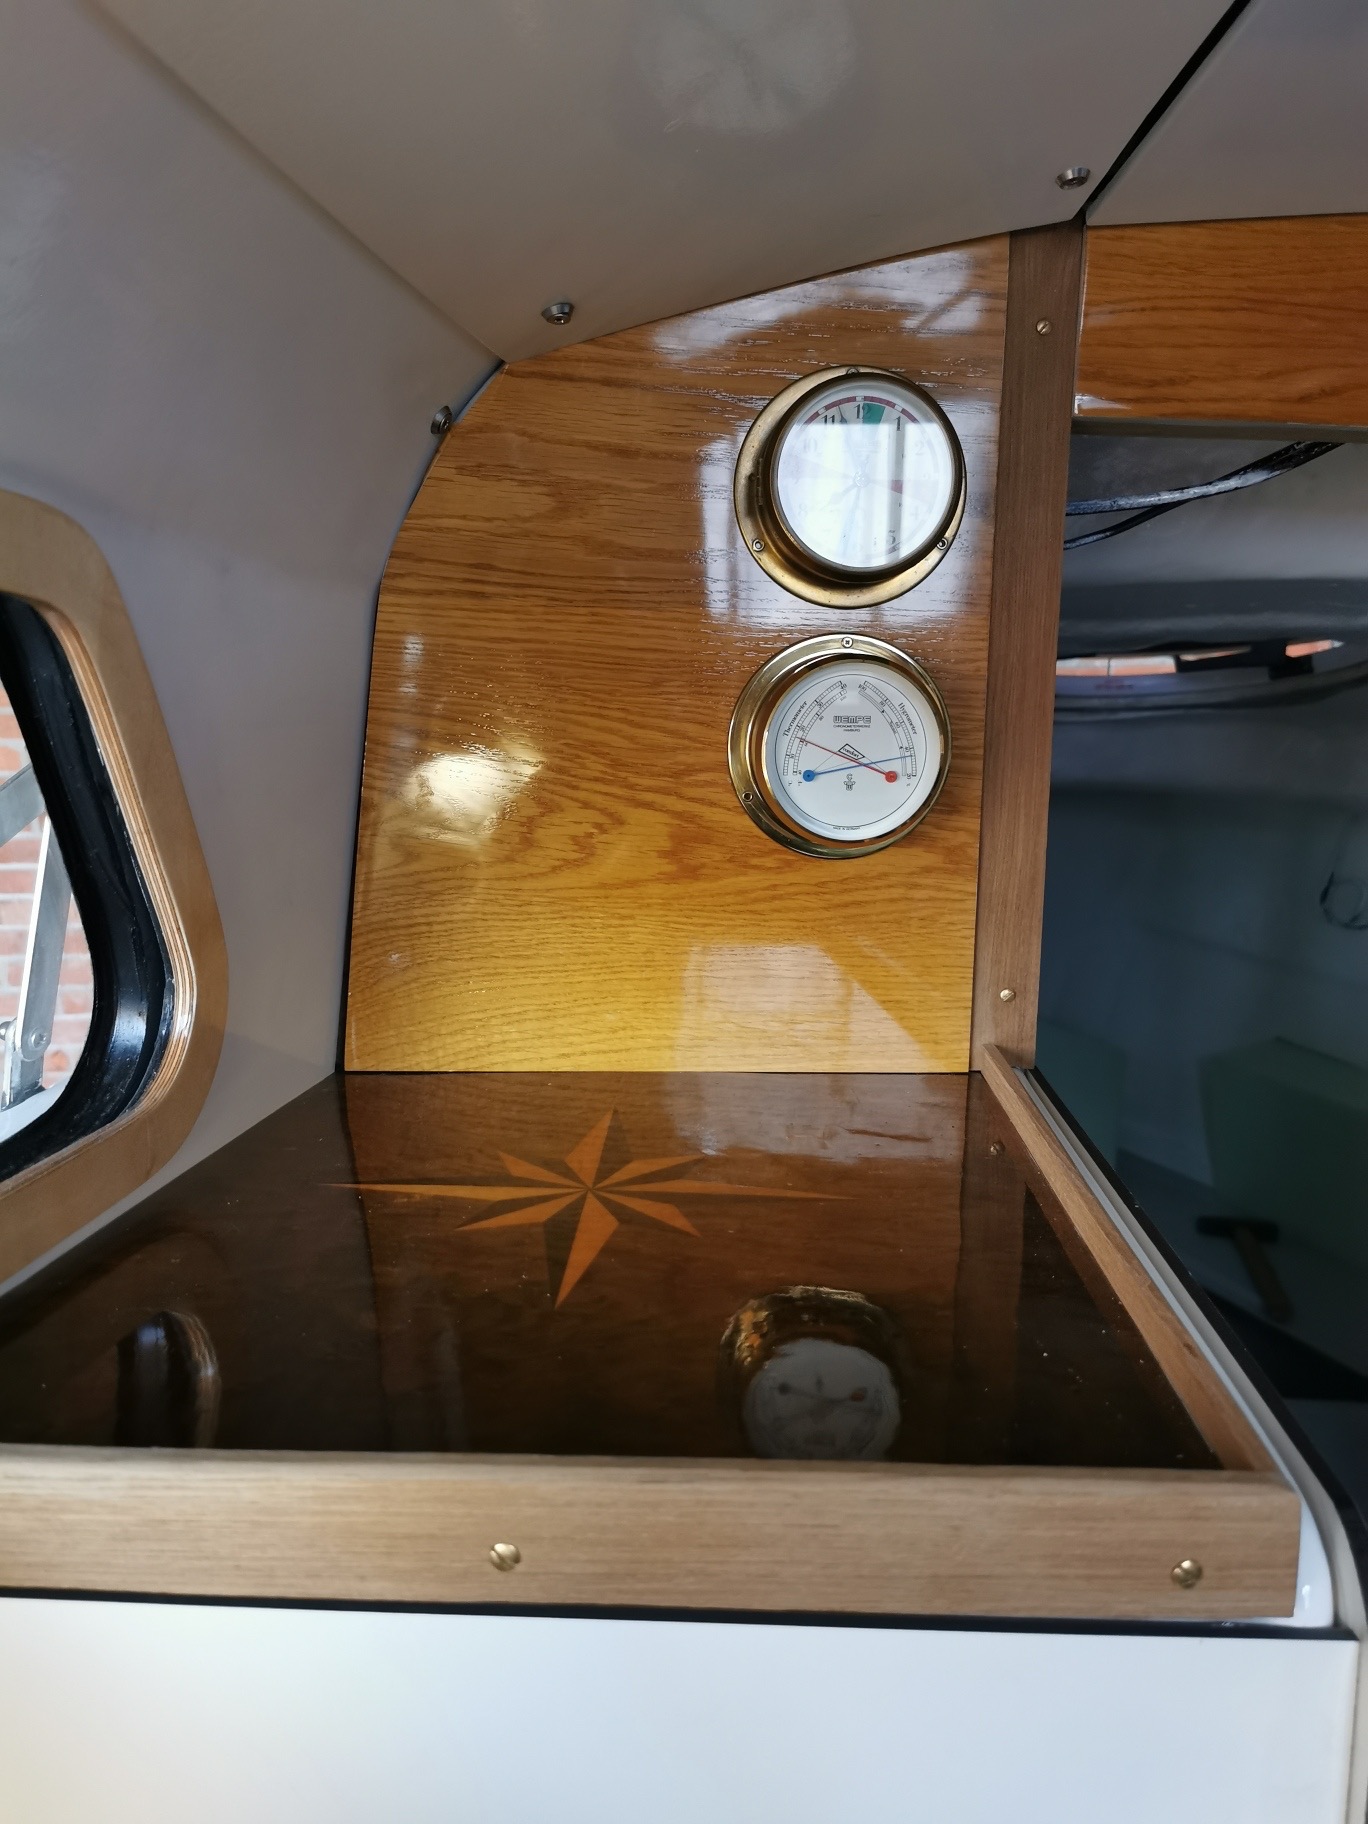
Before the plate can be glued in, it must be sealed with a clear varnish. A porthole should also be installed there.
15.12.2019
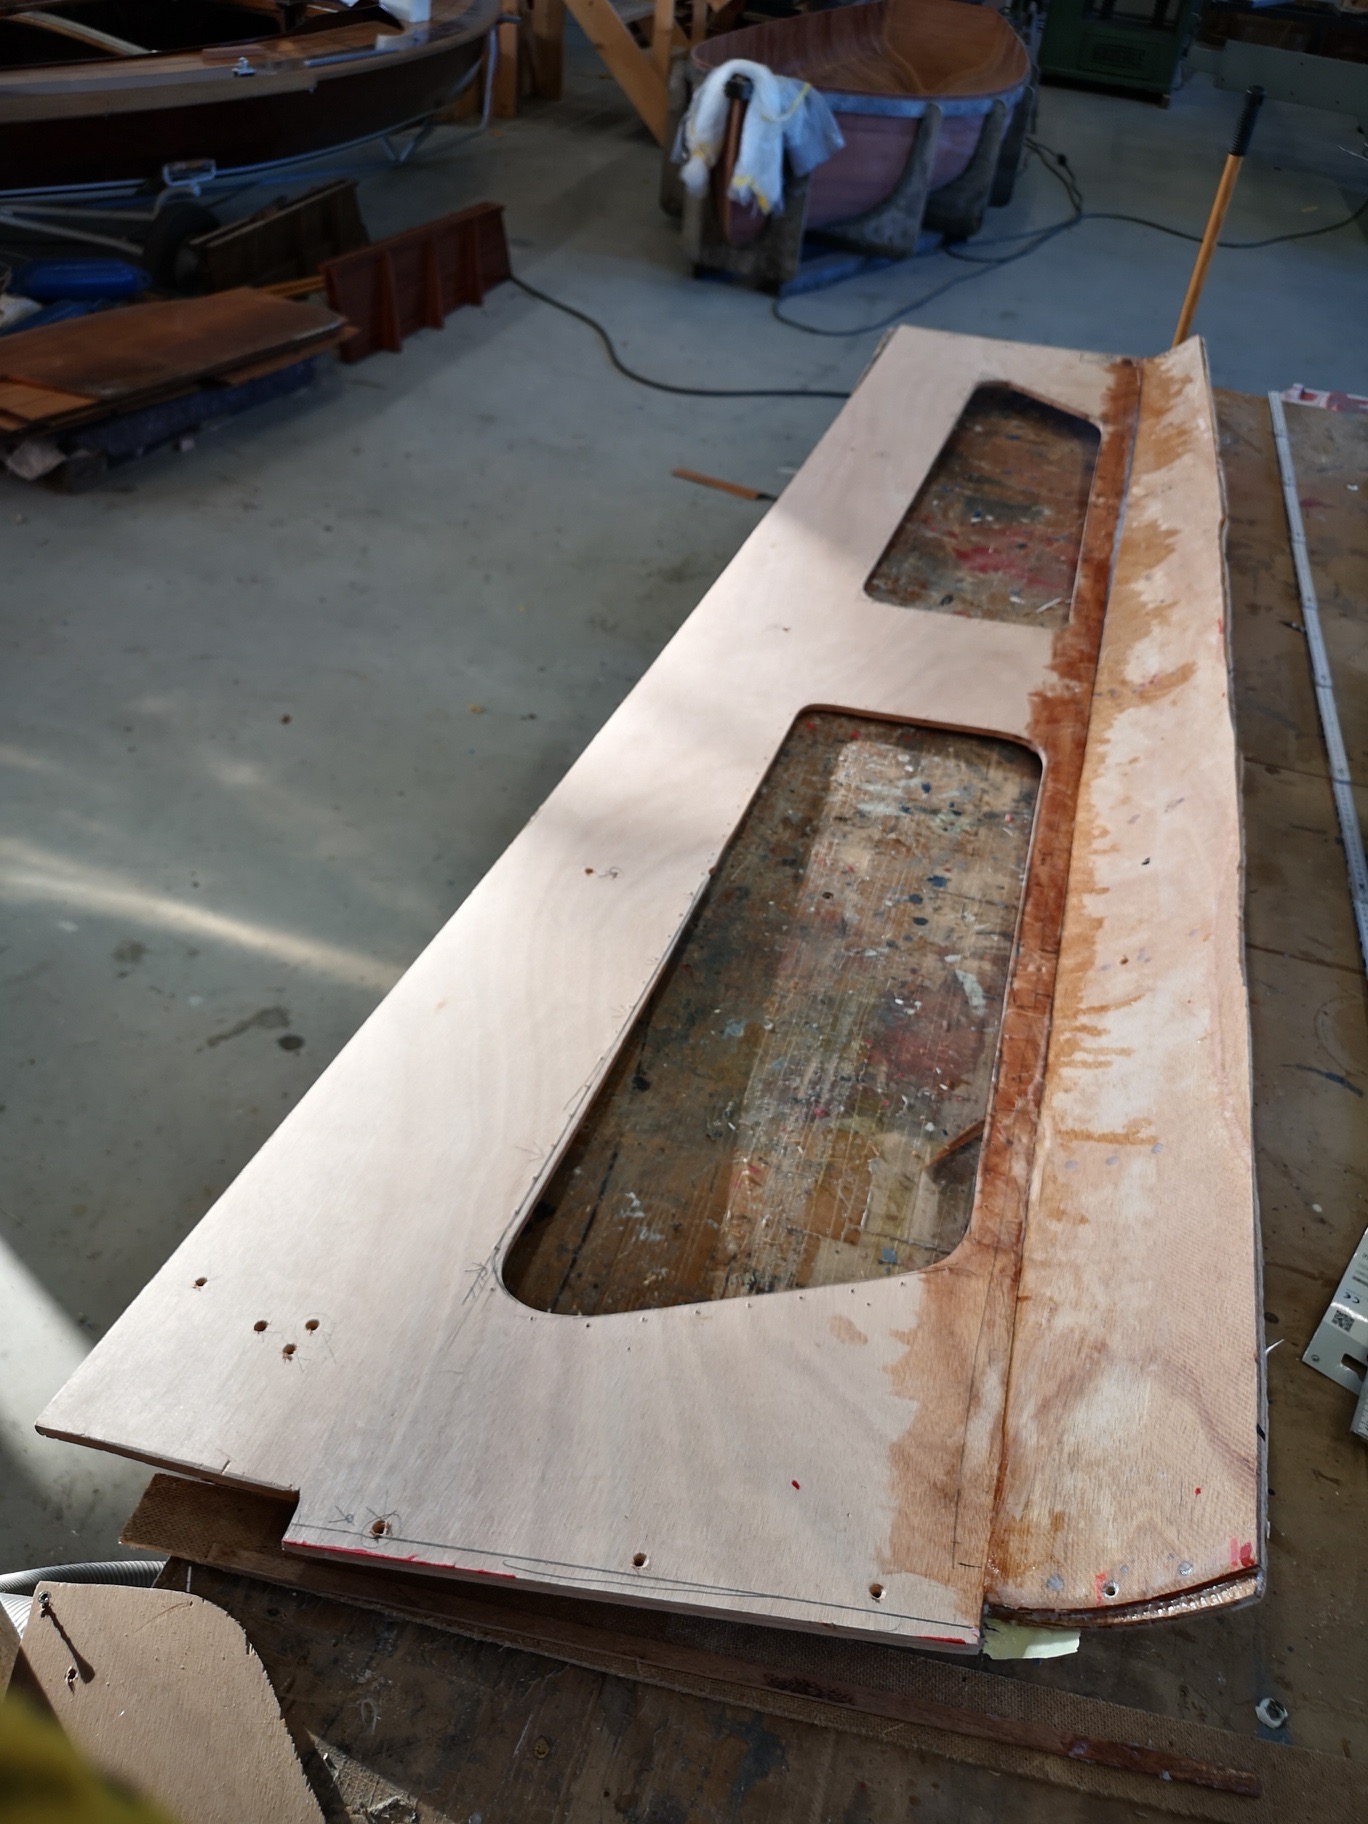
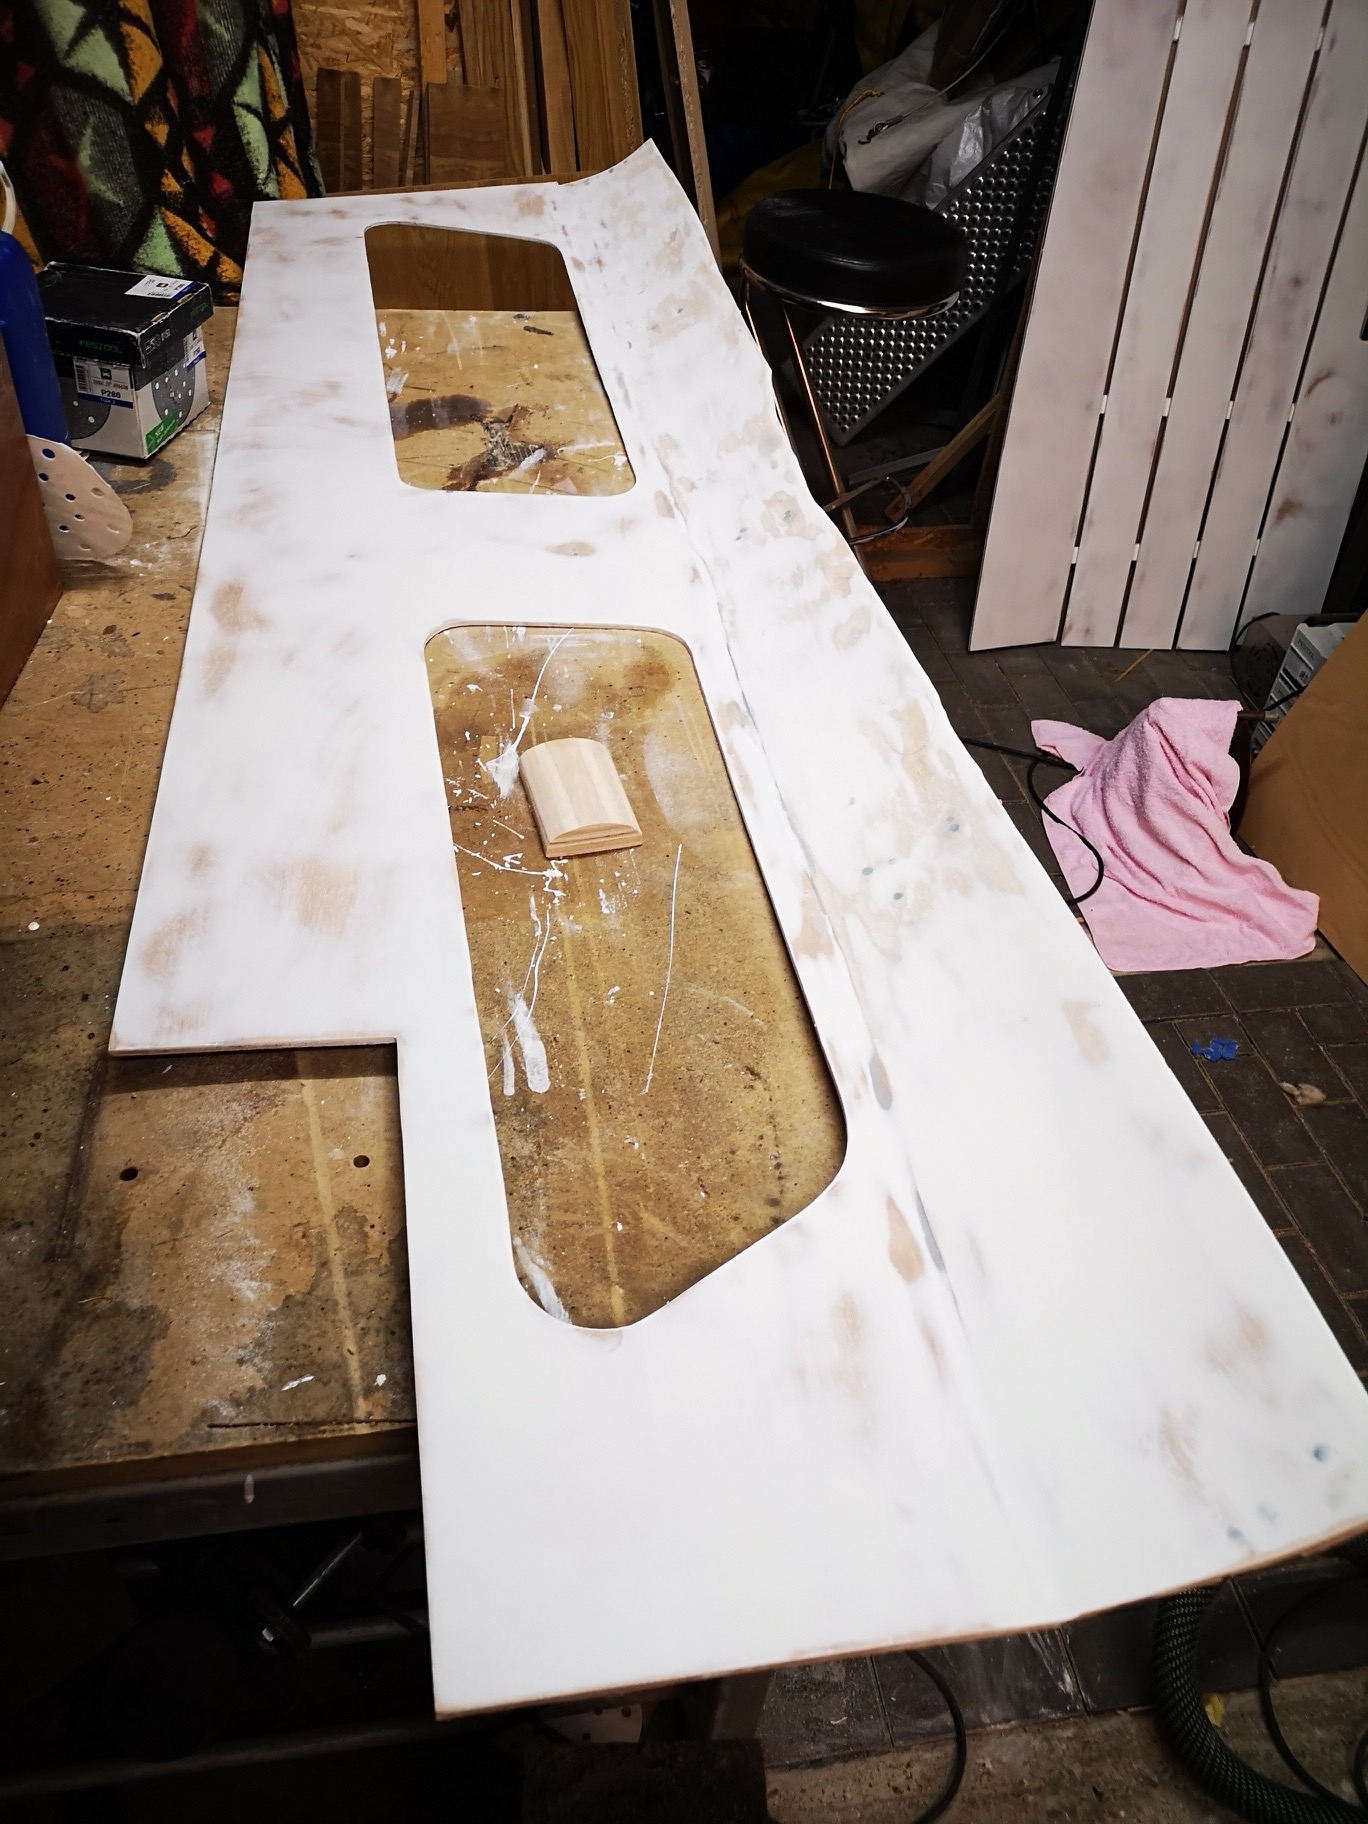
The upper and lower part of the side cladding are now connected after 48 hours of curing and I was able to remove the cladding again to sand, fill, refinish and prime.
Tomorrow the primer will be sanded again.
So, the primer is applied and I'm glad that I'm now slowly finished with the starboard side paneling.
o The bulkhead cladding in the salon
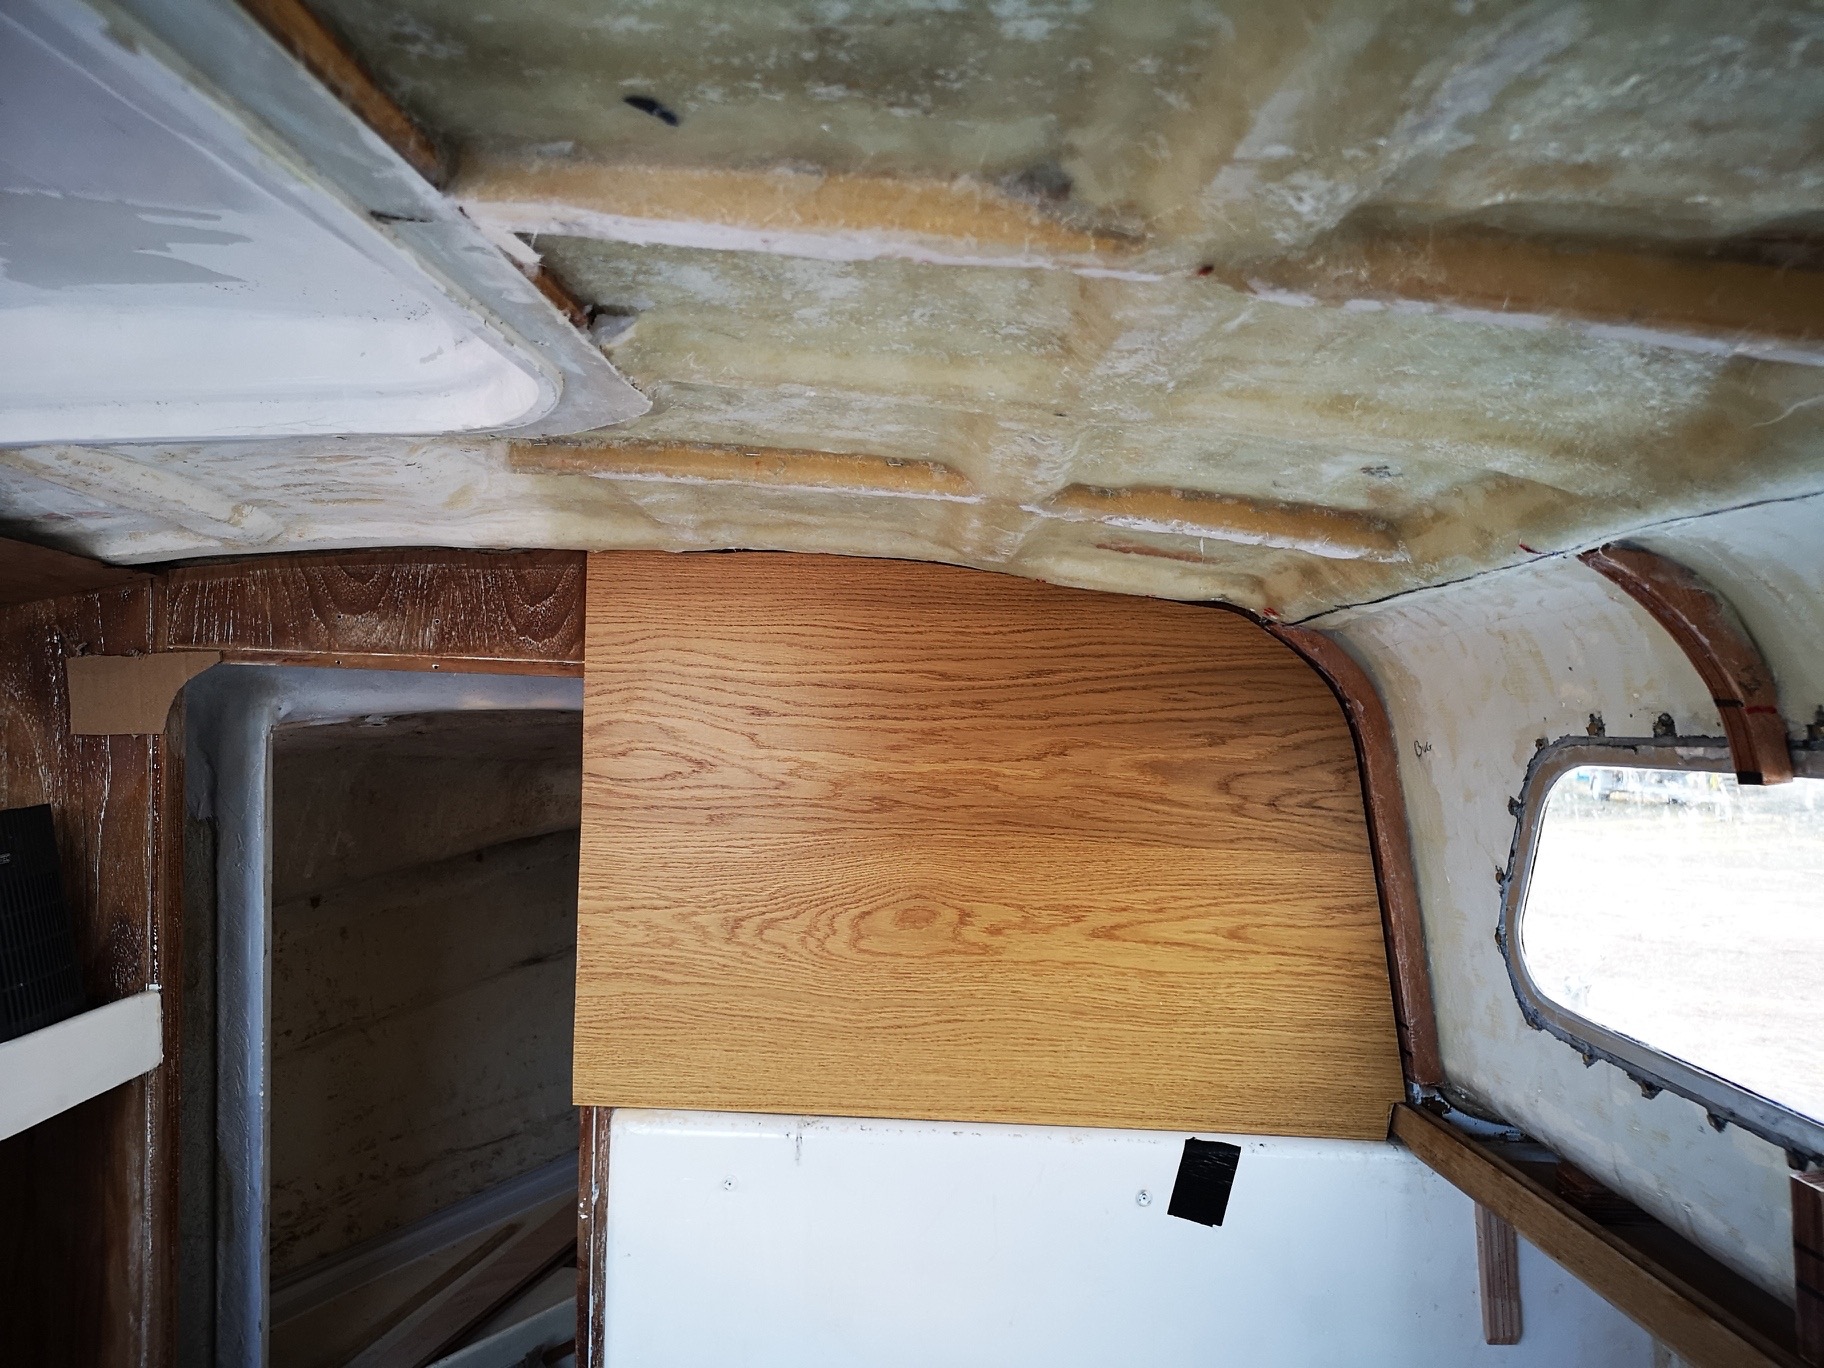
I have changed my mind and I will no take cherry veneer as cladding for the salon bulkheads. Instead there is this beautifully grained oak.
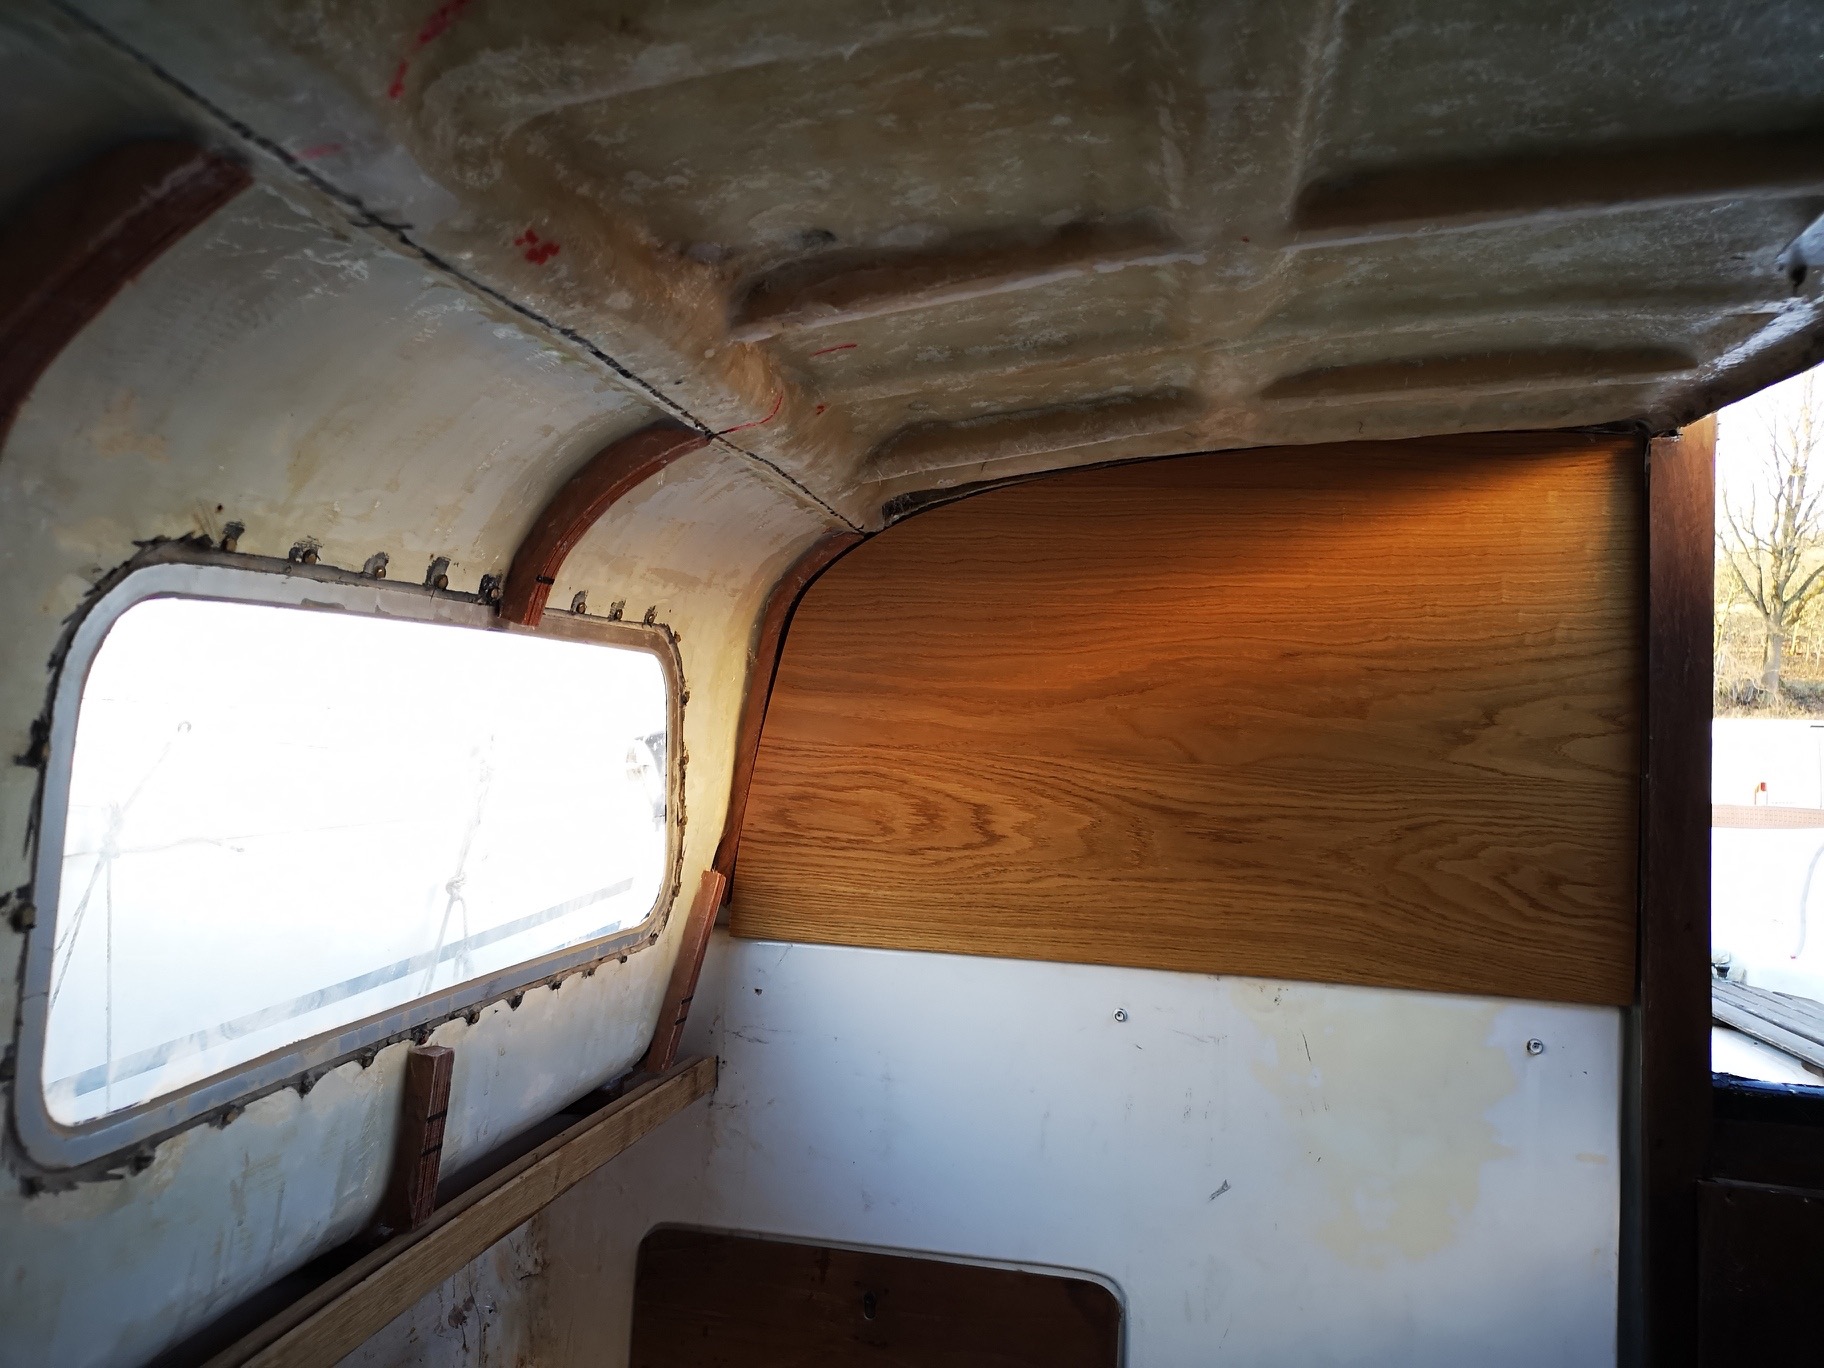
Here I tried out the new bulkhead-cladding to see how it looked.
30.+ 31.12.2019
The boat owner is satisfied ;-)
o The side panel in the salon
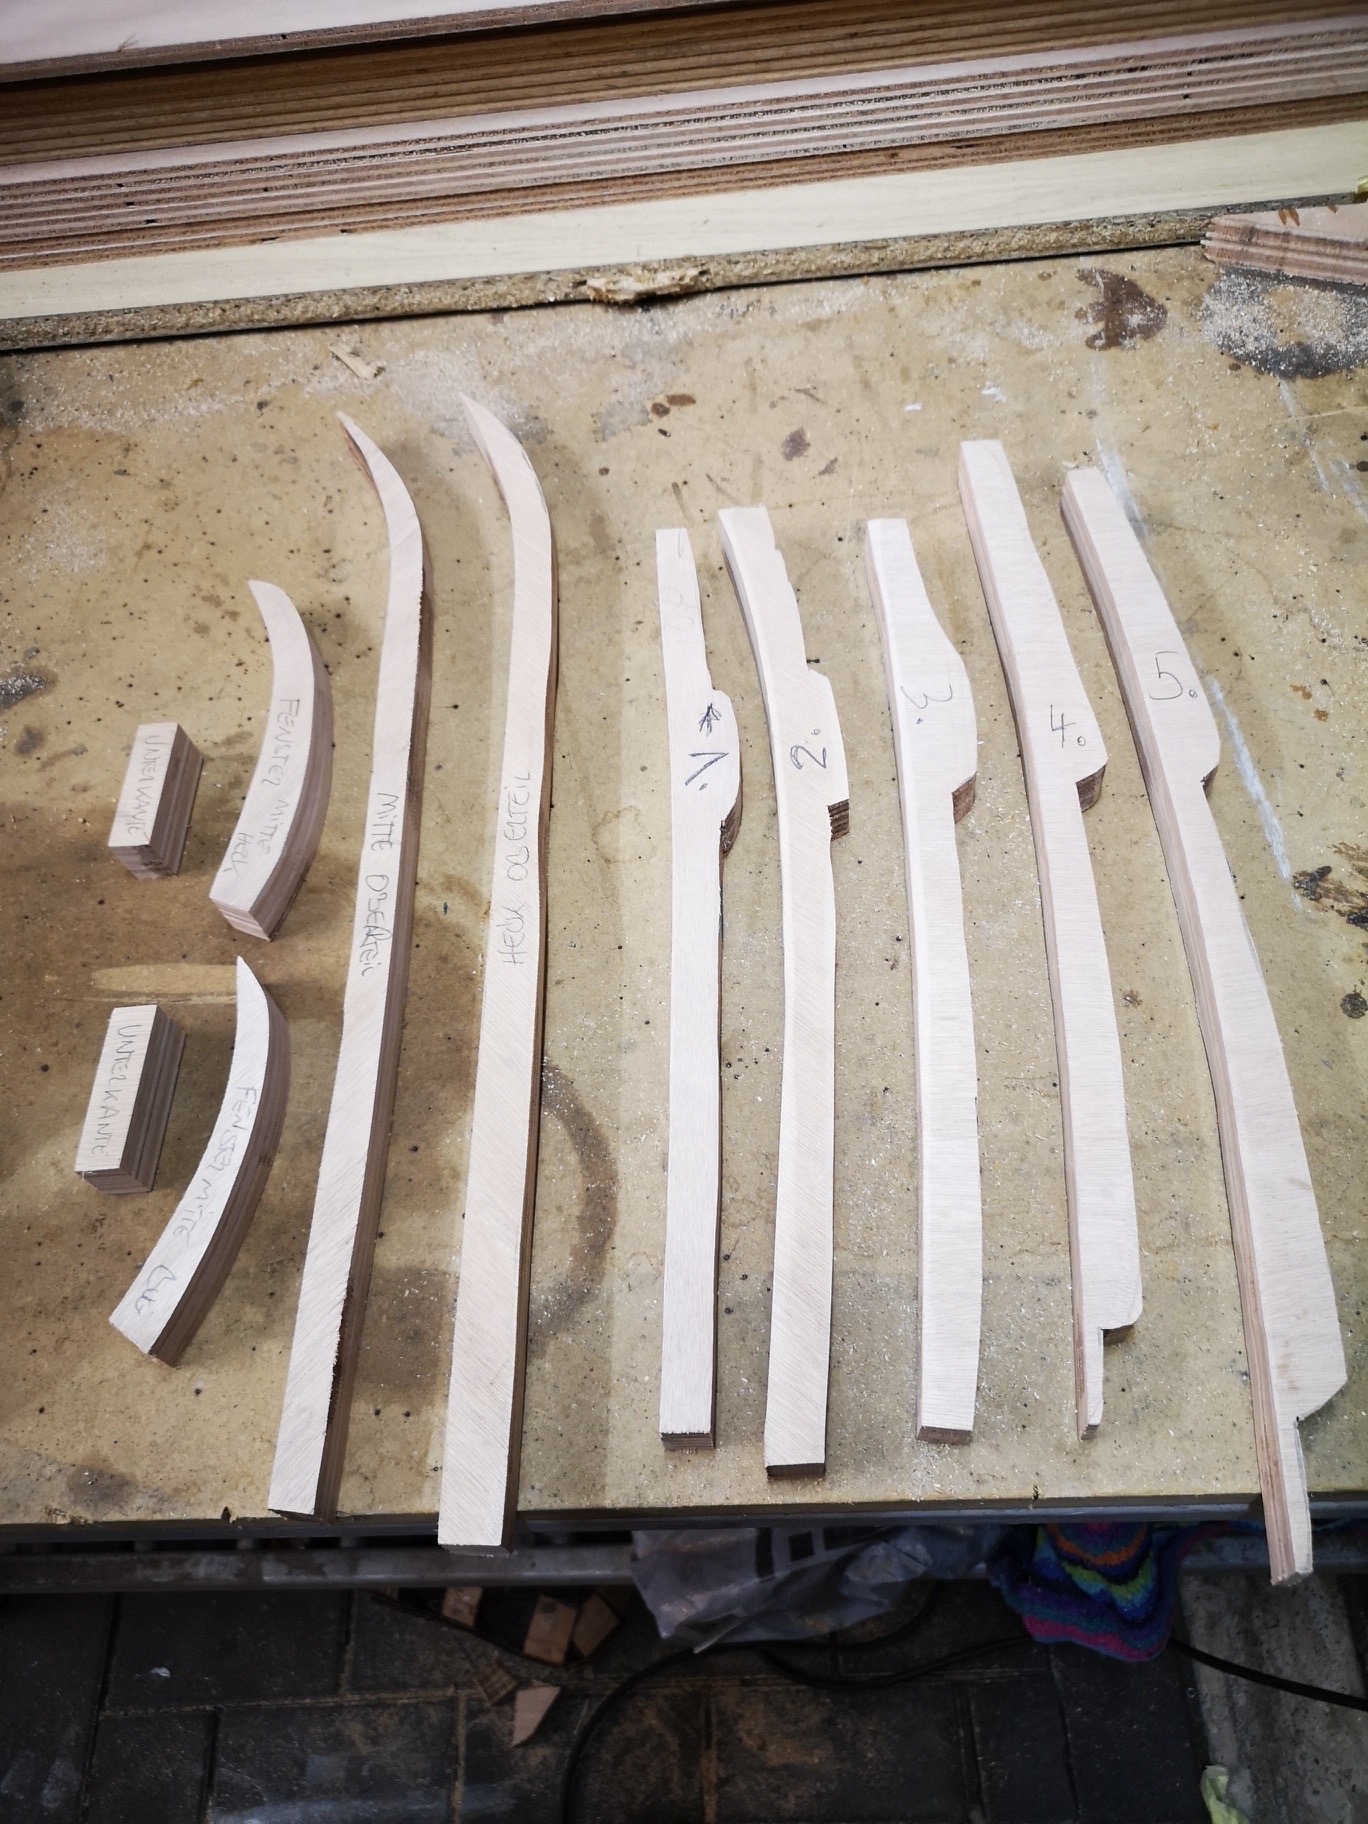
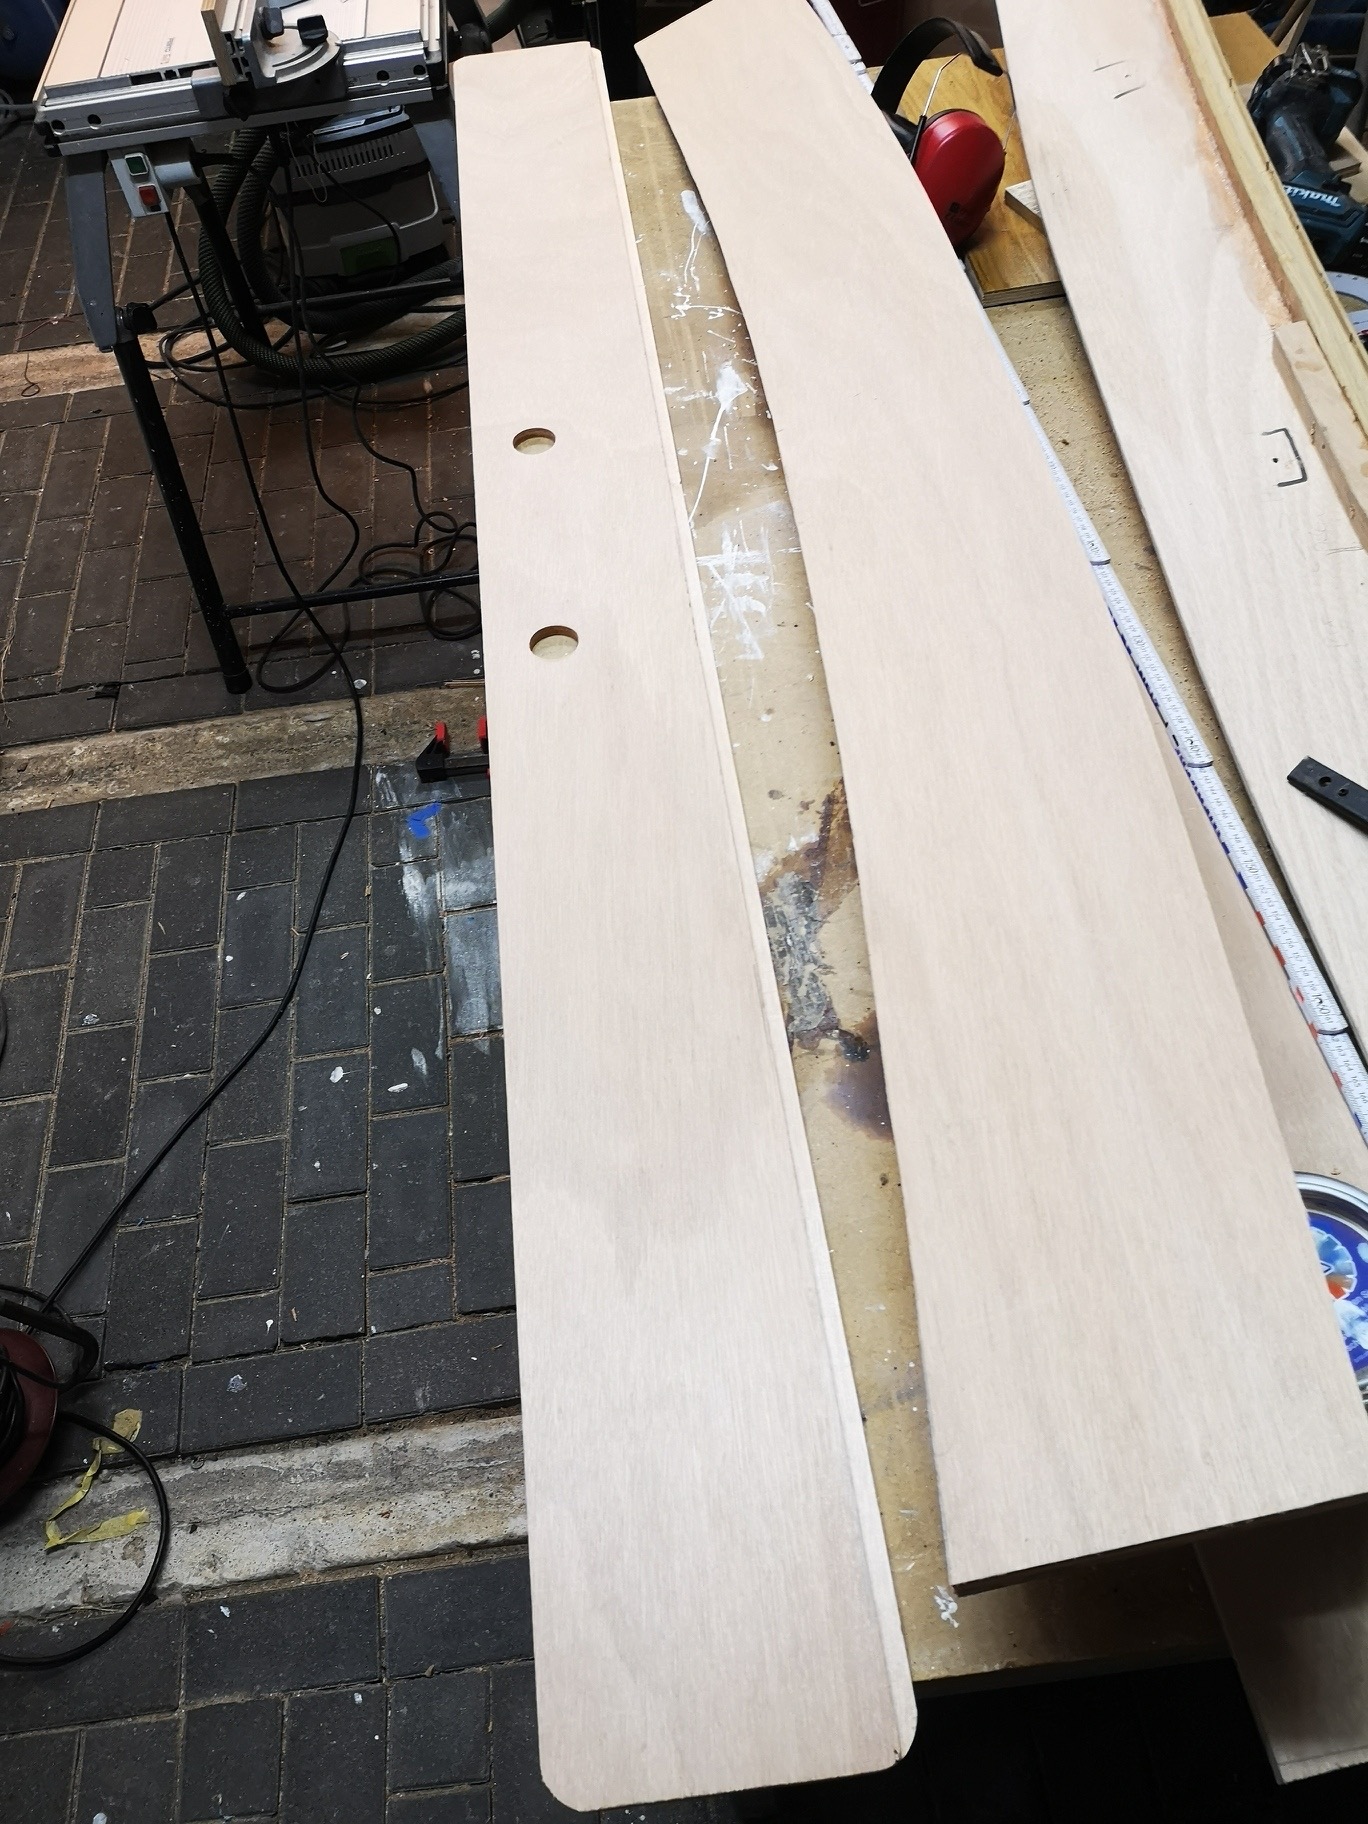
The wooden strips has been sawn and will soon come under the side panels in the salon. The 8mm plywood is veneered with cherry wood.
16.12.2019 & 1.1.2020
The frames for the wooden strips have to be made. I made again a cardboard stencil. Then I sawed out the first frame.
2.1.2020
Now the frames in the lower half of the starboard side of the saloon are sawn and glued in with thickened epoxy.
4.1.2020
The templates for the port side in the salon are also prefabricated with cardboard and then applied to plywood, allready sawn and ...

5.1.2020
... glued in with epoxy today.
At the outside temperatures only possible with a fan heater, because the air humidity could be max. 80% and the temp. should not fall below 10 degrees Celsius.
10.1.2020
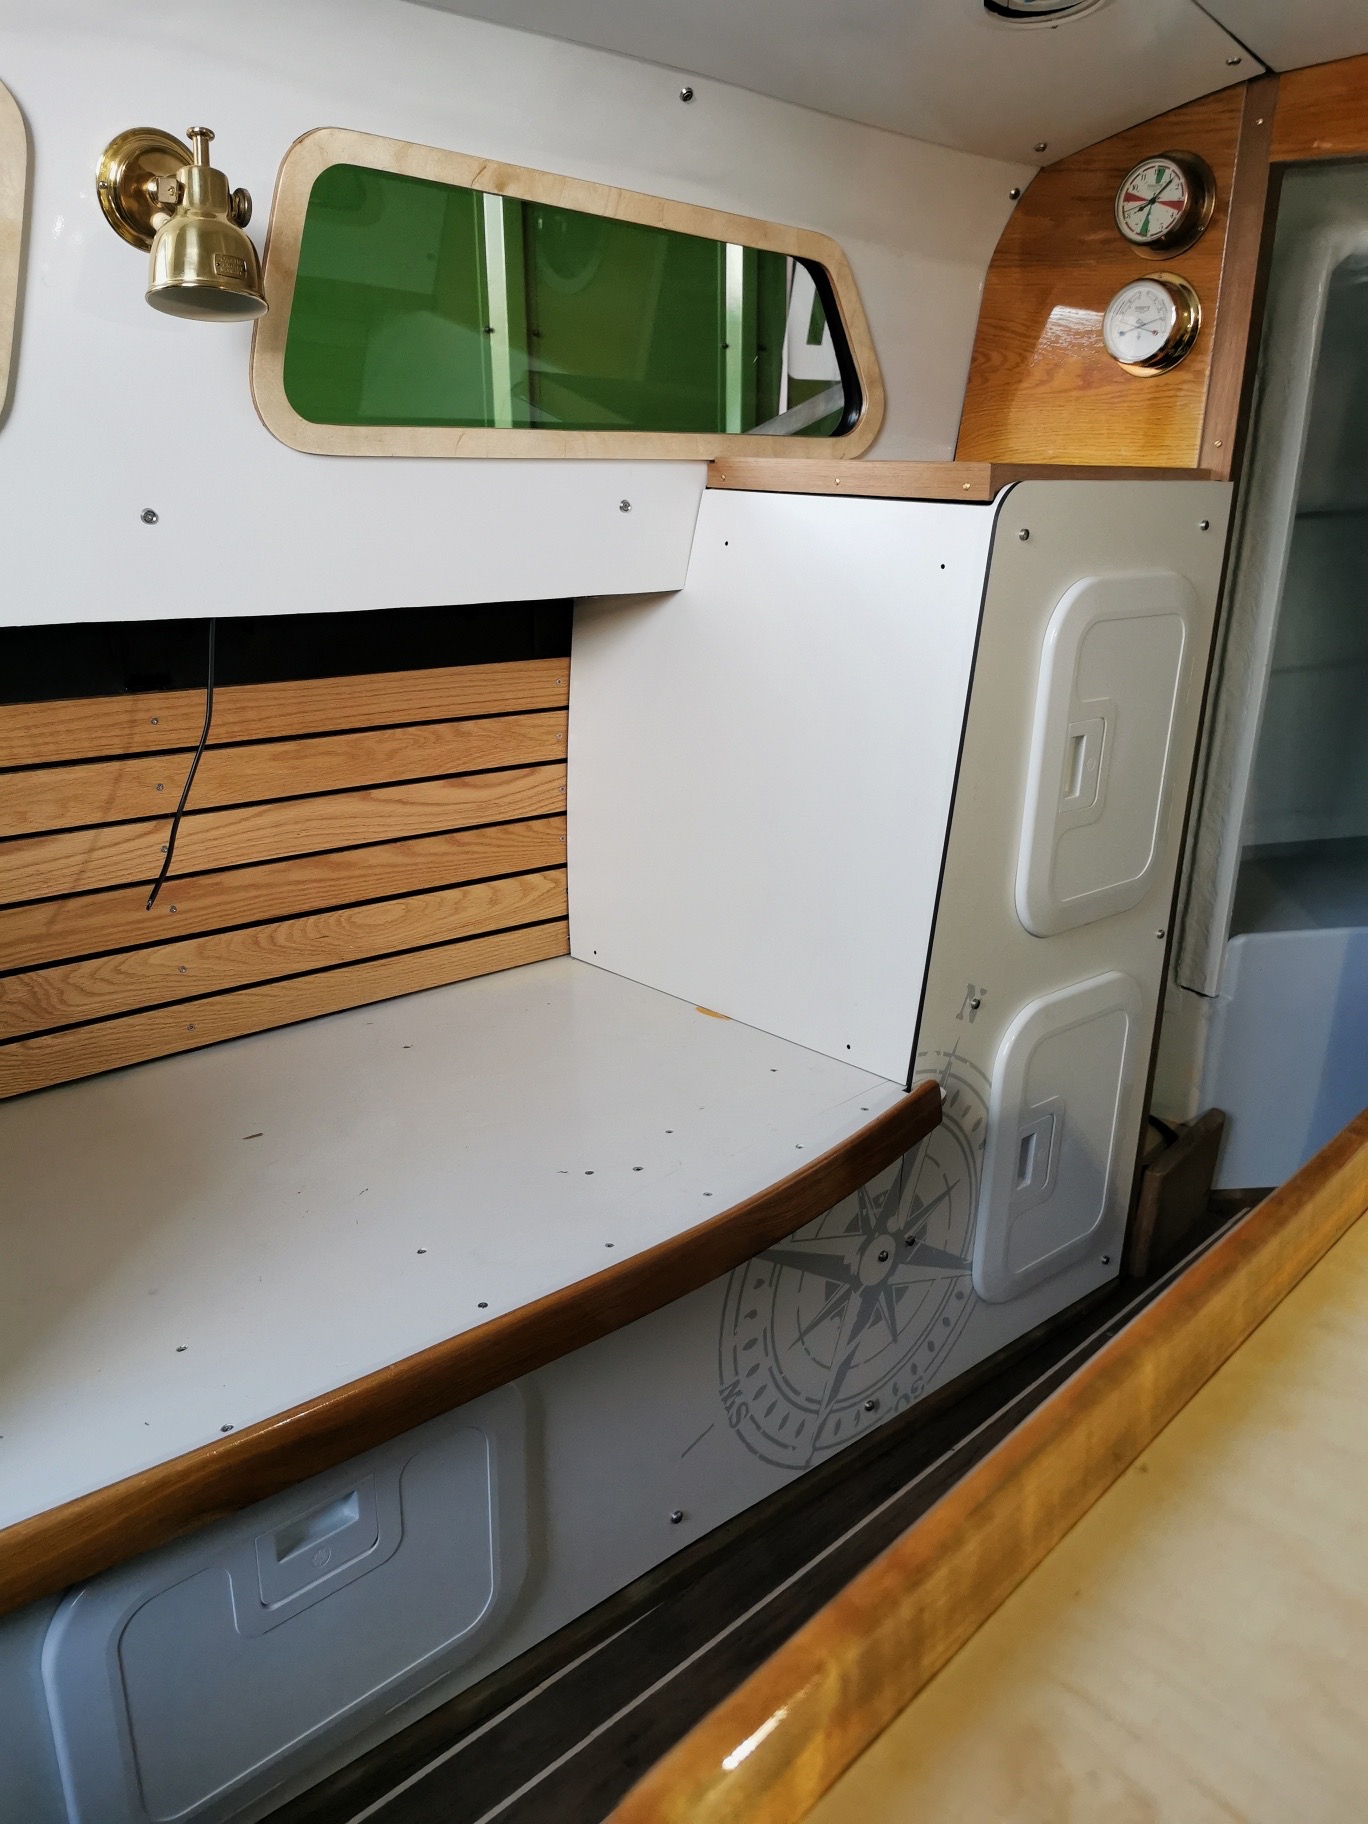
Many small construction sites just have to be served. The seat of the chaise longue had to be rounded off at the edge and the window frames (inside) are made from the remains of oak wood.
The rear bulkhead cladding is just getting its first paint job.
I painted the seating surface of the Recamiere days ago. Today I attached a ledge to the bottom board so that the upholstery does not slide off the chaise longue later.

15. - 17.1.2020
18.1.2020
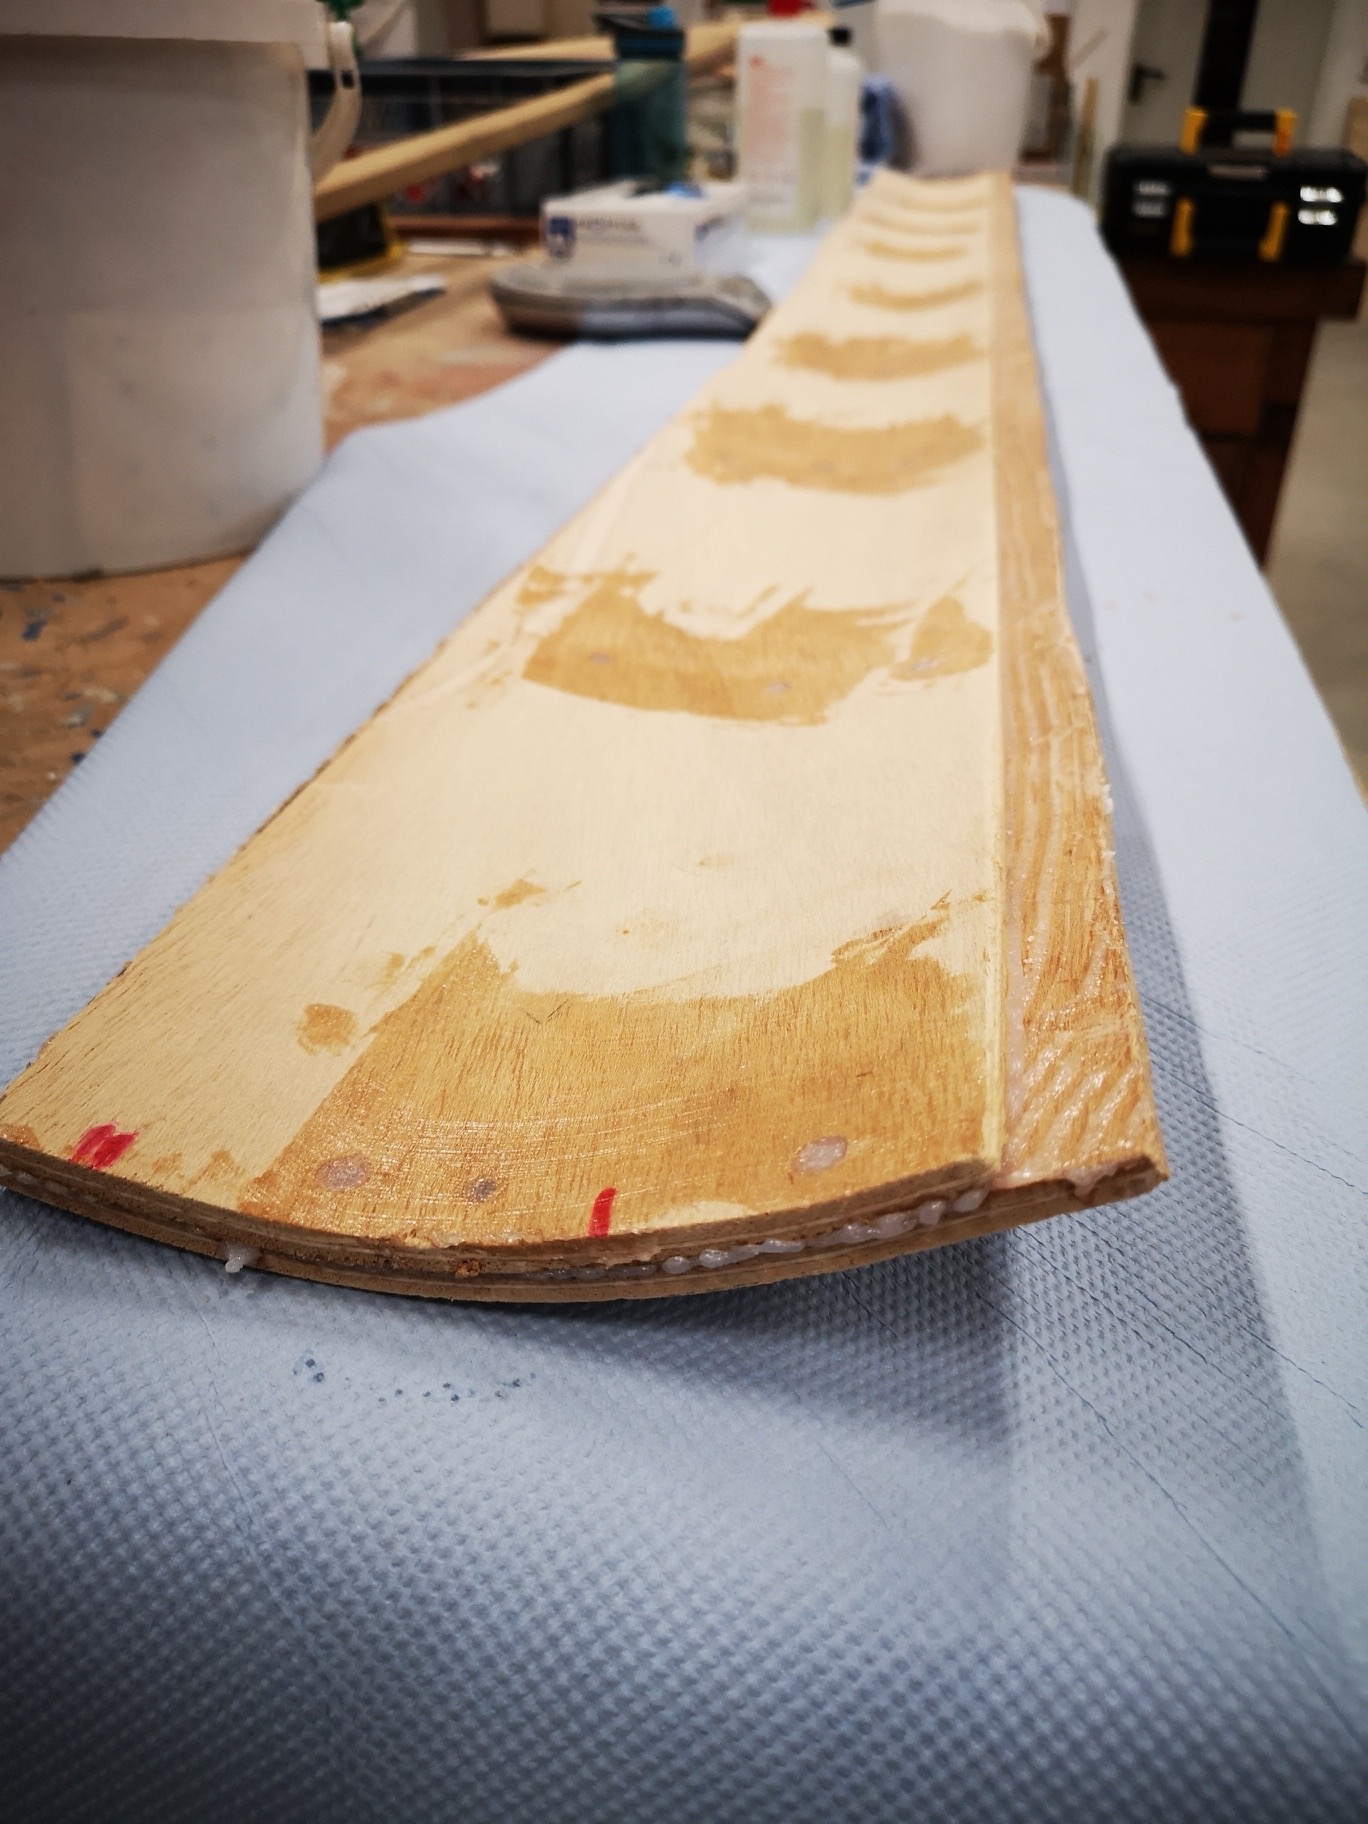
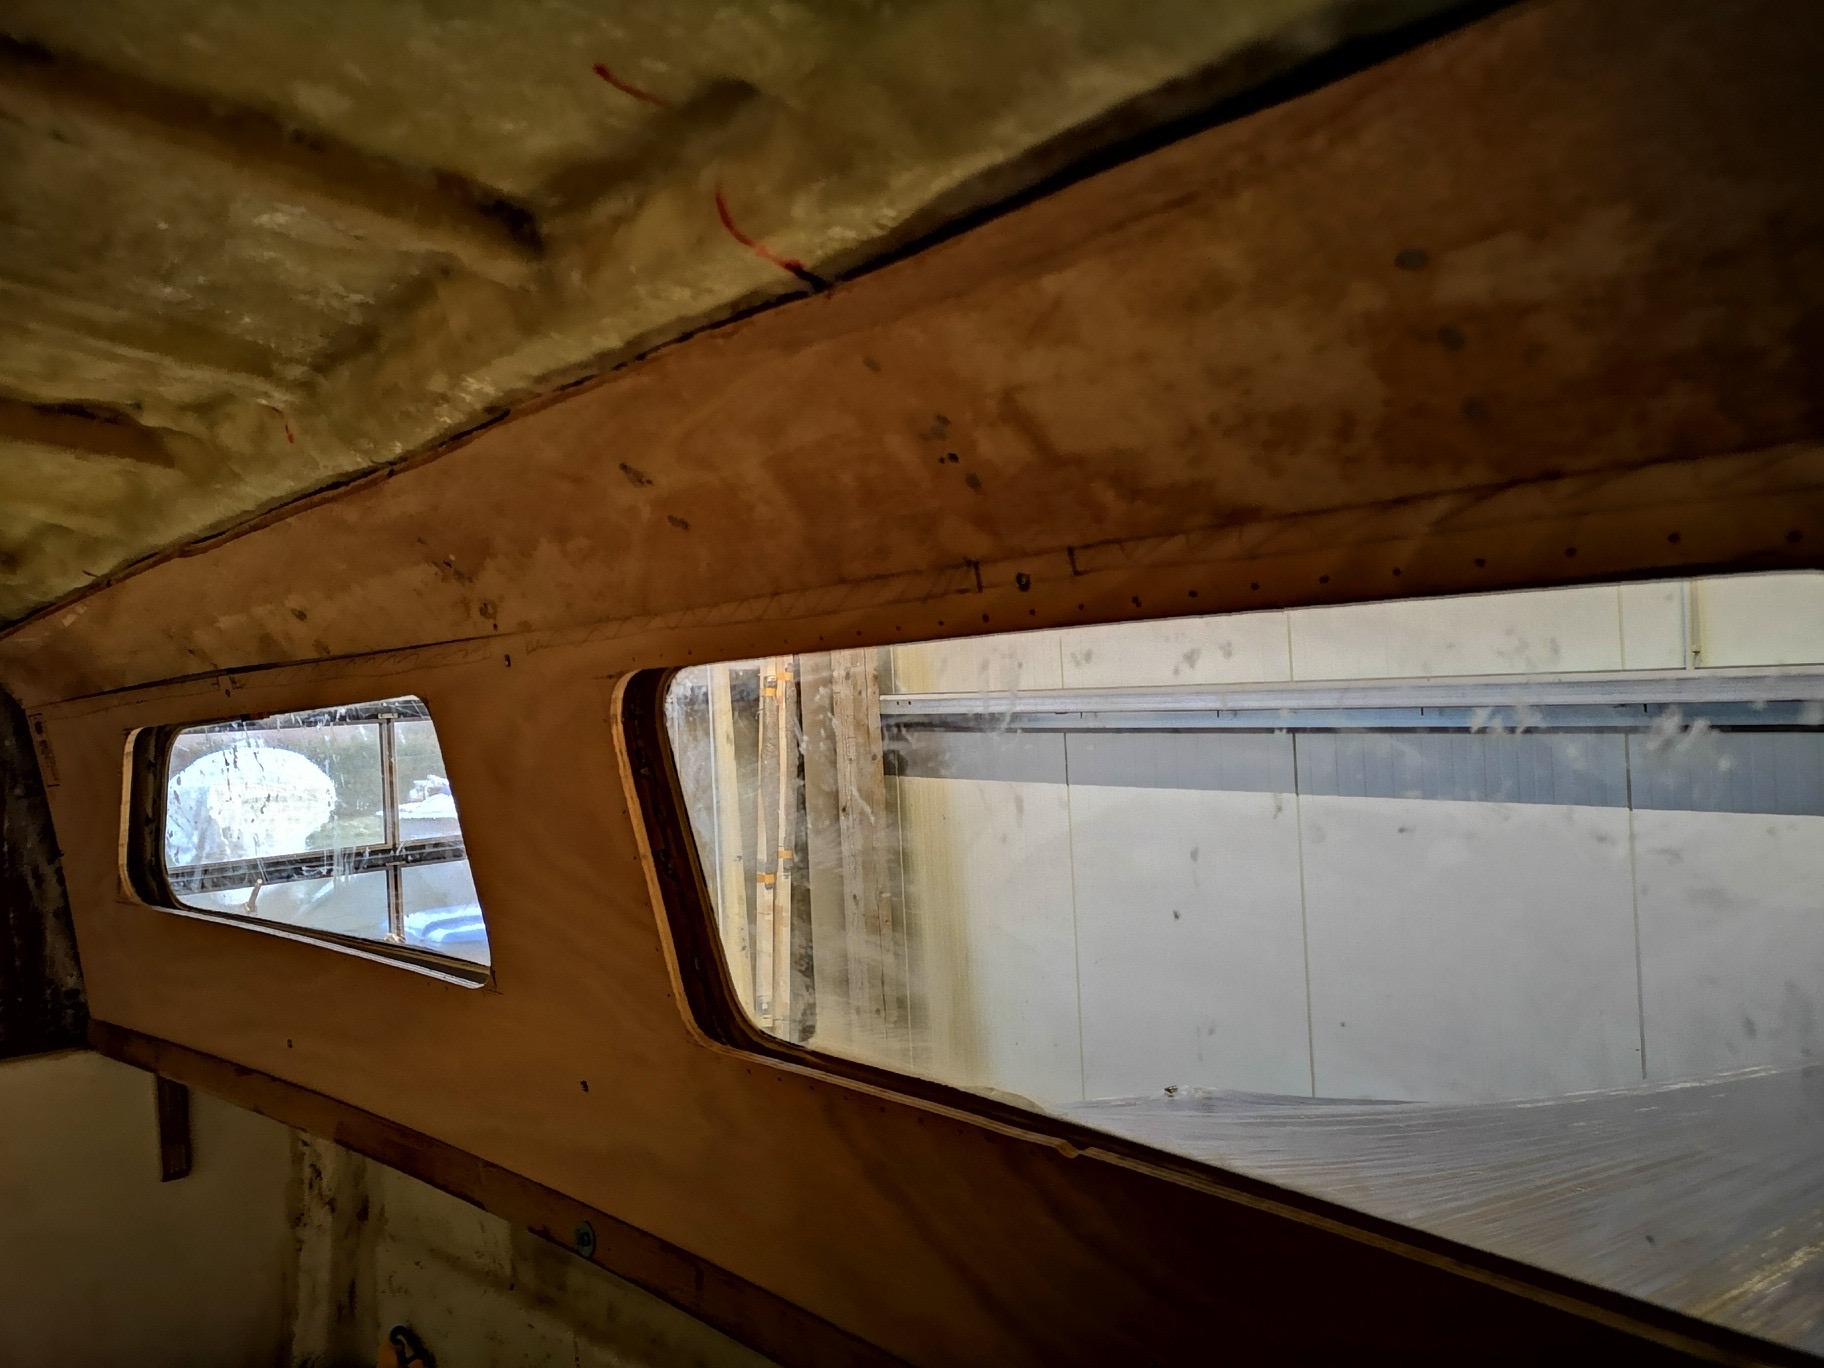
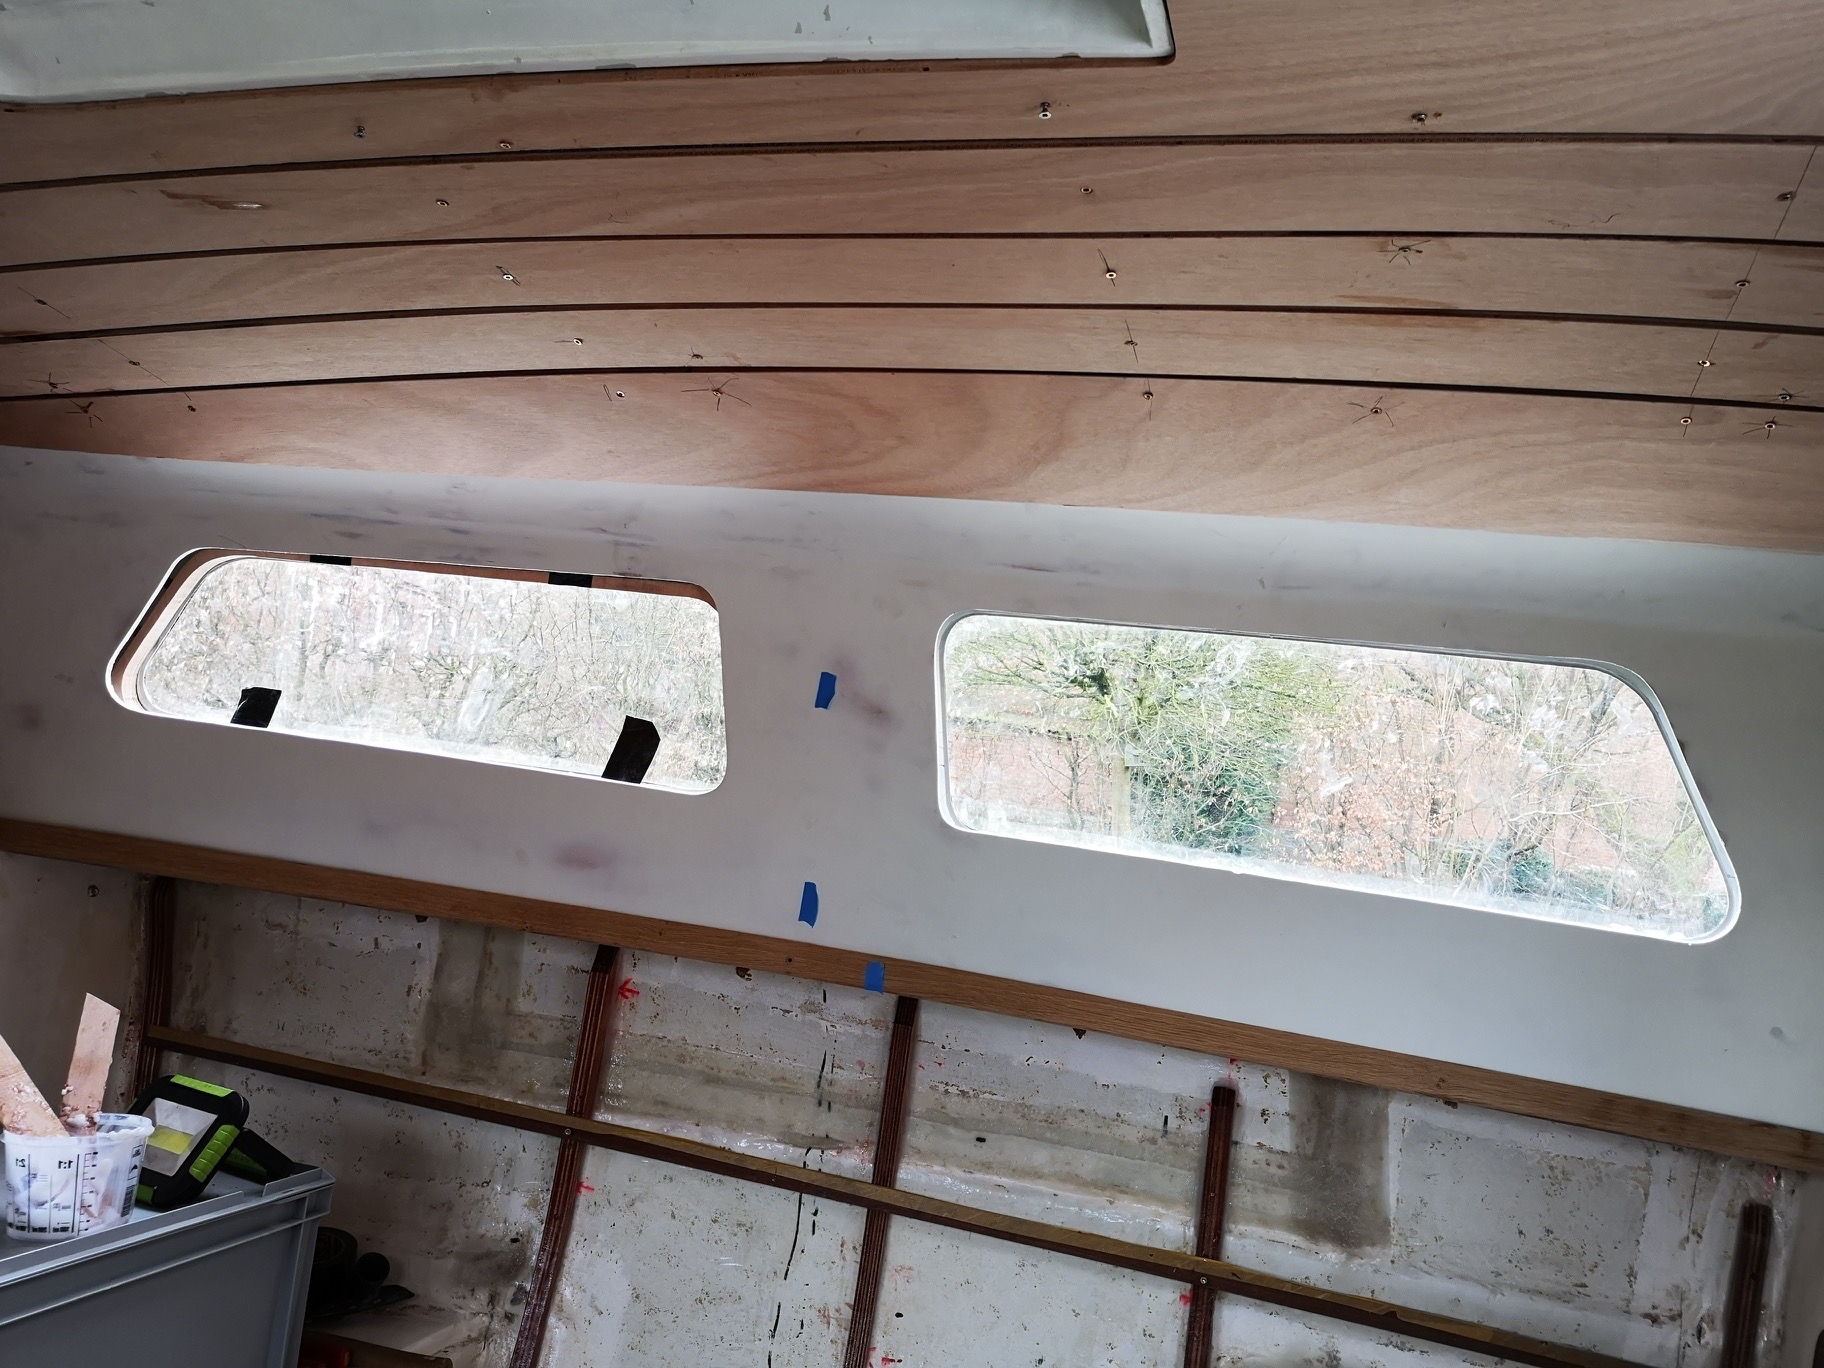
I have now started to produce the window panel on port side. A big challenge is the bend towards the ceiling. Bending plywood is also used on the port side in the upper part of the panel, which is glued together in two layers with epoxy in the bend so that the bend is retained after curing.
20.1.2020
I connected the curved top and the flat bottom with epoxy.
26.1.2020
The plywood under the ceiling is trial and attached to starboard for measurement.
23.1.2020
26.1.2020
The plywood cover consists of several individual boards, but they are glued together with a cross-piece, so that I have a closed unit that I can now easily work on.
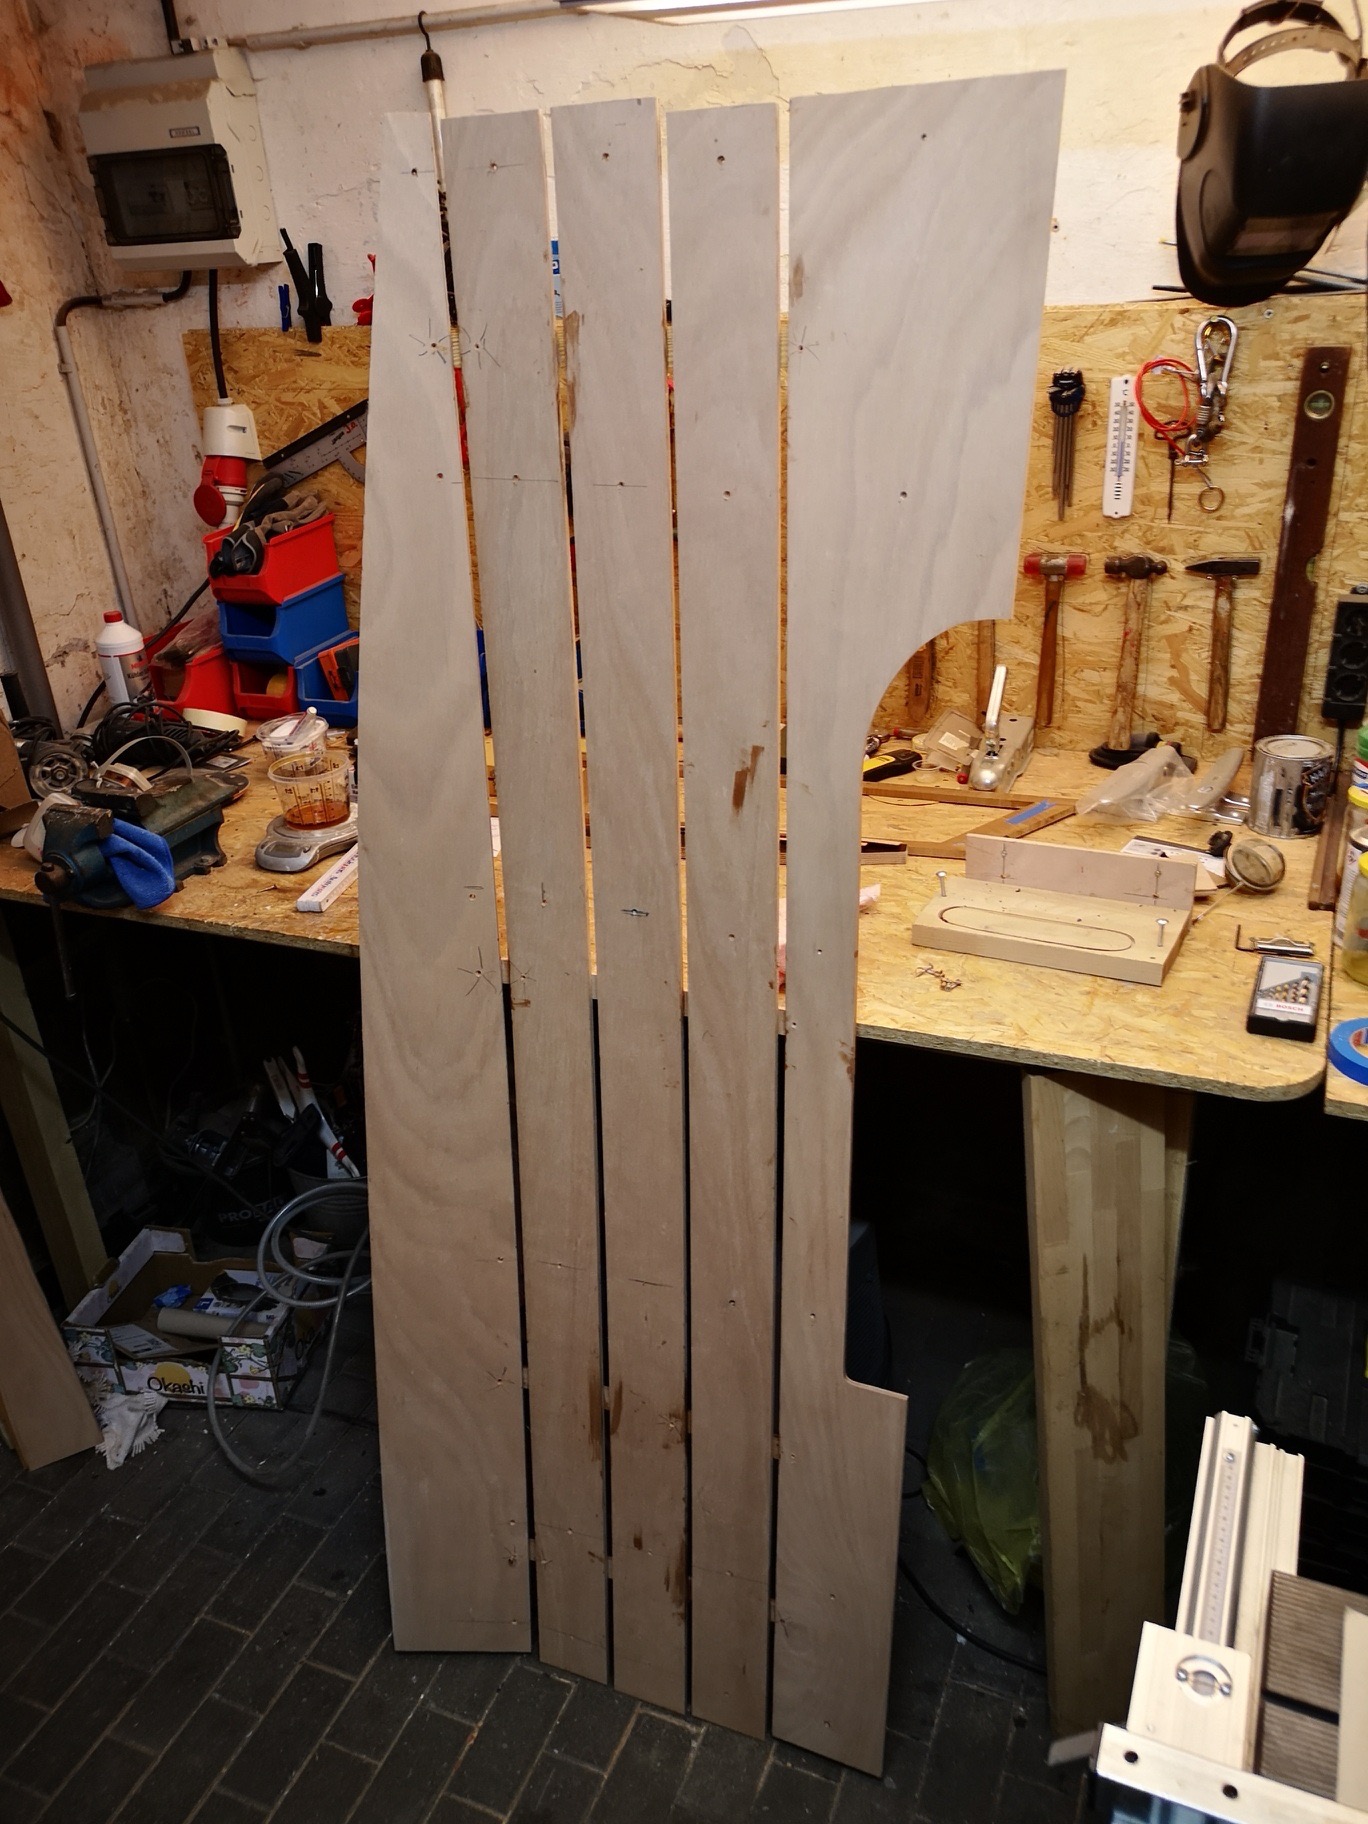
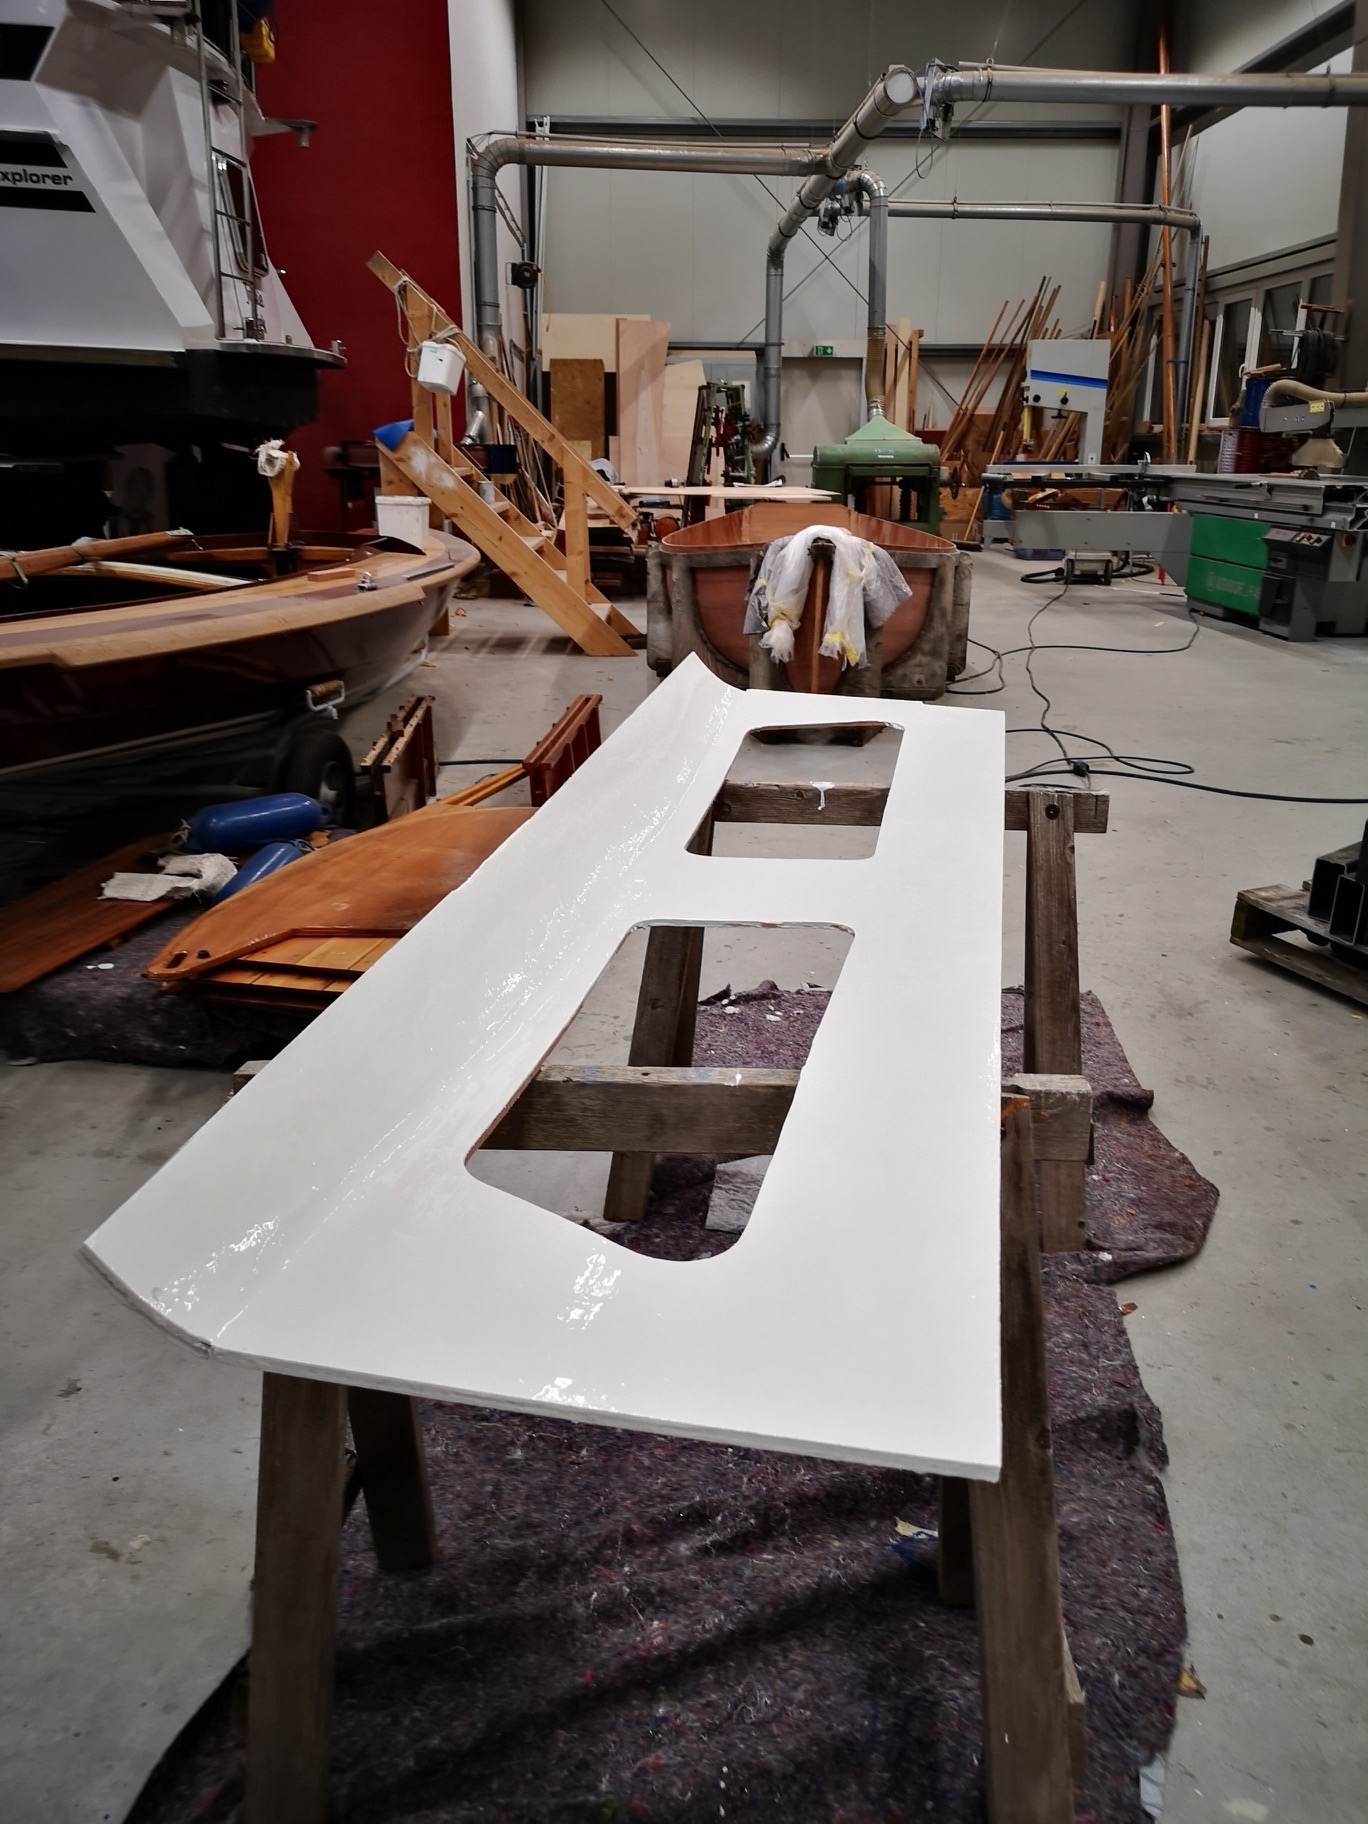
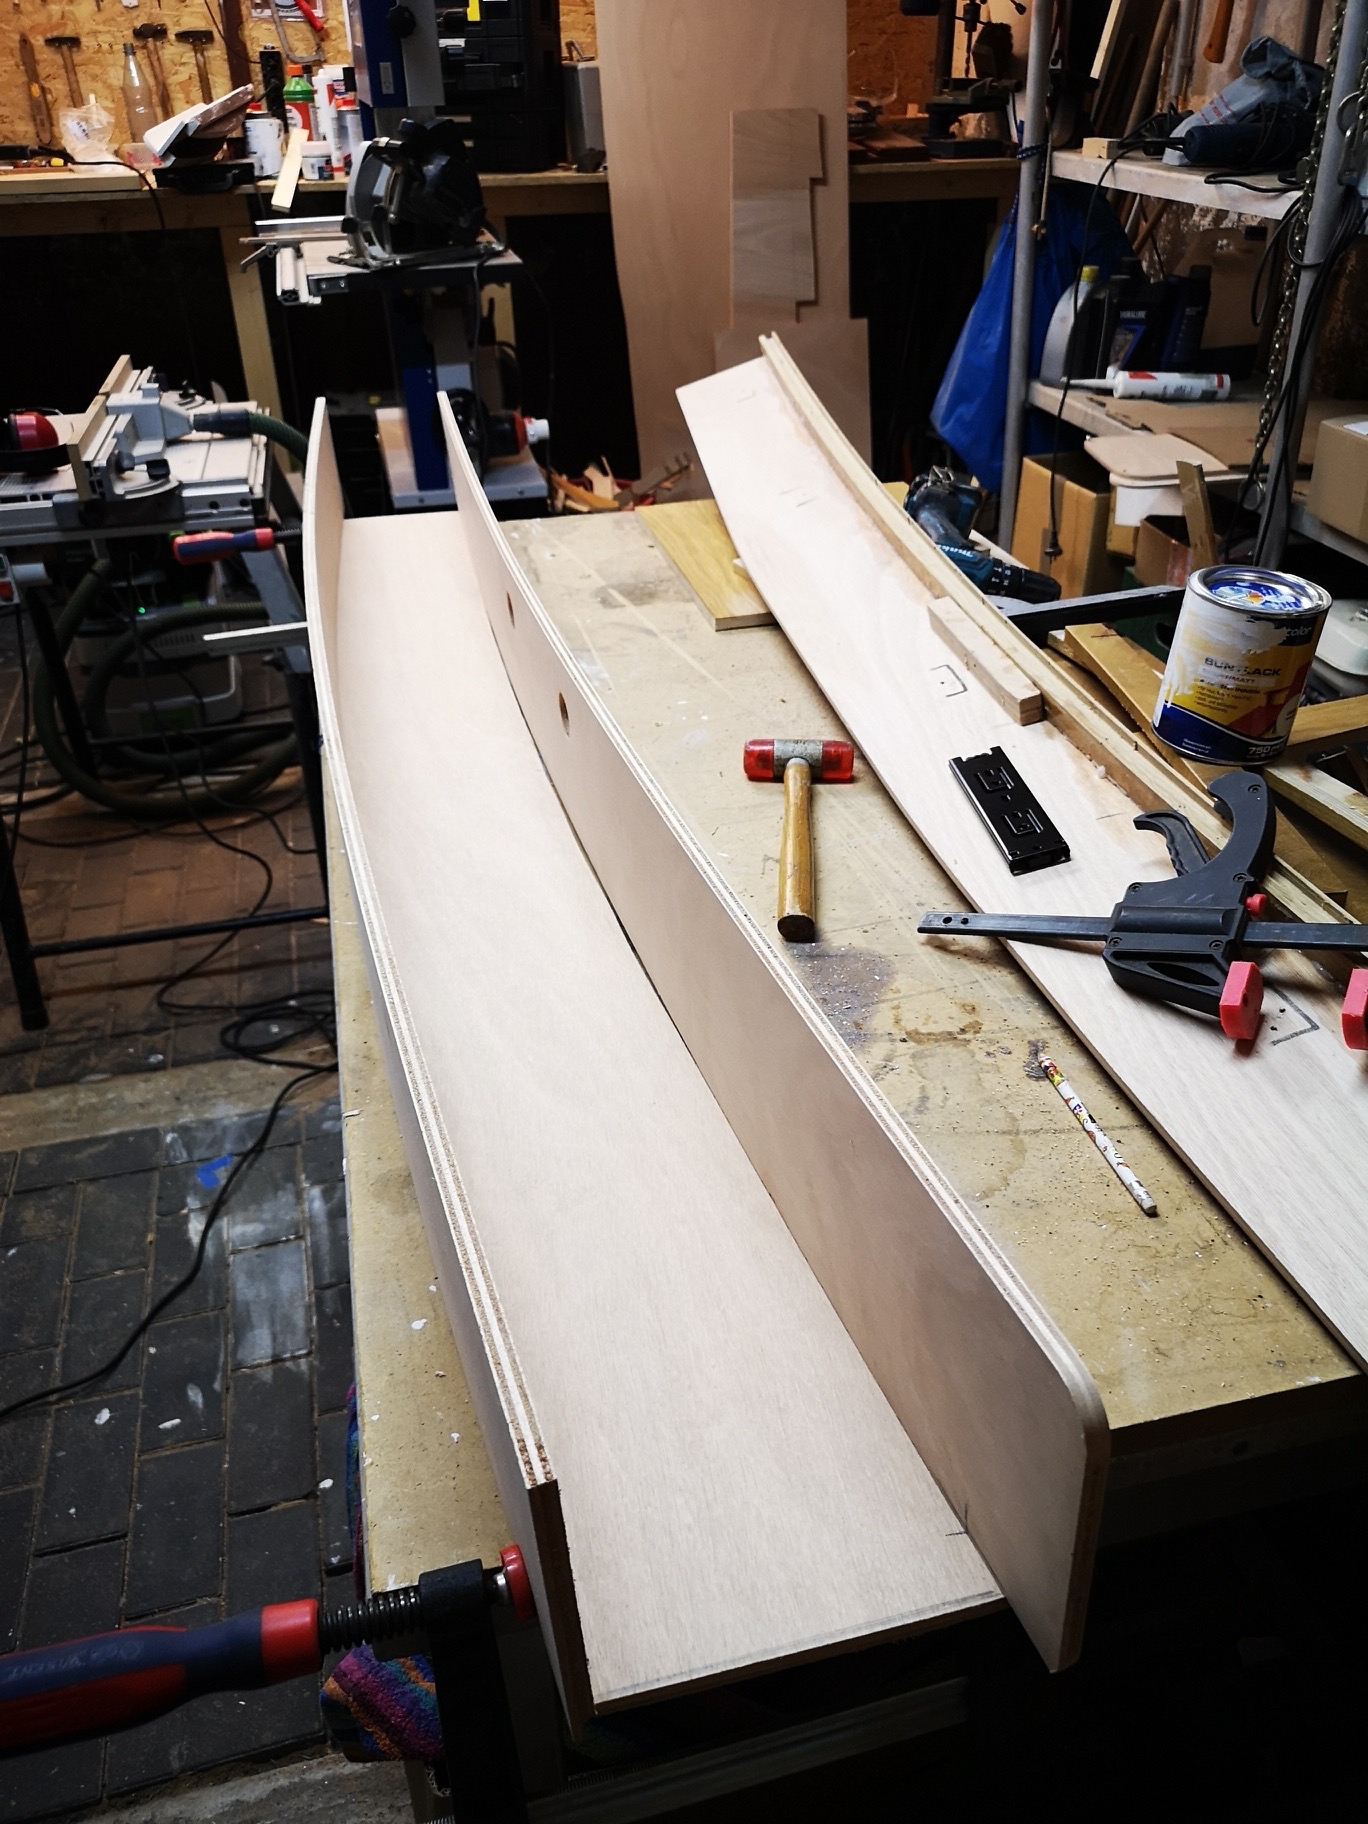
5.2.2020
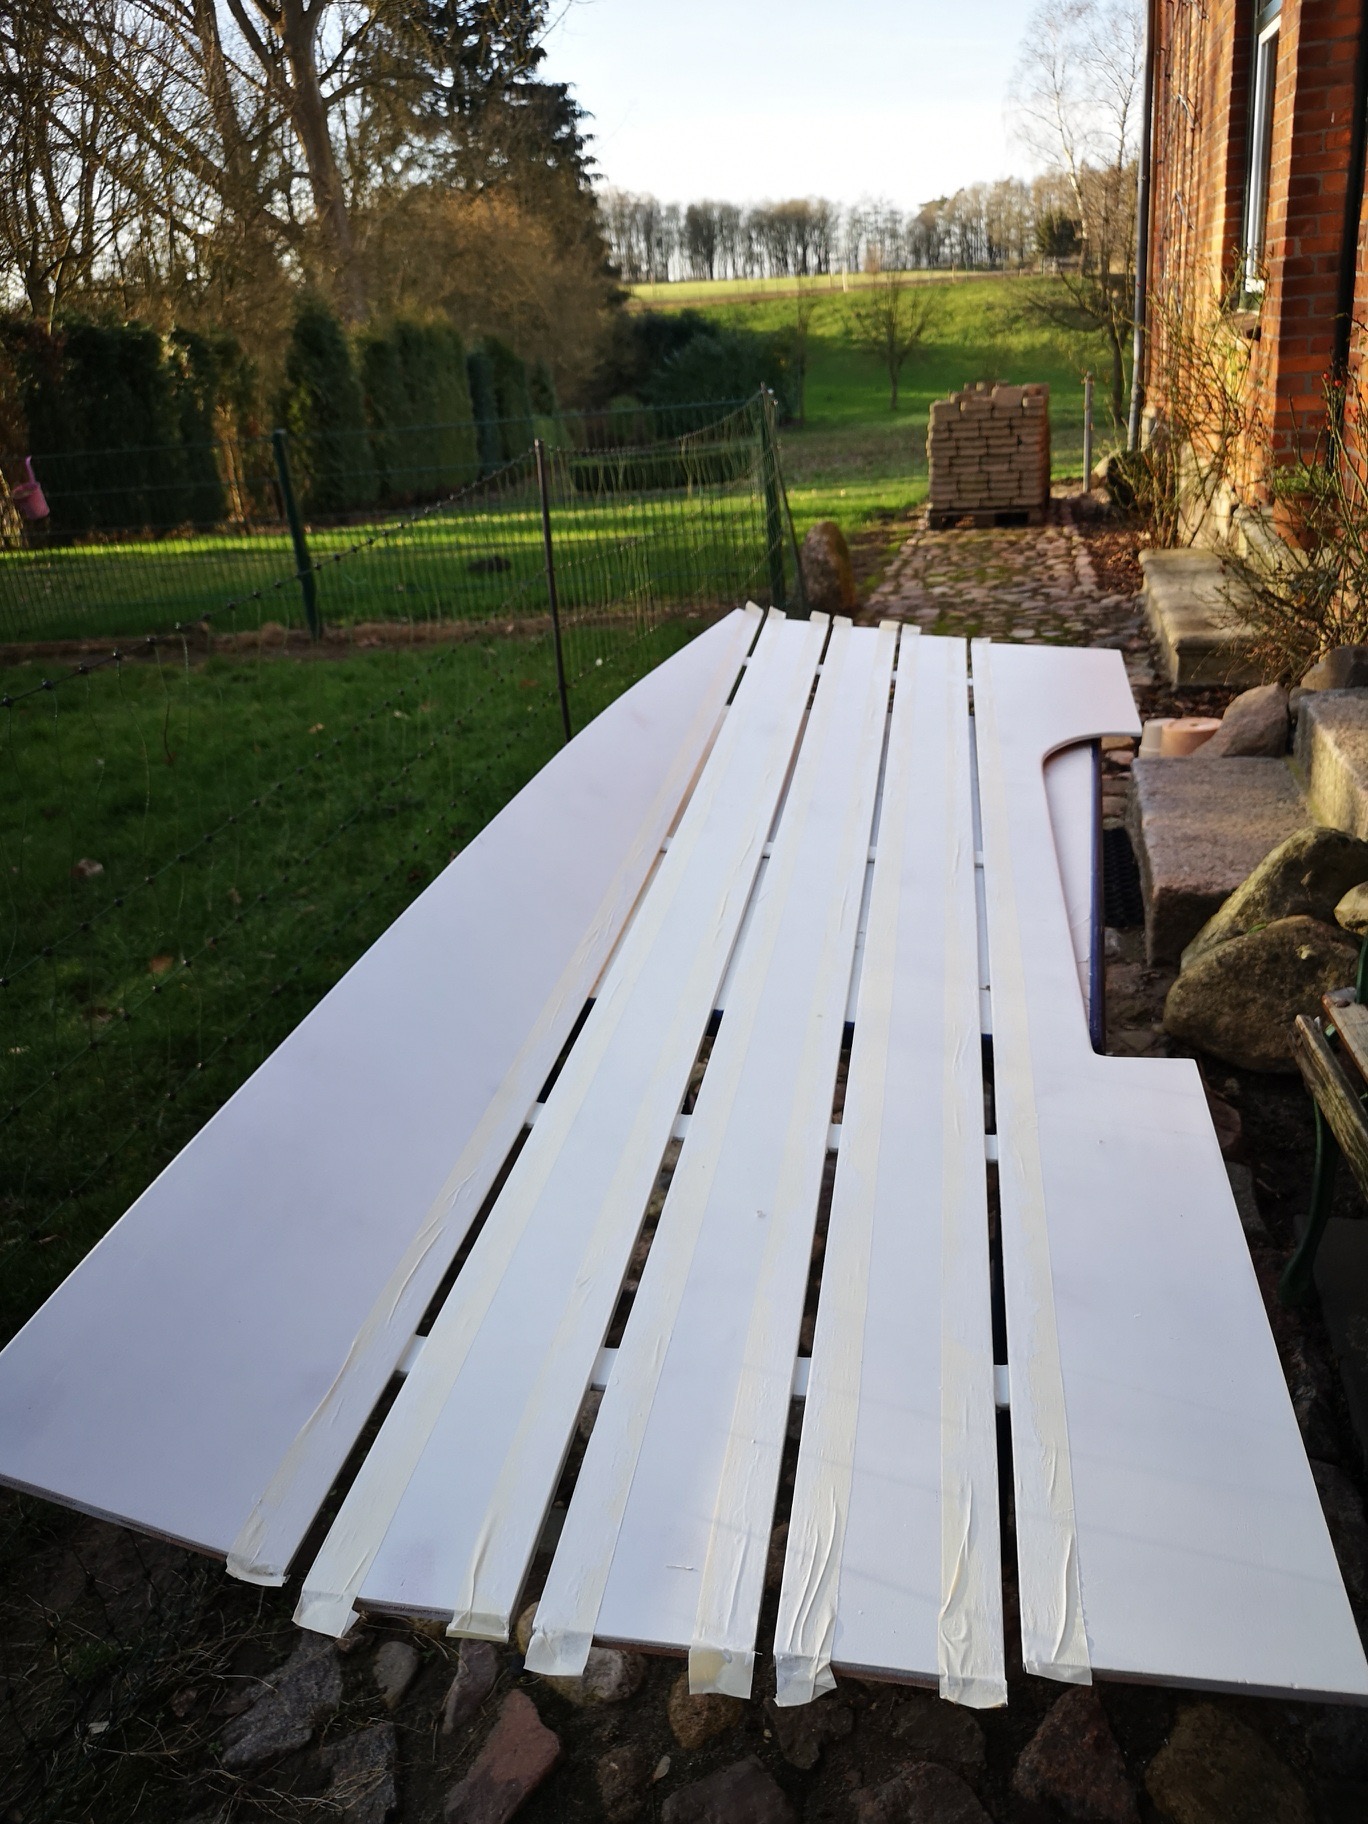
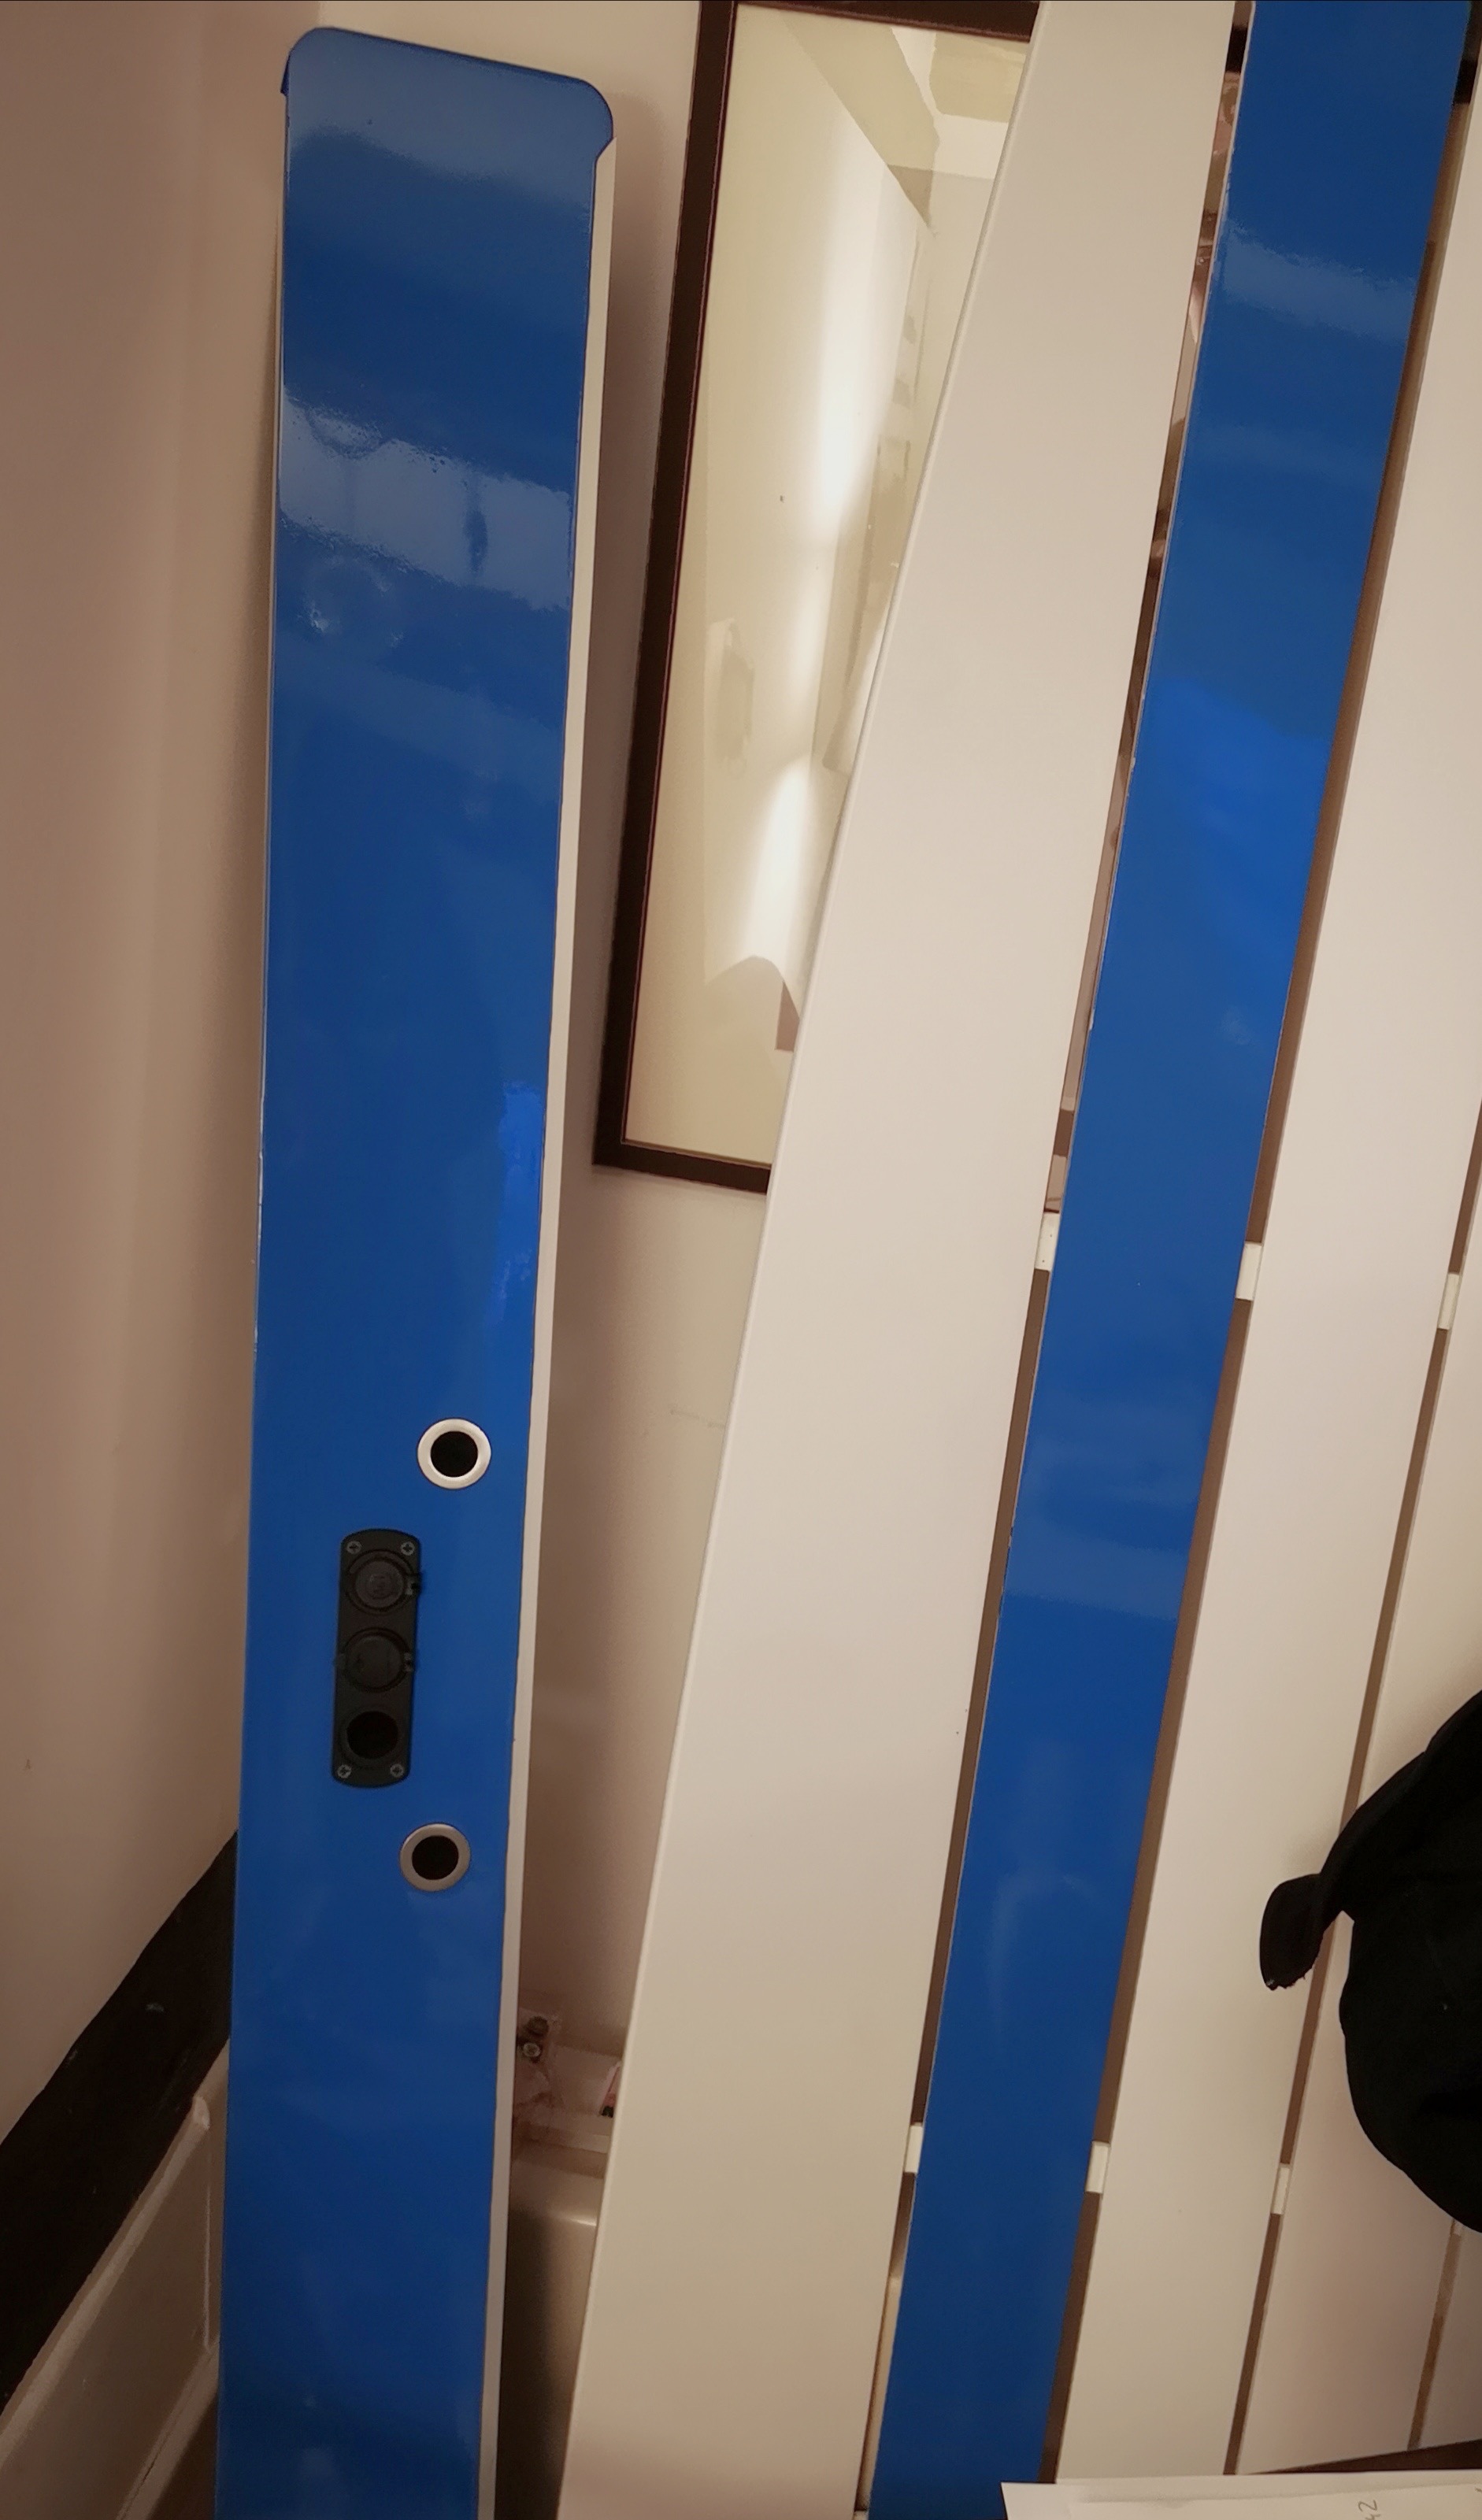
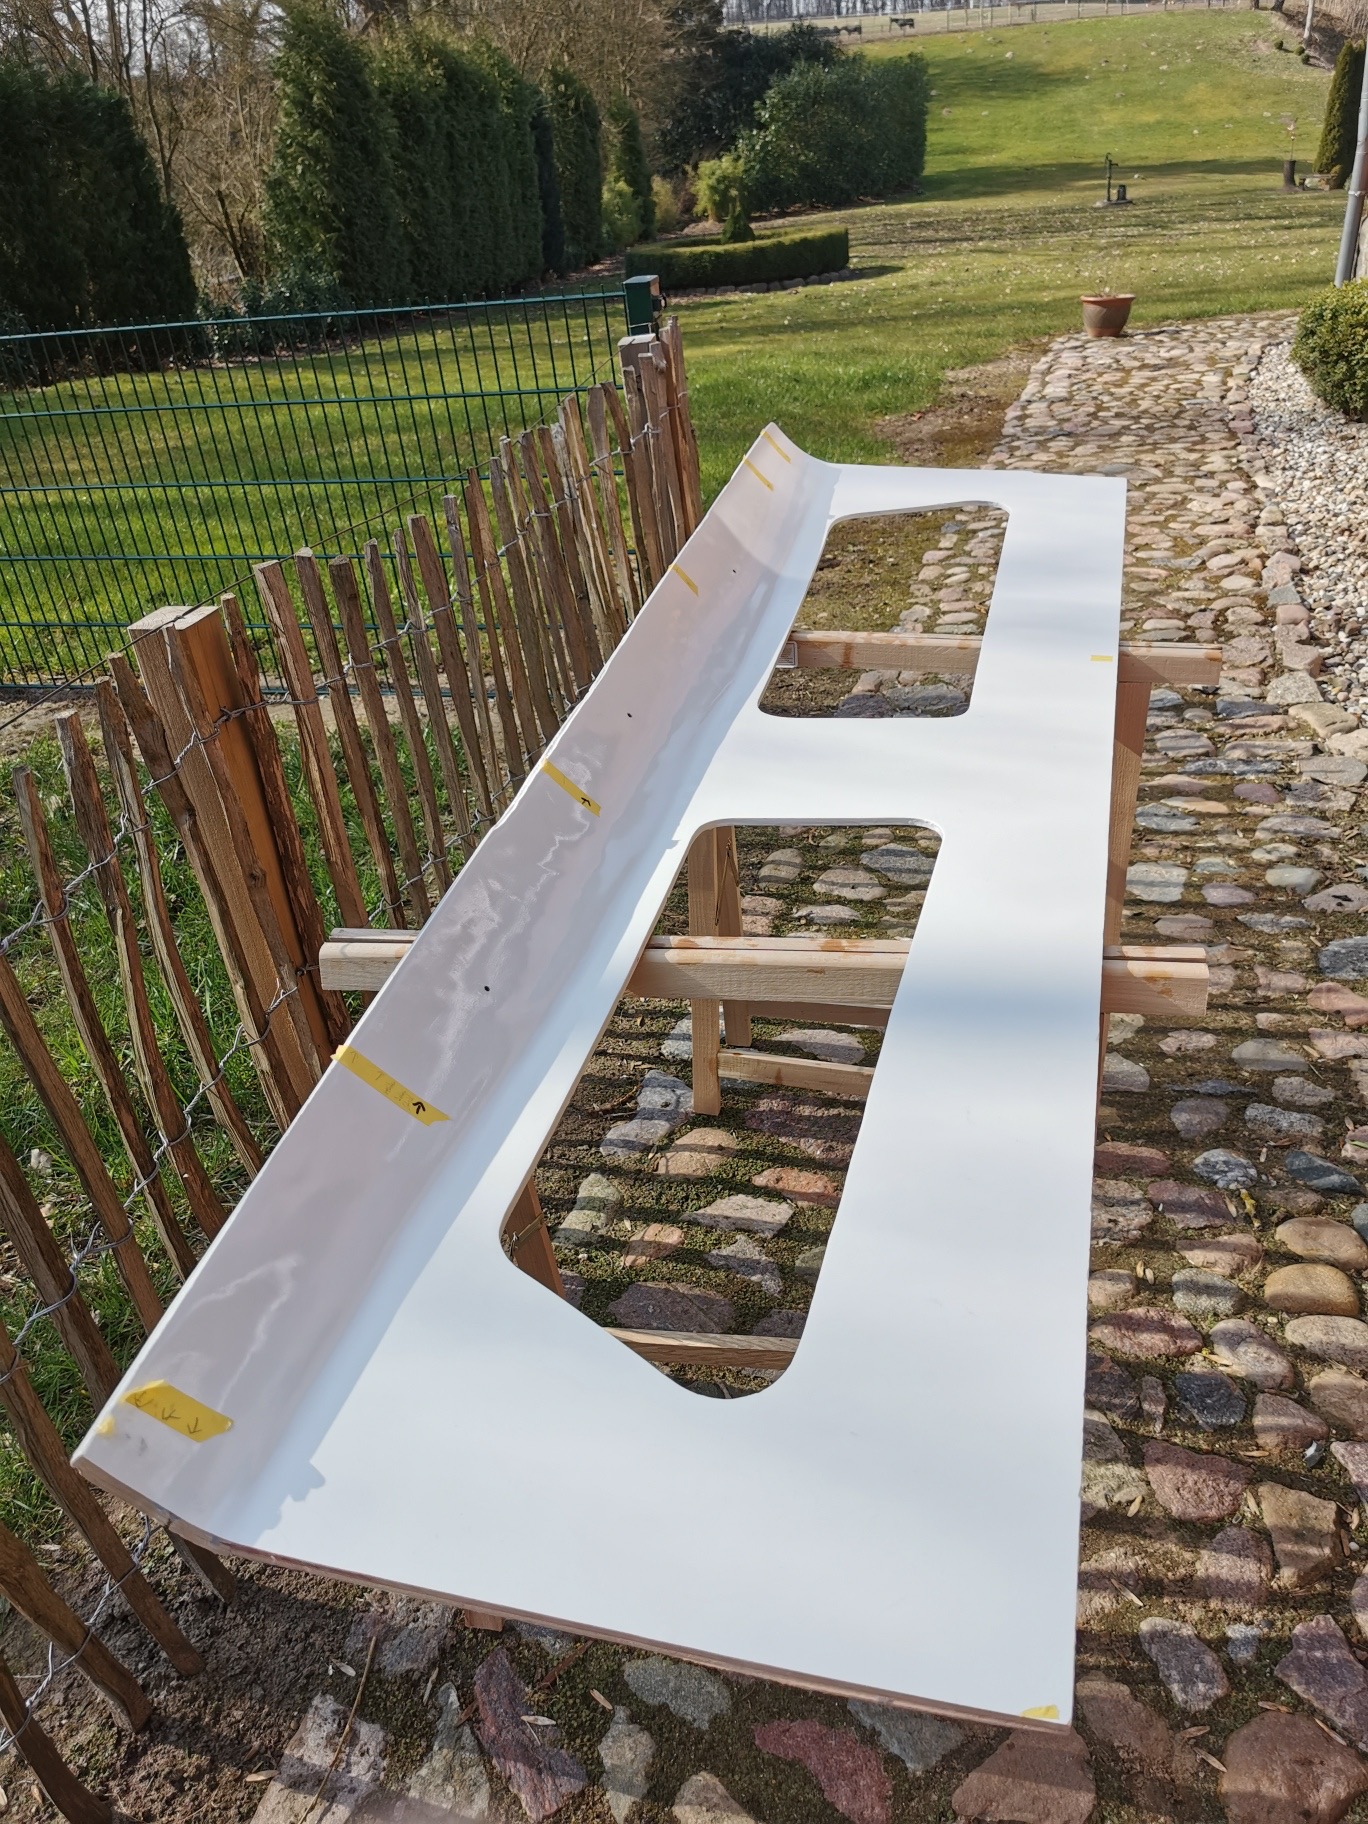
On the left you can see the finished starboard window panel. In the middle the pre-painted ceiling panel and on the right the primed and reground port panel. A lot of worksteps are necessary until you have prepared such a panel ready for installation.
19.2.2020
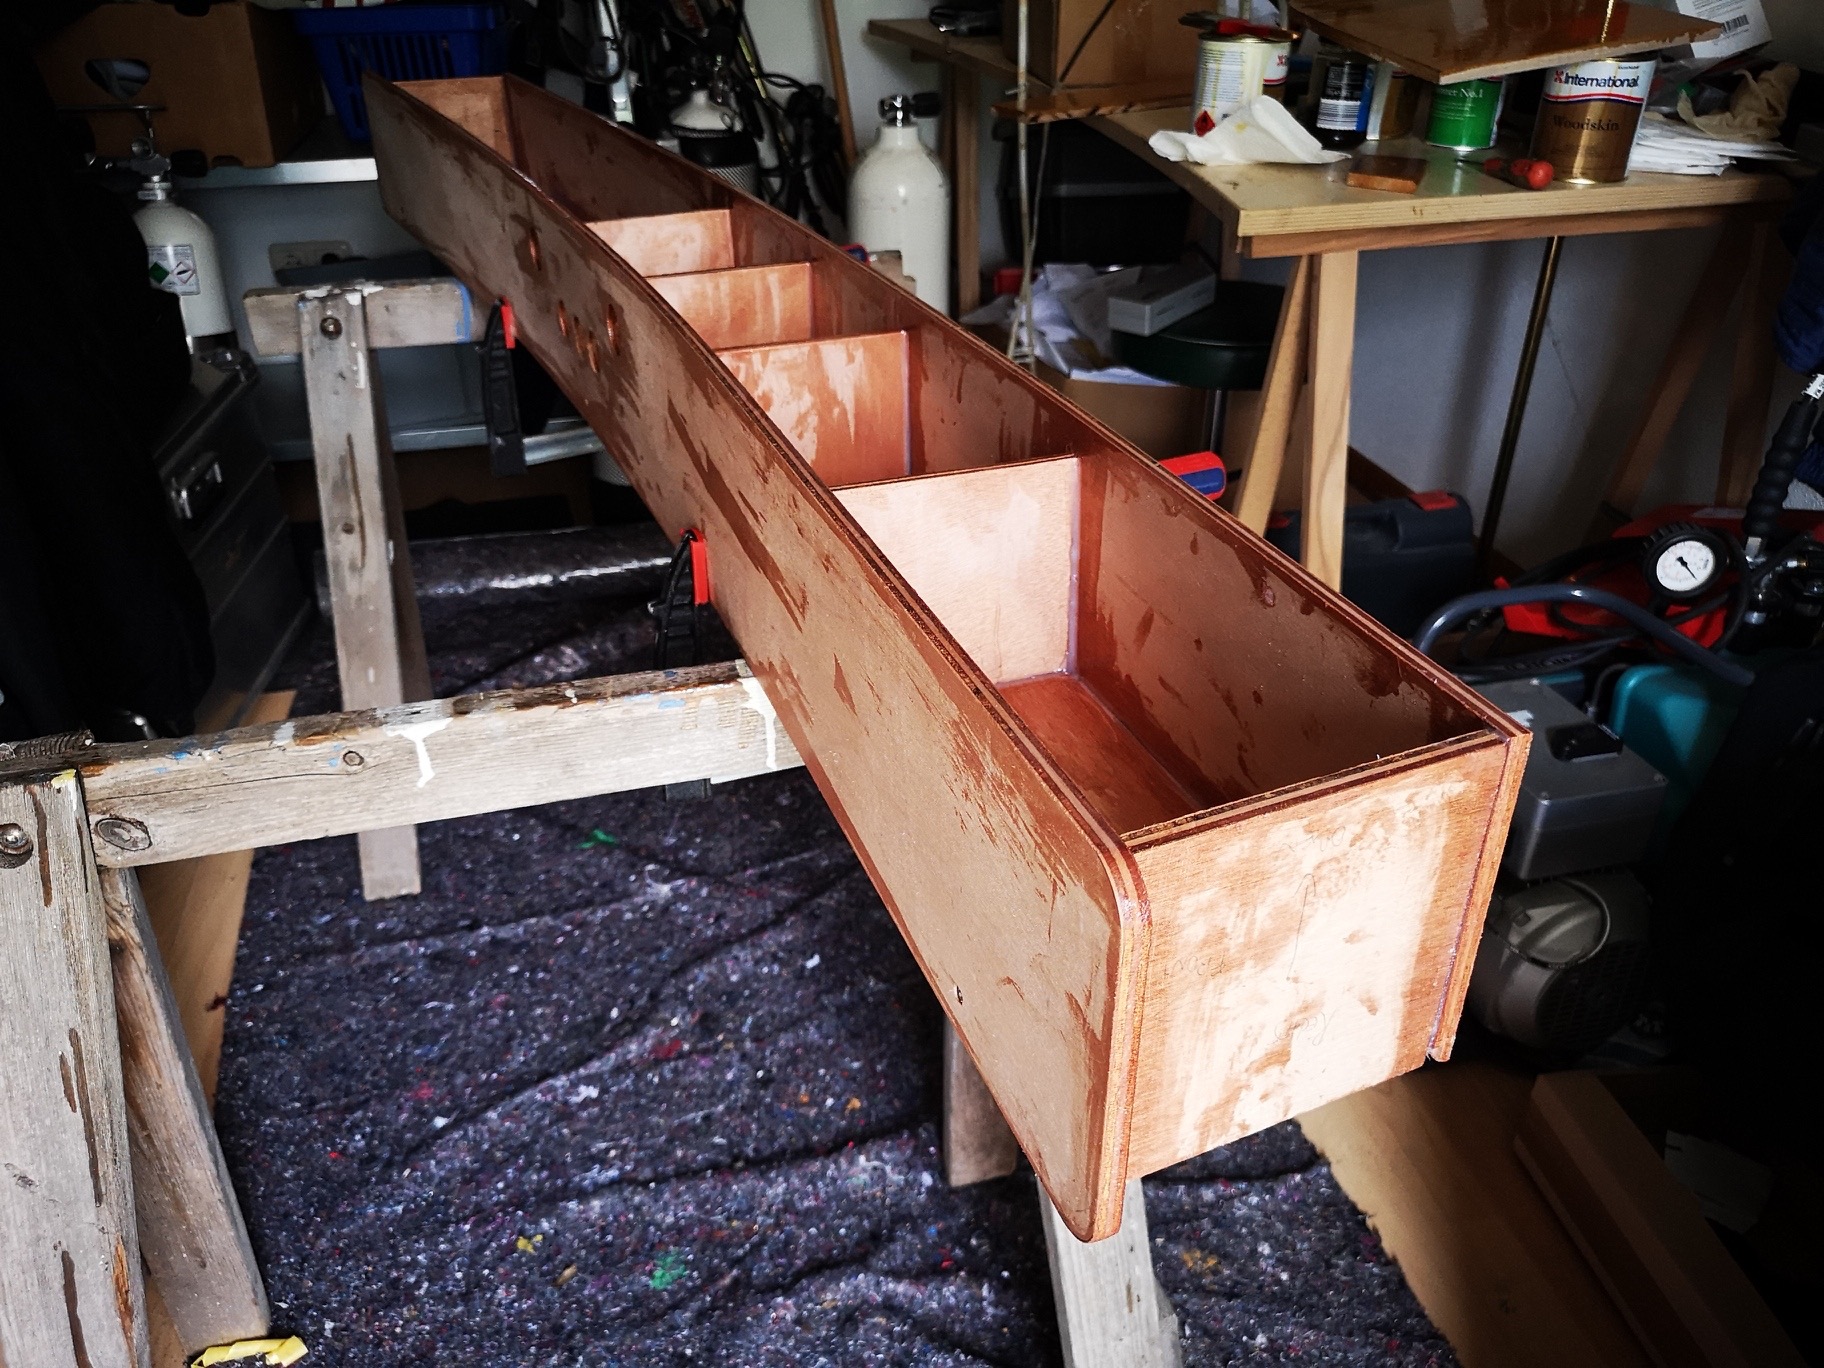
Here I creates a drawer for the underside of the starboard window panel. Sawing, drilling, milling so that everything later holds together.
In everything I do for the ship, I always have to consider that the workpiece can withstand heavy sea, moisture and temperature differences.
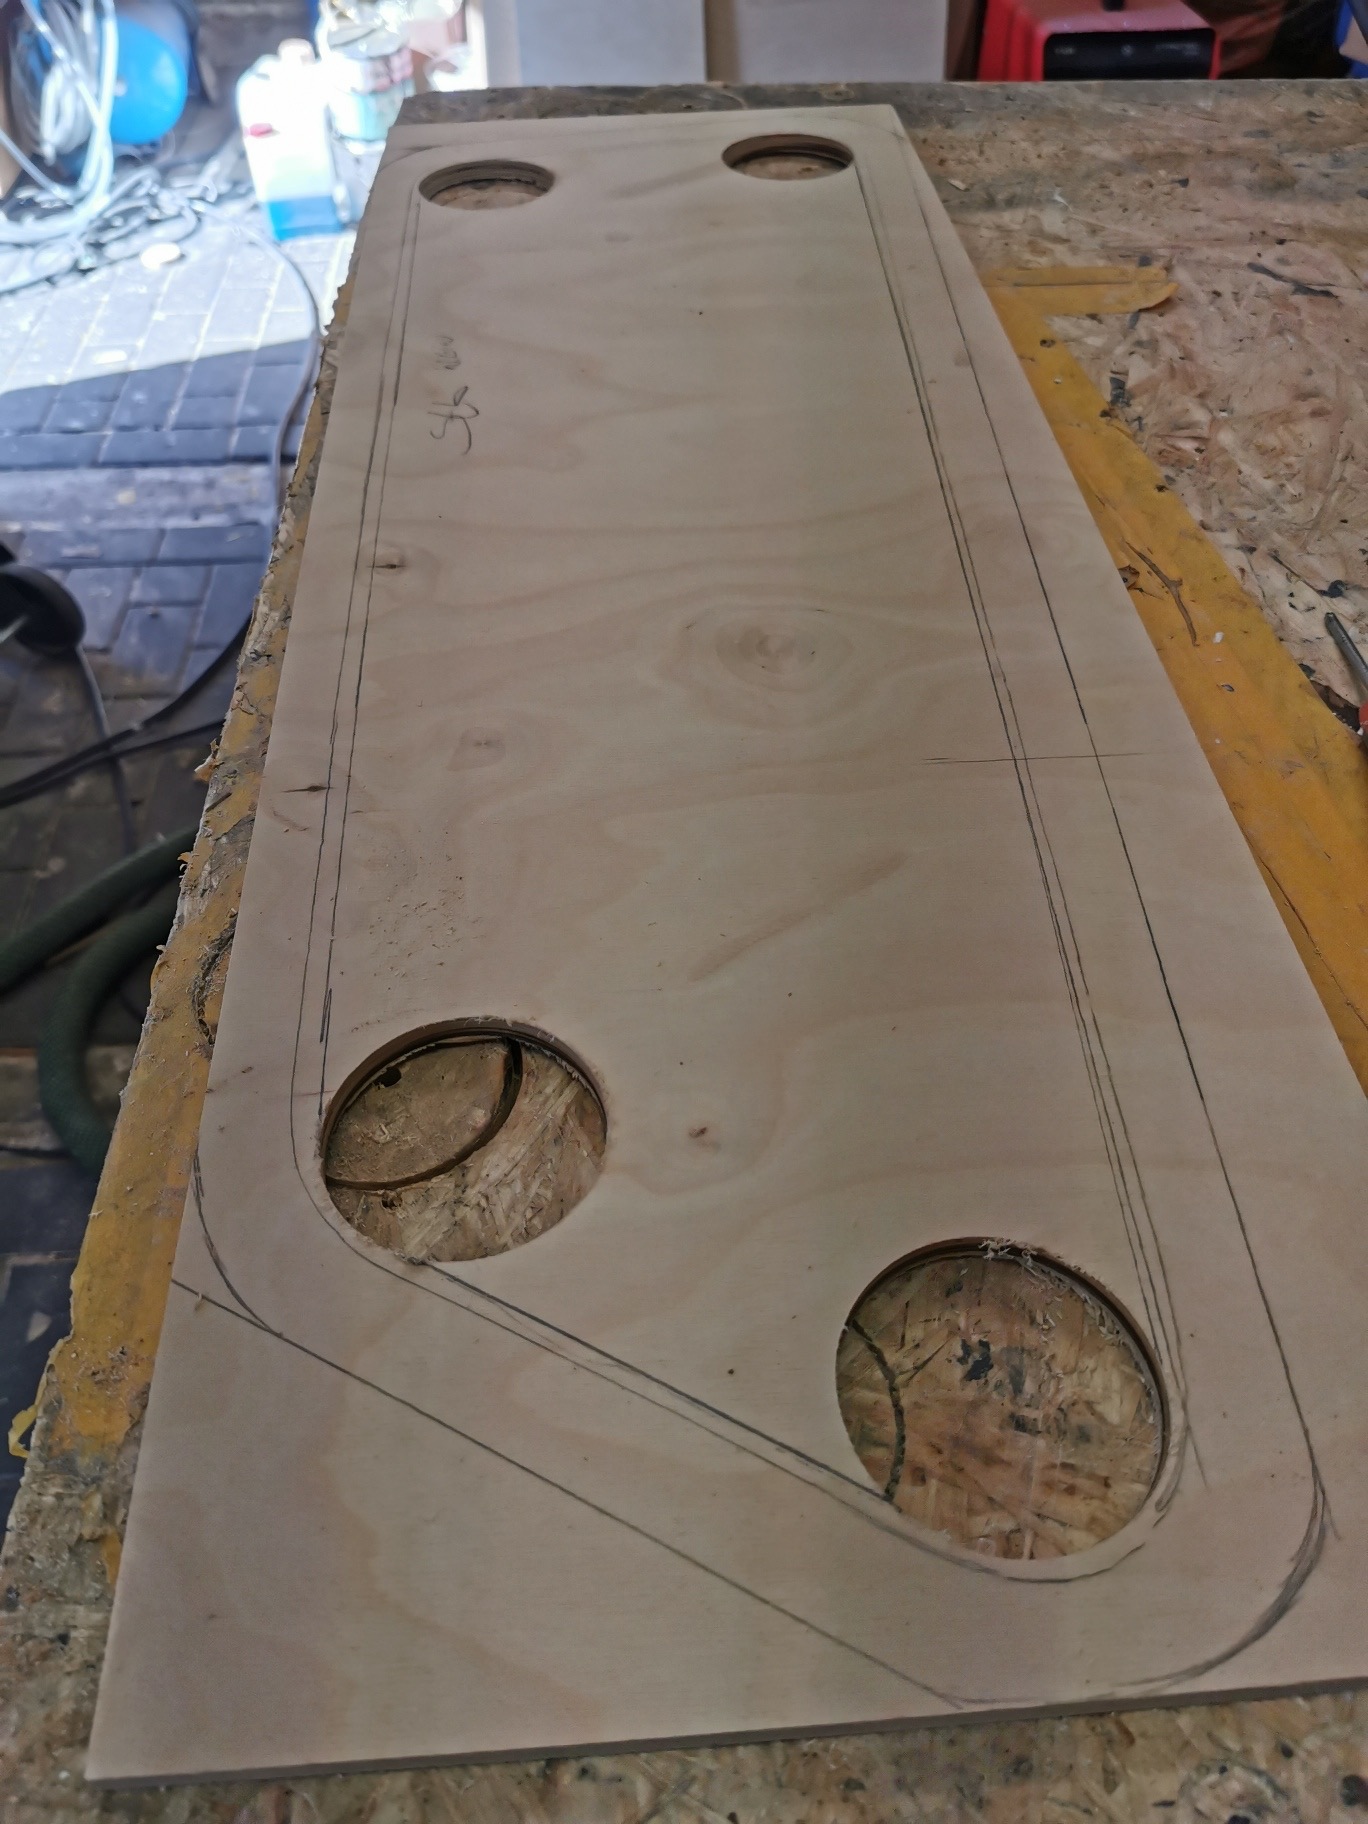
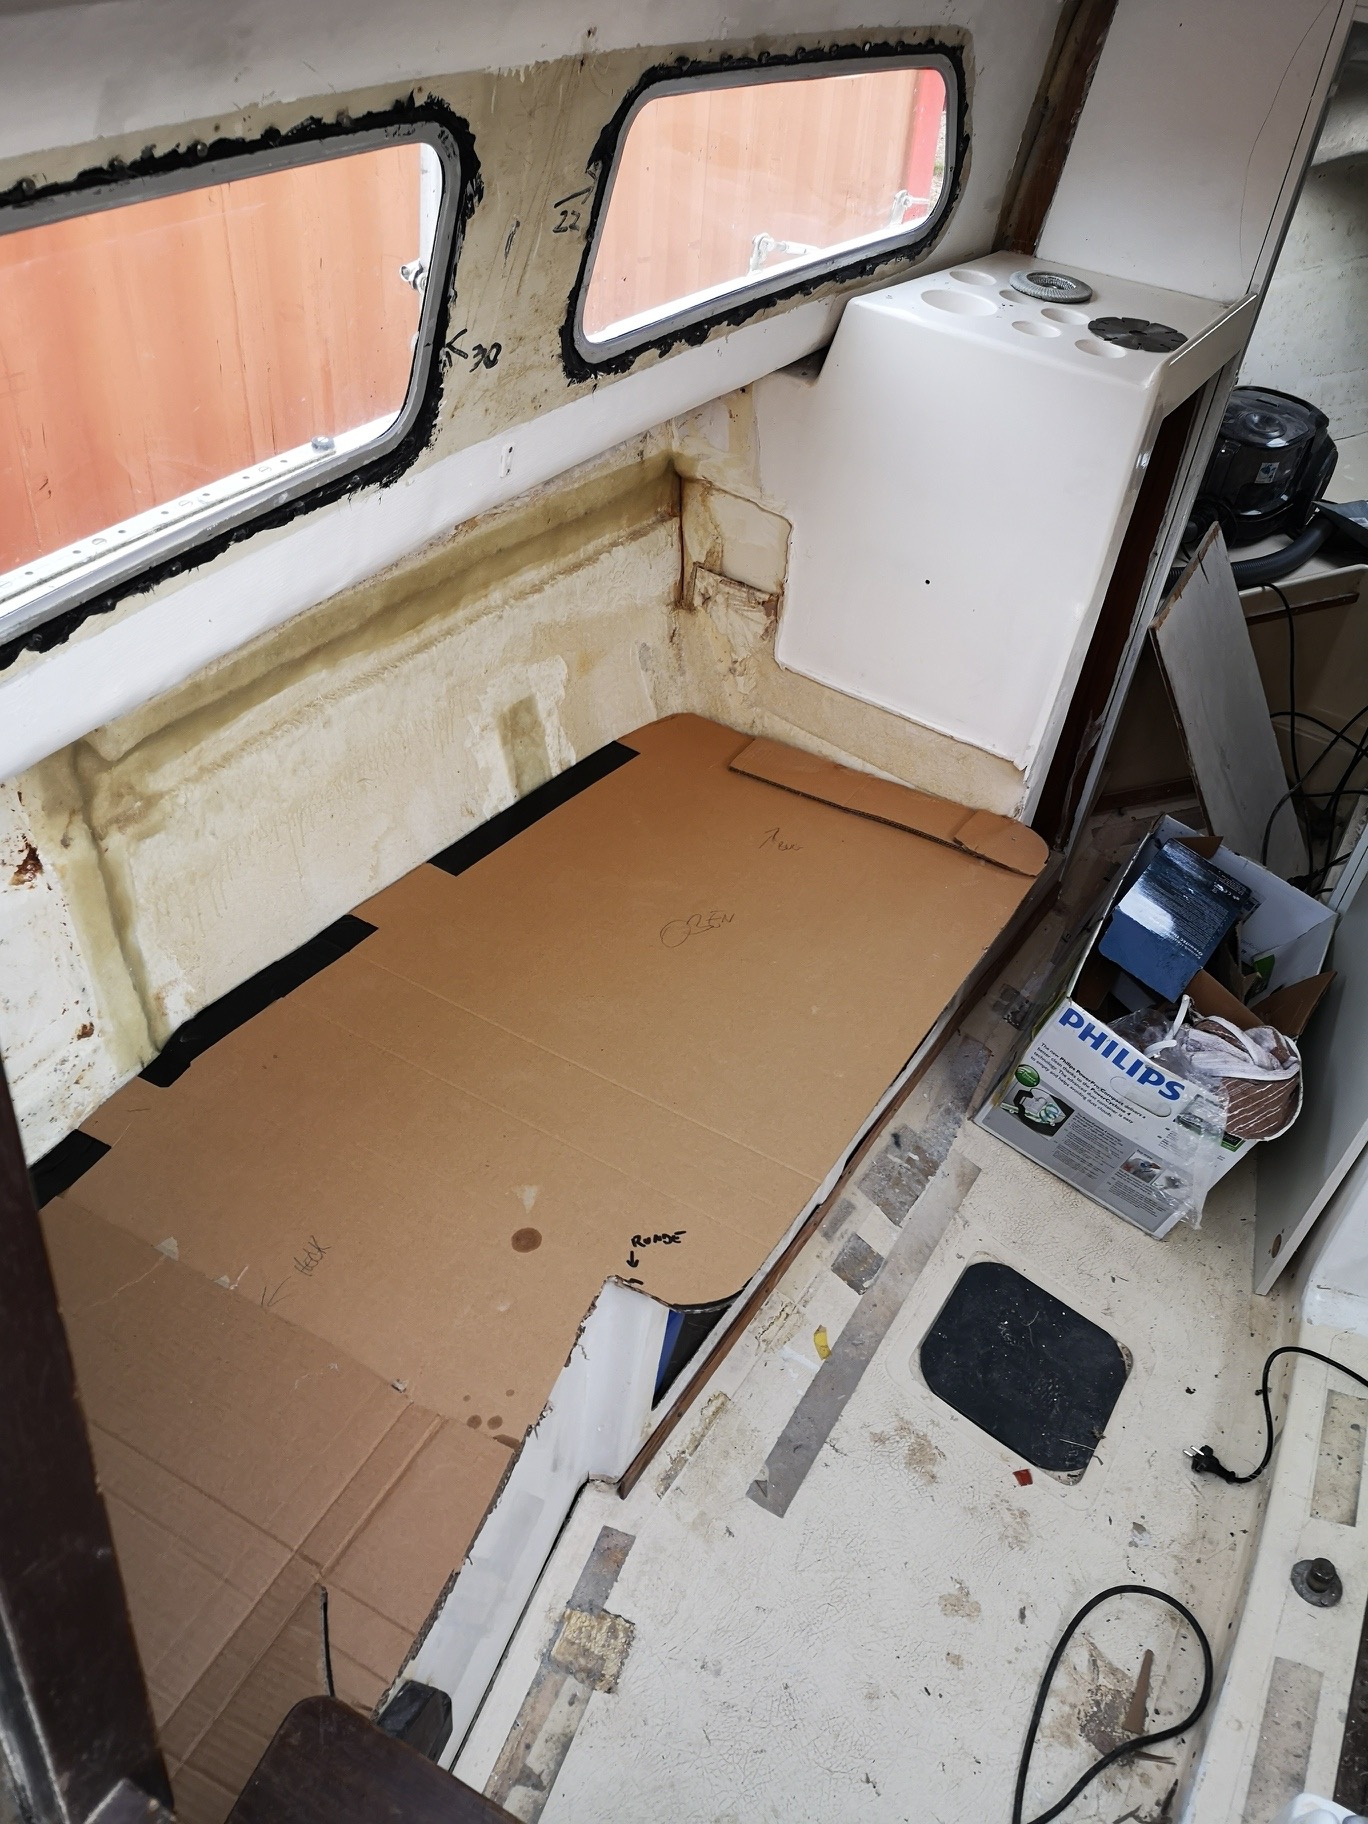
Here you can see the cardboard template for a new floor plate in the salon. A nice laminate is then placed on the board that is still to be made.
The drawer has now been glued with epoxy and you can already see how well it will fit under the curved window panel.
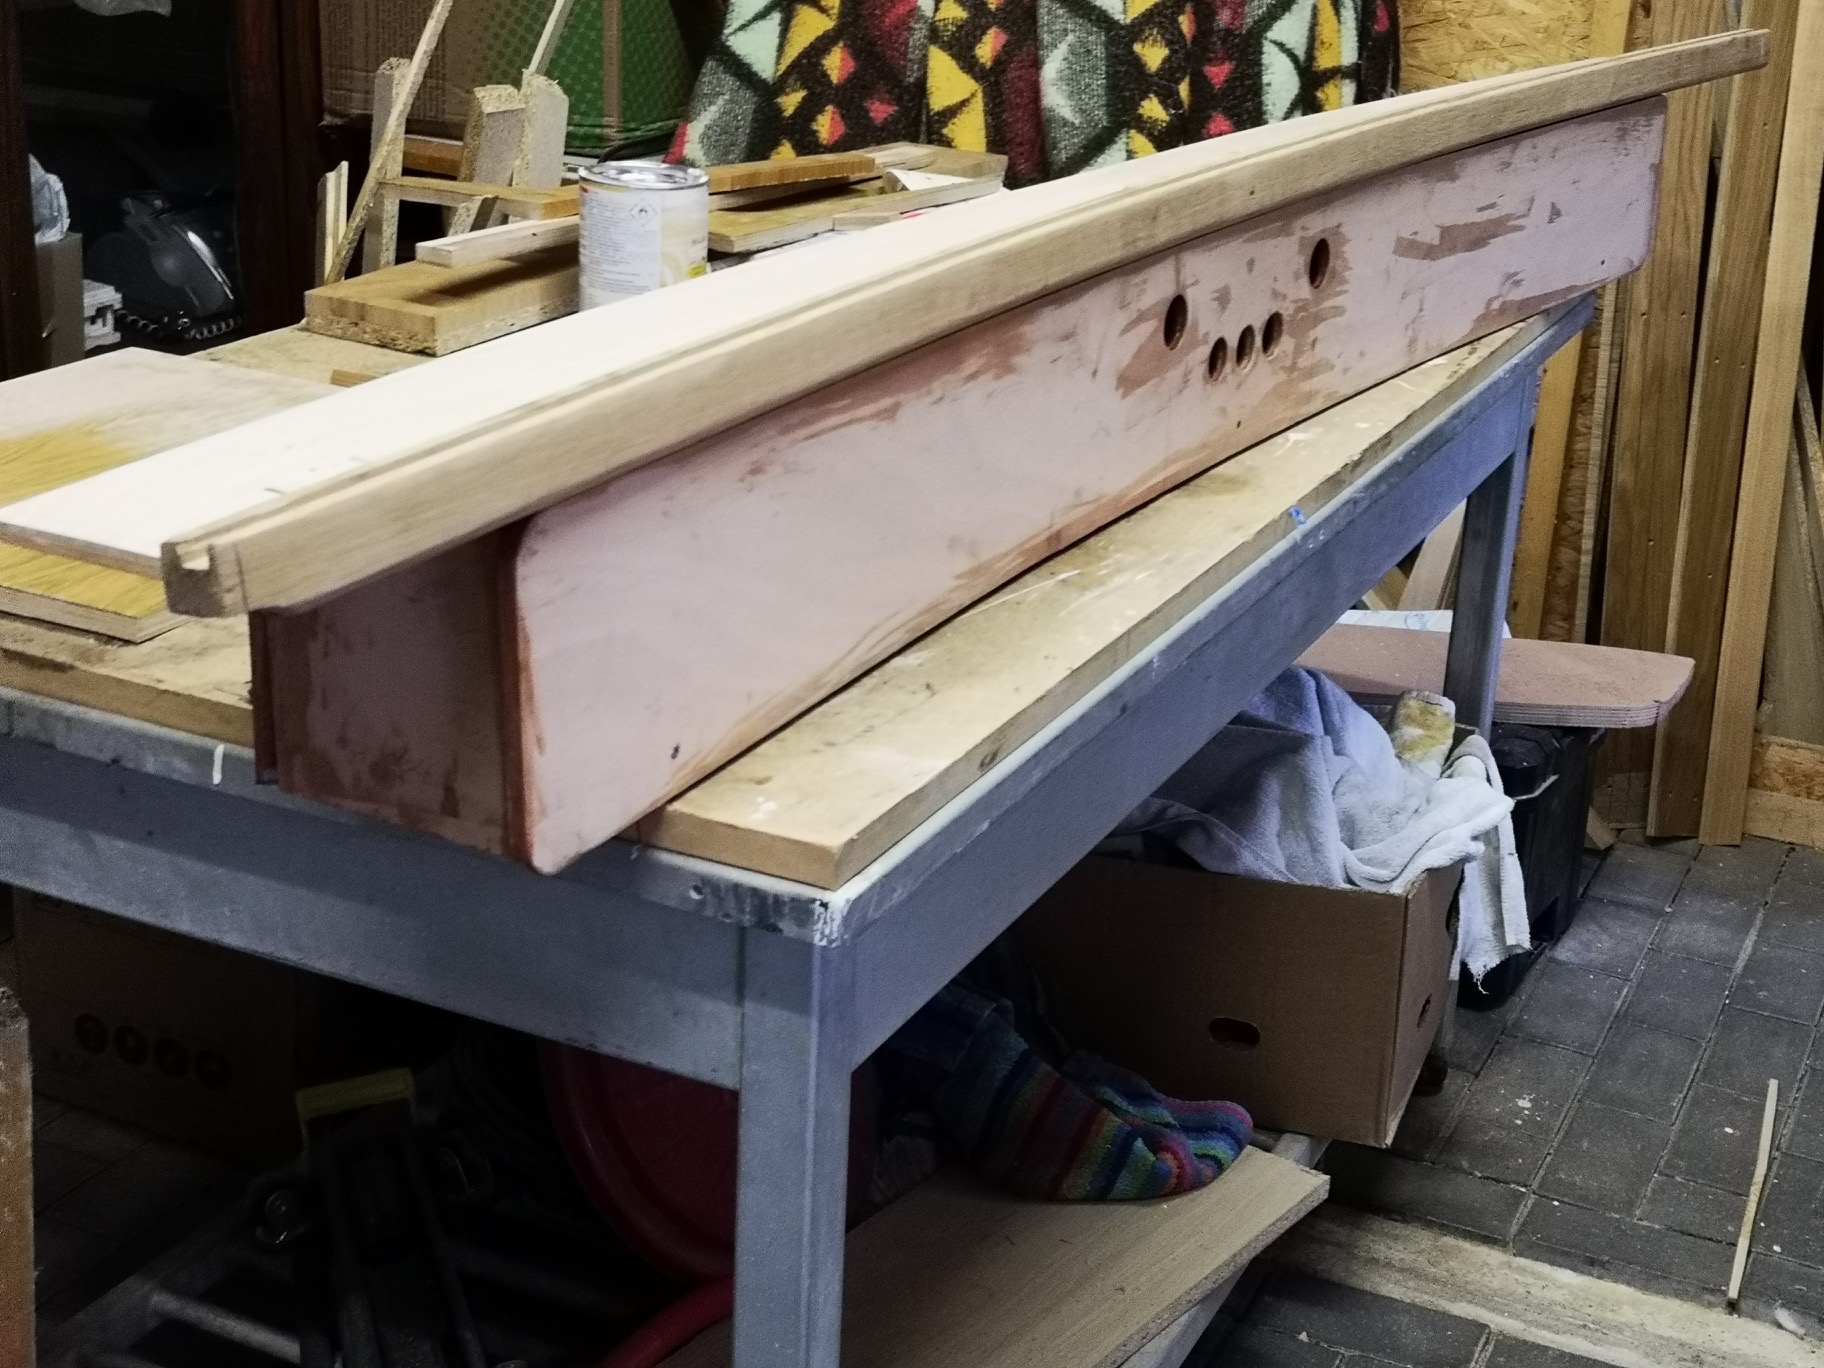
1.3.2020
The drawer is largely finished. The recessed handles are made of stainless steel, an electrical panel with USB and 12V socket is installed centrally and a U-aluminum is attached to the top edge of the drawer front.
Here you can see the cardboard template for the new floor plate in the salon. A nice laminate is then placed on the board that is still to be made.
4.3.2020
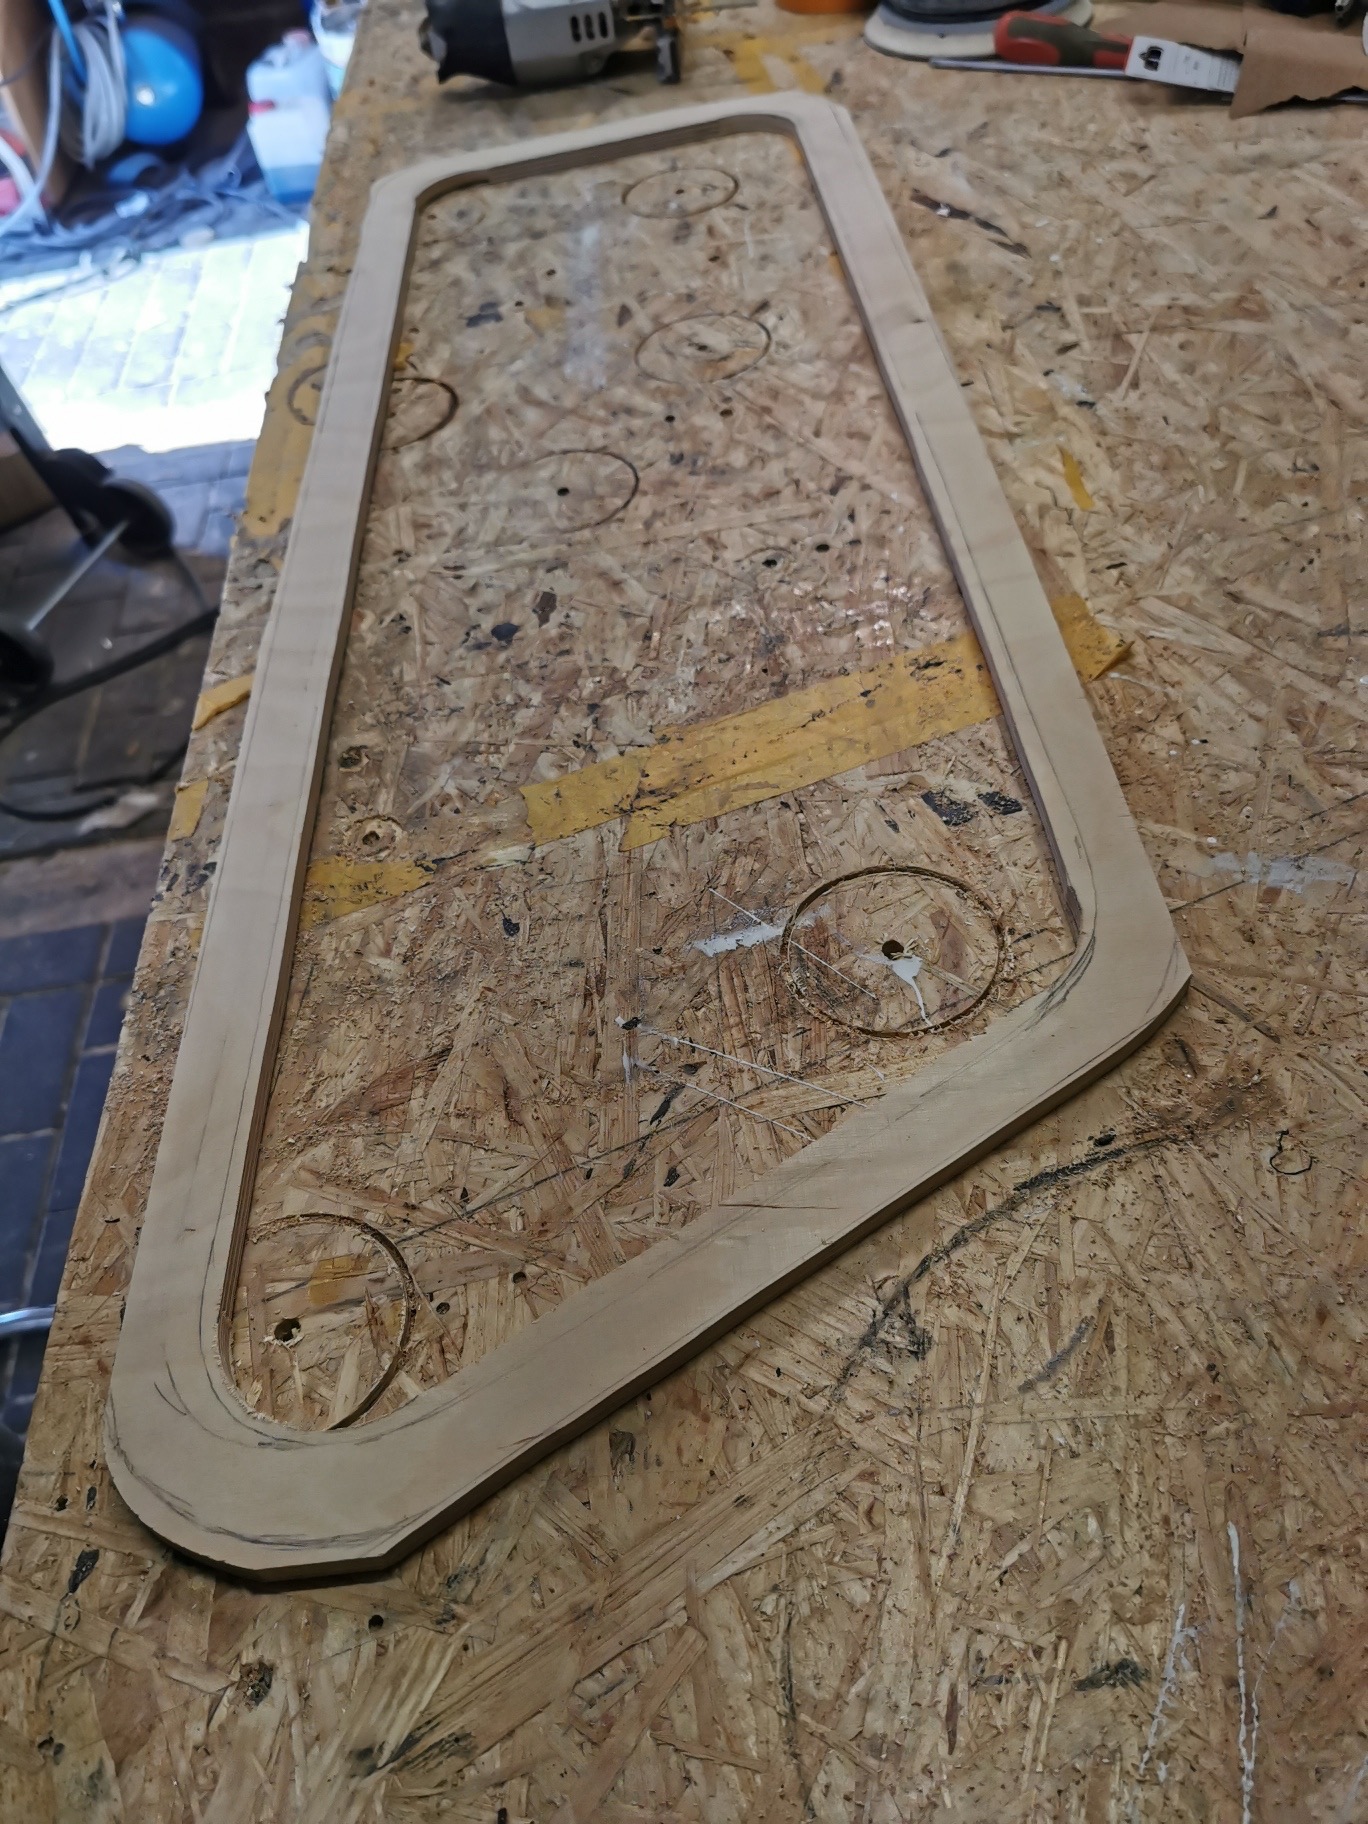
My son saws the base plate and the laminate is already being prepared for a precise cut.

7.3.2020
I applyed Sikaflex to the base plate with the notched trowel, apply the laminate very carefully and cleanly, weigh it down overnight, try it on in the boat the next day, ... be happy that everything fits and another step is completed ;-)

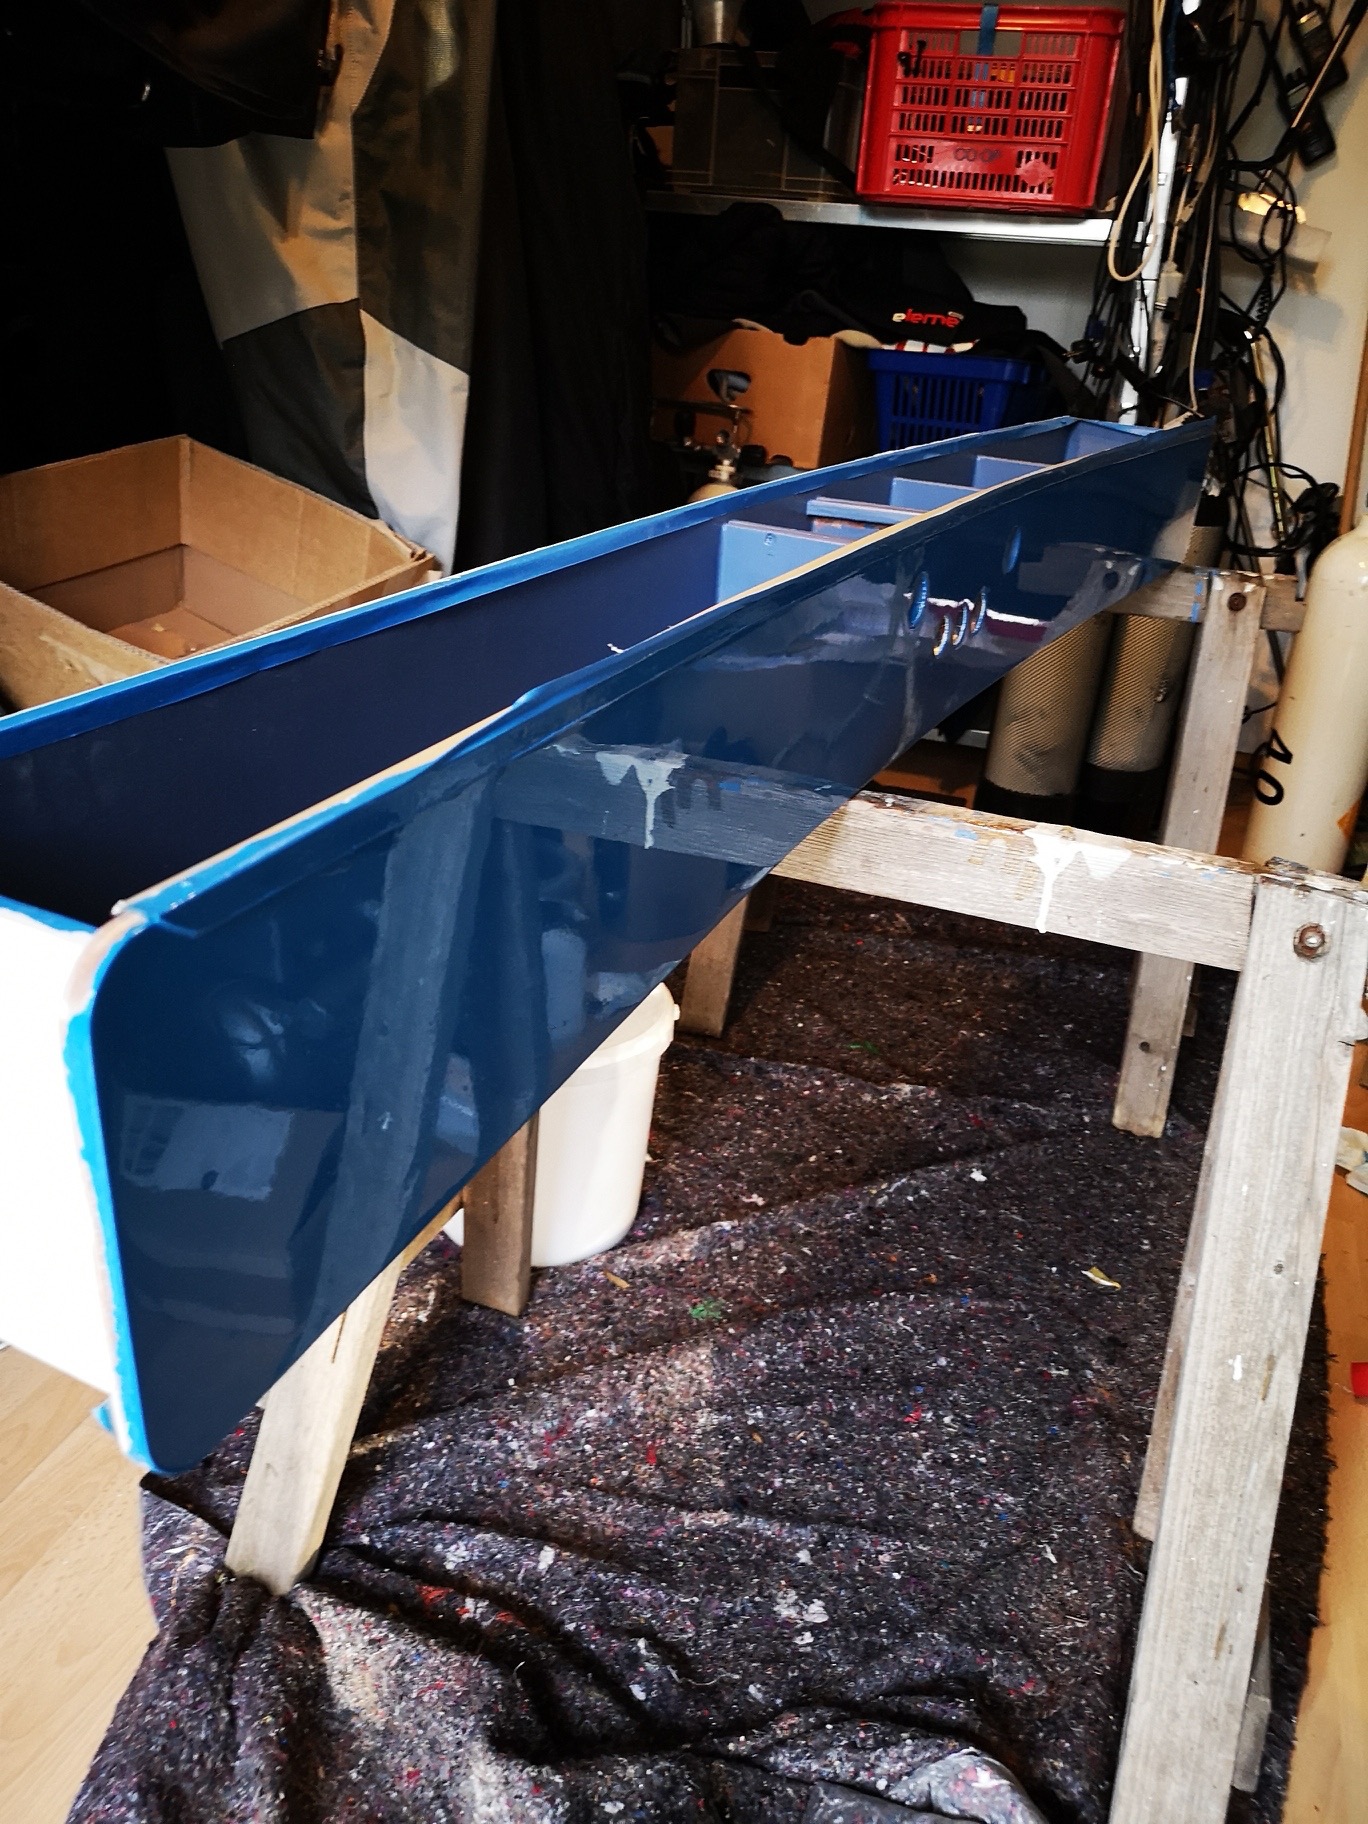
The drawer got its drawer slides today and is almost finished.

The port side ceiling panel is currently being duplicated based on the old panel.

13.3.2020
The benches will be repainted shortly. Before that, they have to be filled and sanded.
As long as I can't go into the warm shipyard, the interior work continues.
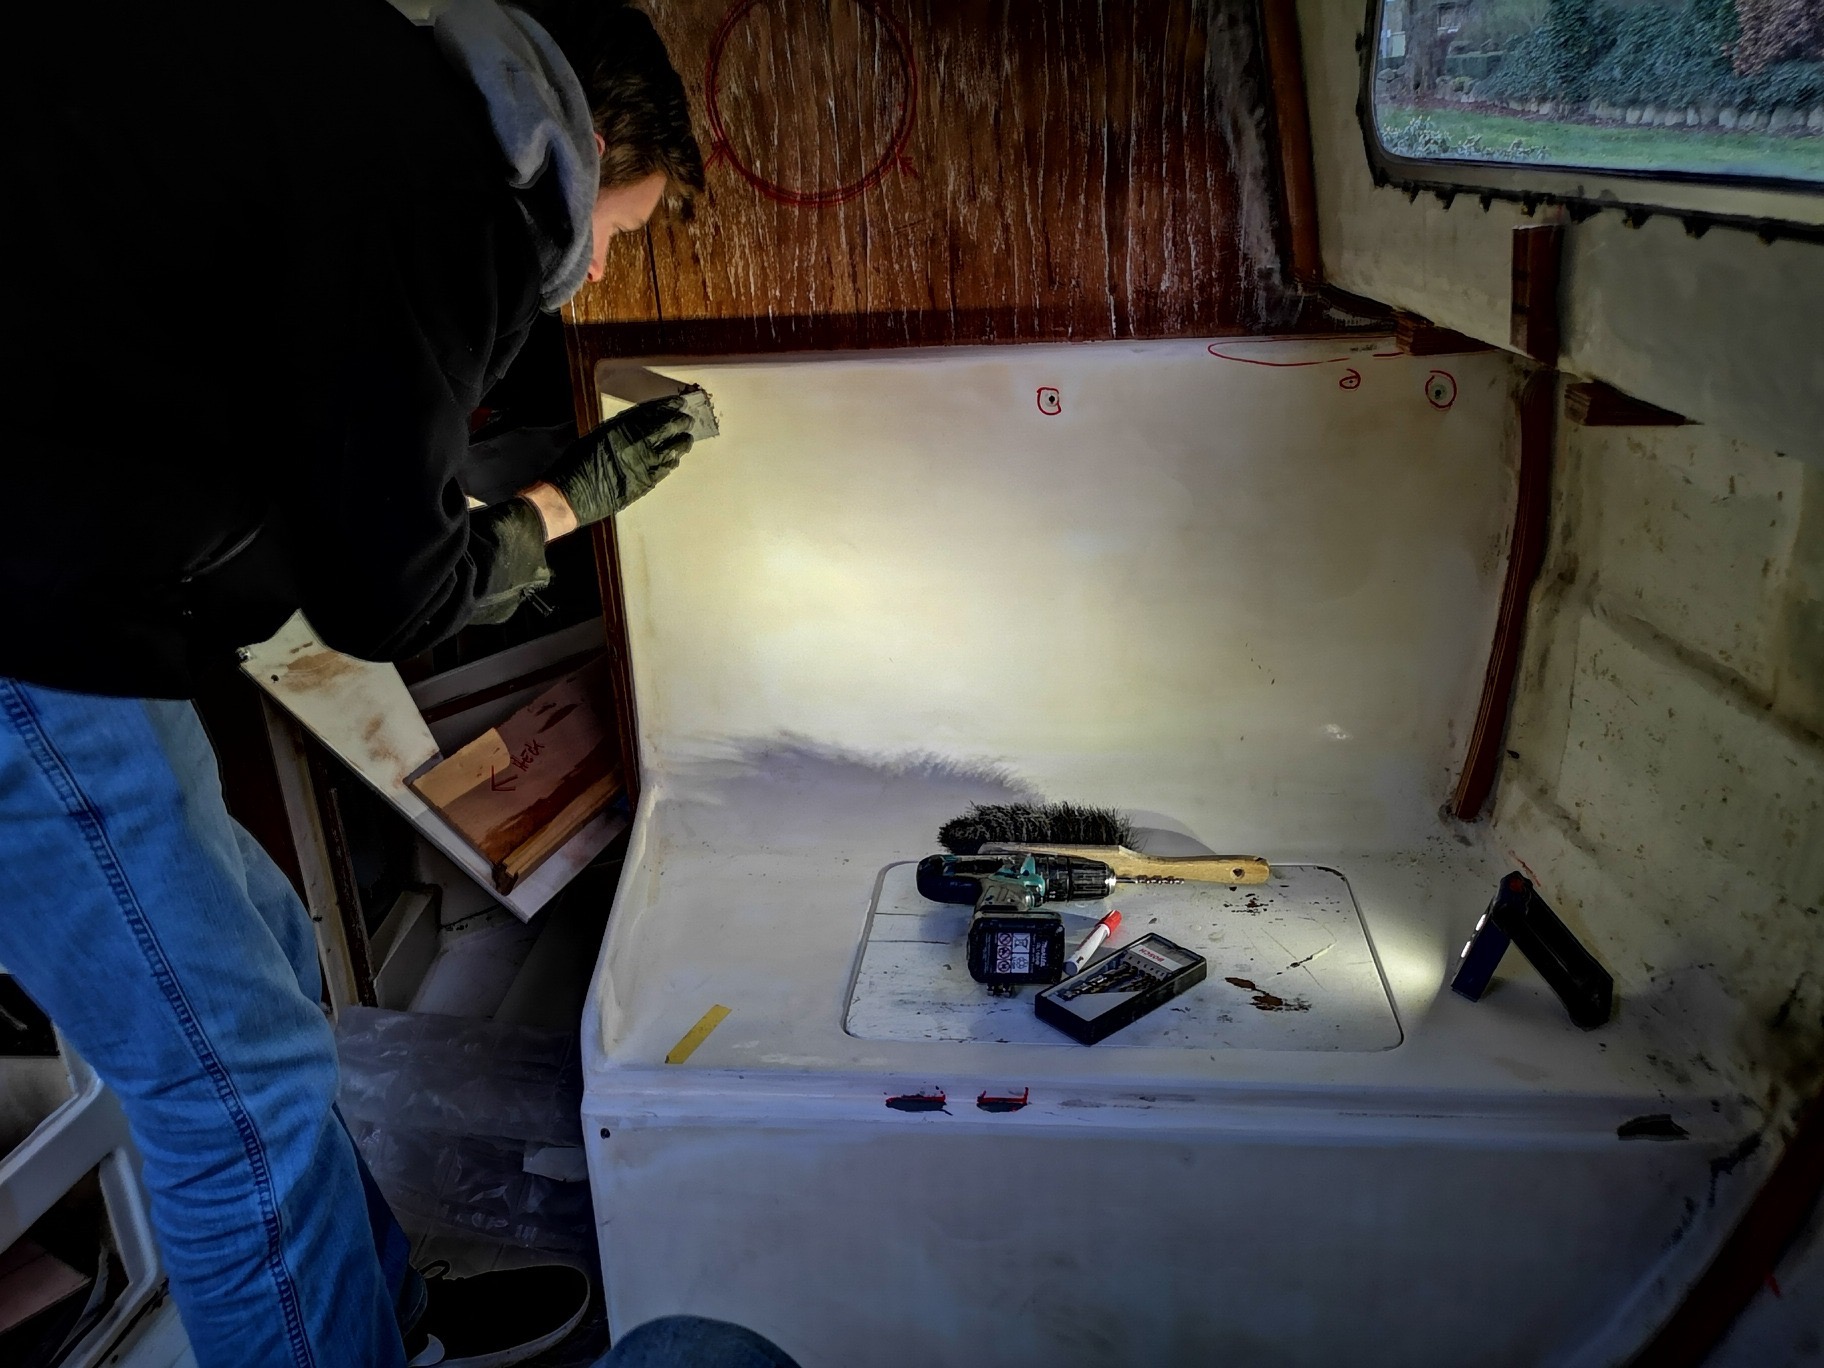
My son is still helping me with all my work.
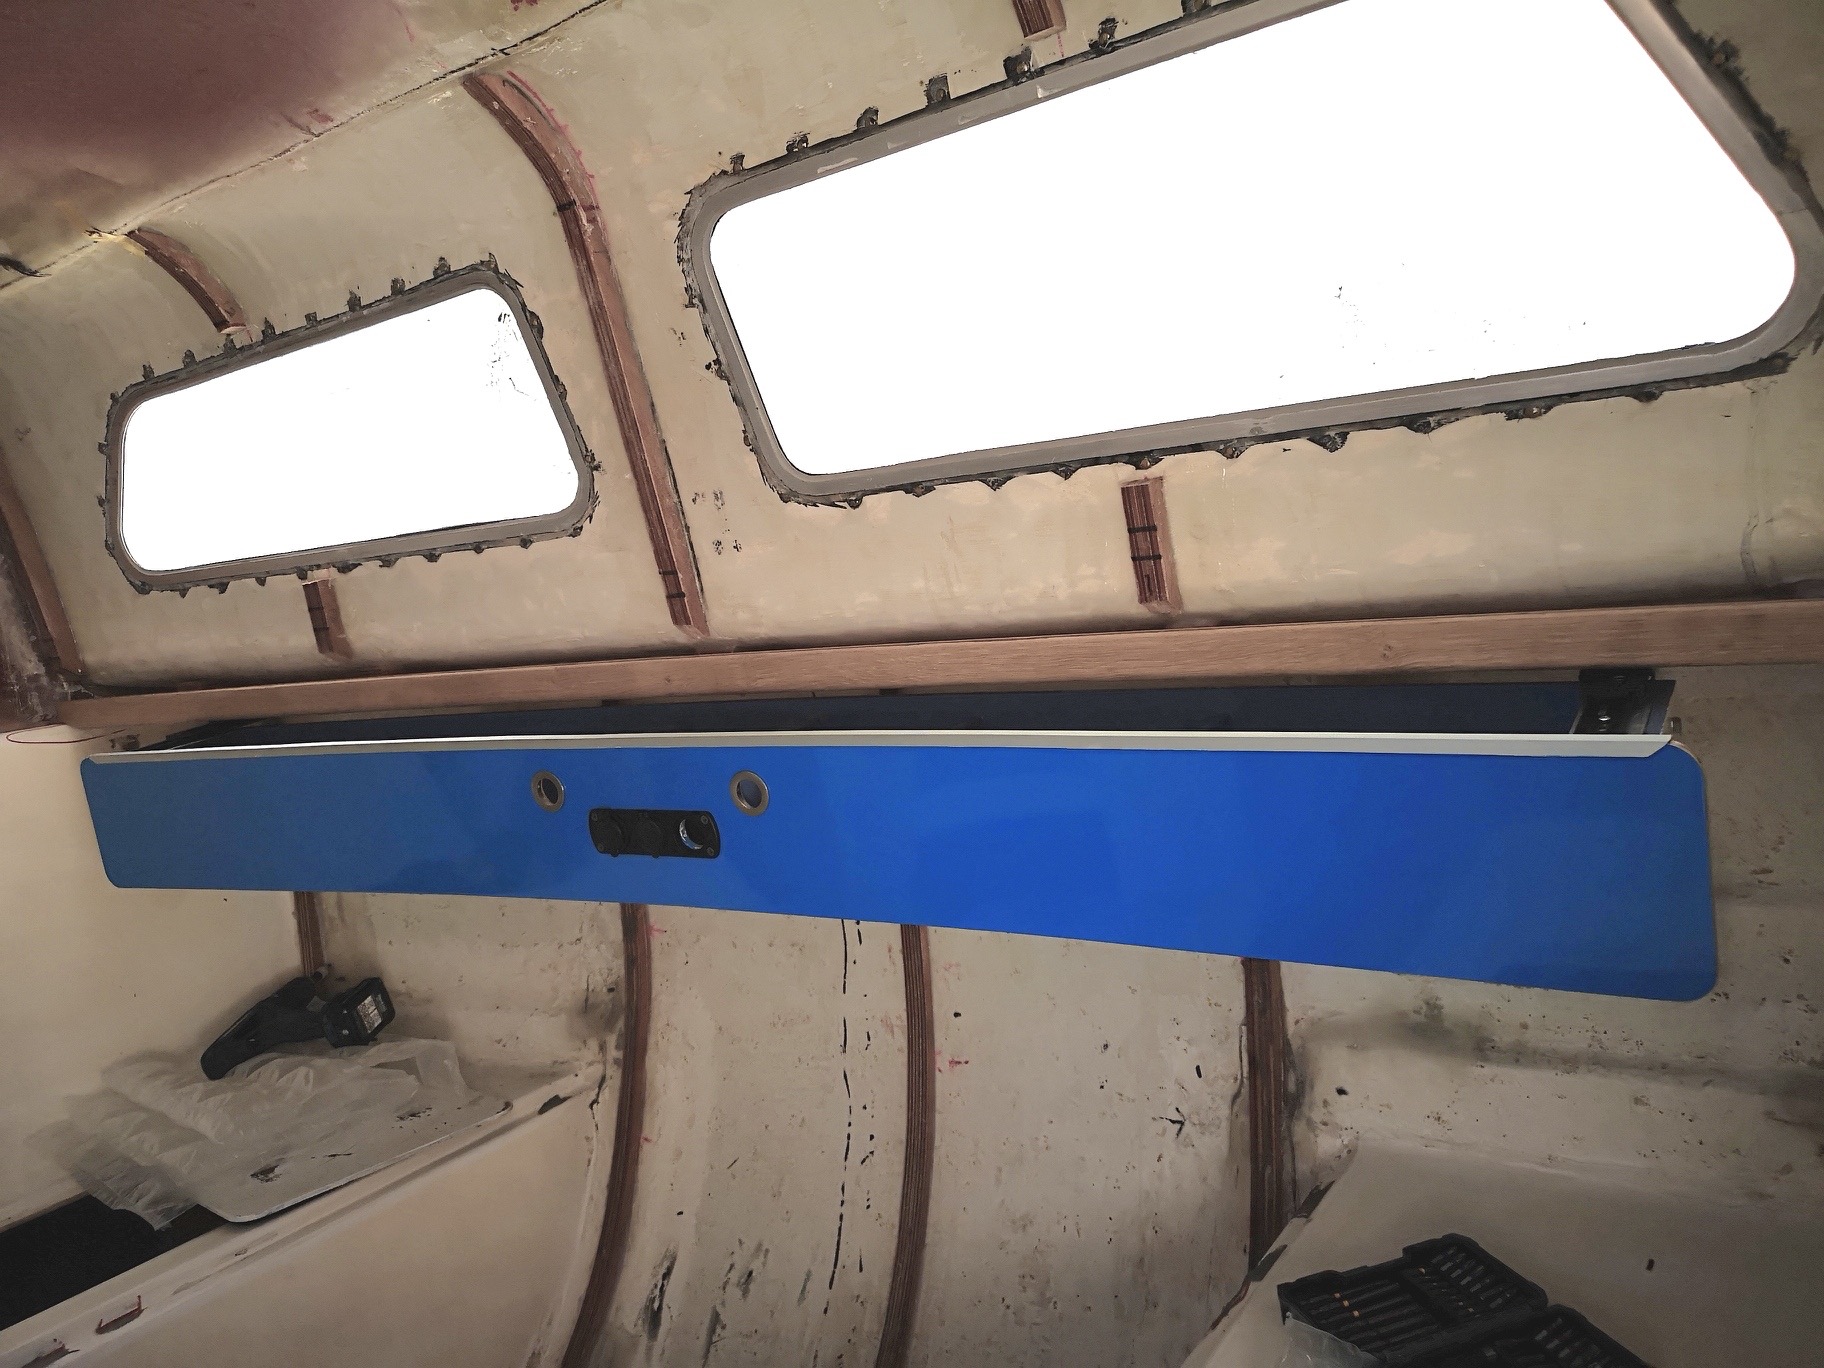
The border plank of the port side window panel is now also created.
14.3.2020
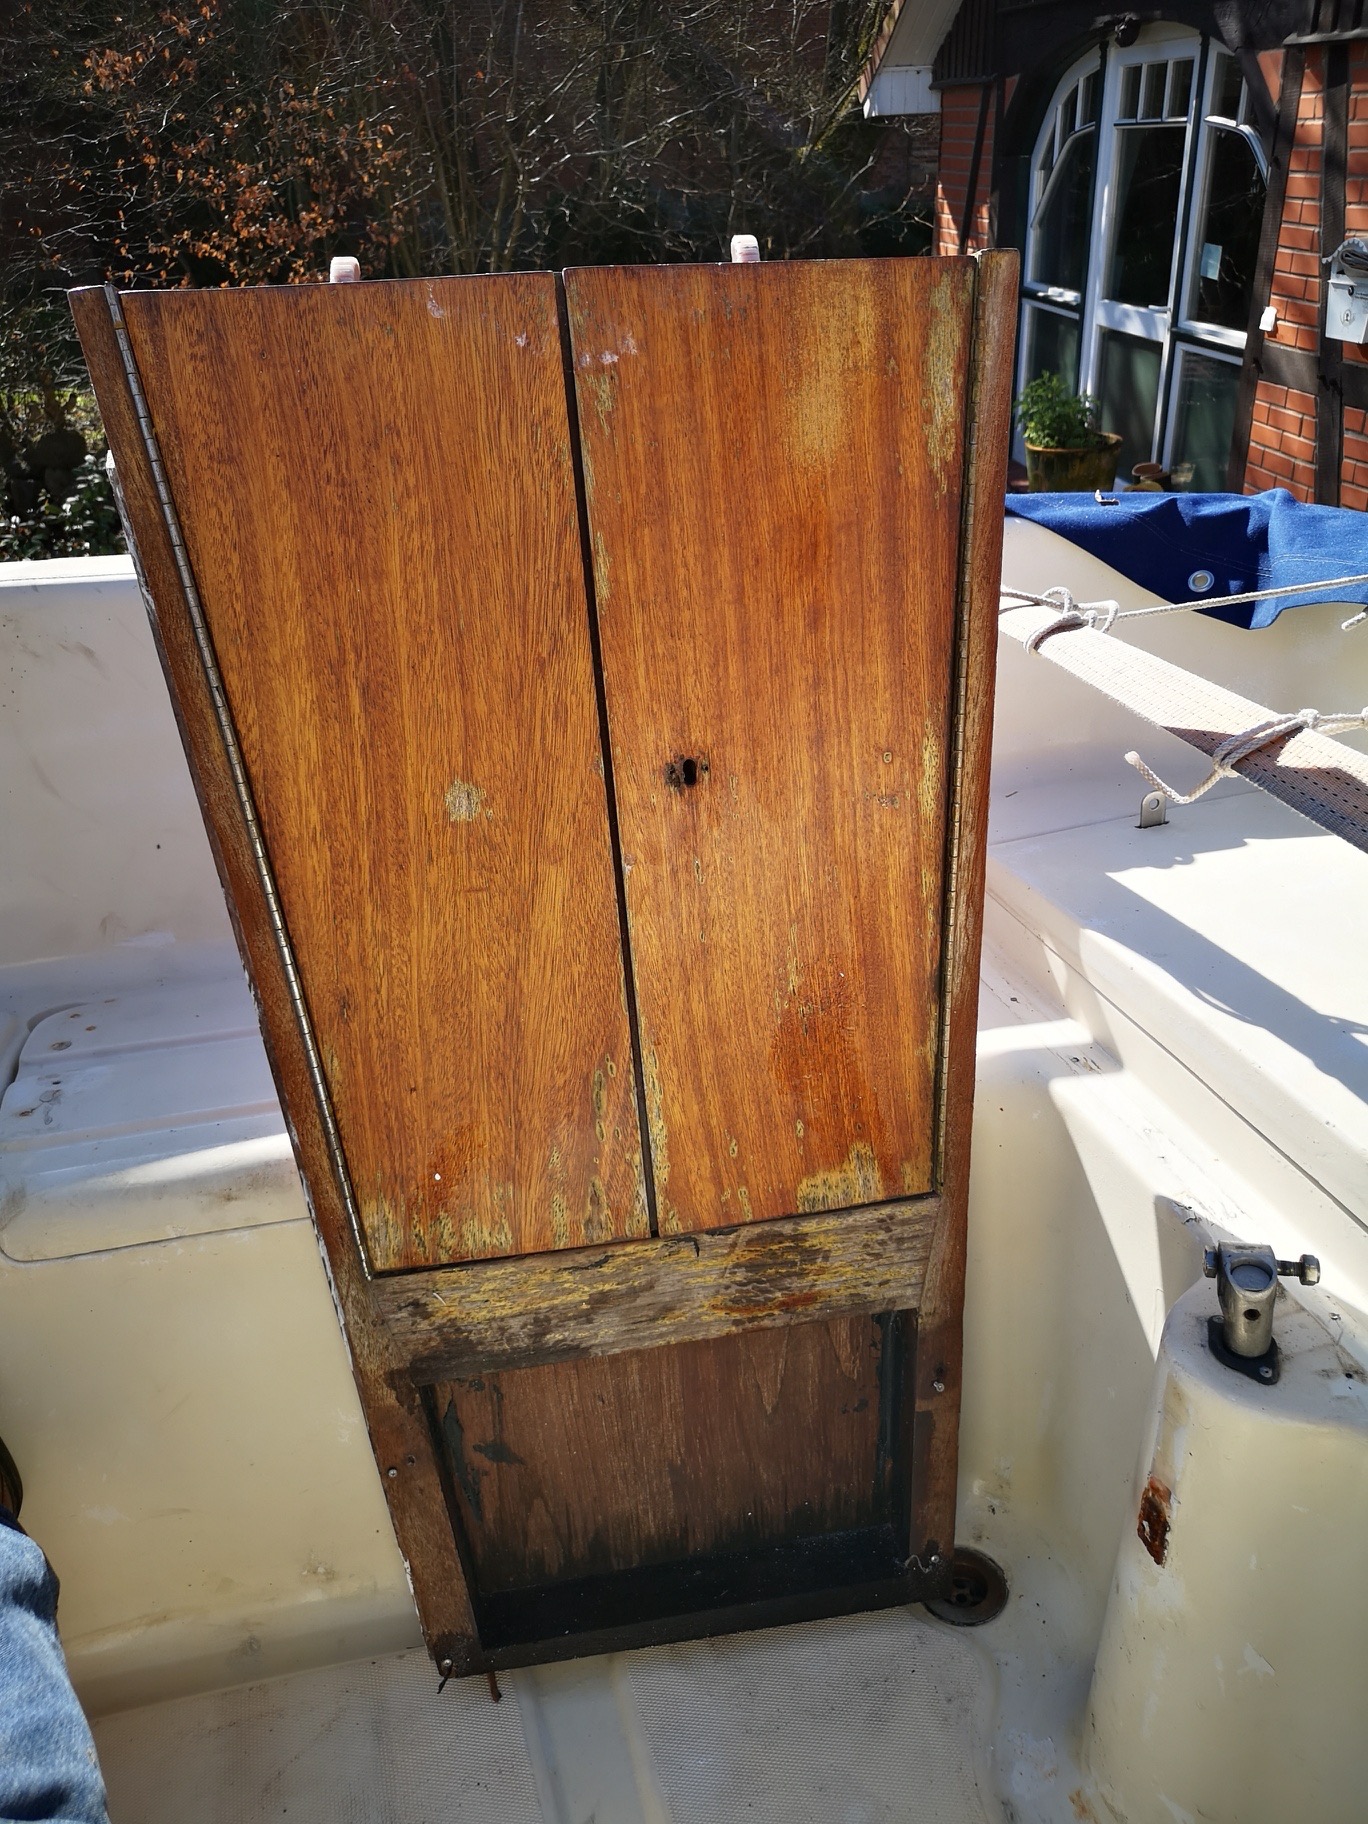
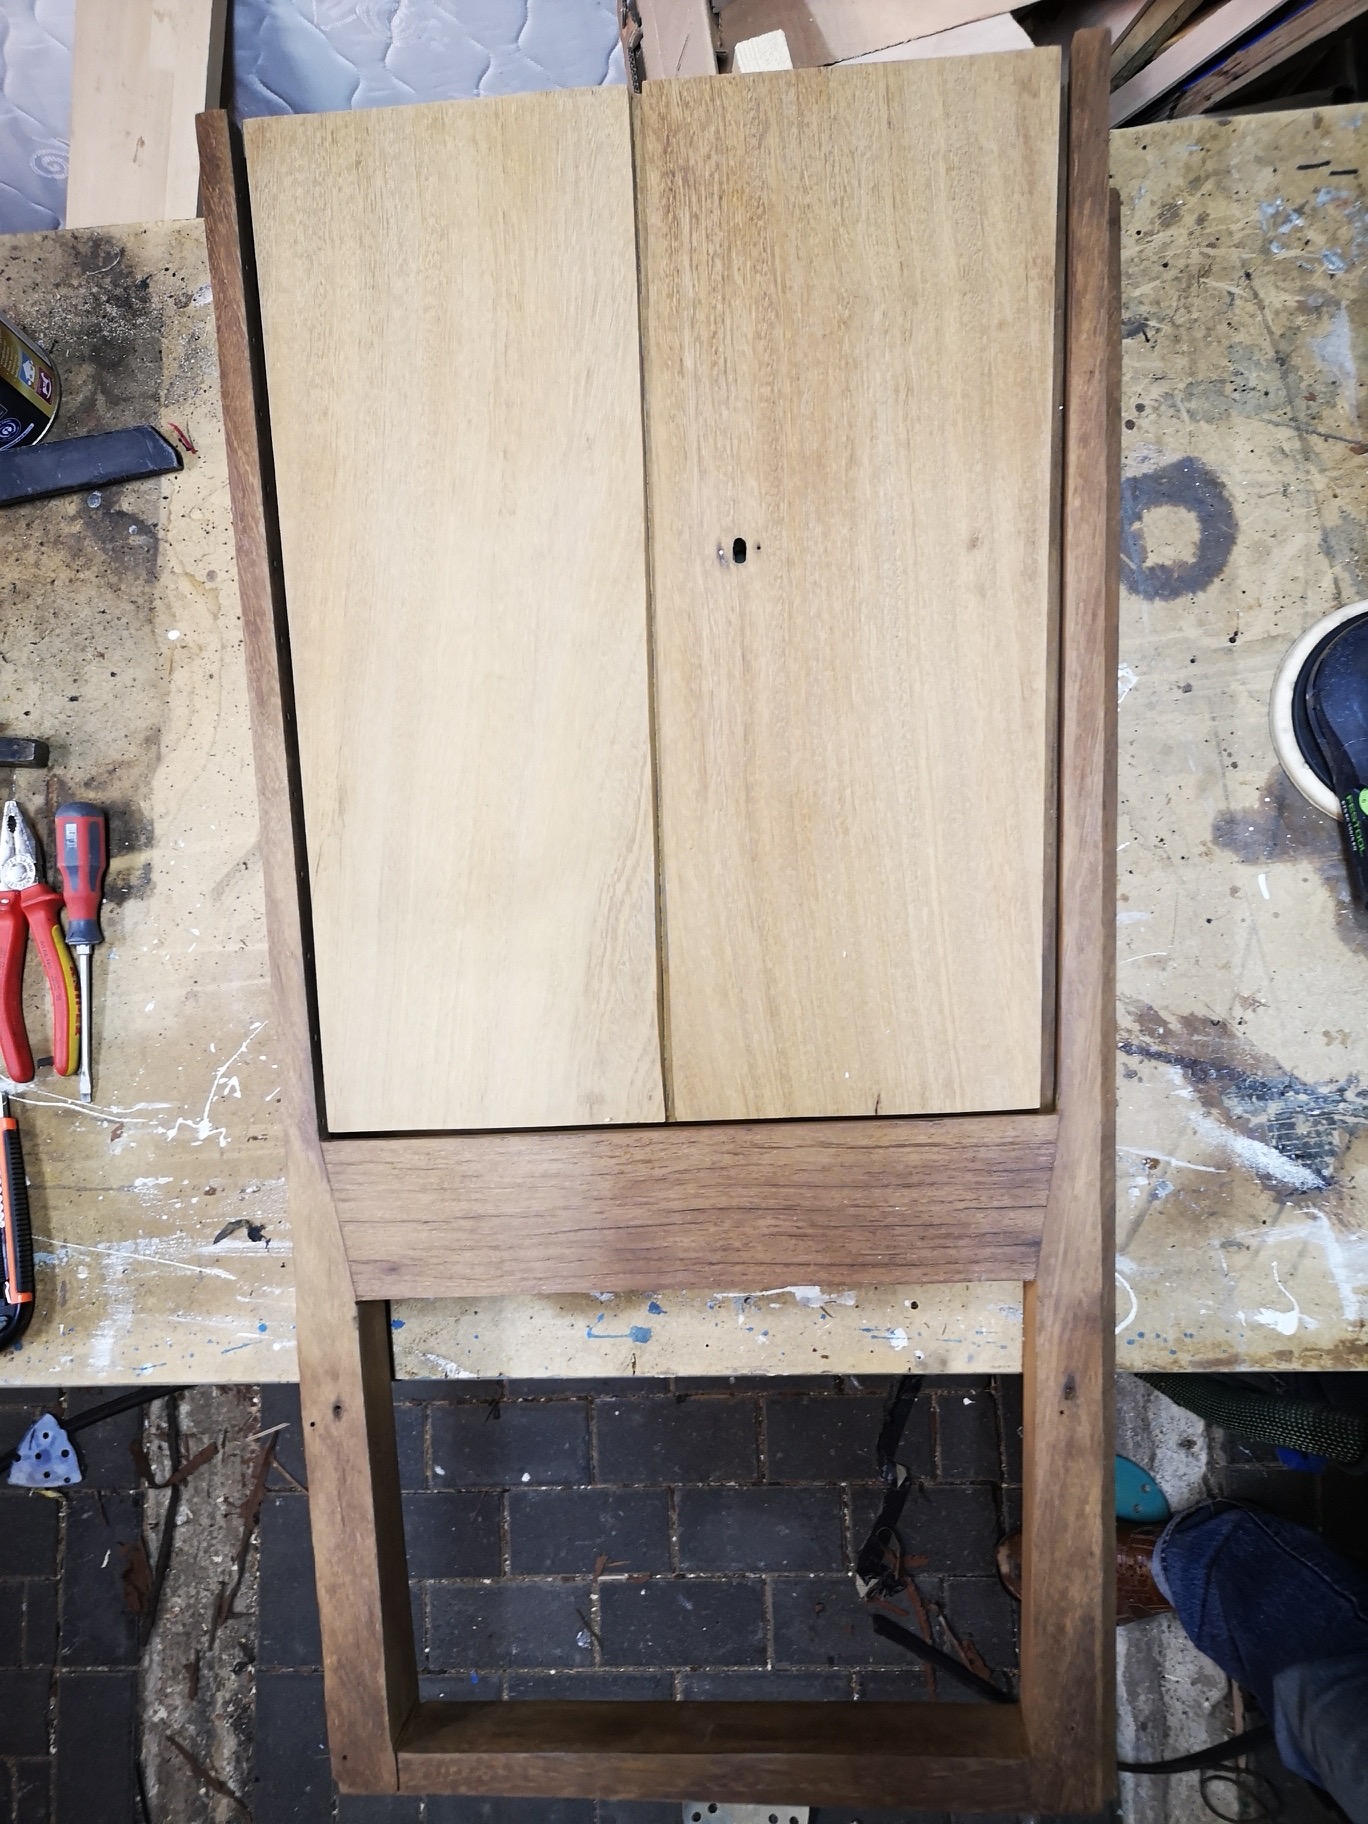
Today I removed the entrance hatch and found that it is absolutely fine under the old paint. I guess the hatch is made of teak.
22.3.2020
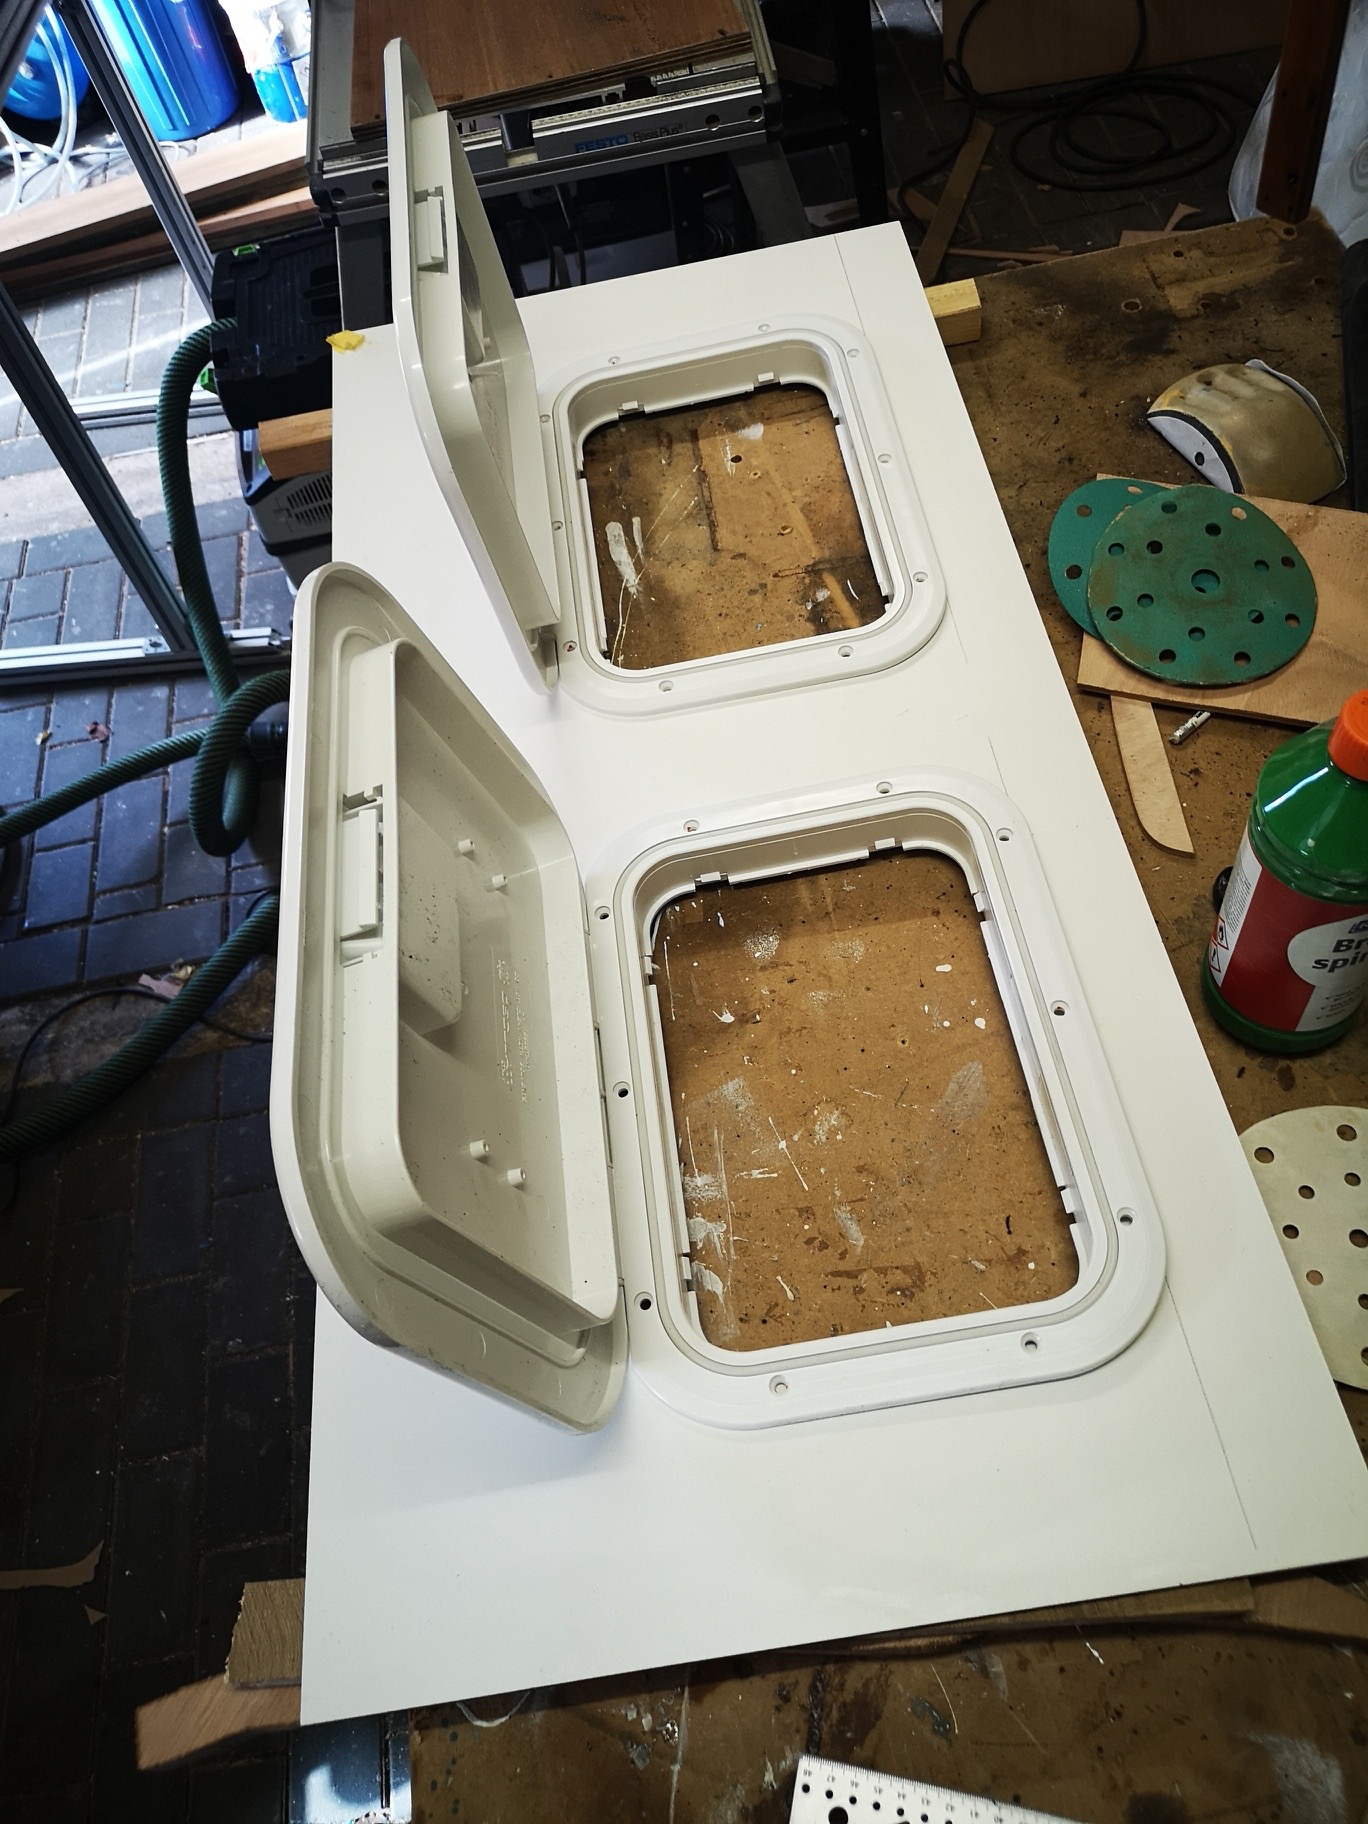
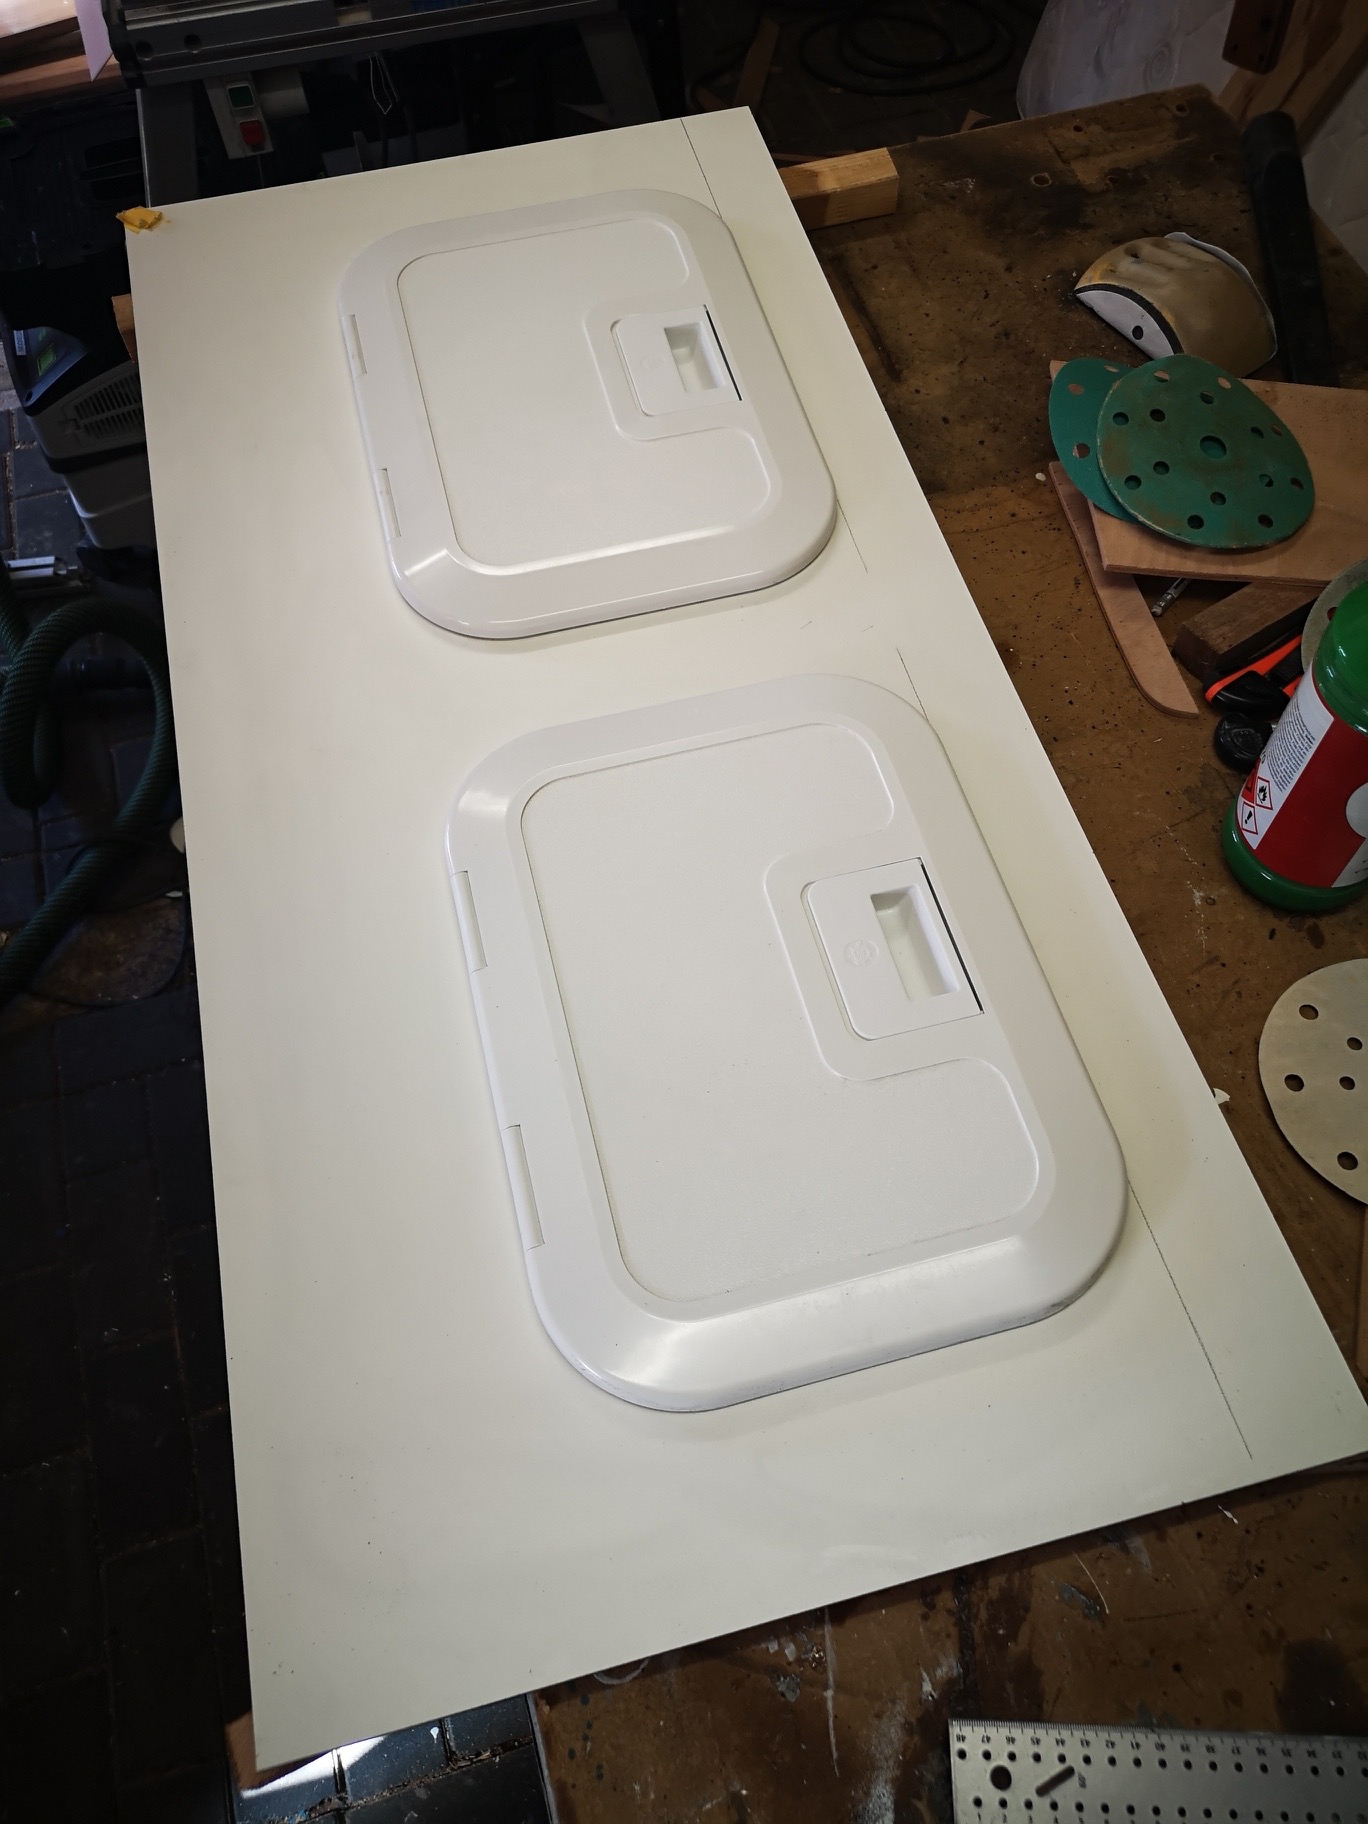
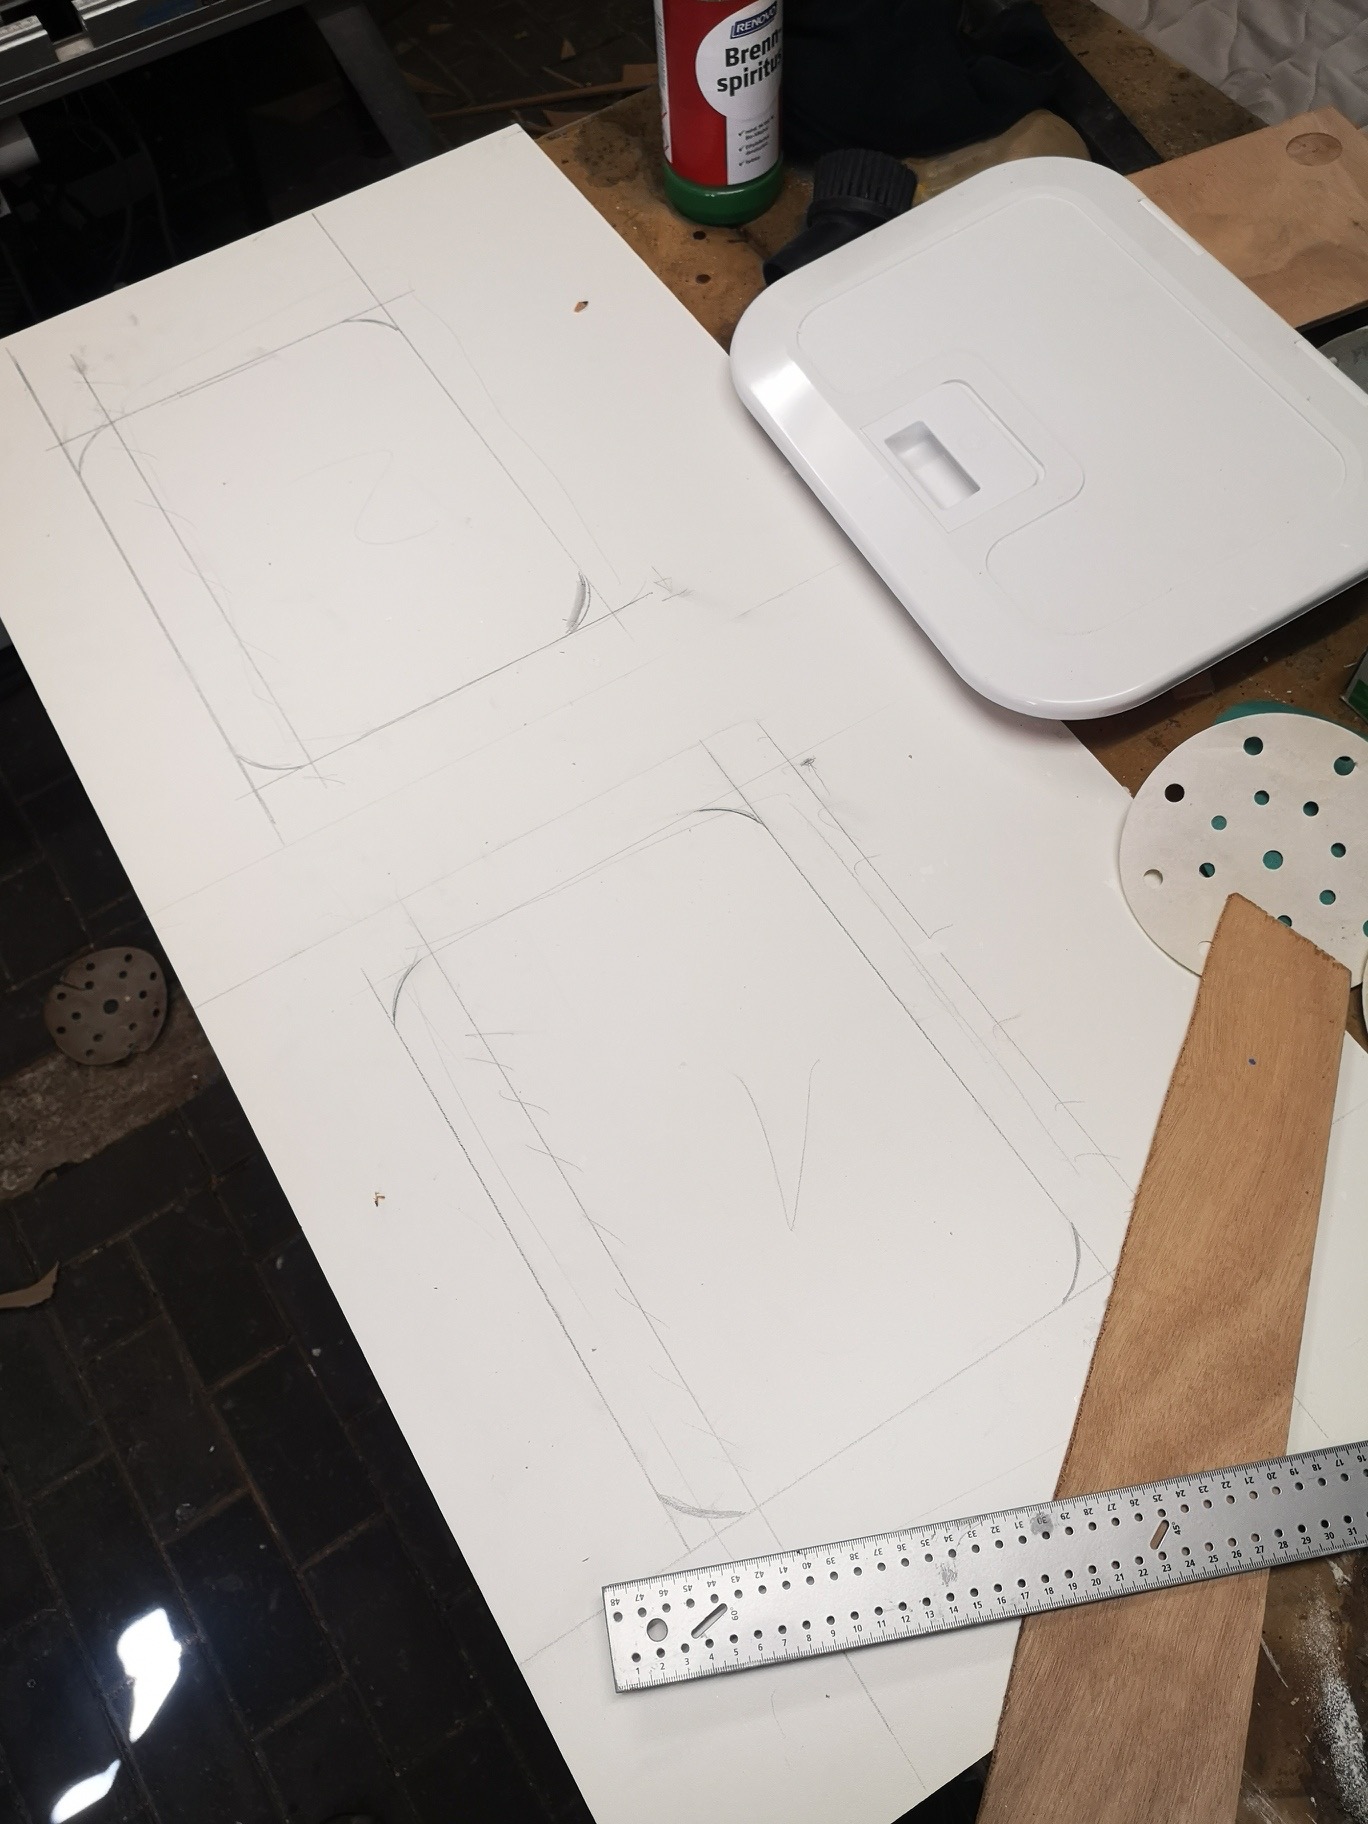
In front of the remaining closet, on the port side in the salon, I cover with a duro-plastic front, in which I fitted two inspection hatches today.
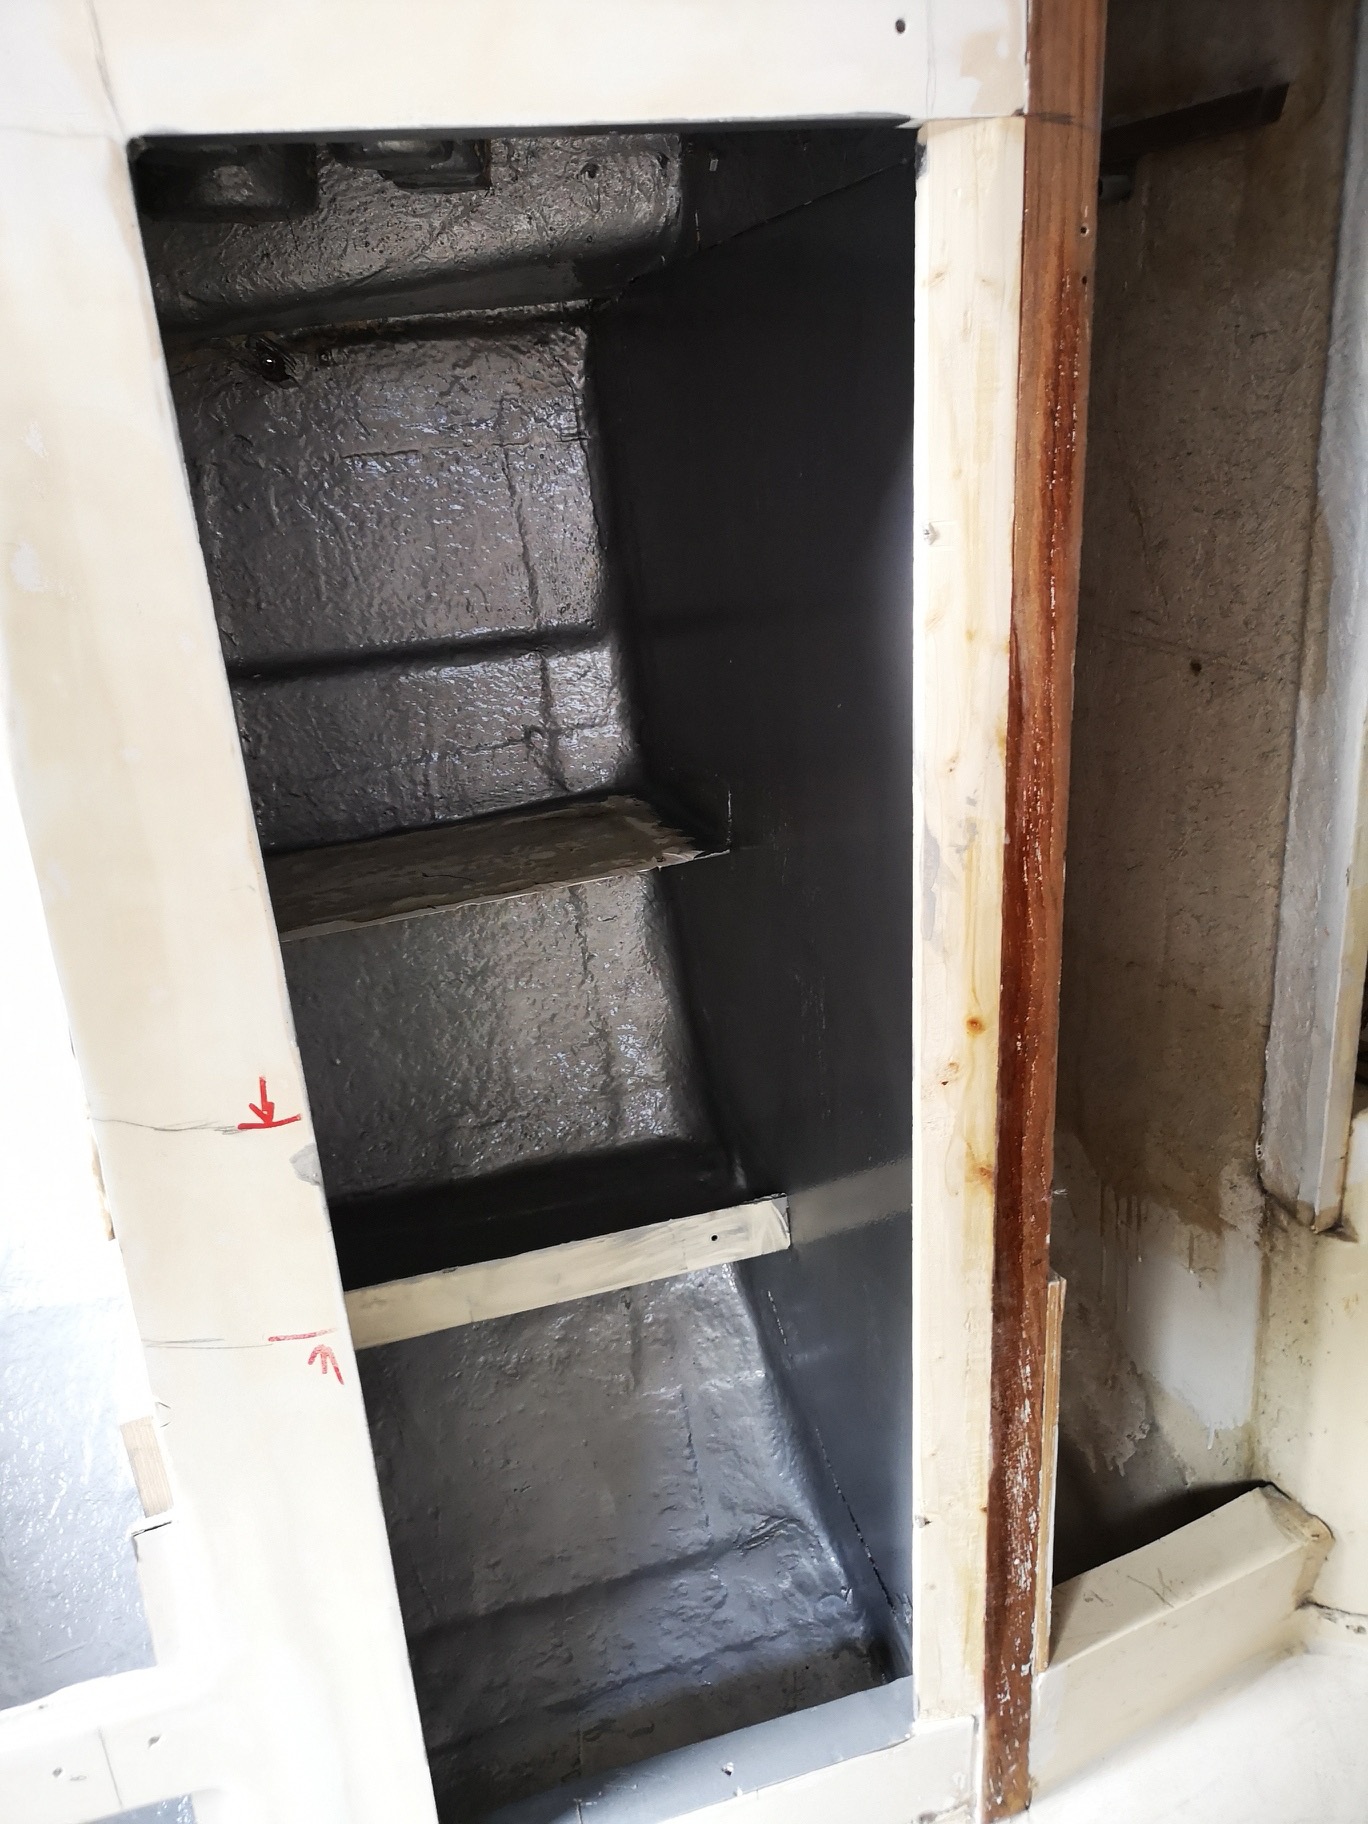
24.3.2020
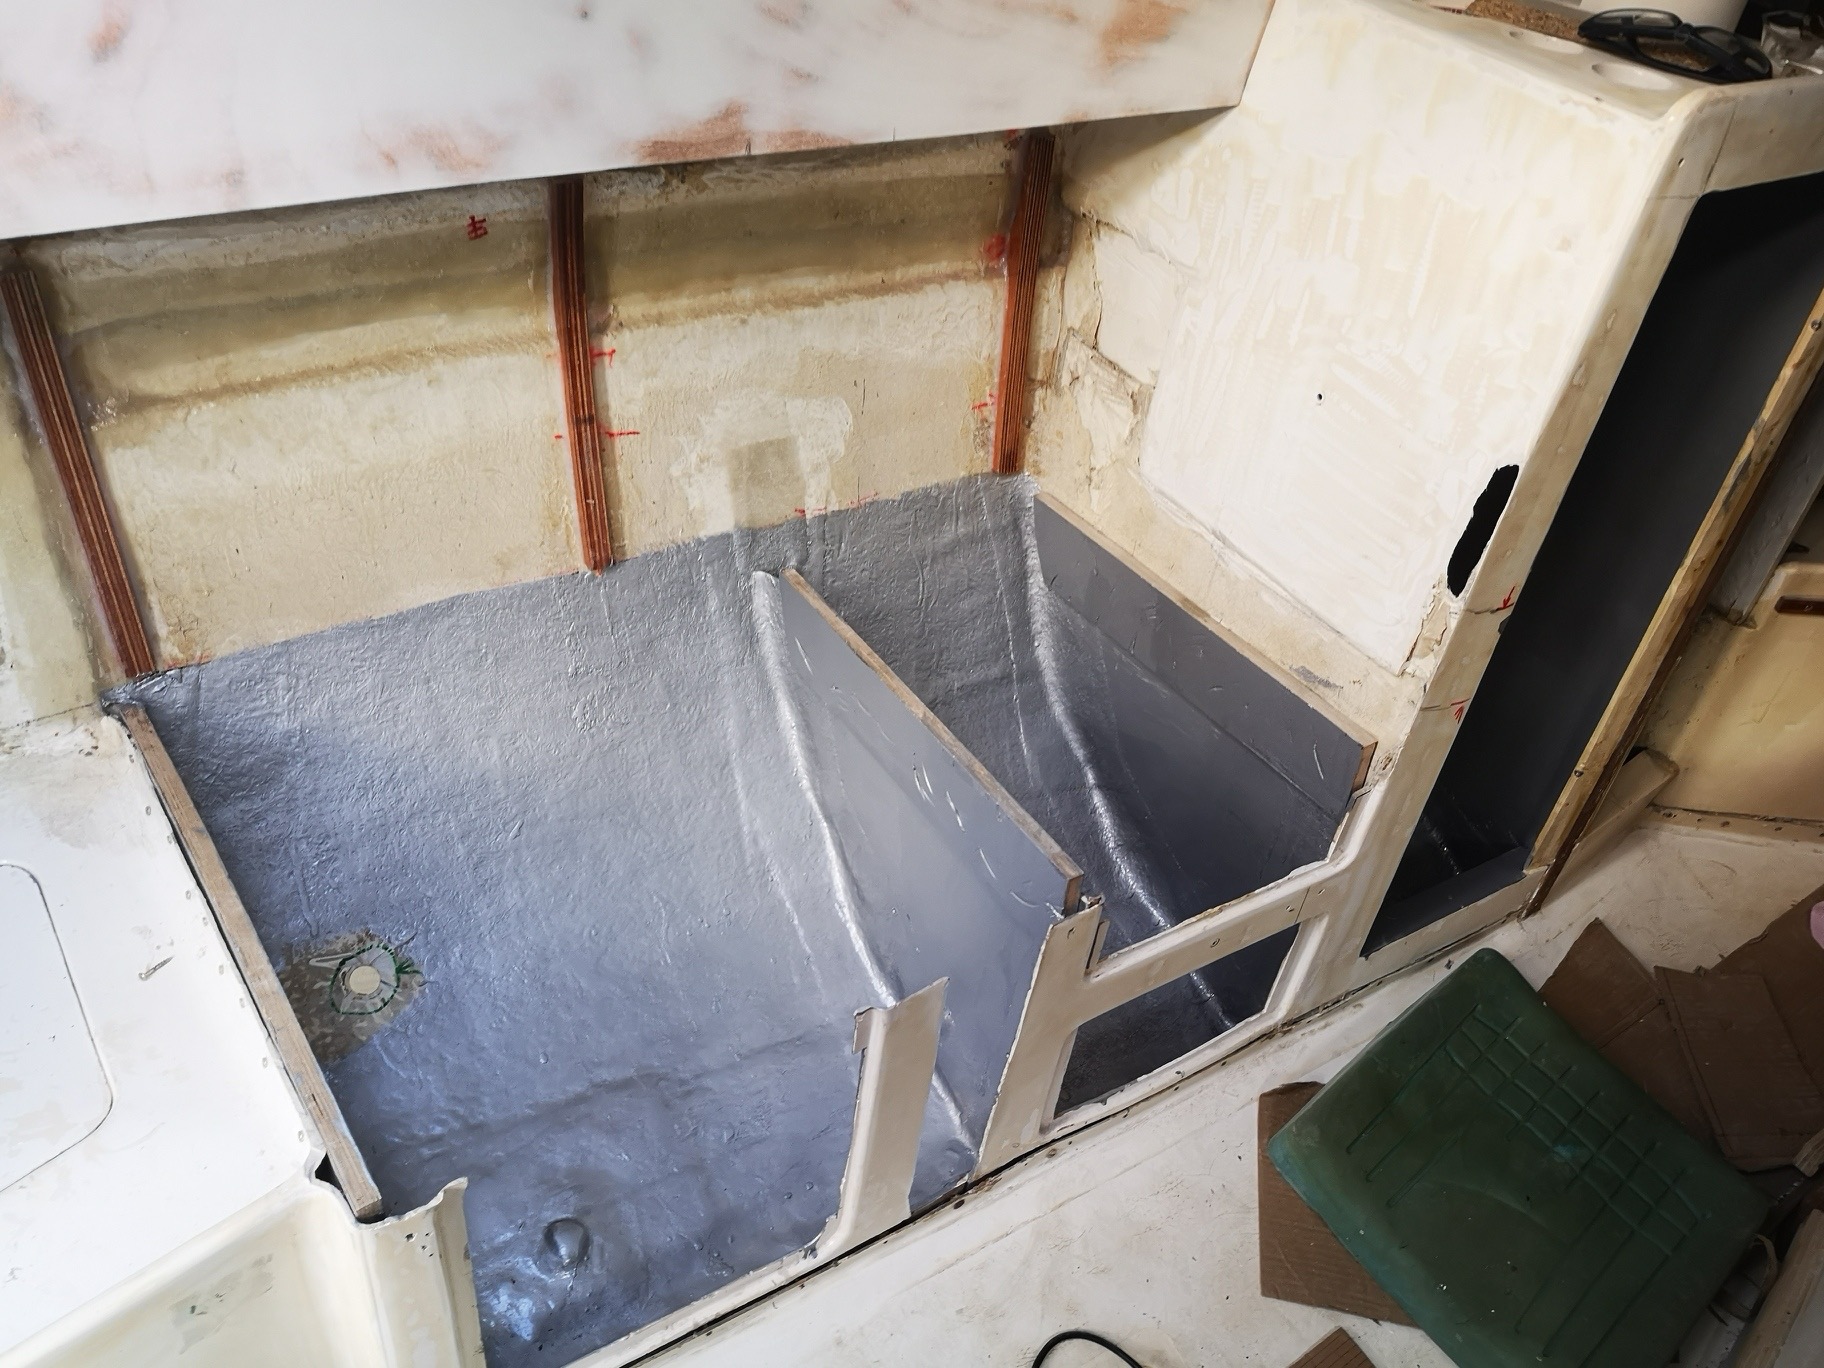
Before the new fronts can be attached, the closet and the storage box must be sanded on the inside and painted with a strong varnish.
28.3.2020
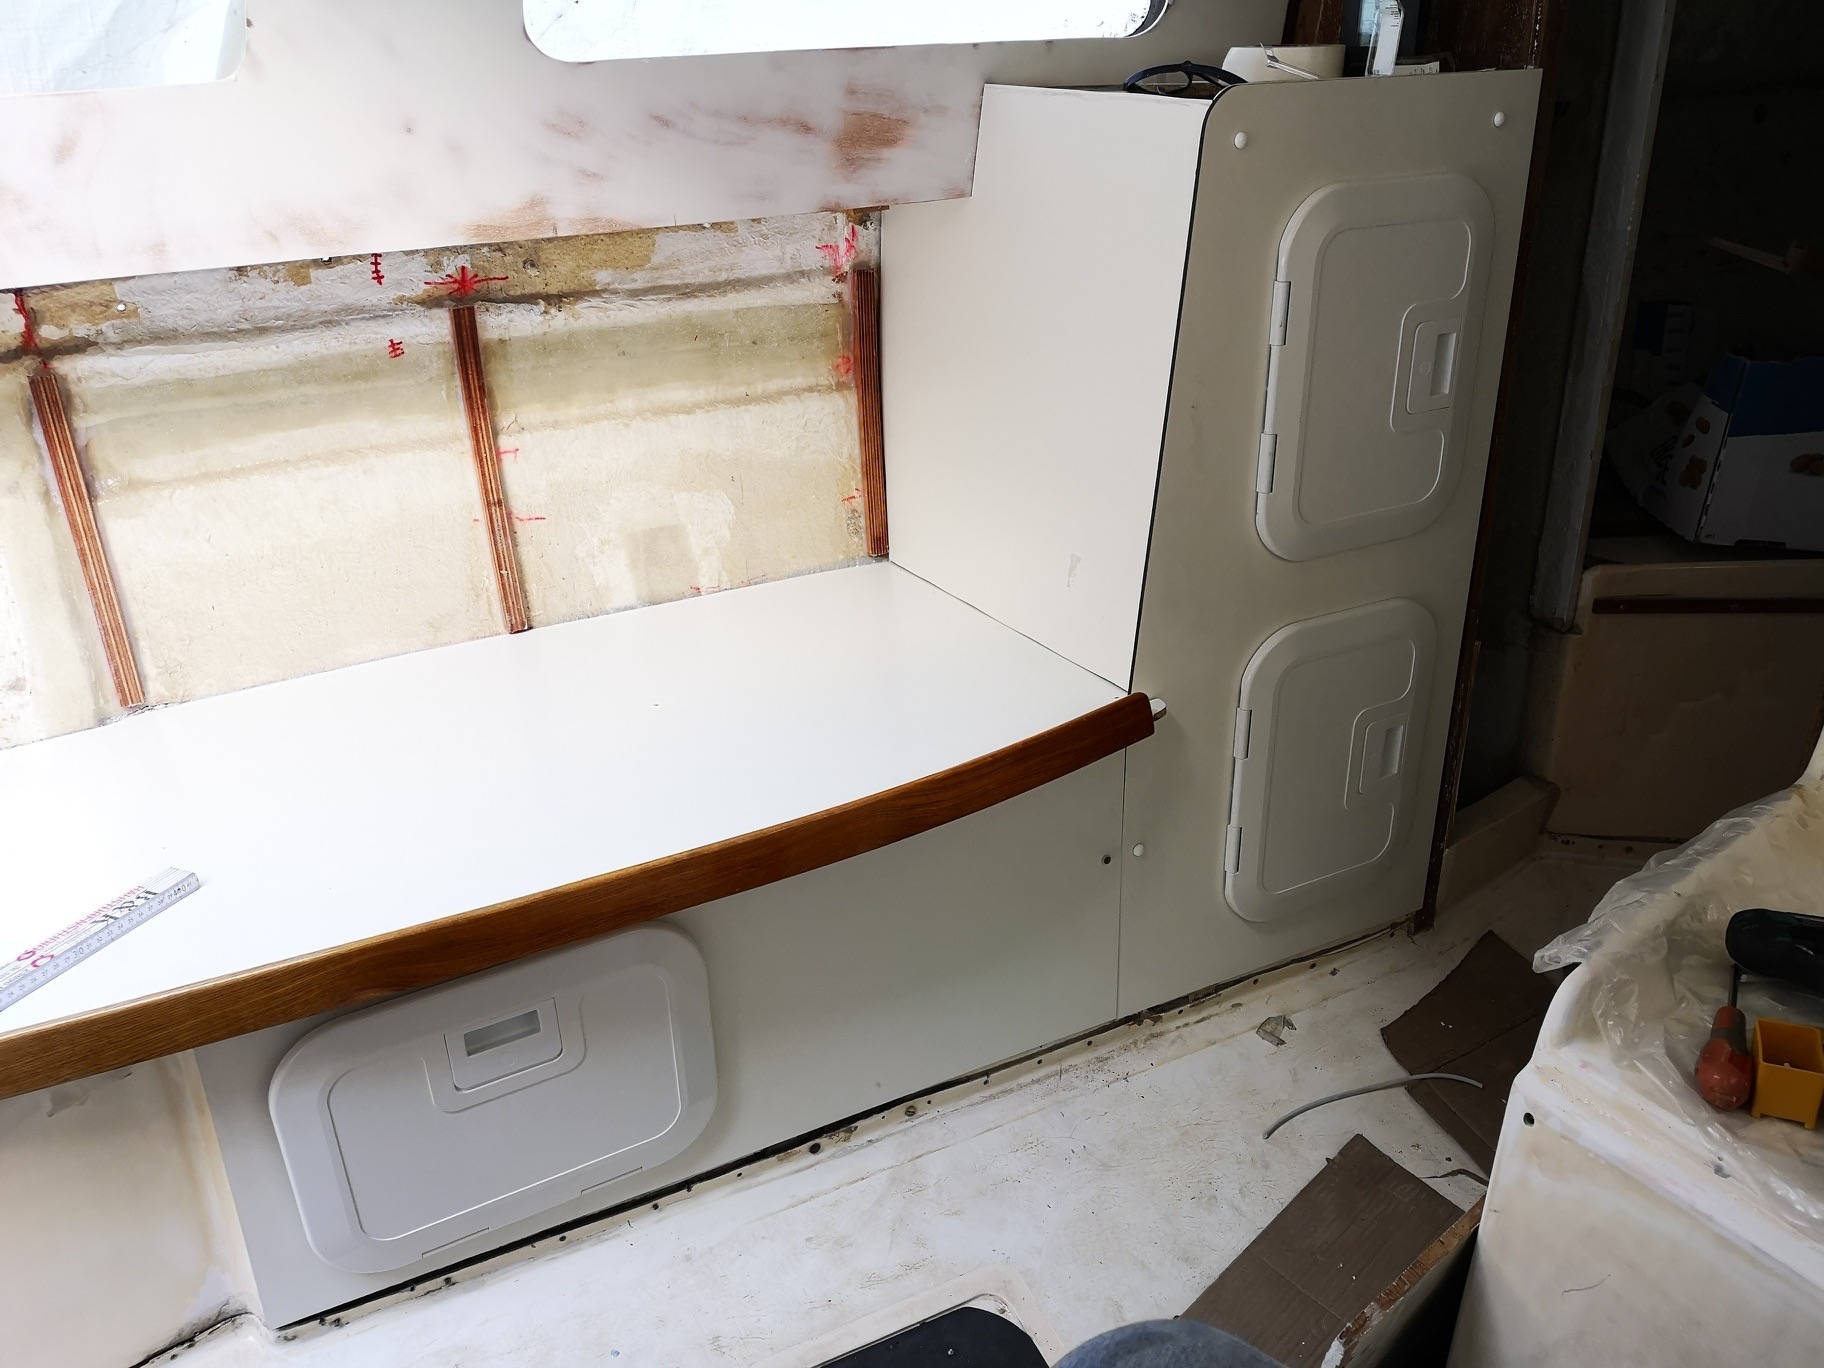
Wait a moment, the images are loading!
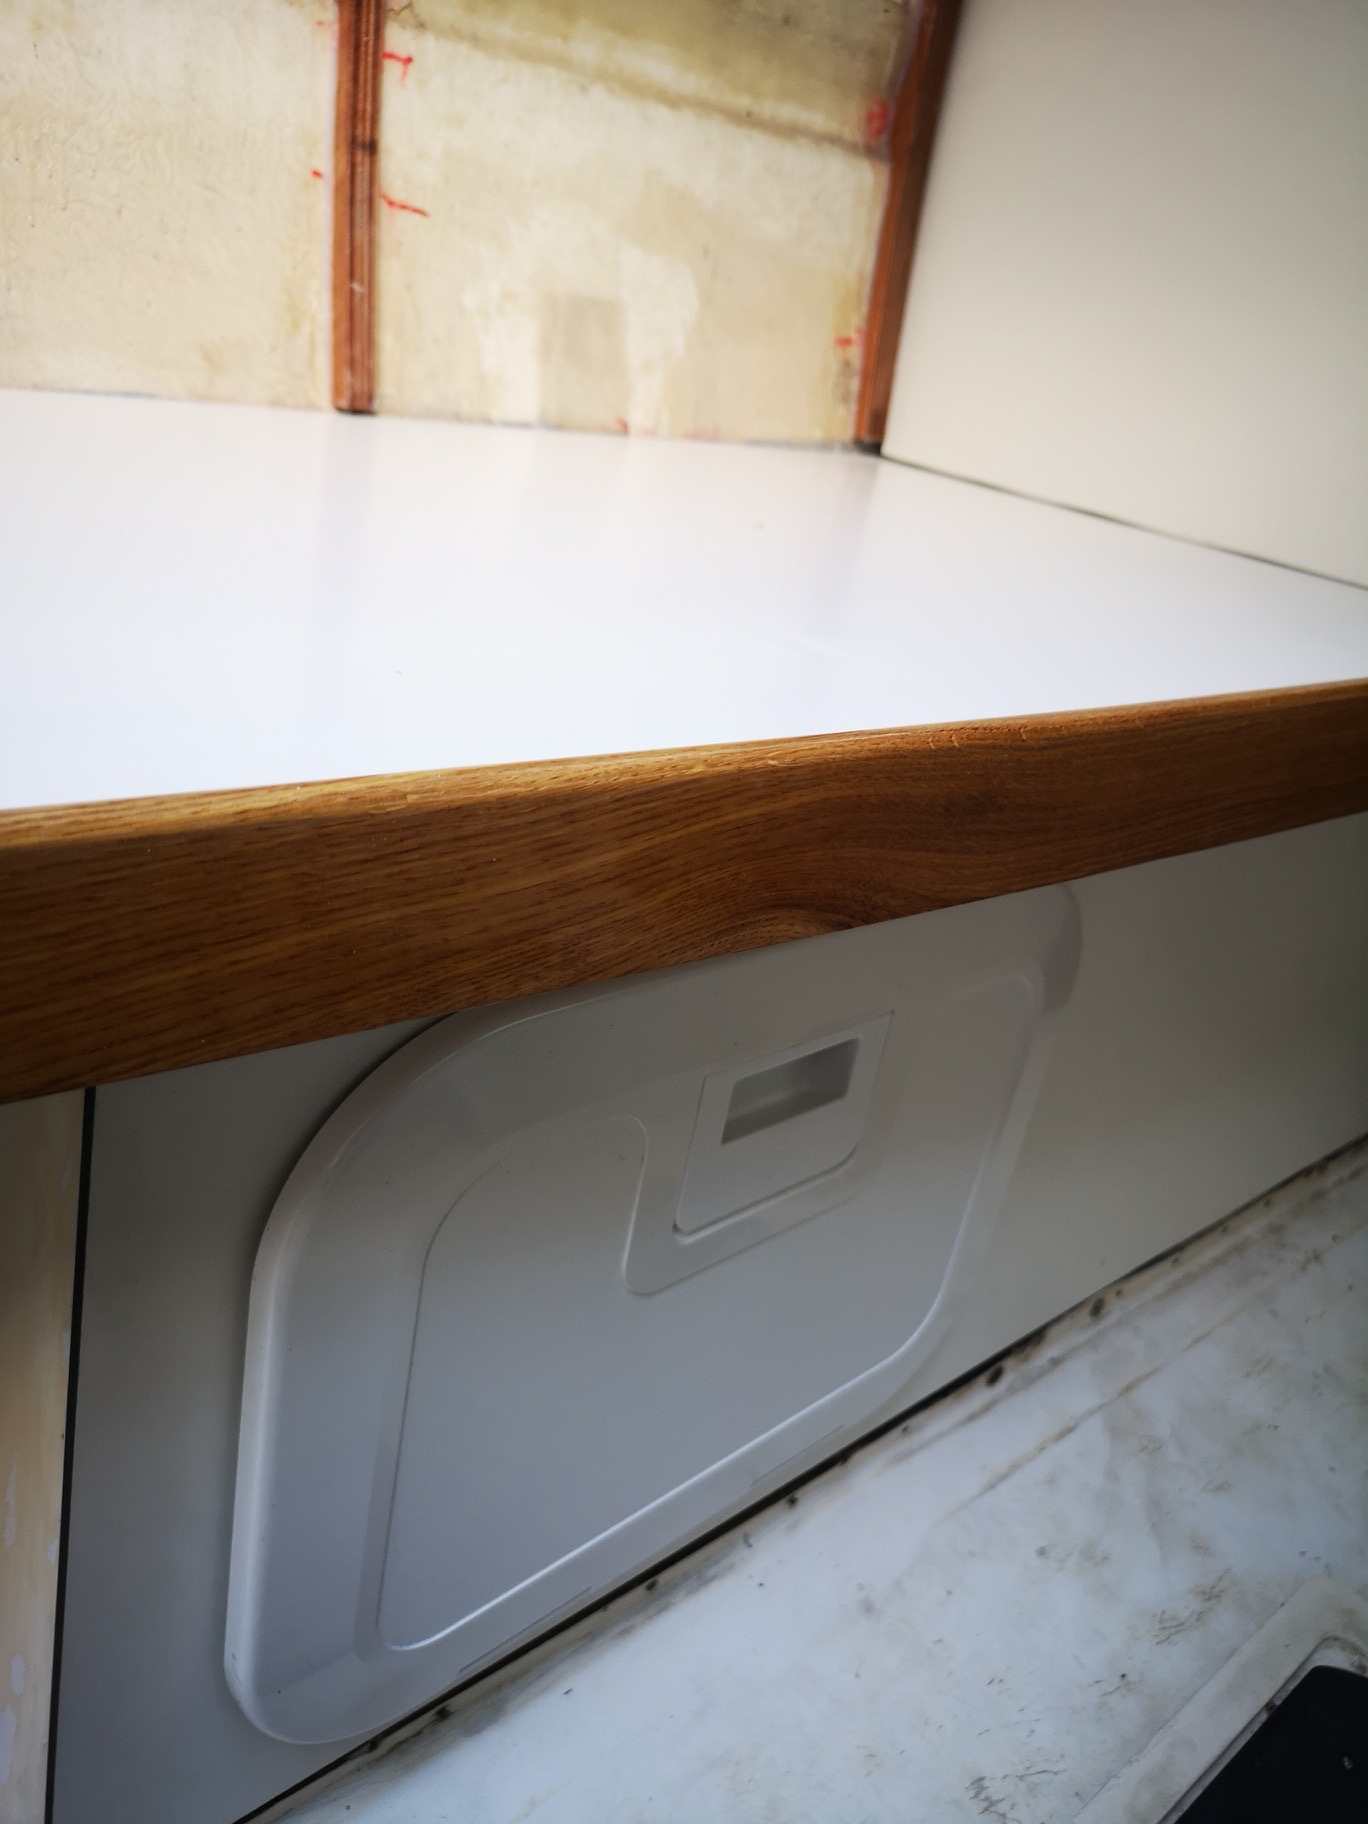
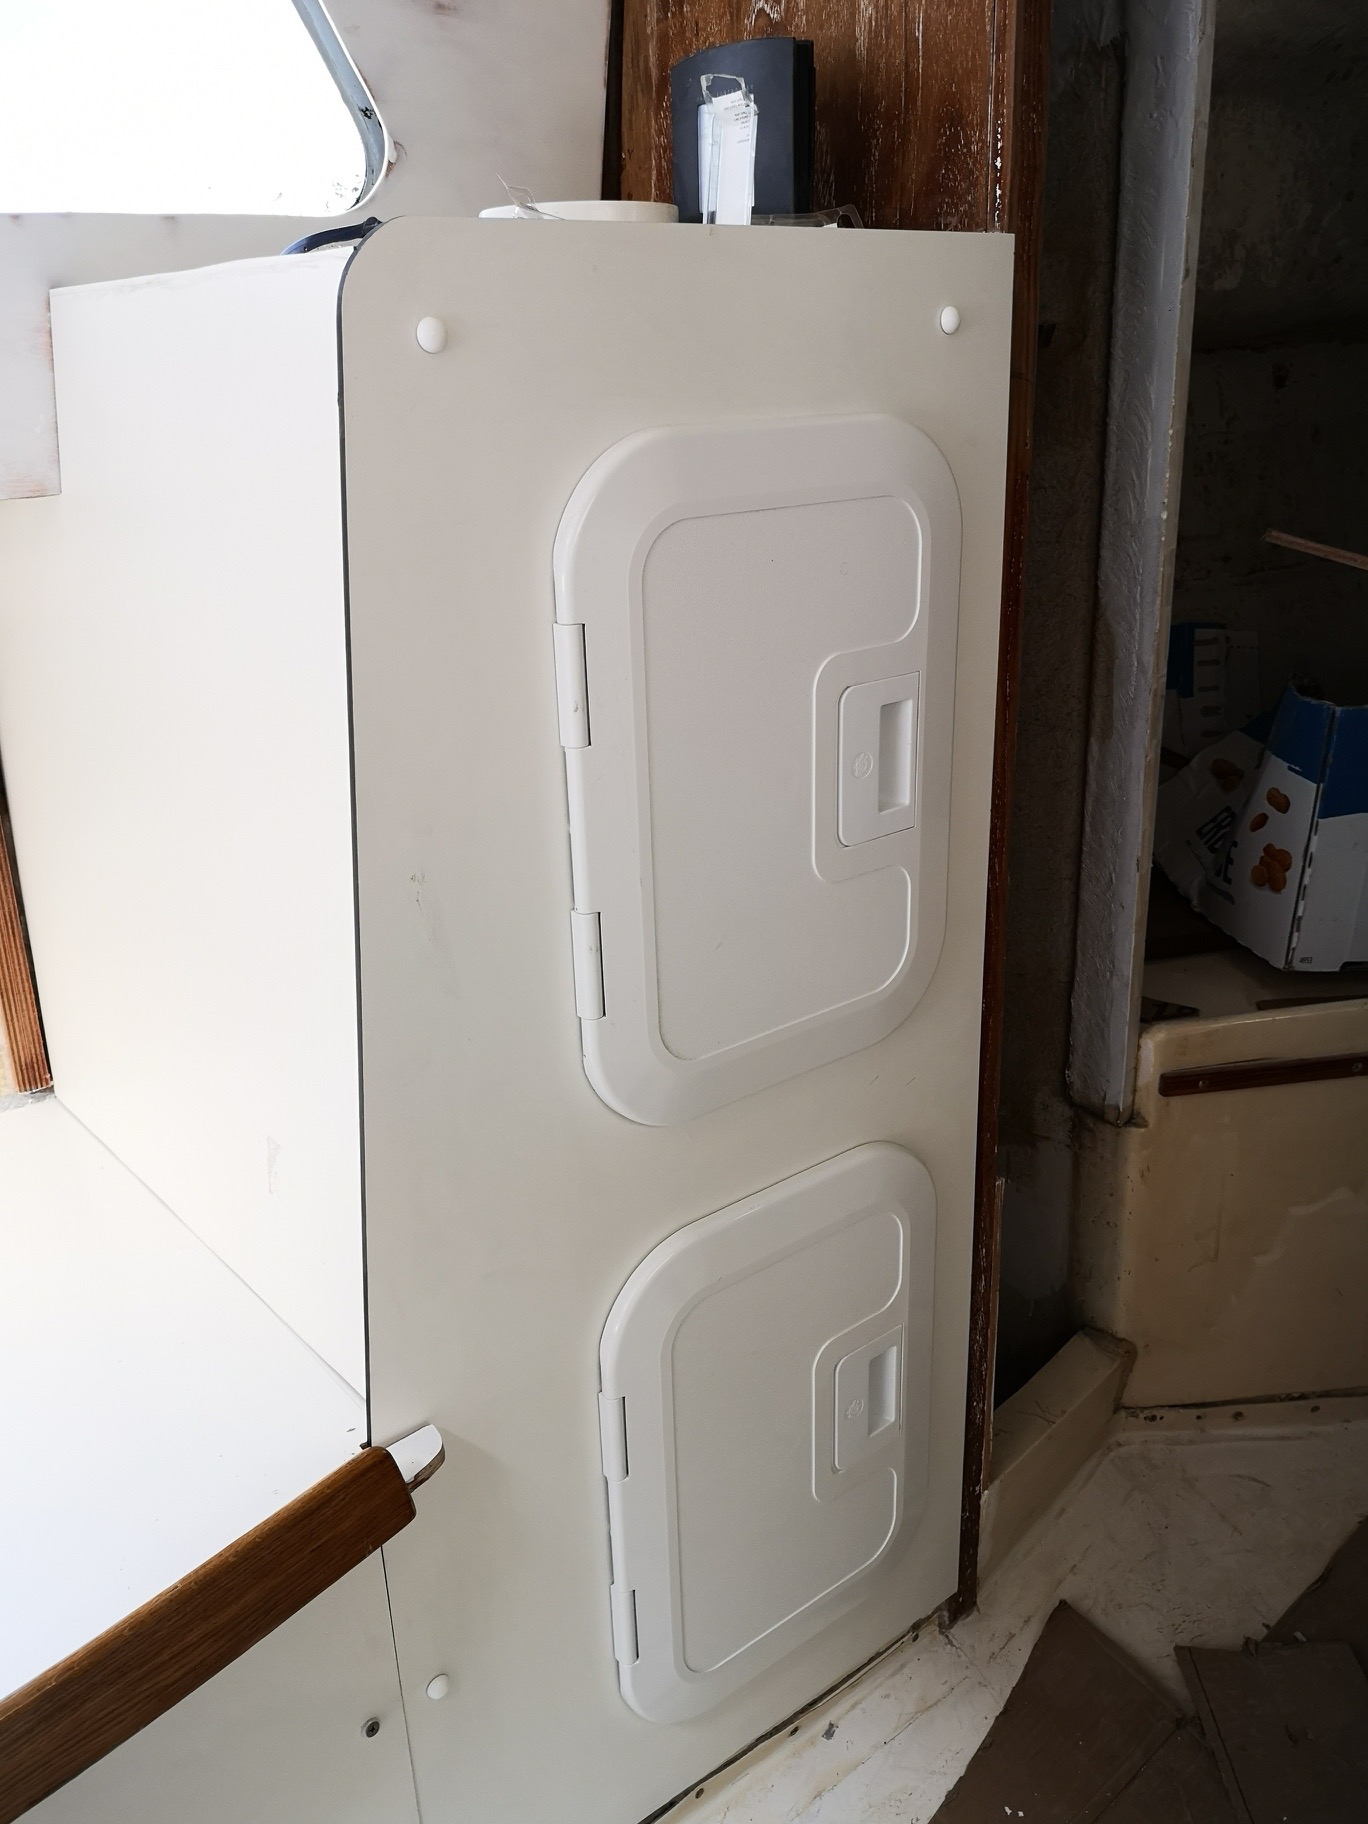
The particular elements are now sawn, attached and screwed to see how everything fits together. Since nothing on the L22 is straight and symmetrical, each element had to be individually and extensively produced. The 3 built-in inspection hatches are from Osculati and serve their purpose as closet doors.

5.4.2020
I am currently doing a lot of small work on the boat, which I usually do not document. Therefore, there are fewer reports at the moment.
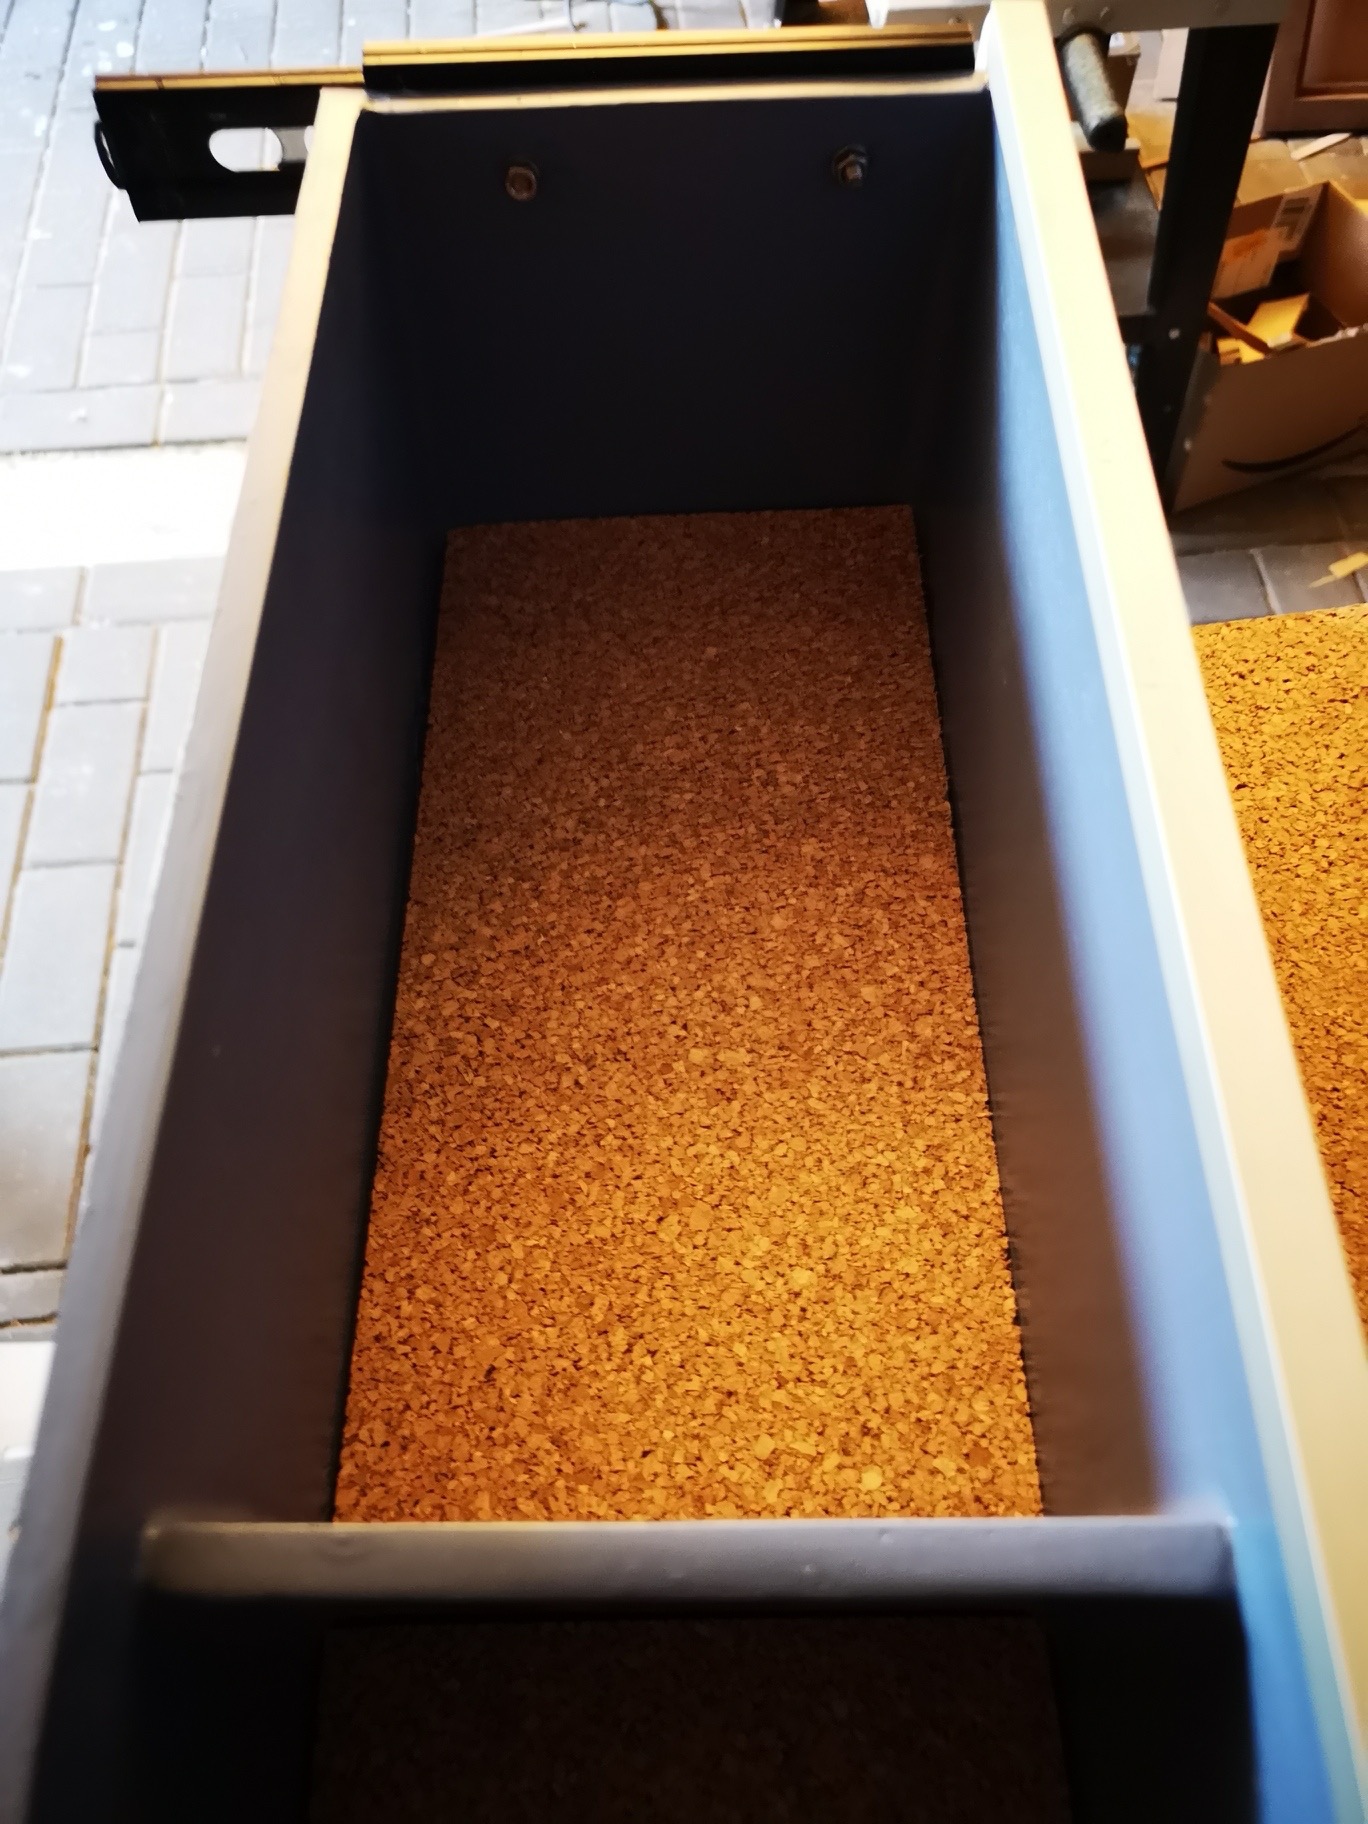
Today I lined the drawer that comes under the starboard window panel with cork and then completely reworked the drawer pull-outs because I was dissatisfied.
7.4.2020
This afternoon I spatled and sanded the dinette's seats again. Then I vacuumed the dust properly and wiped the benches with silicone cleaner.
Epifanes Mono-Urethane varnish. I worked with a solvent resistant foam roller. I am very satisfied with the result.
Then I painted the seats with
After almost 2 years, the interior work continues
Februar y 2022
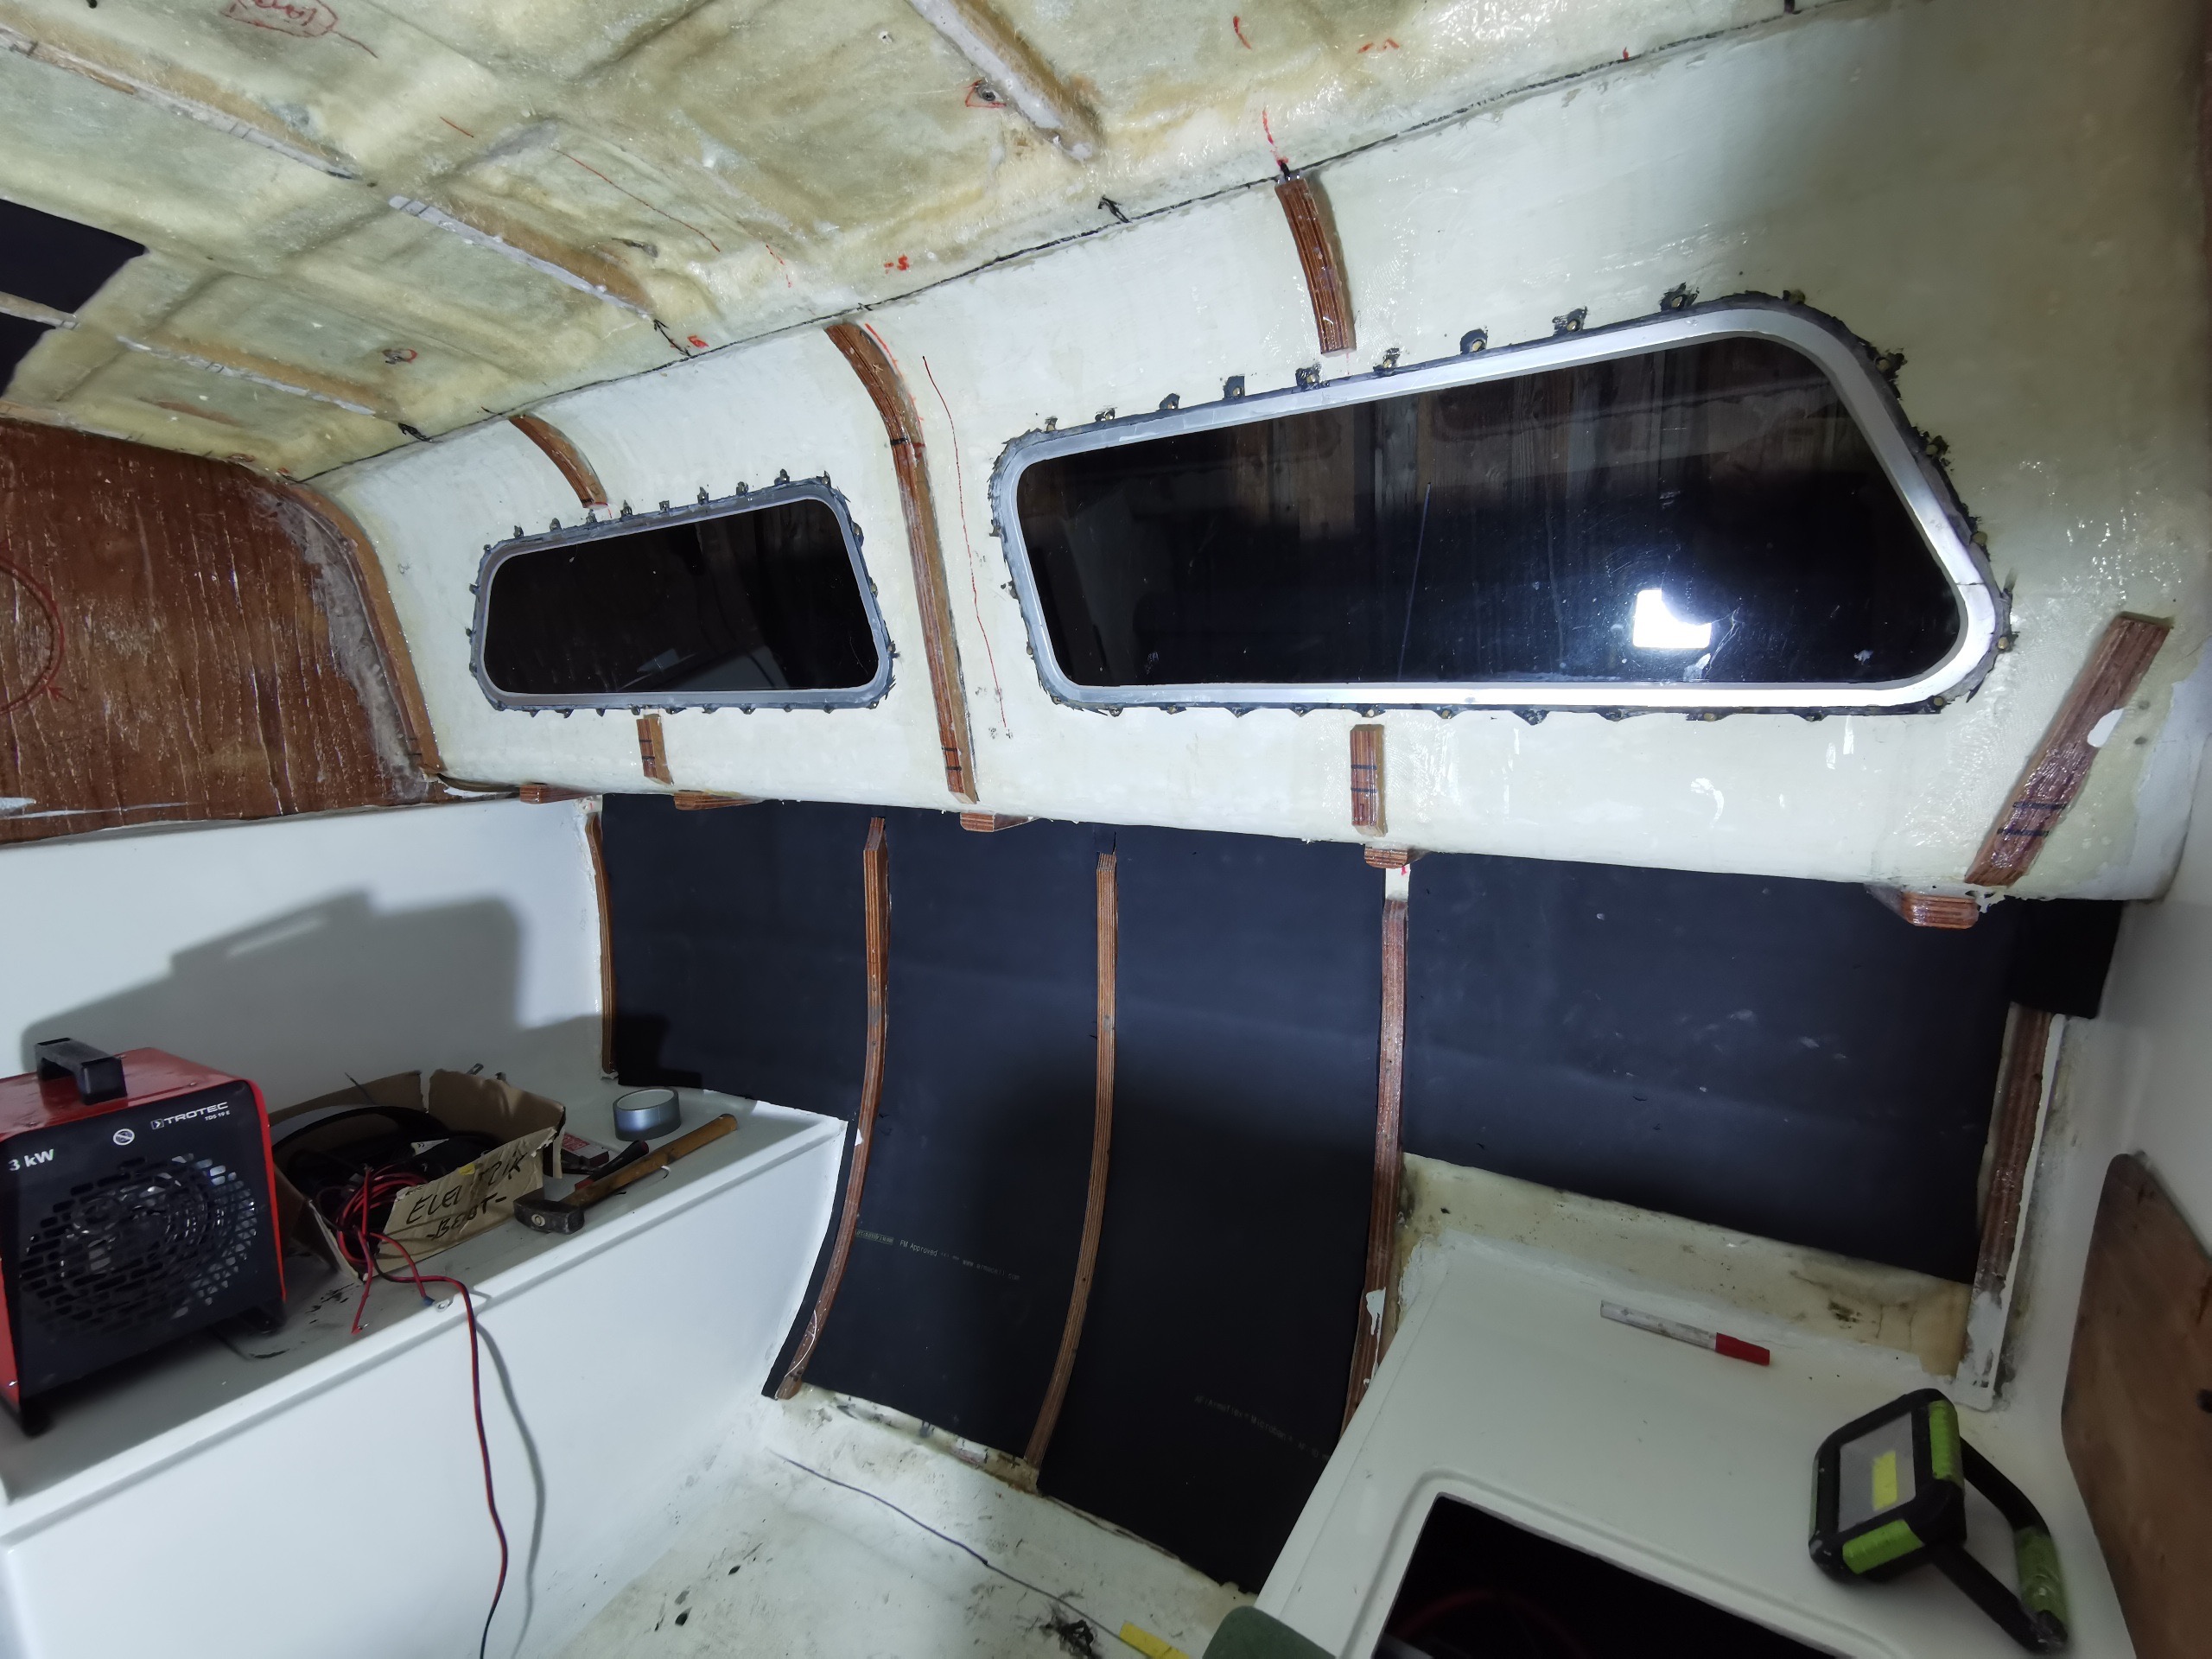
Before the already finished panels and the oak-ceiling can be attached, the saloon has to be completely lined with 10mm thick Armaflex AF , to be insulated against condensation and cold. The Armaflex is very easy to work with and forgives even small mistakes as long as you don't press it on very firmly.
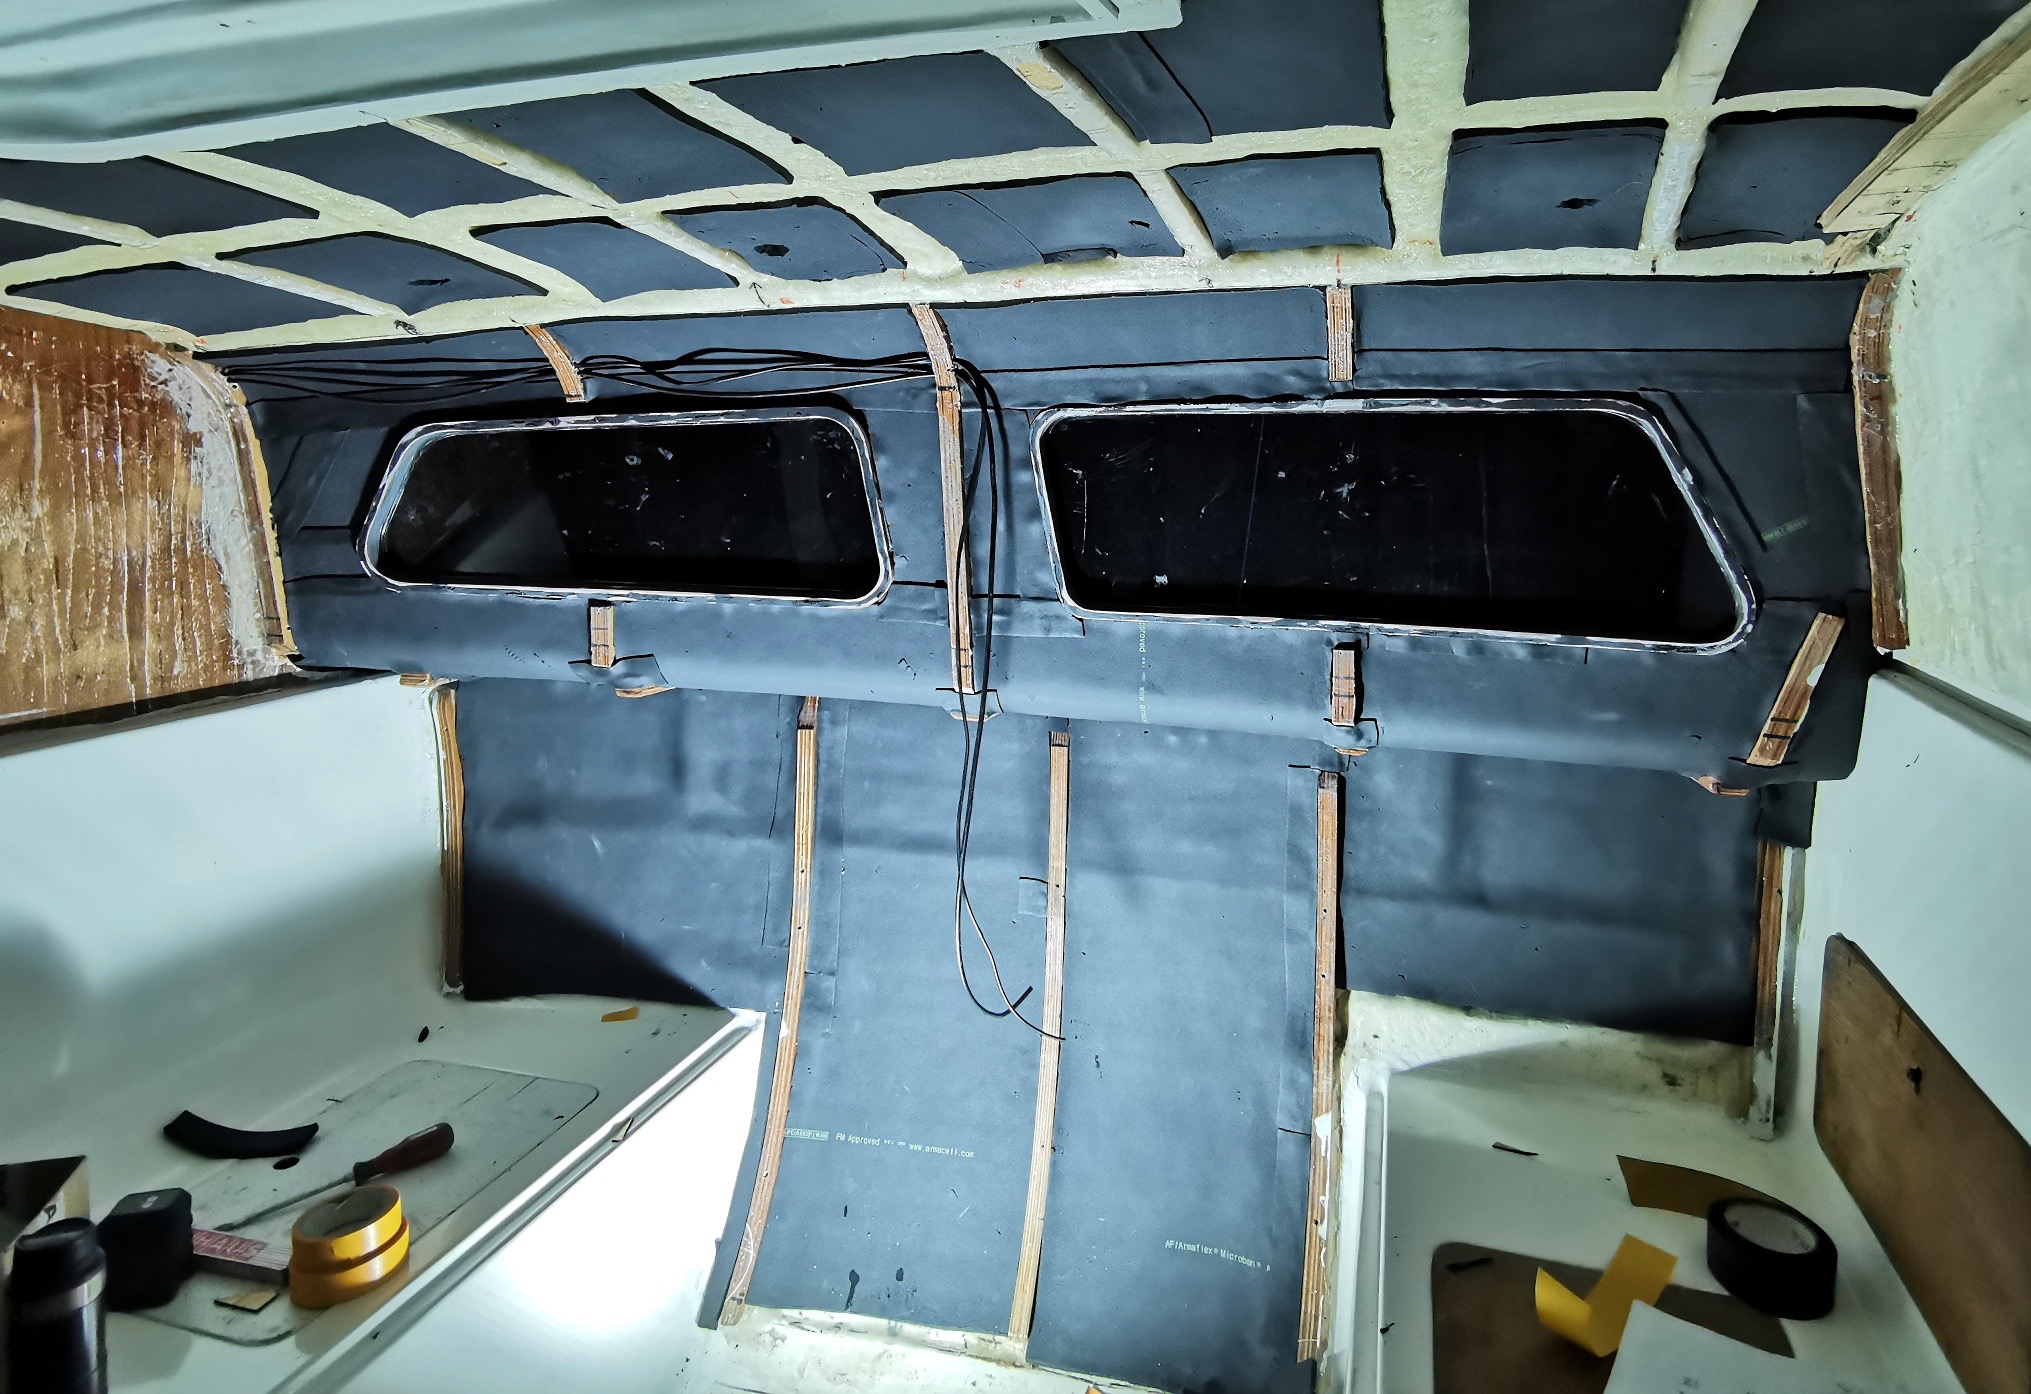
März 2022
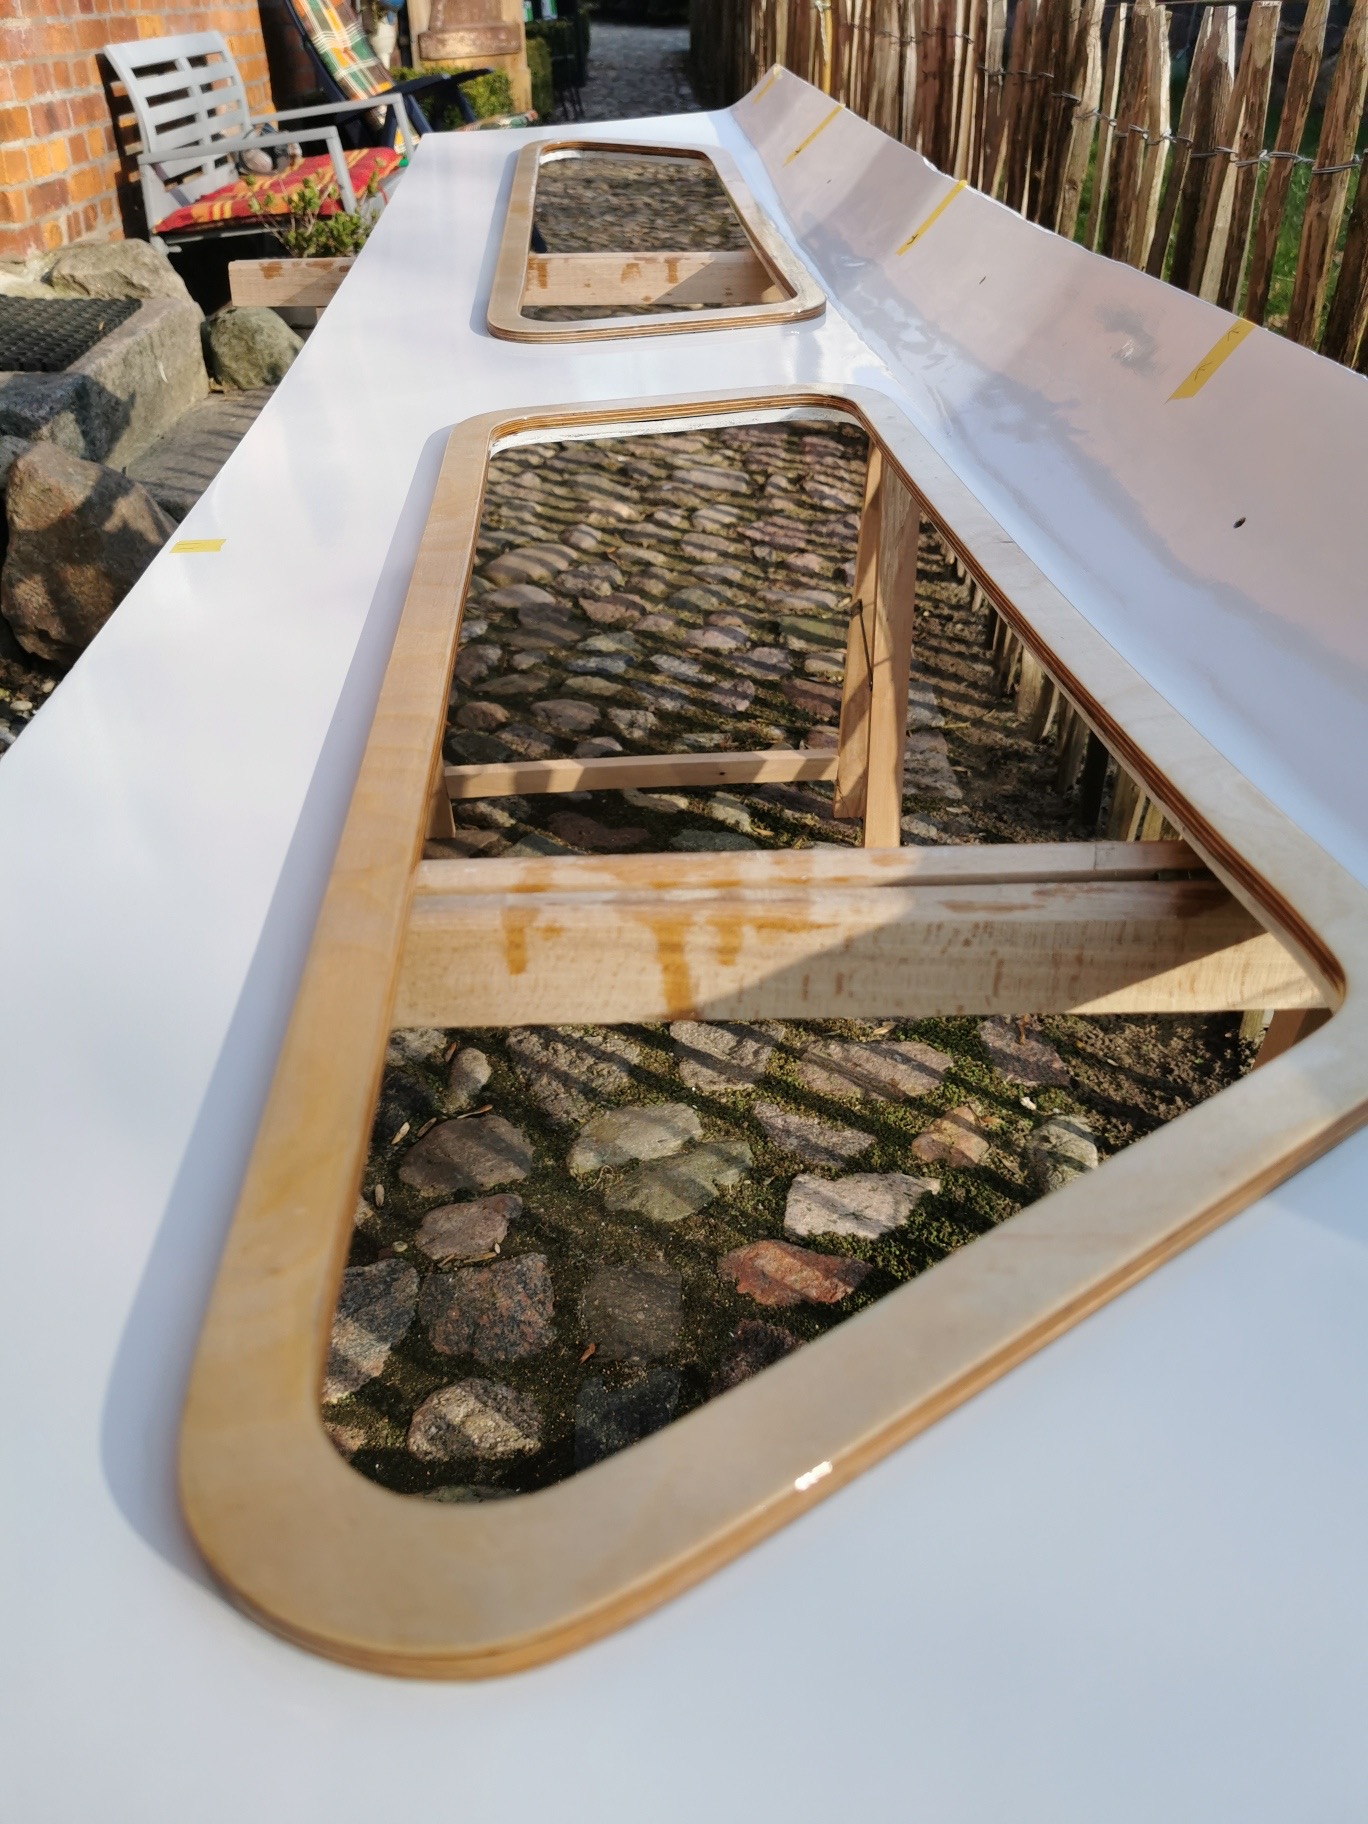
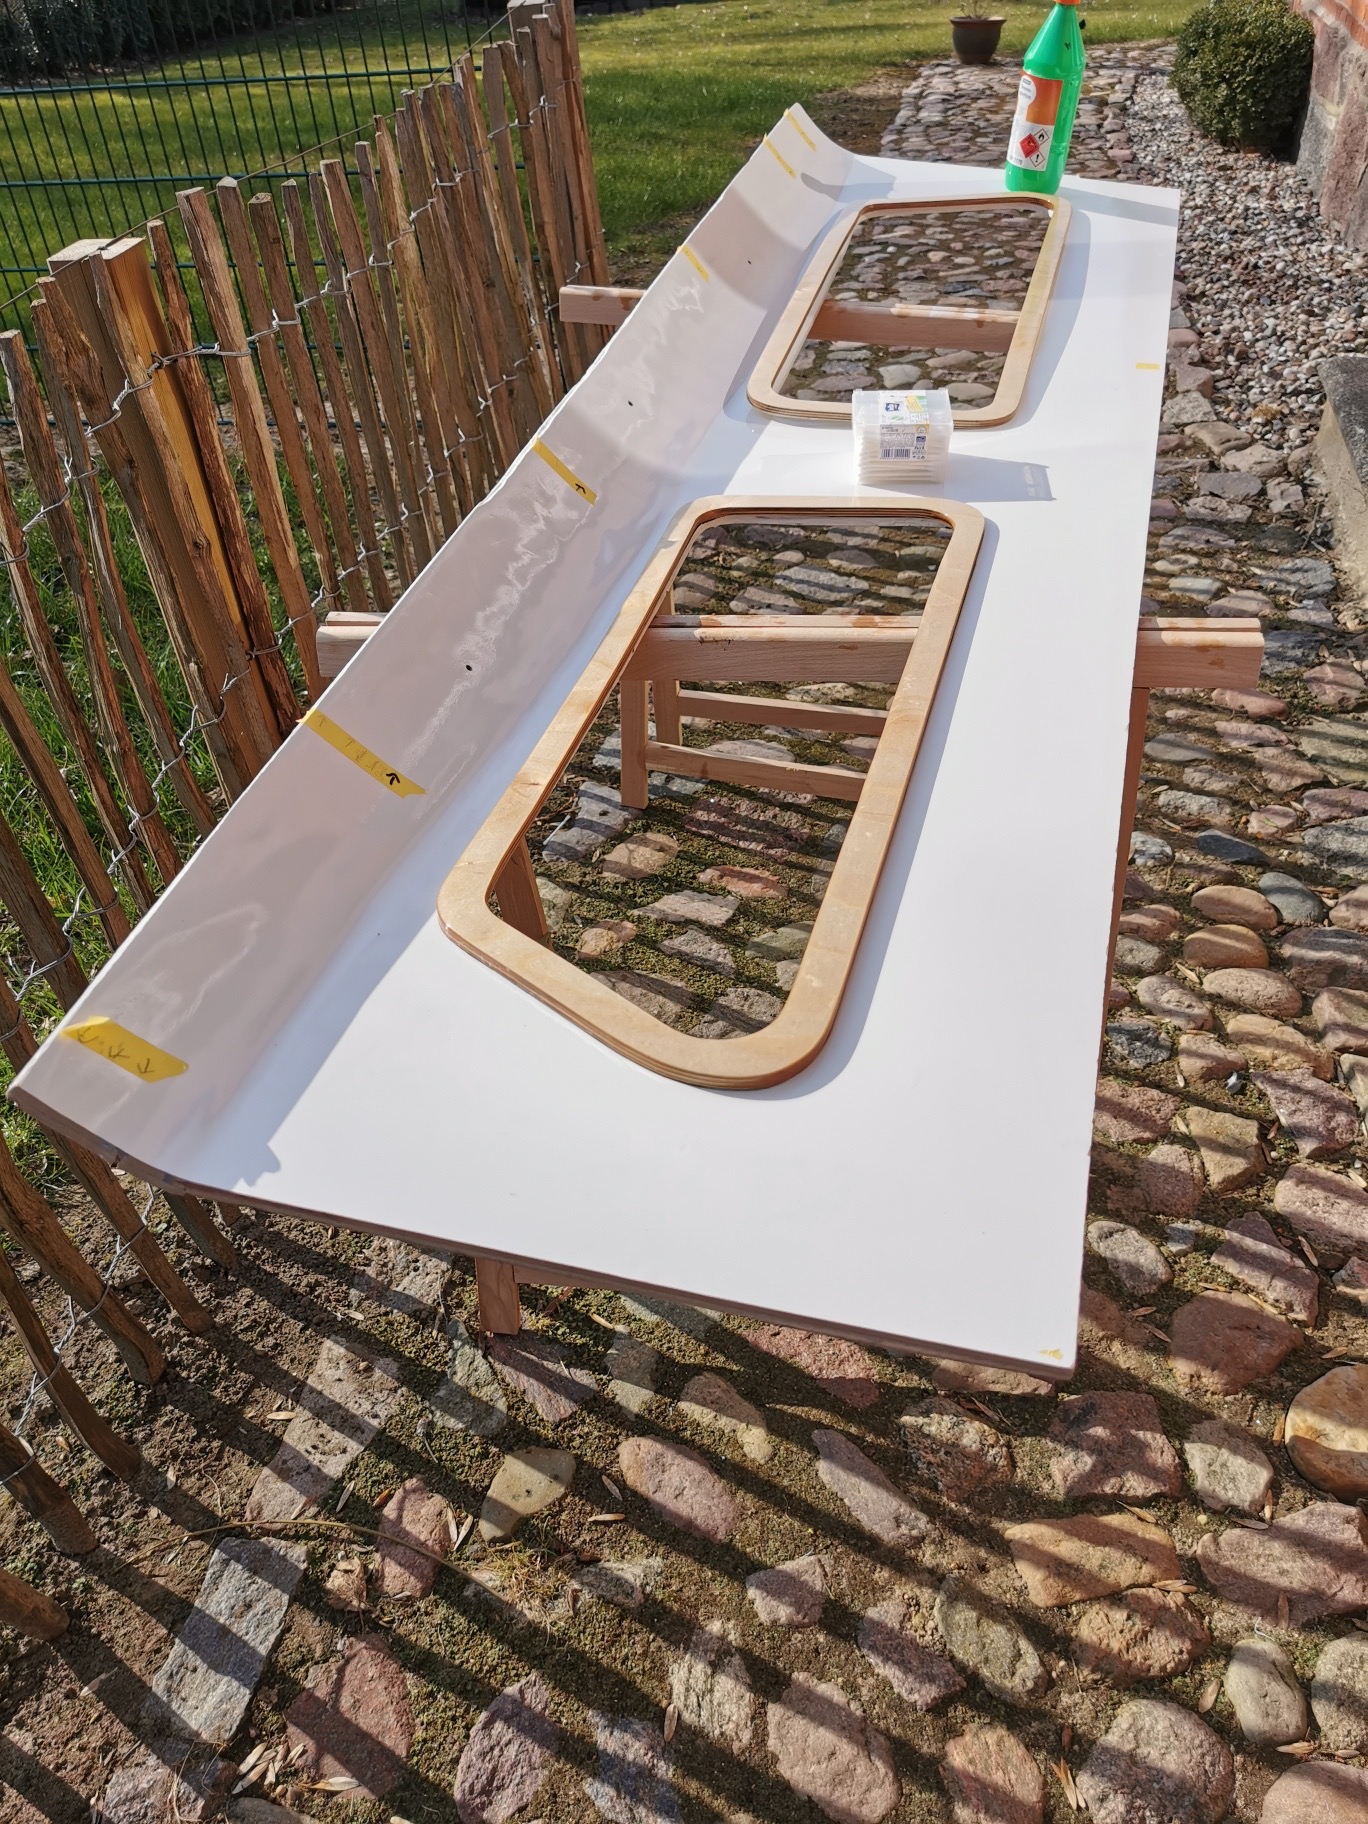
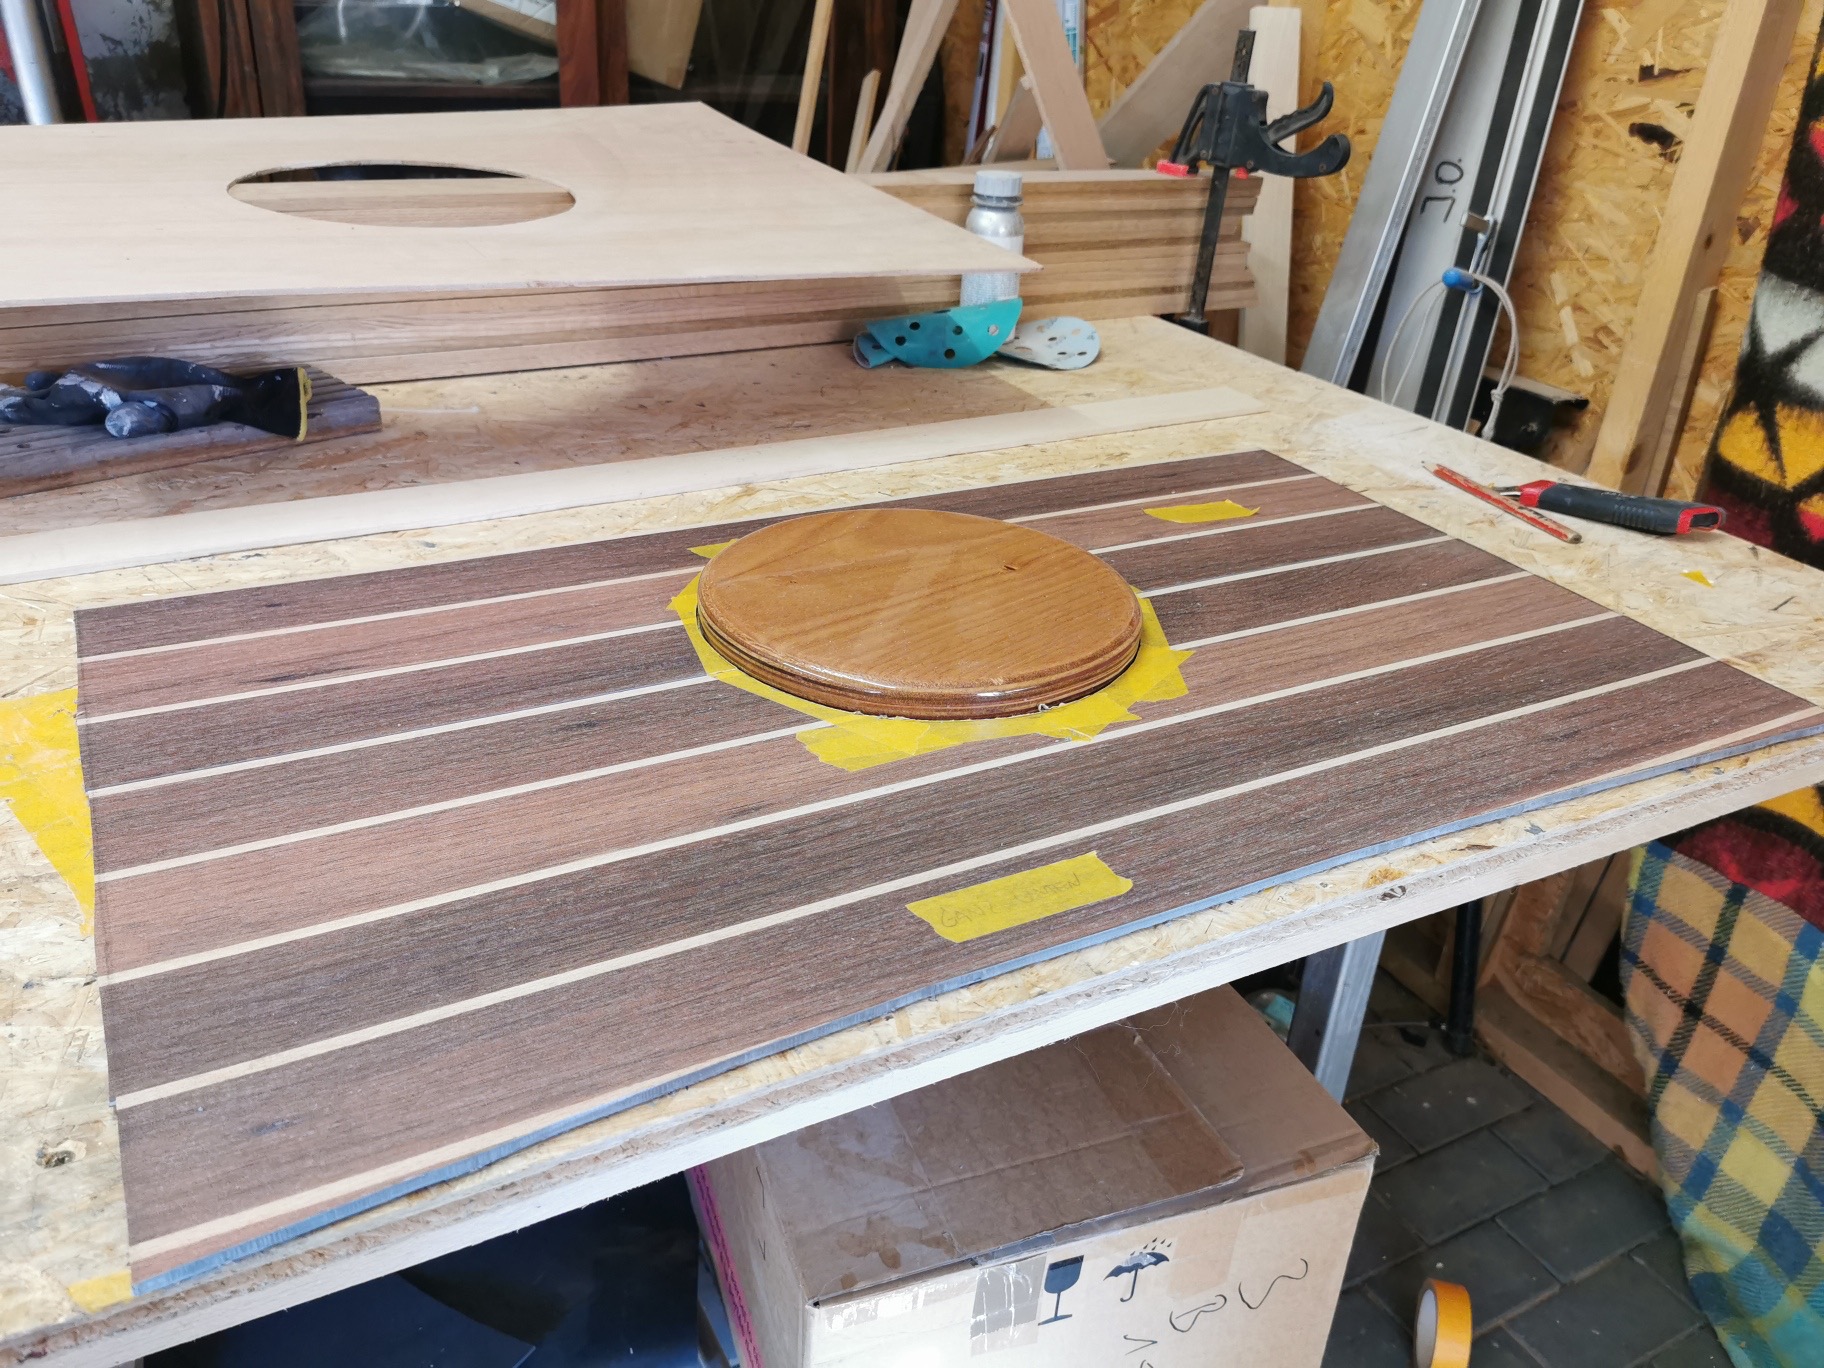
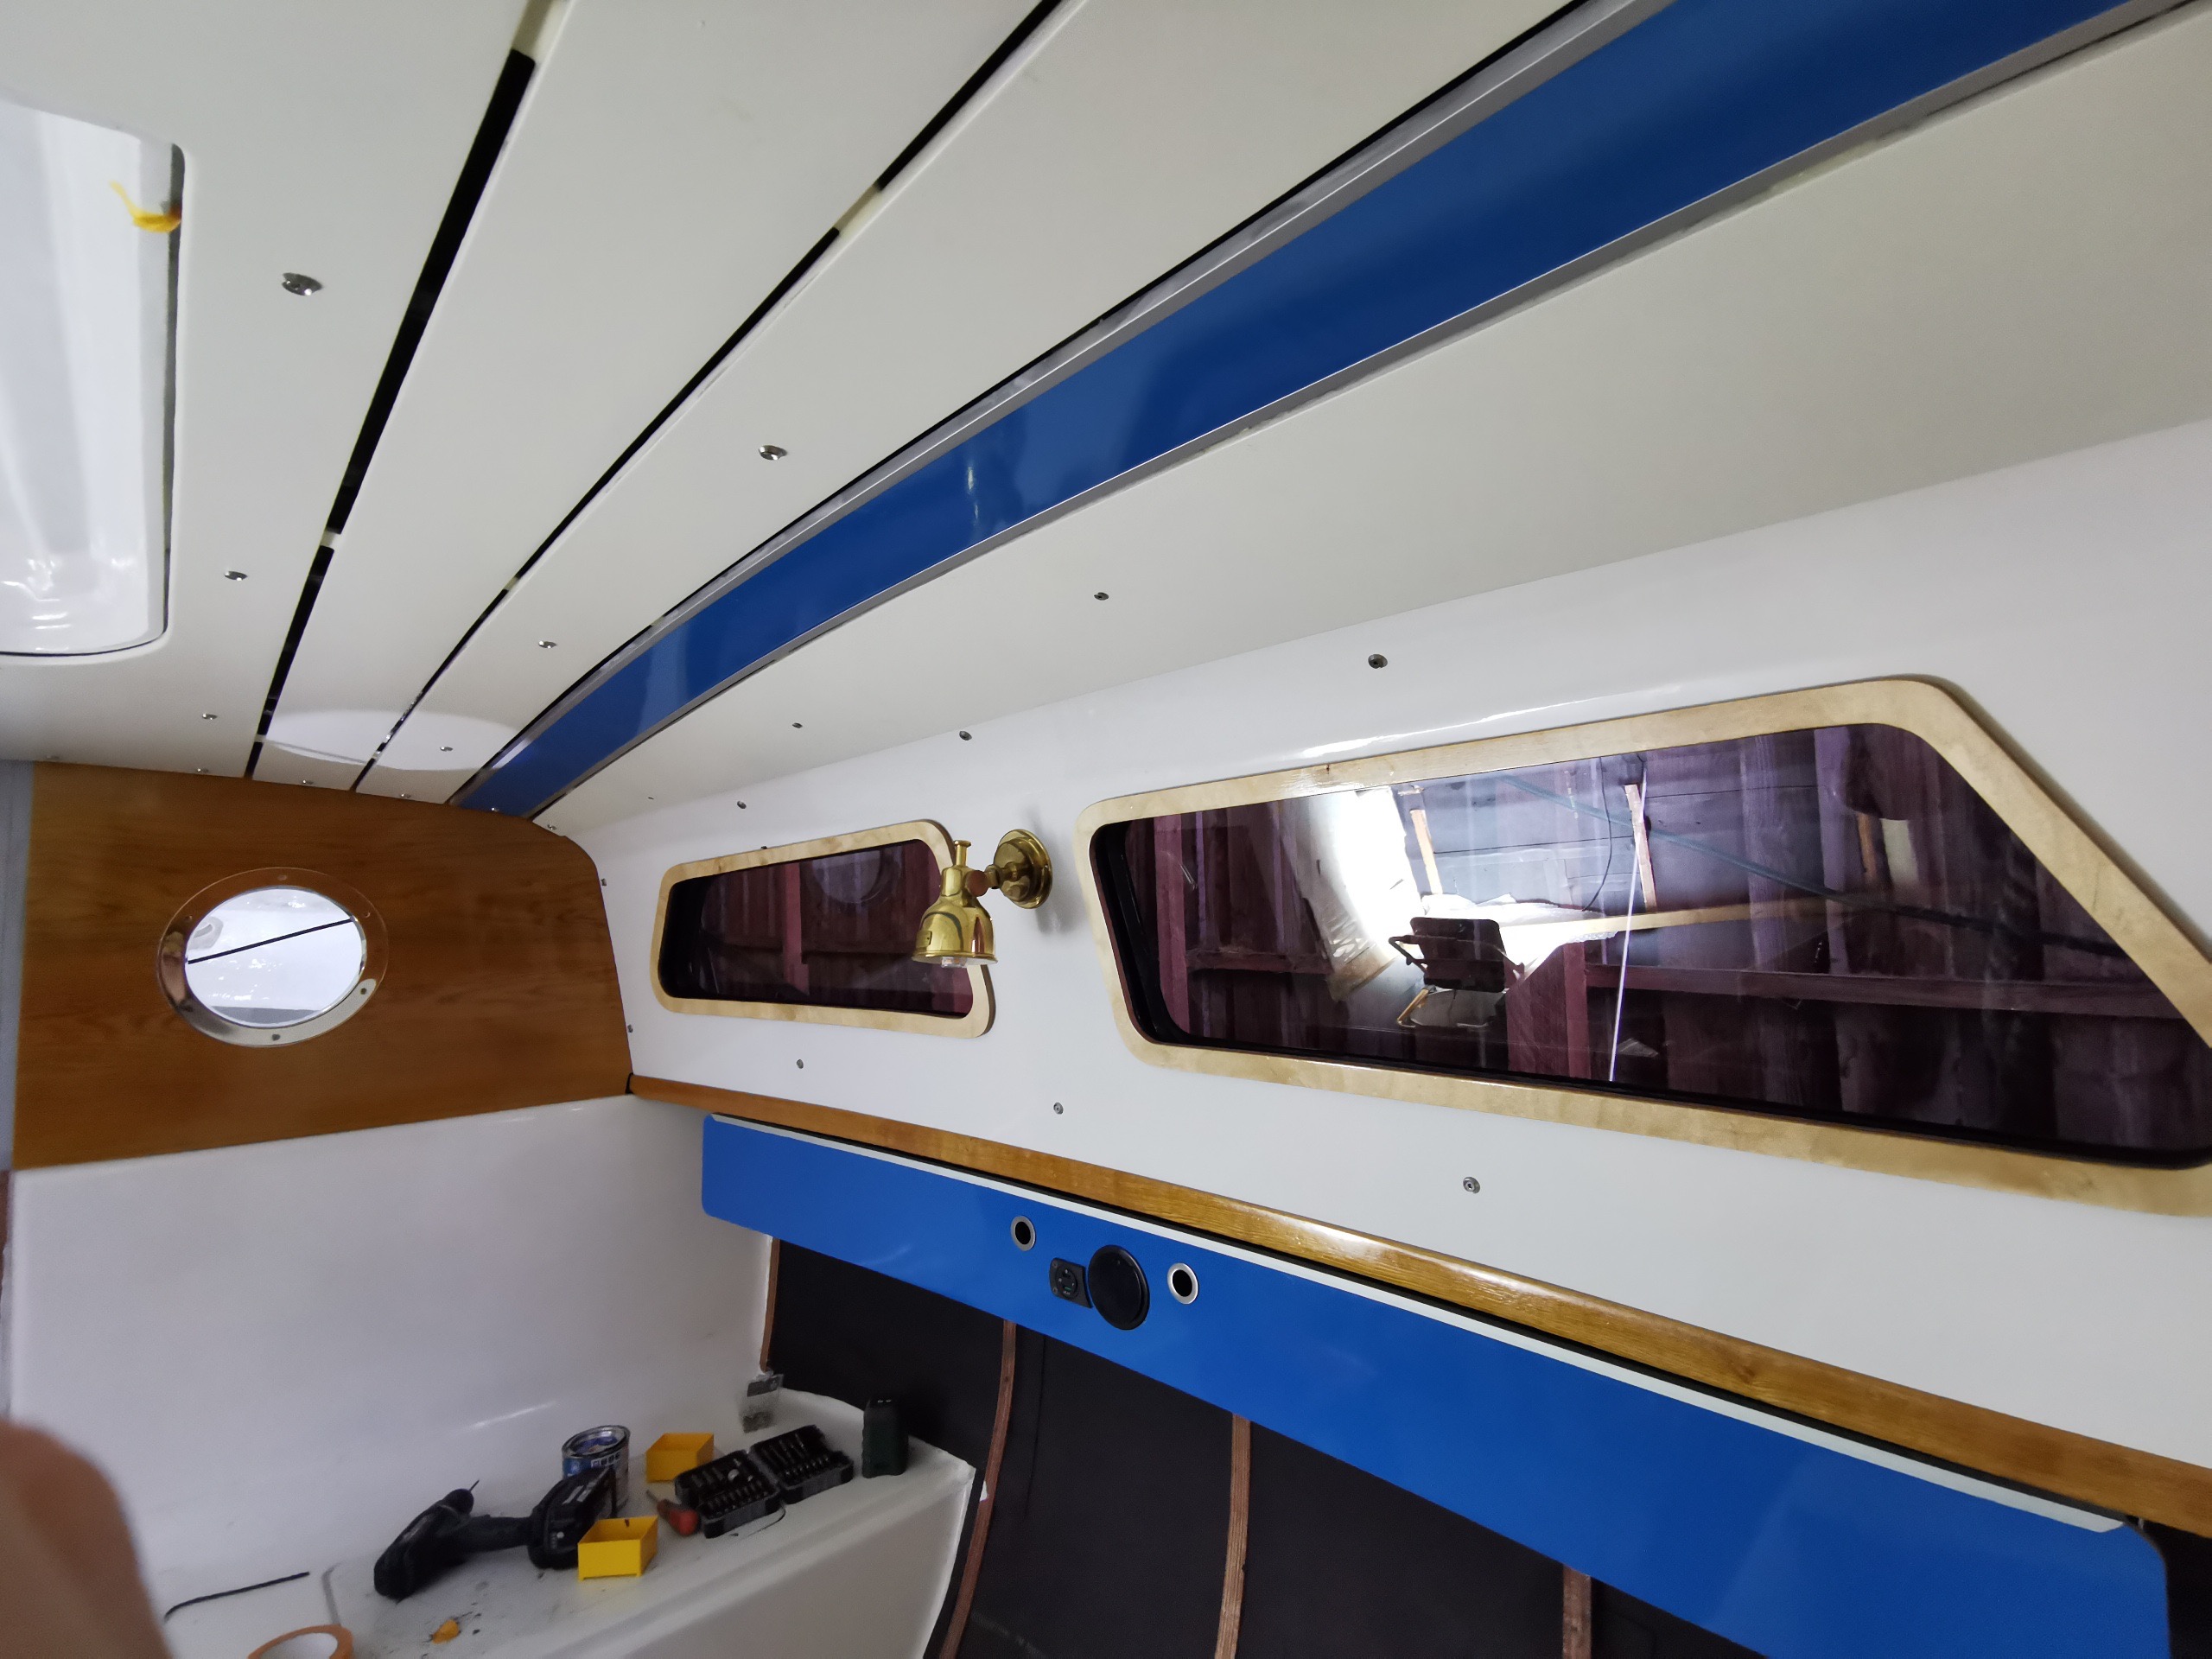
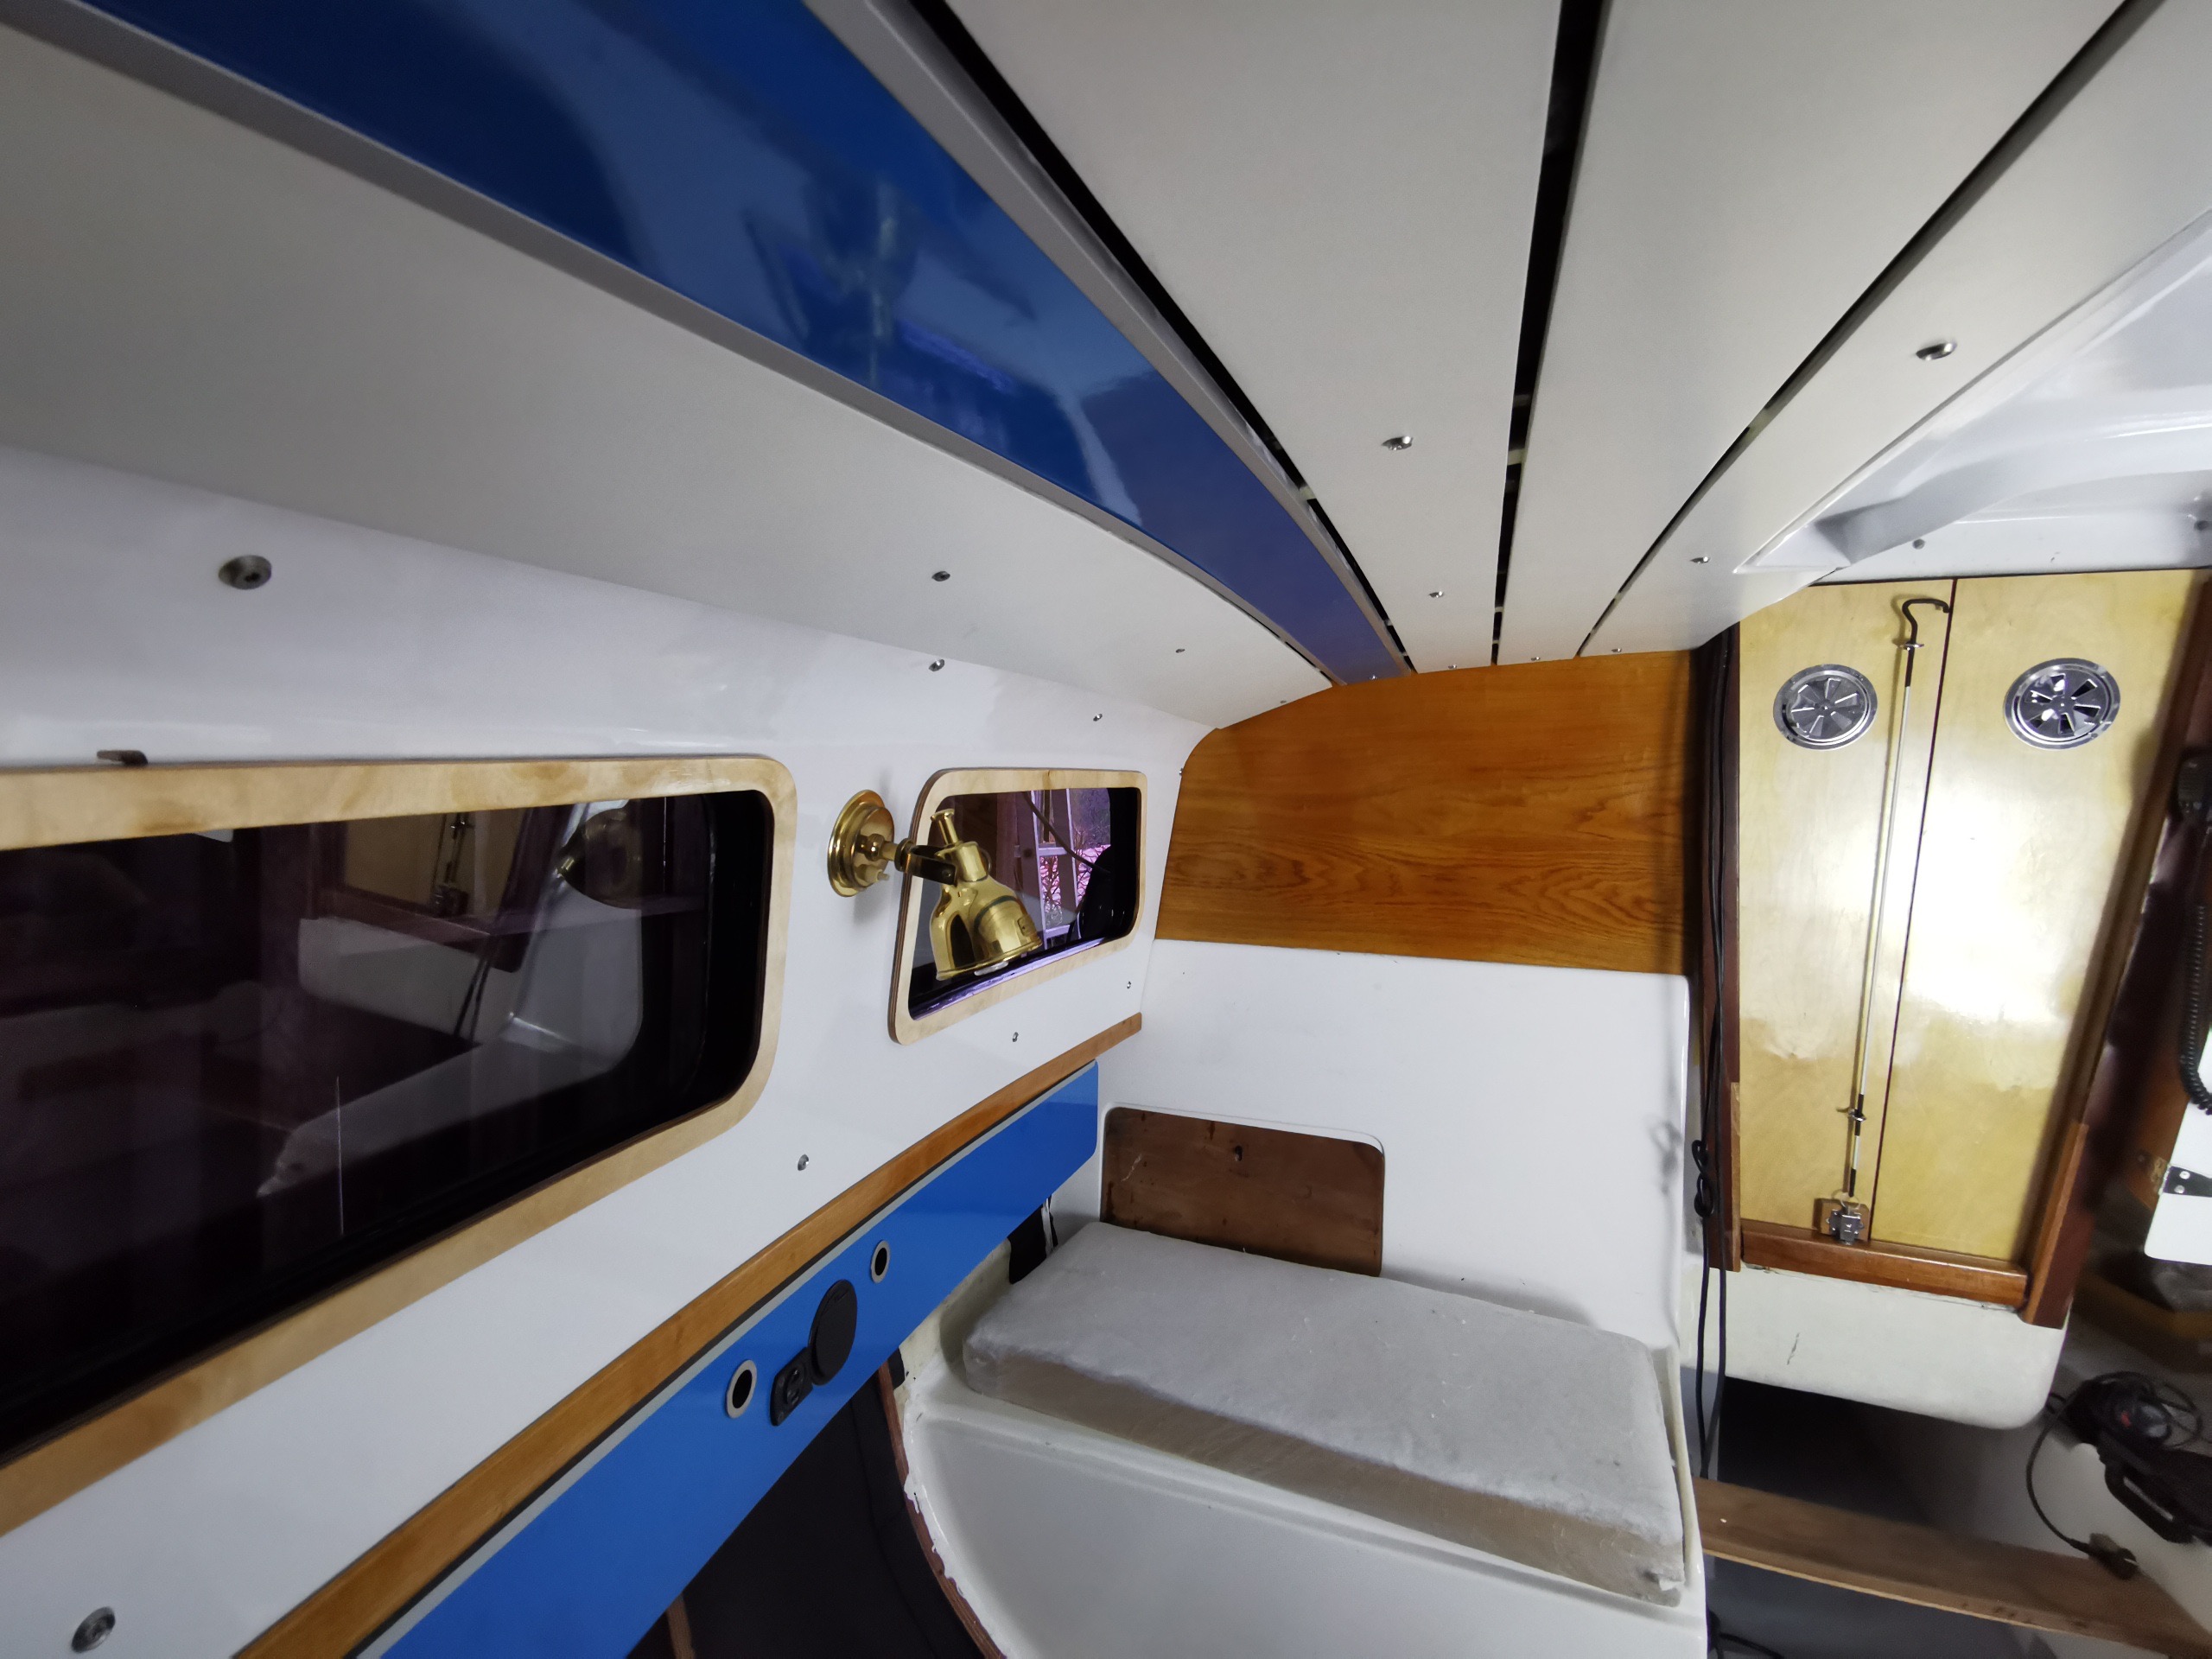
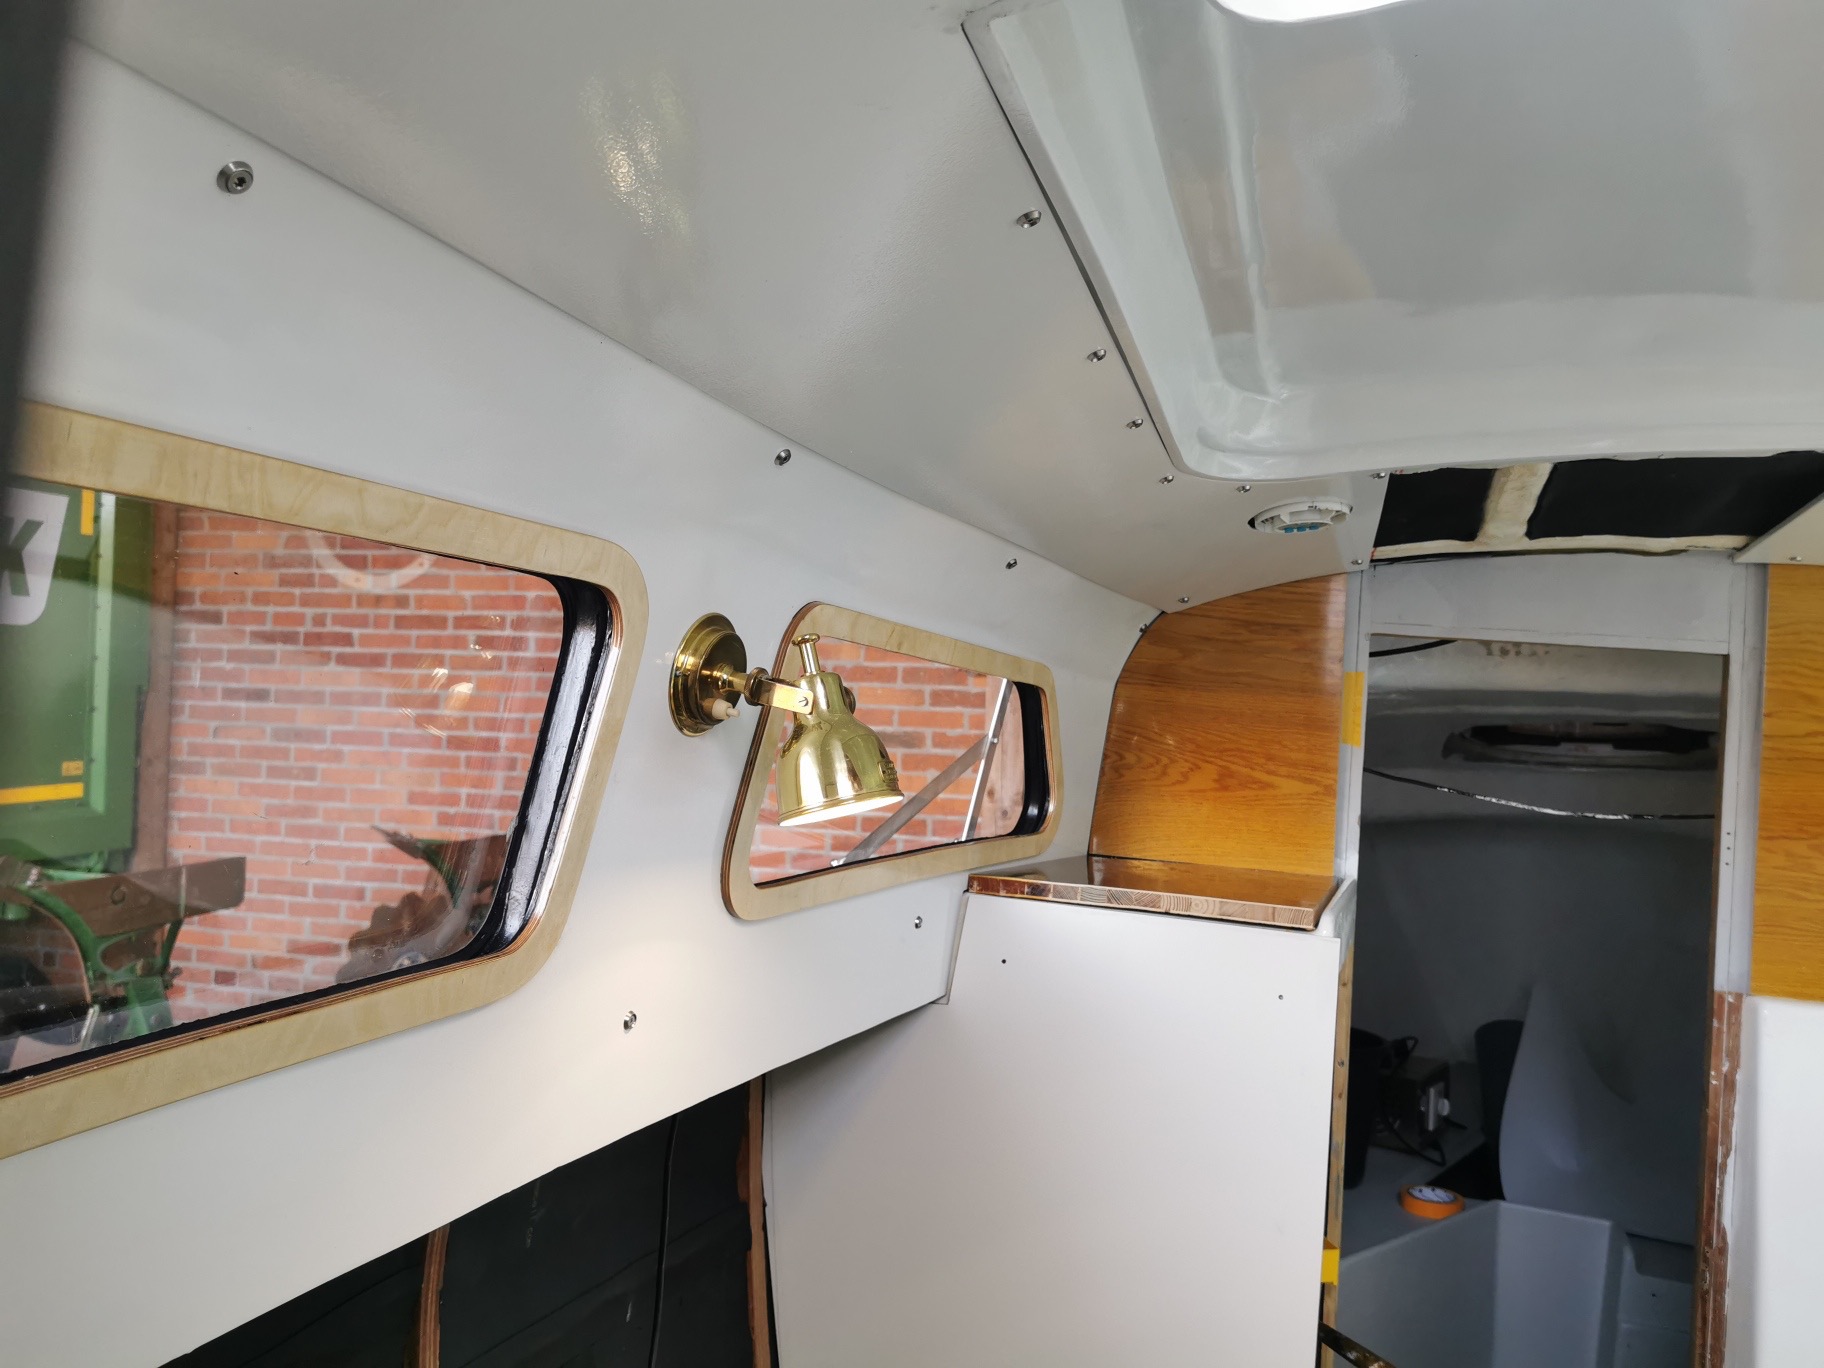
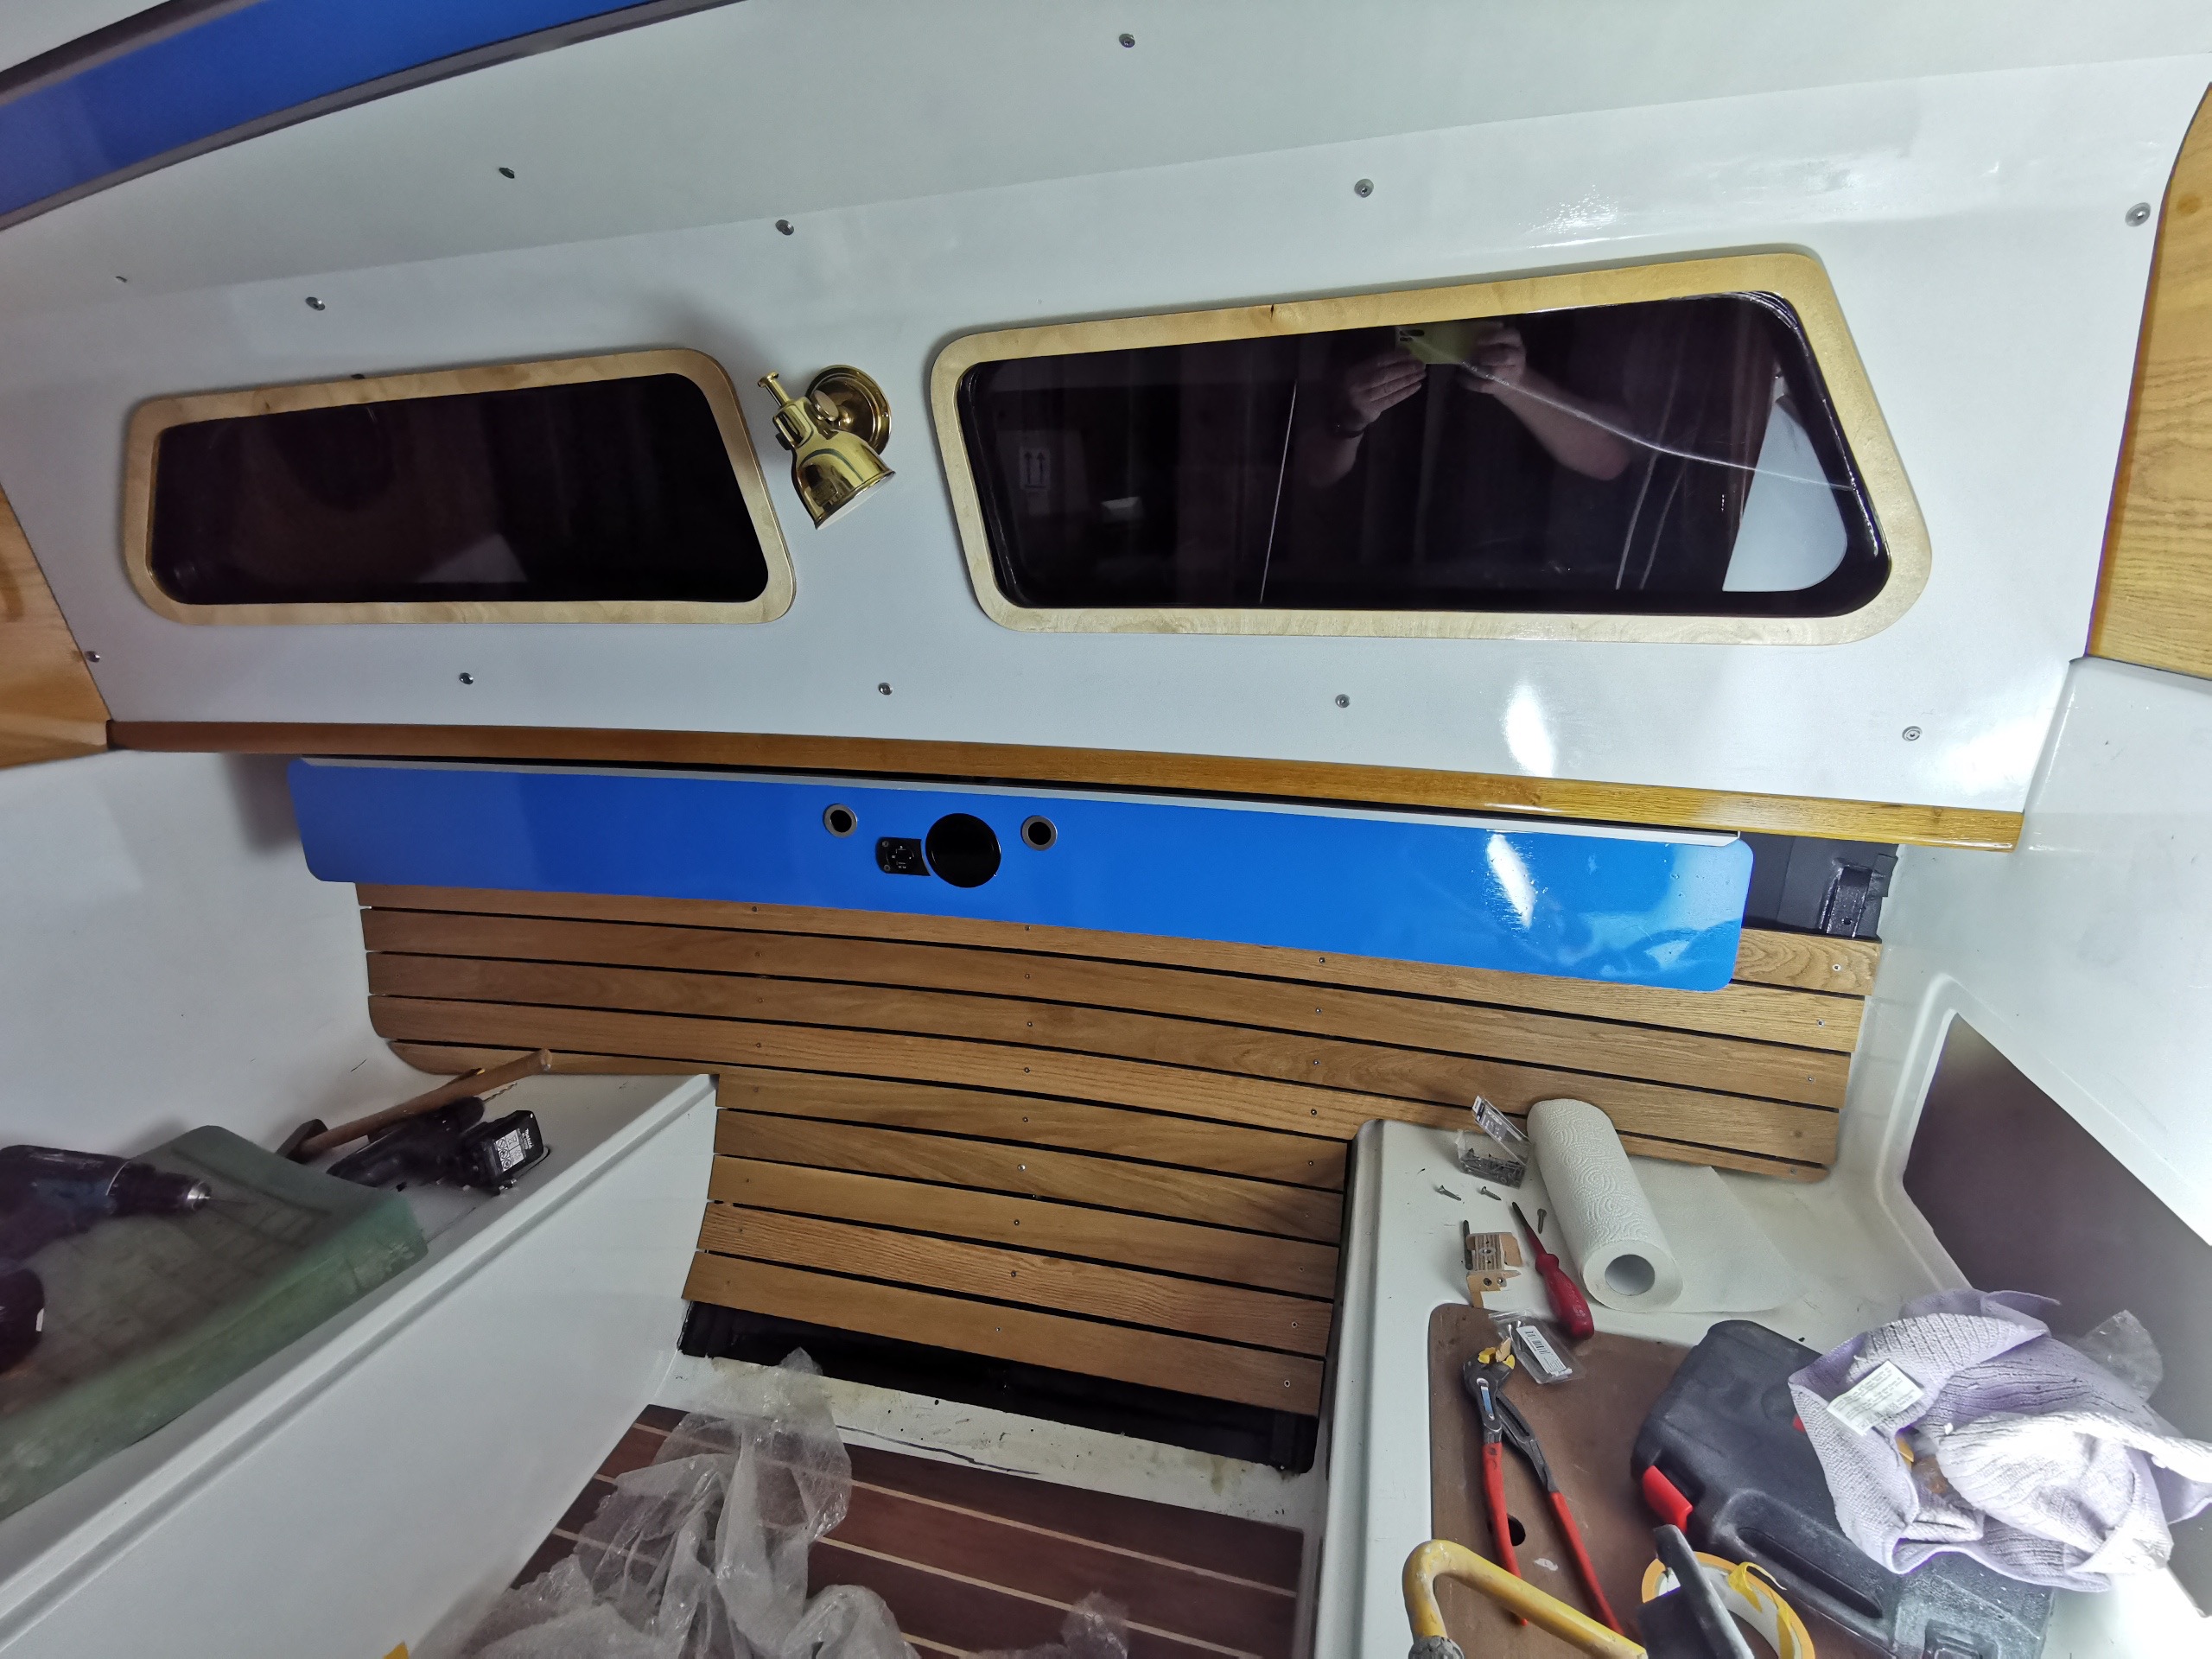
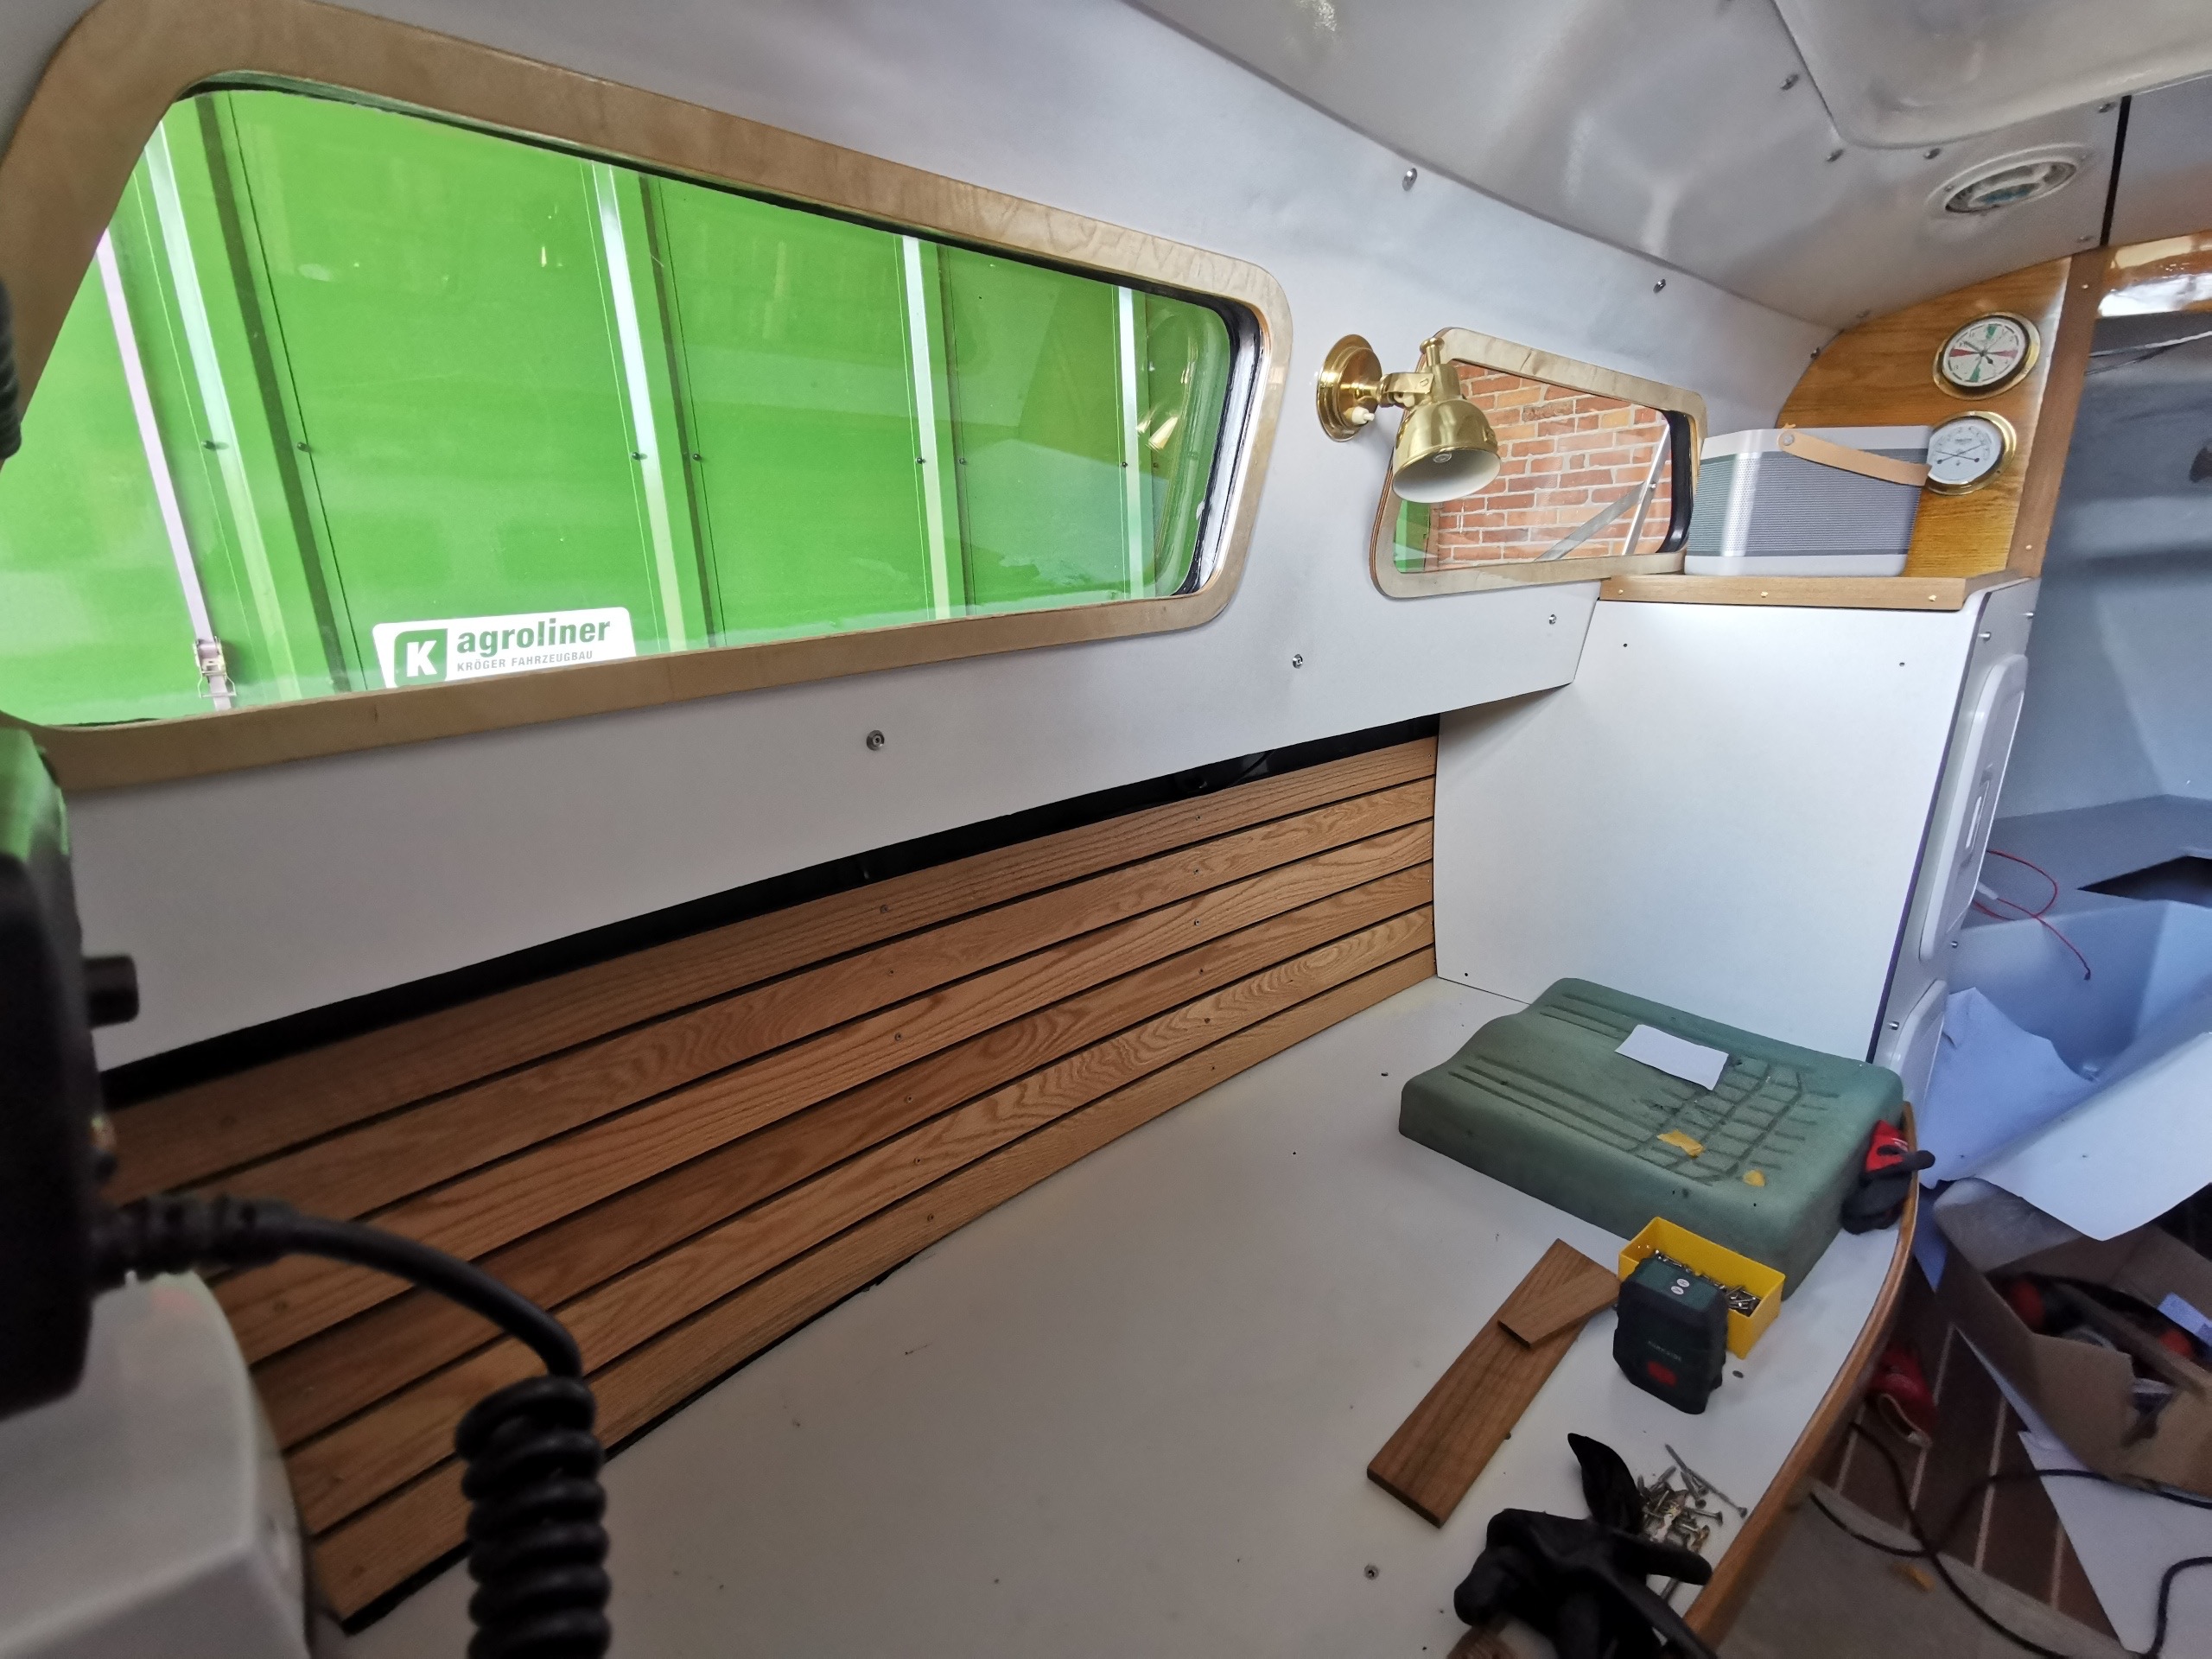
For the window panels I made window frames out of birch plywood to make the panels look nicer. The pictures are self-explanatory and I didn't find the work as complex as I thought. I attached the frames to the panel with Sikaflex and small screws. It is important that the frames are sealed well on the inside and outside before attachment.
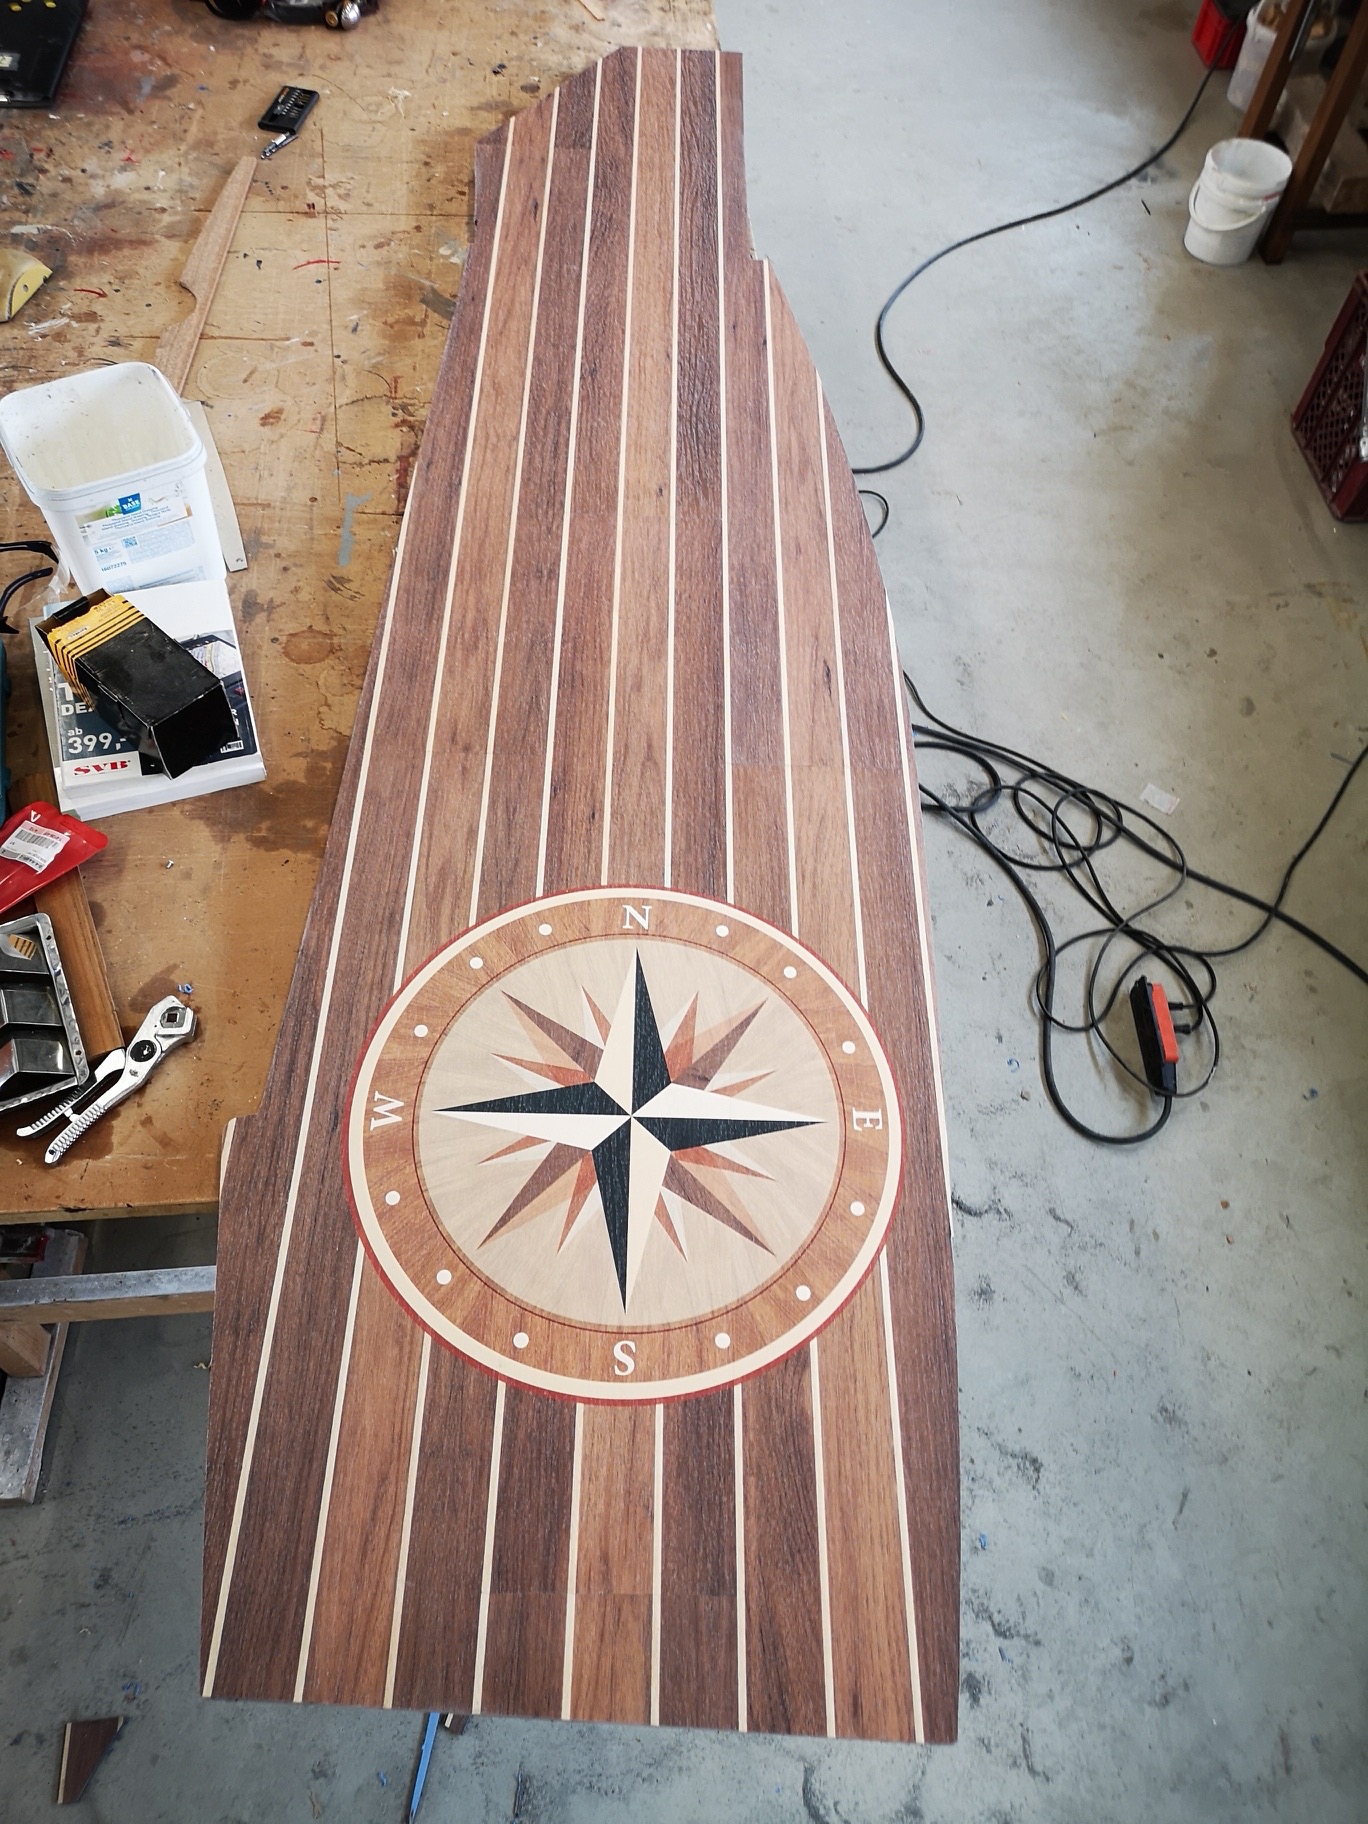
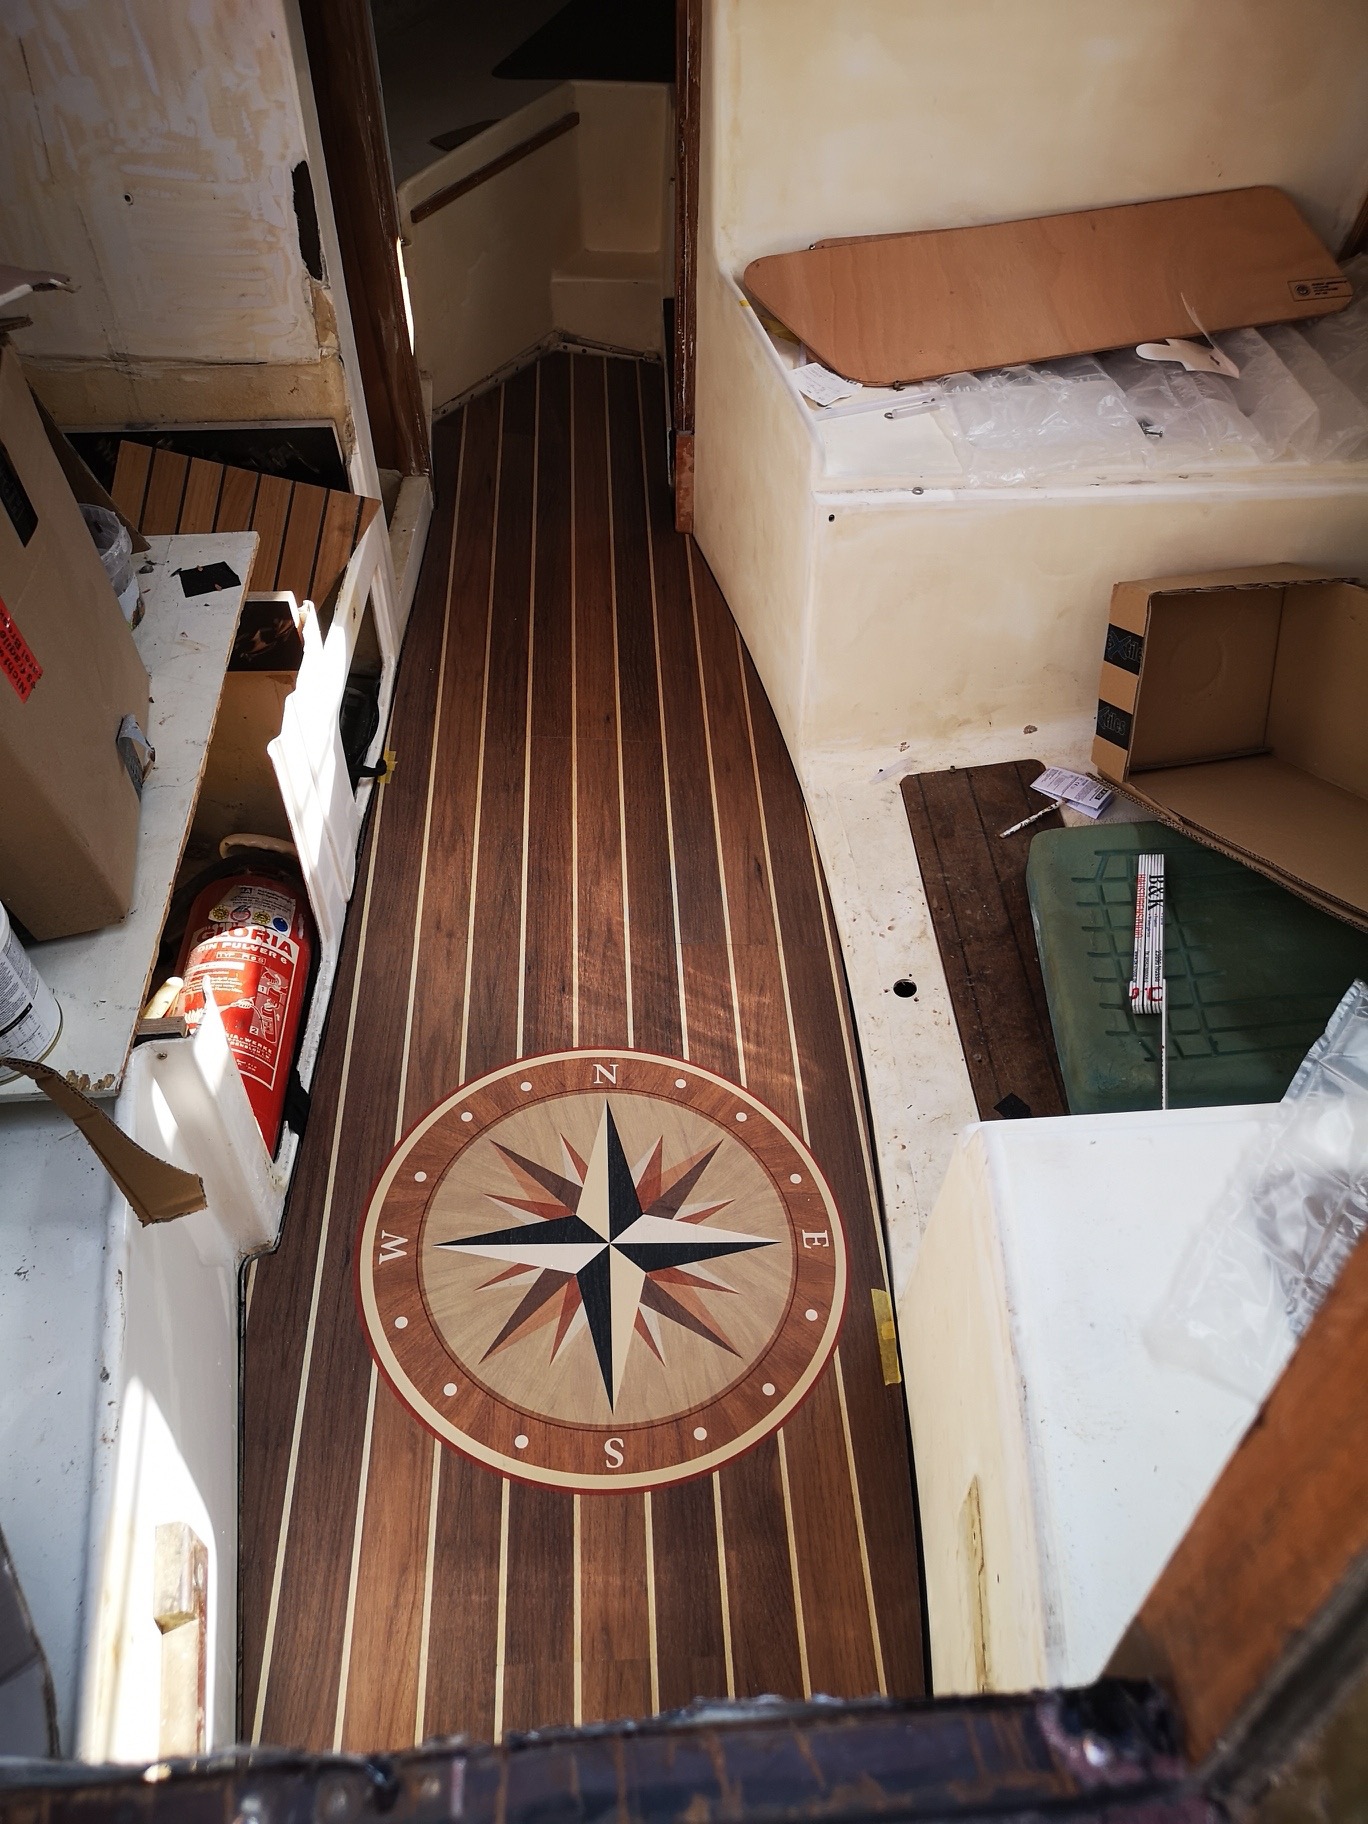
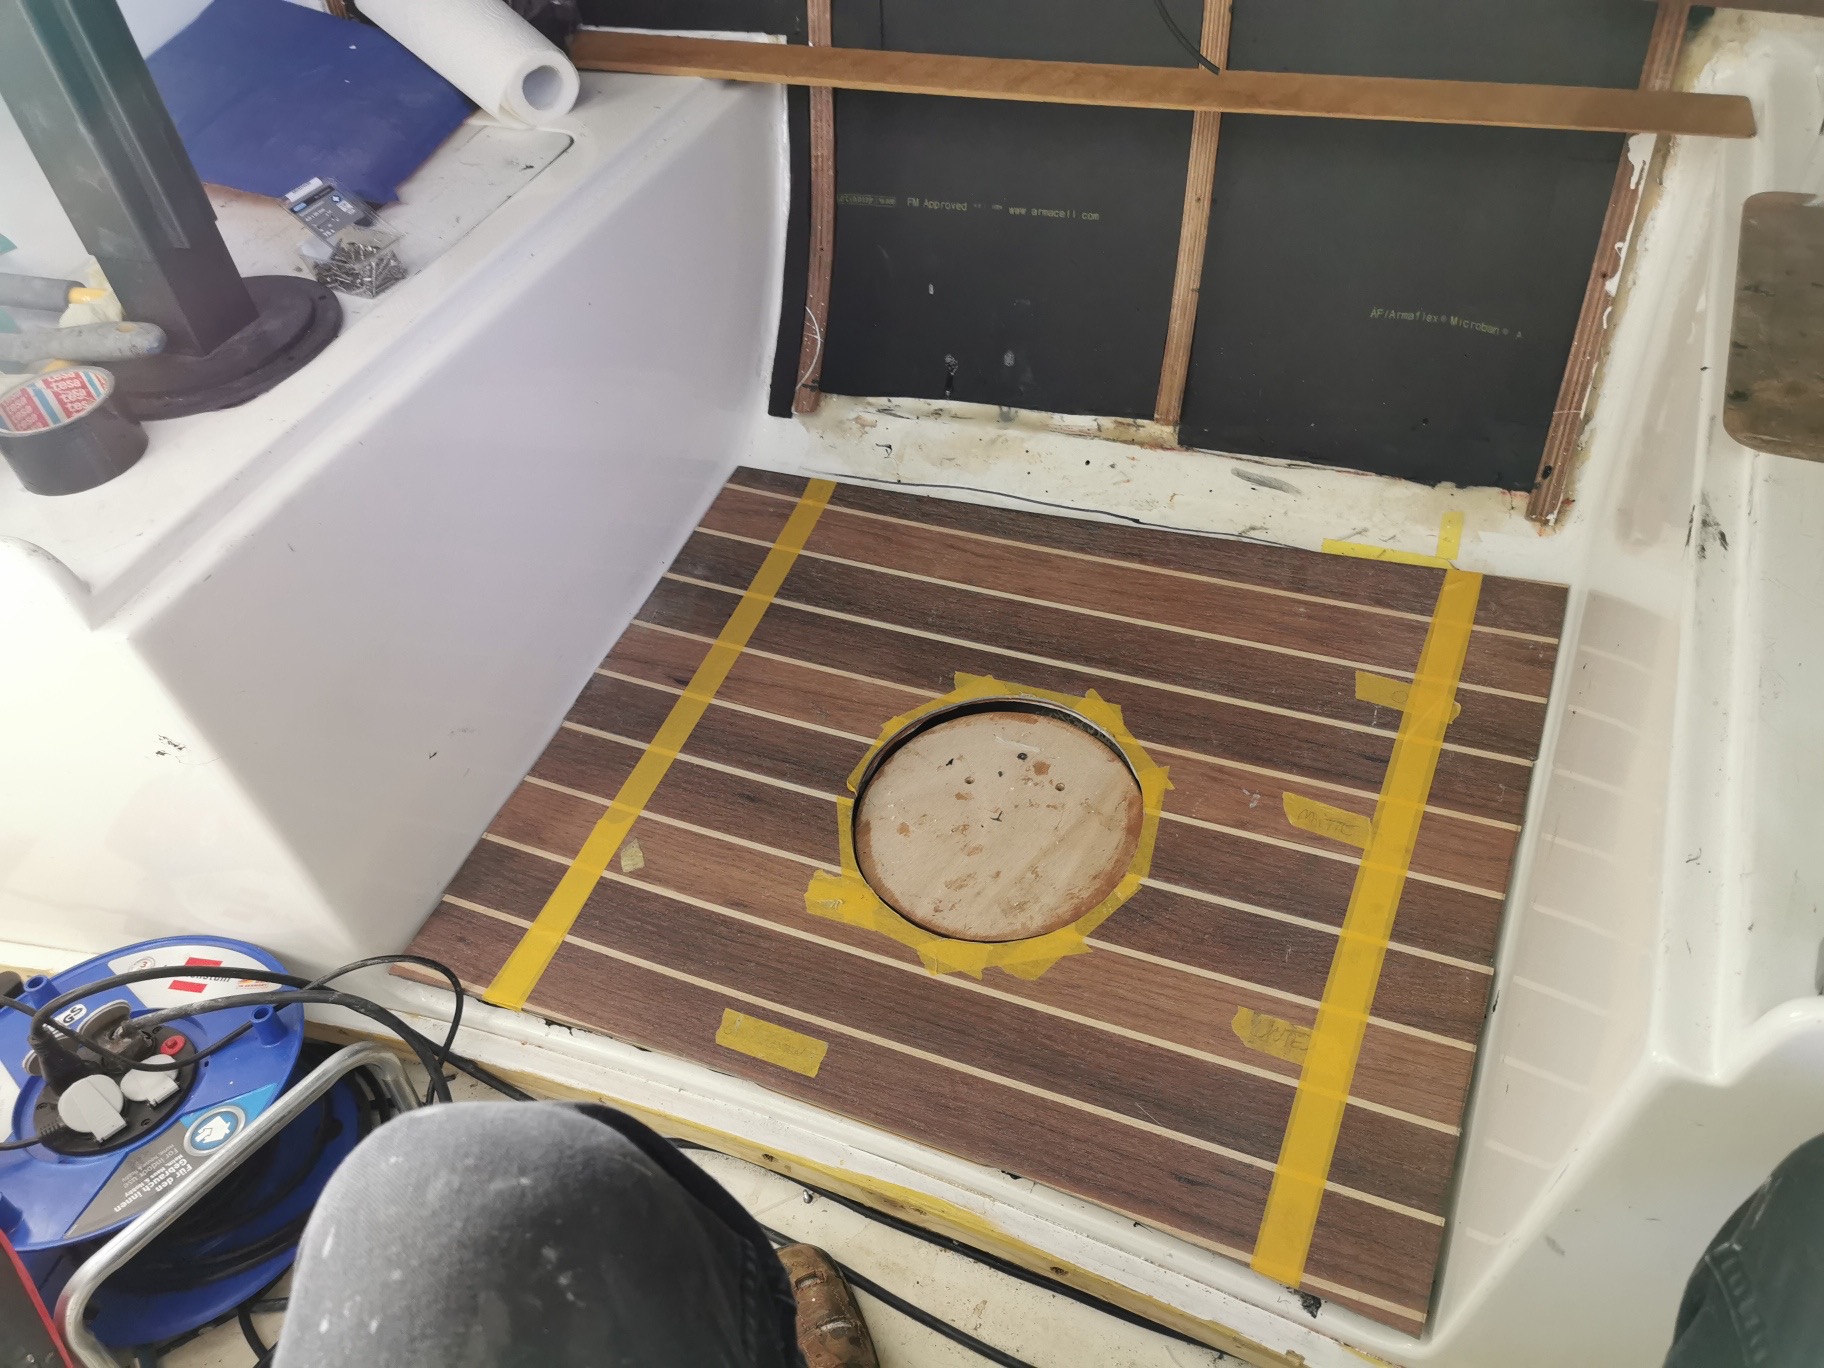
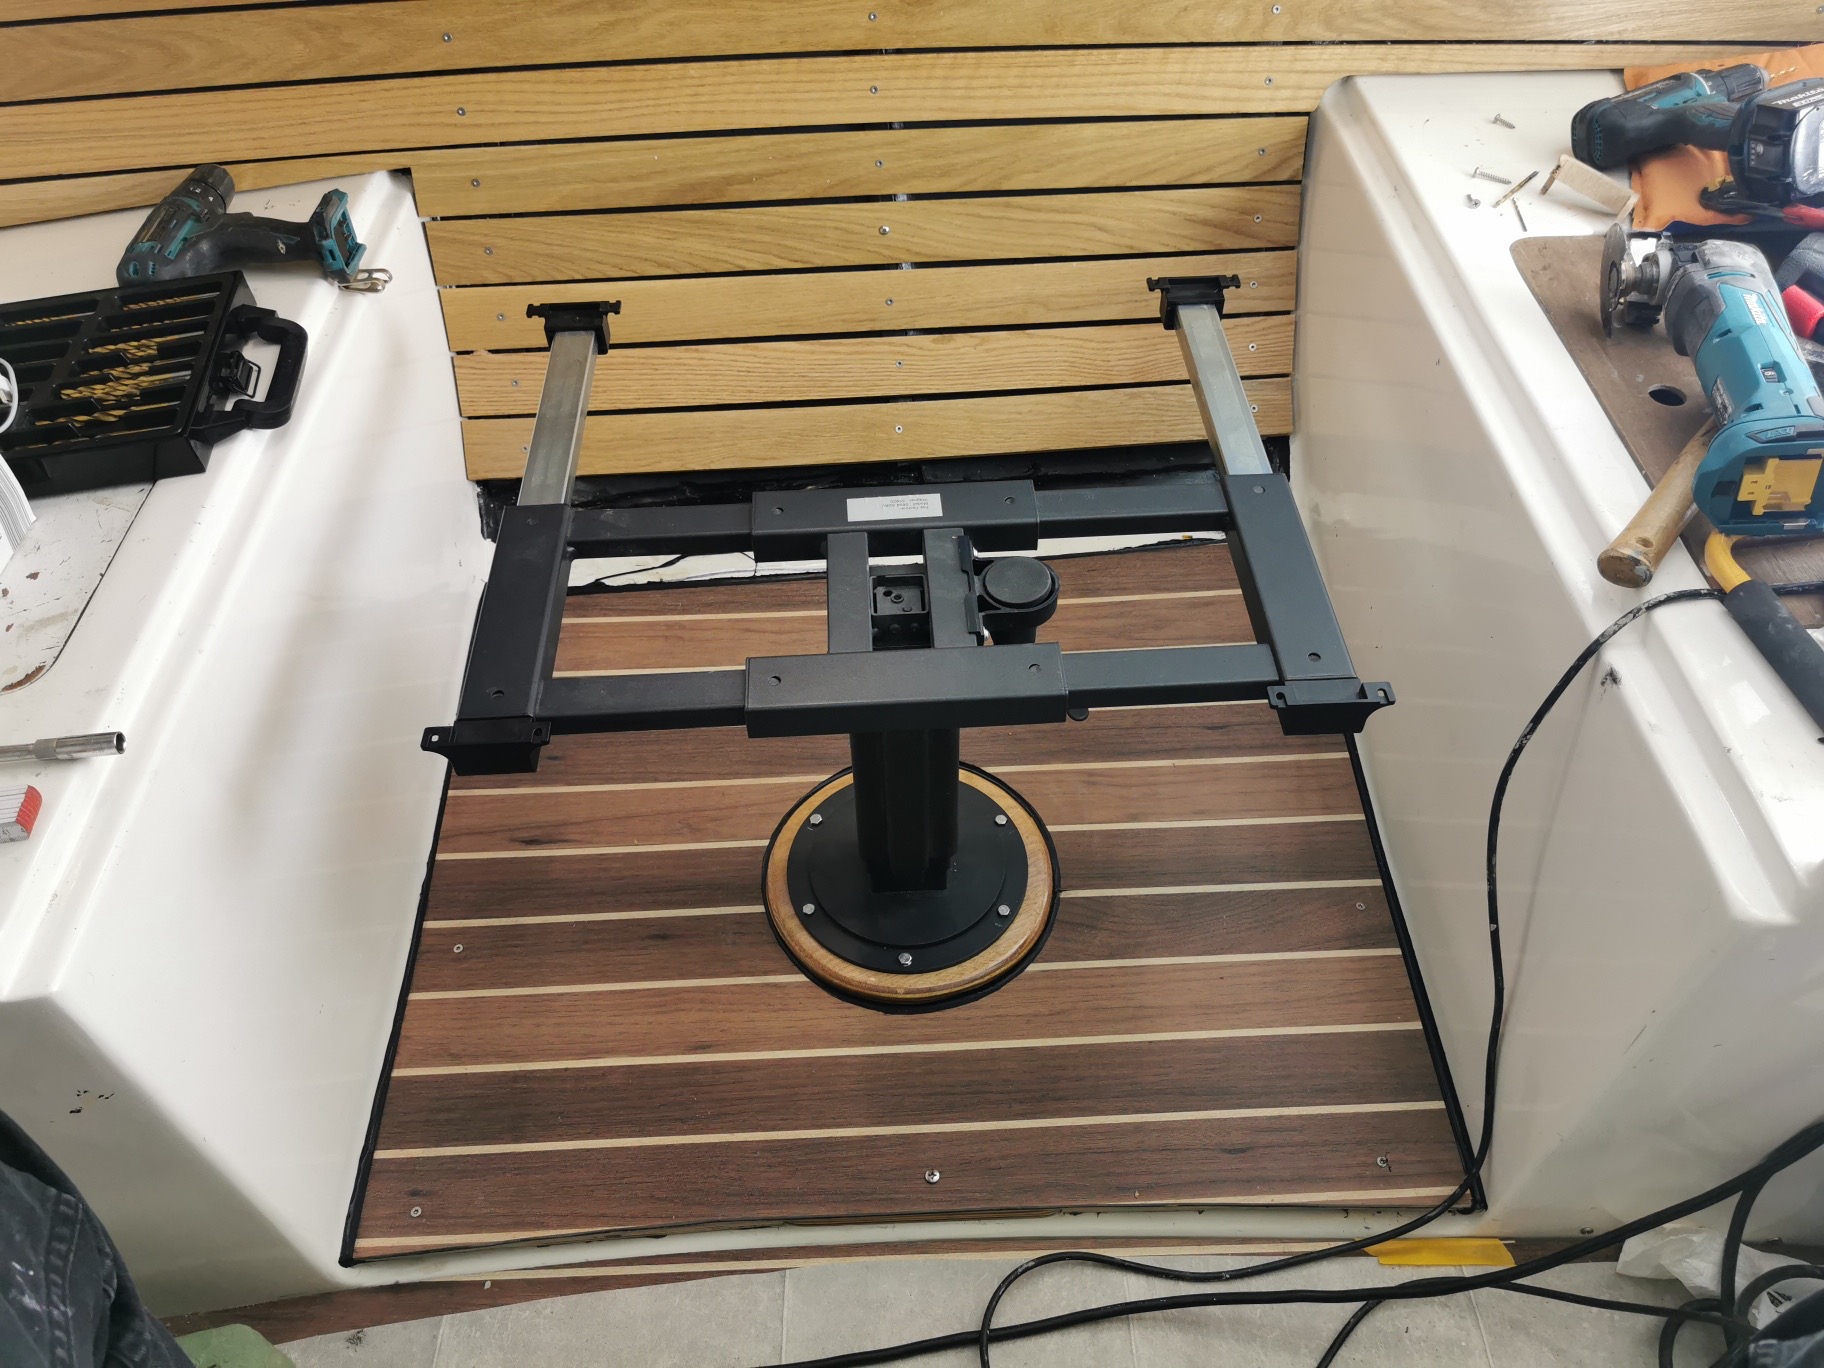
The floor of the dinette (seat on starboard) is covered with a kind of click parquet, which I also use for the aisle in the saloon. So that the brand new lifting table can later be screwed in, a really solid base had to be constructed on the ship's floor at the beginning, to which the custom-made floor panel is finally glued.

März/Apri 2022
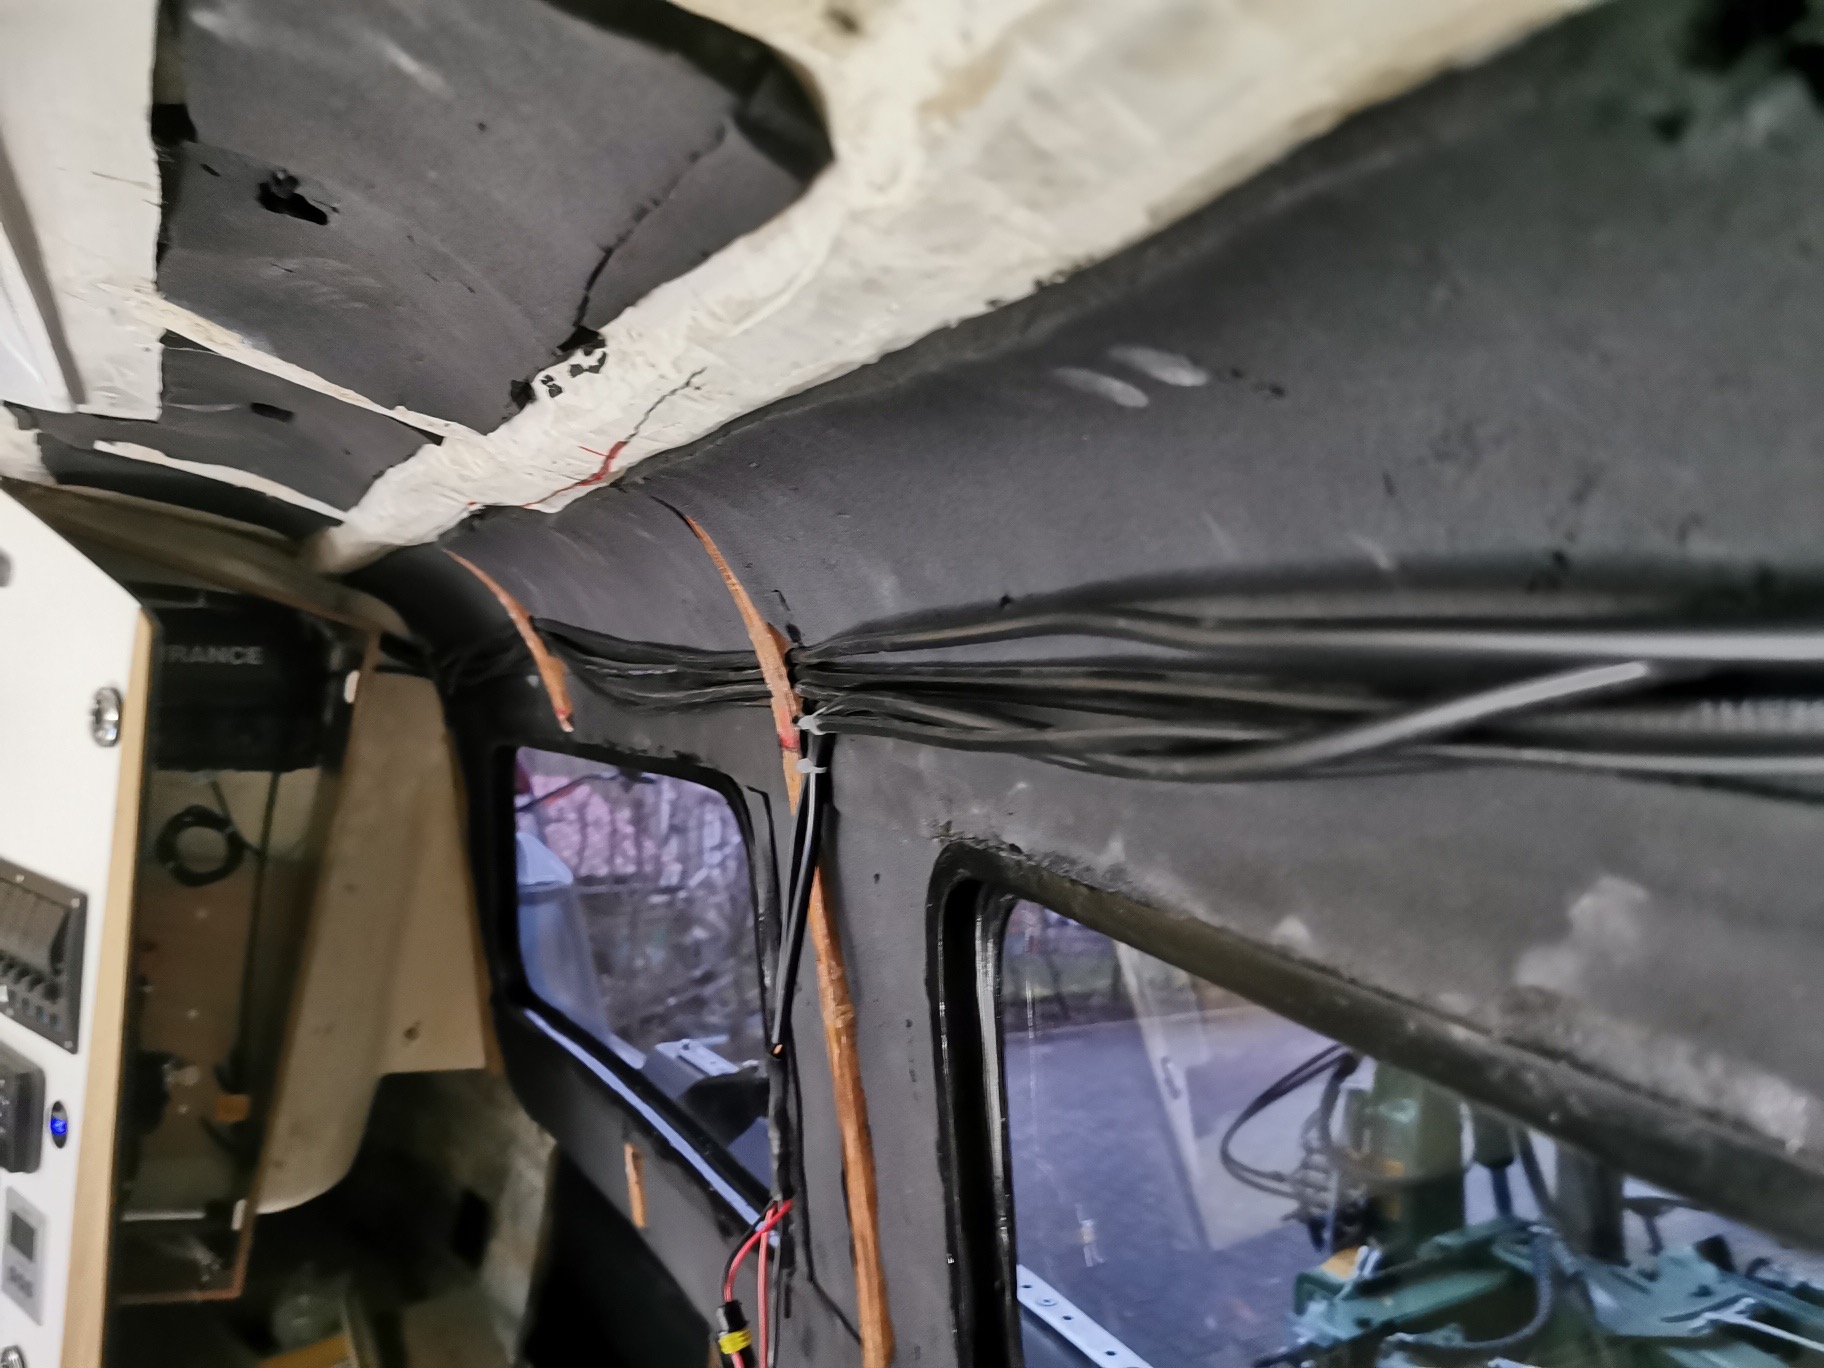
Before attaching the panels, all electrical cables and the antenna cable must also be laid. I have the usual 12V system on board, as well as the boat's own inverter, which supplies 230V (1400W) as well as shore power.
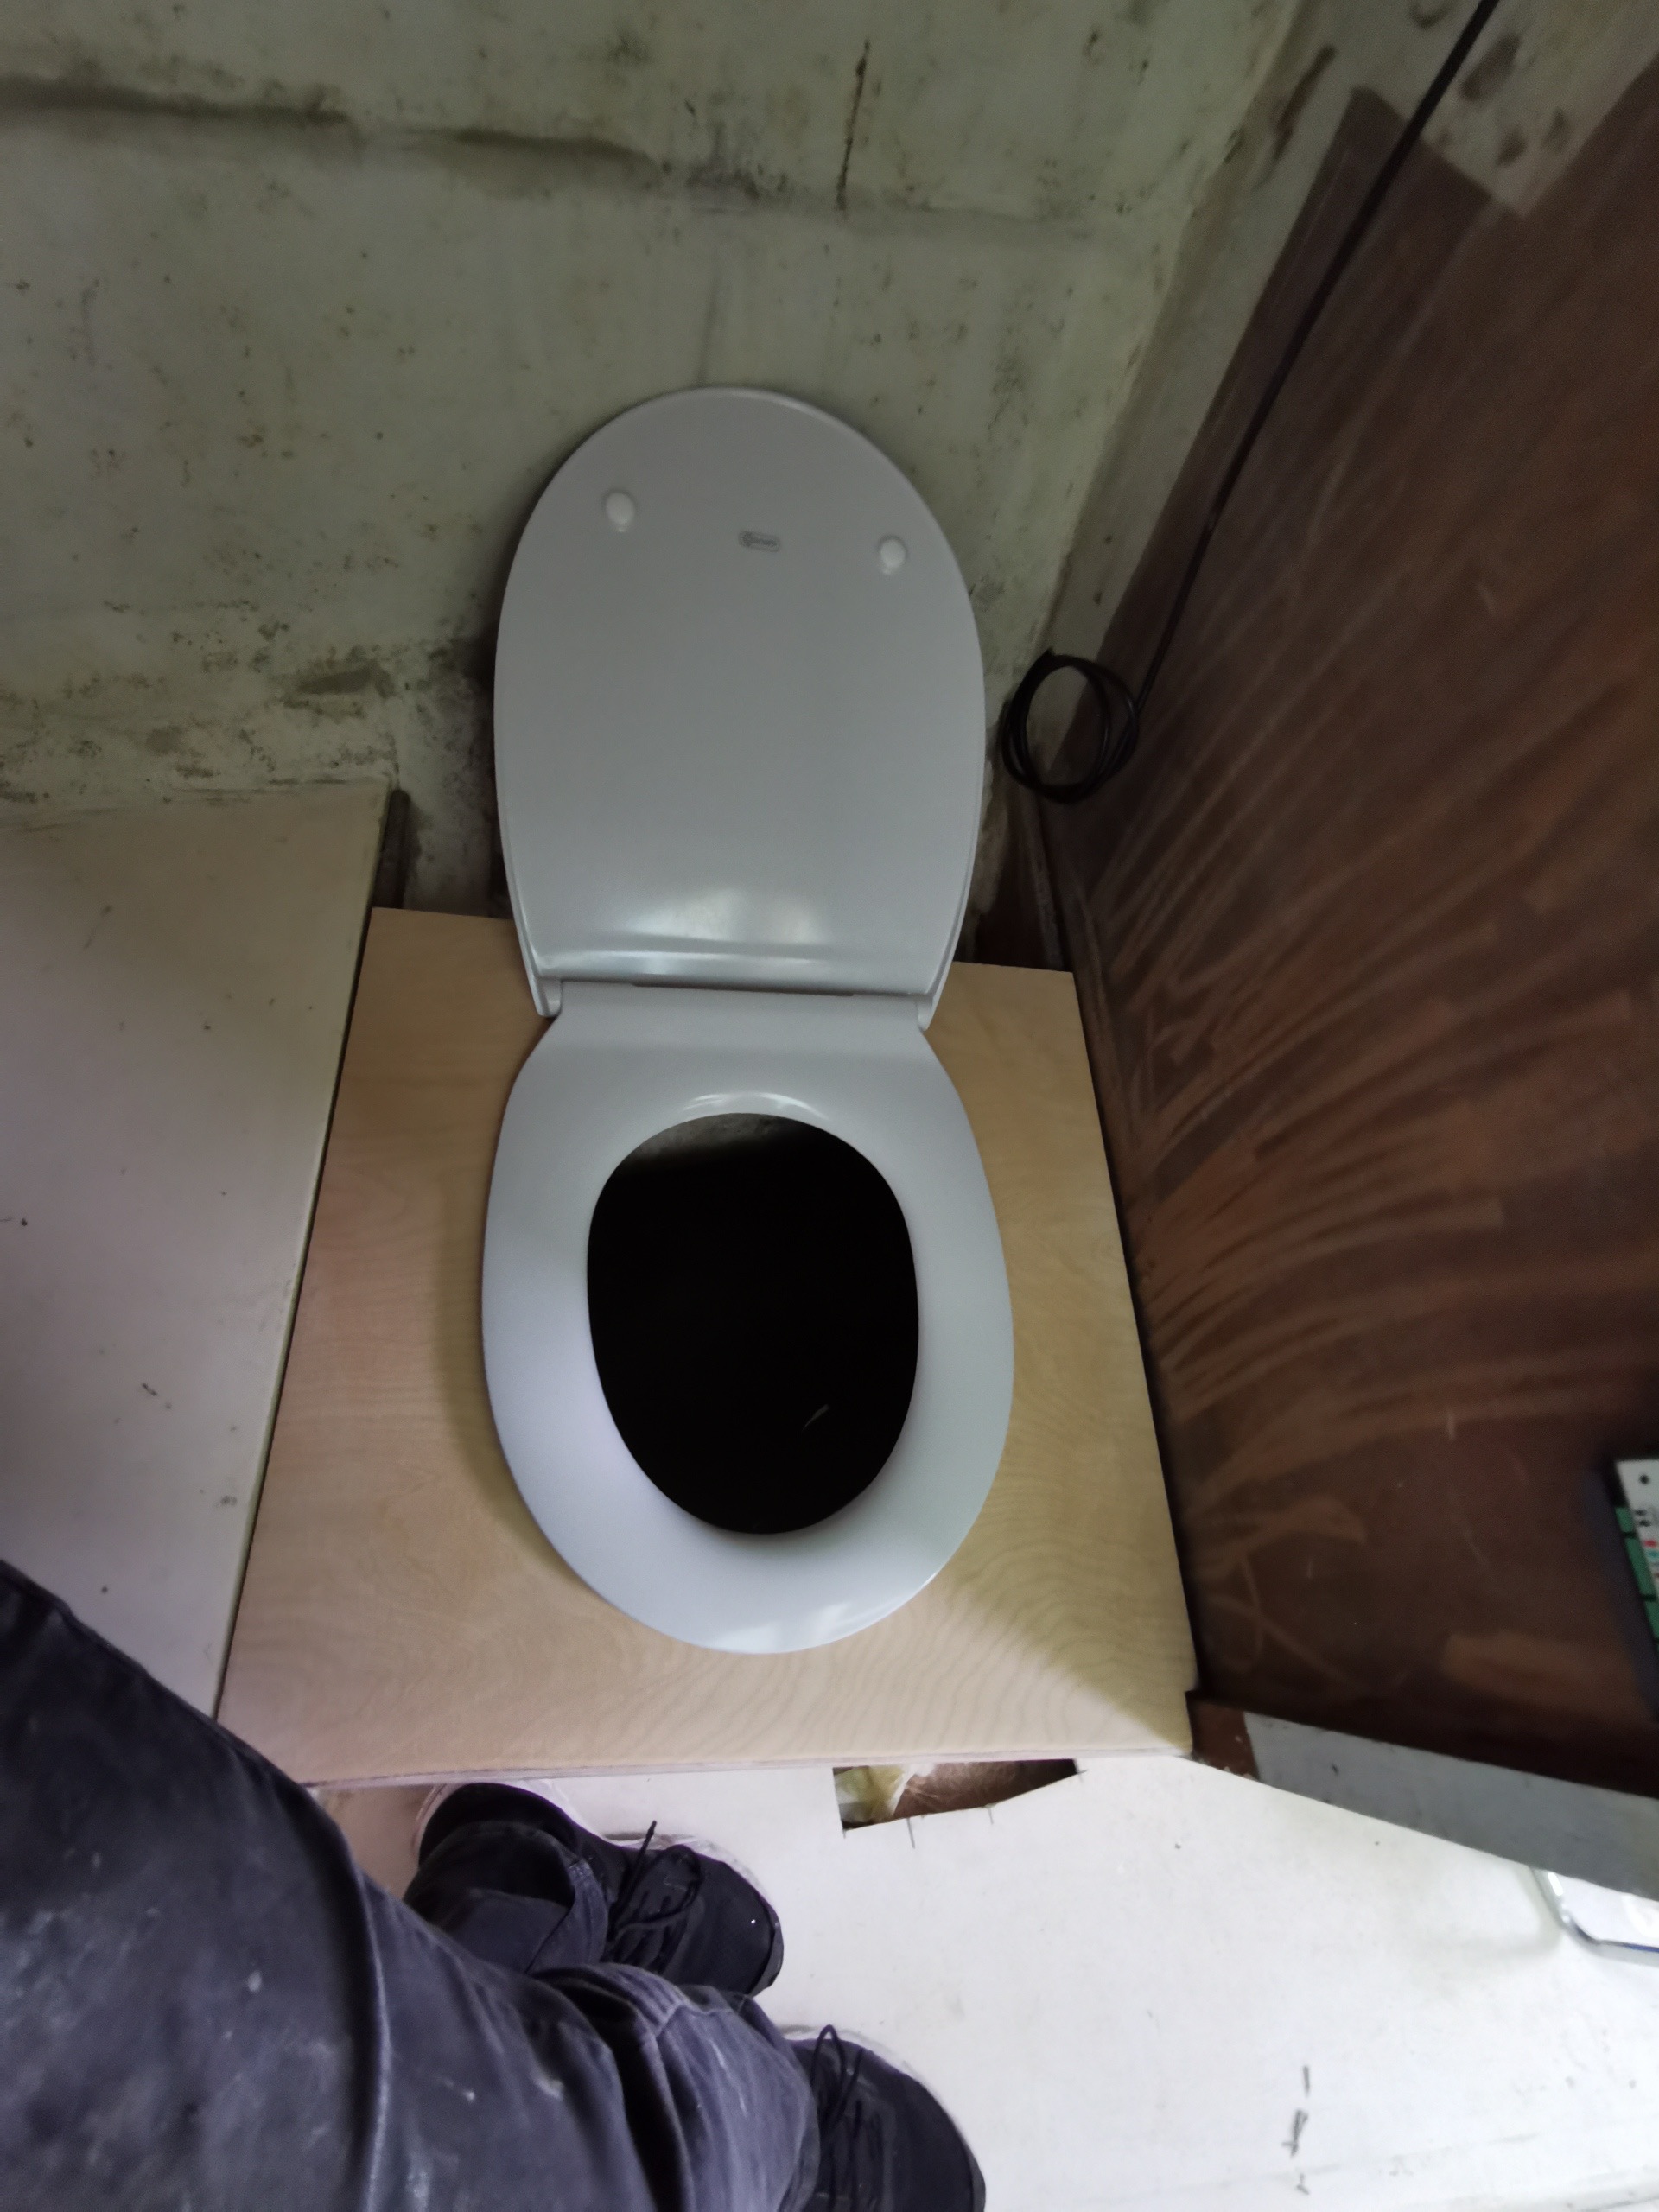

The new toilet, which is located in the foredeck, is in the works. It is a so-called dry toilet, where you do your „things“ in a plasic-bag with cat litter or liquid-binding granules. I removed the sea toilet and professionally closed the passages.
Apri 2022
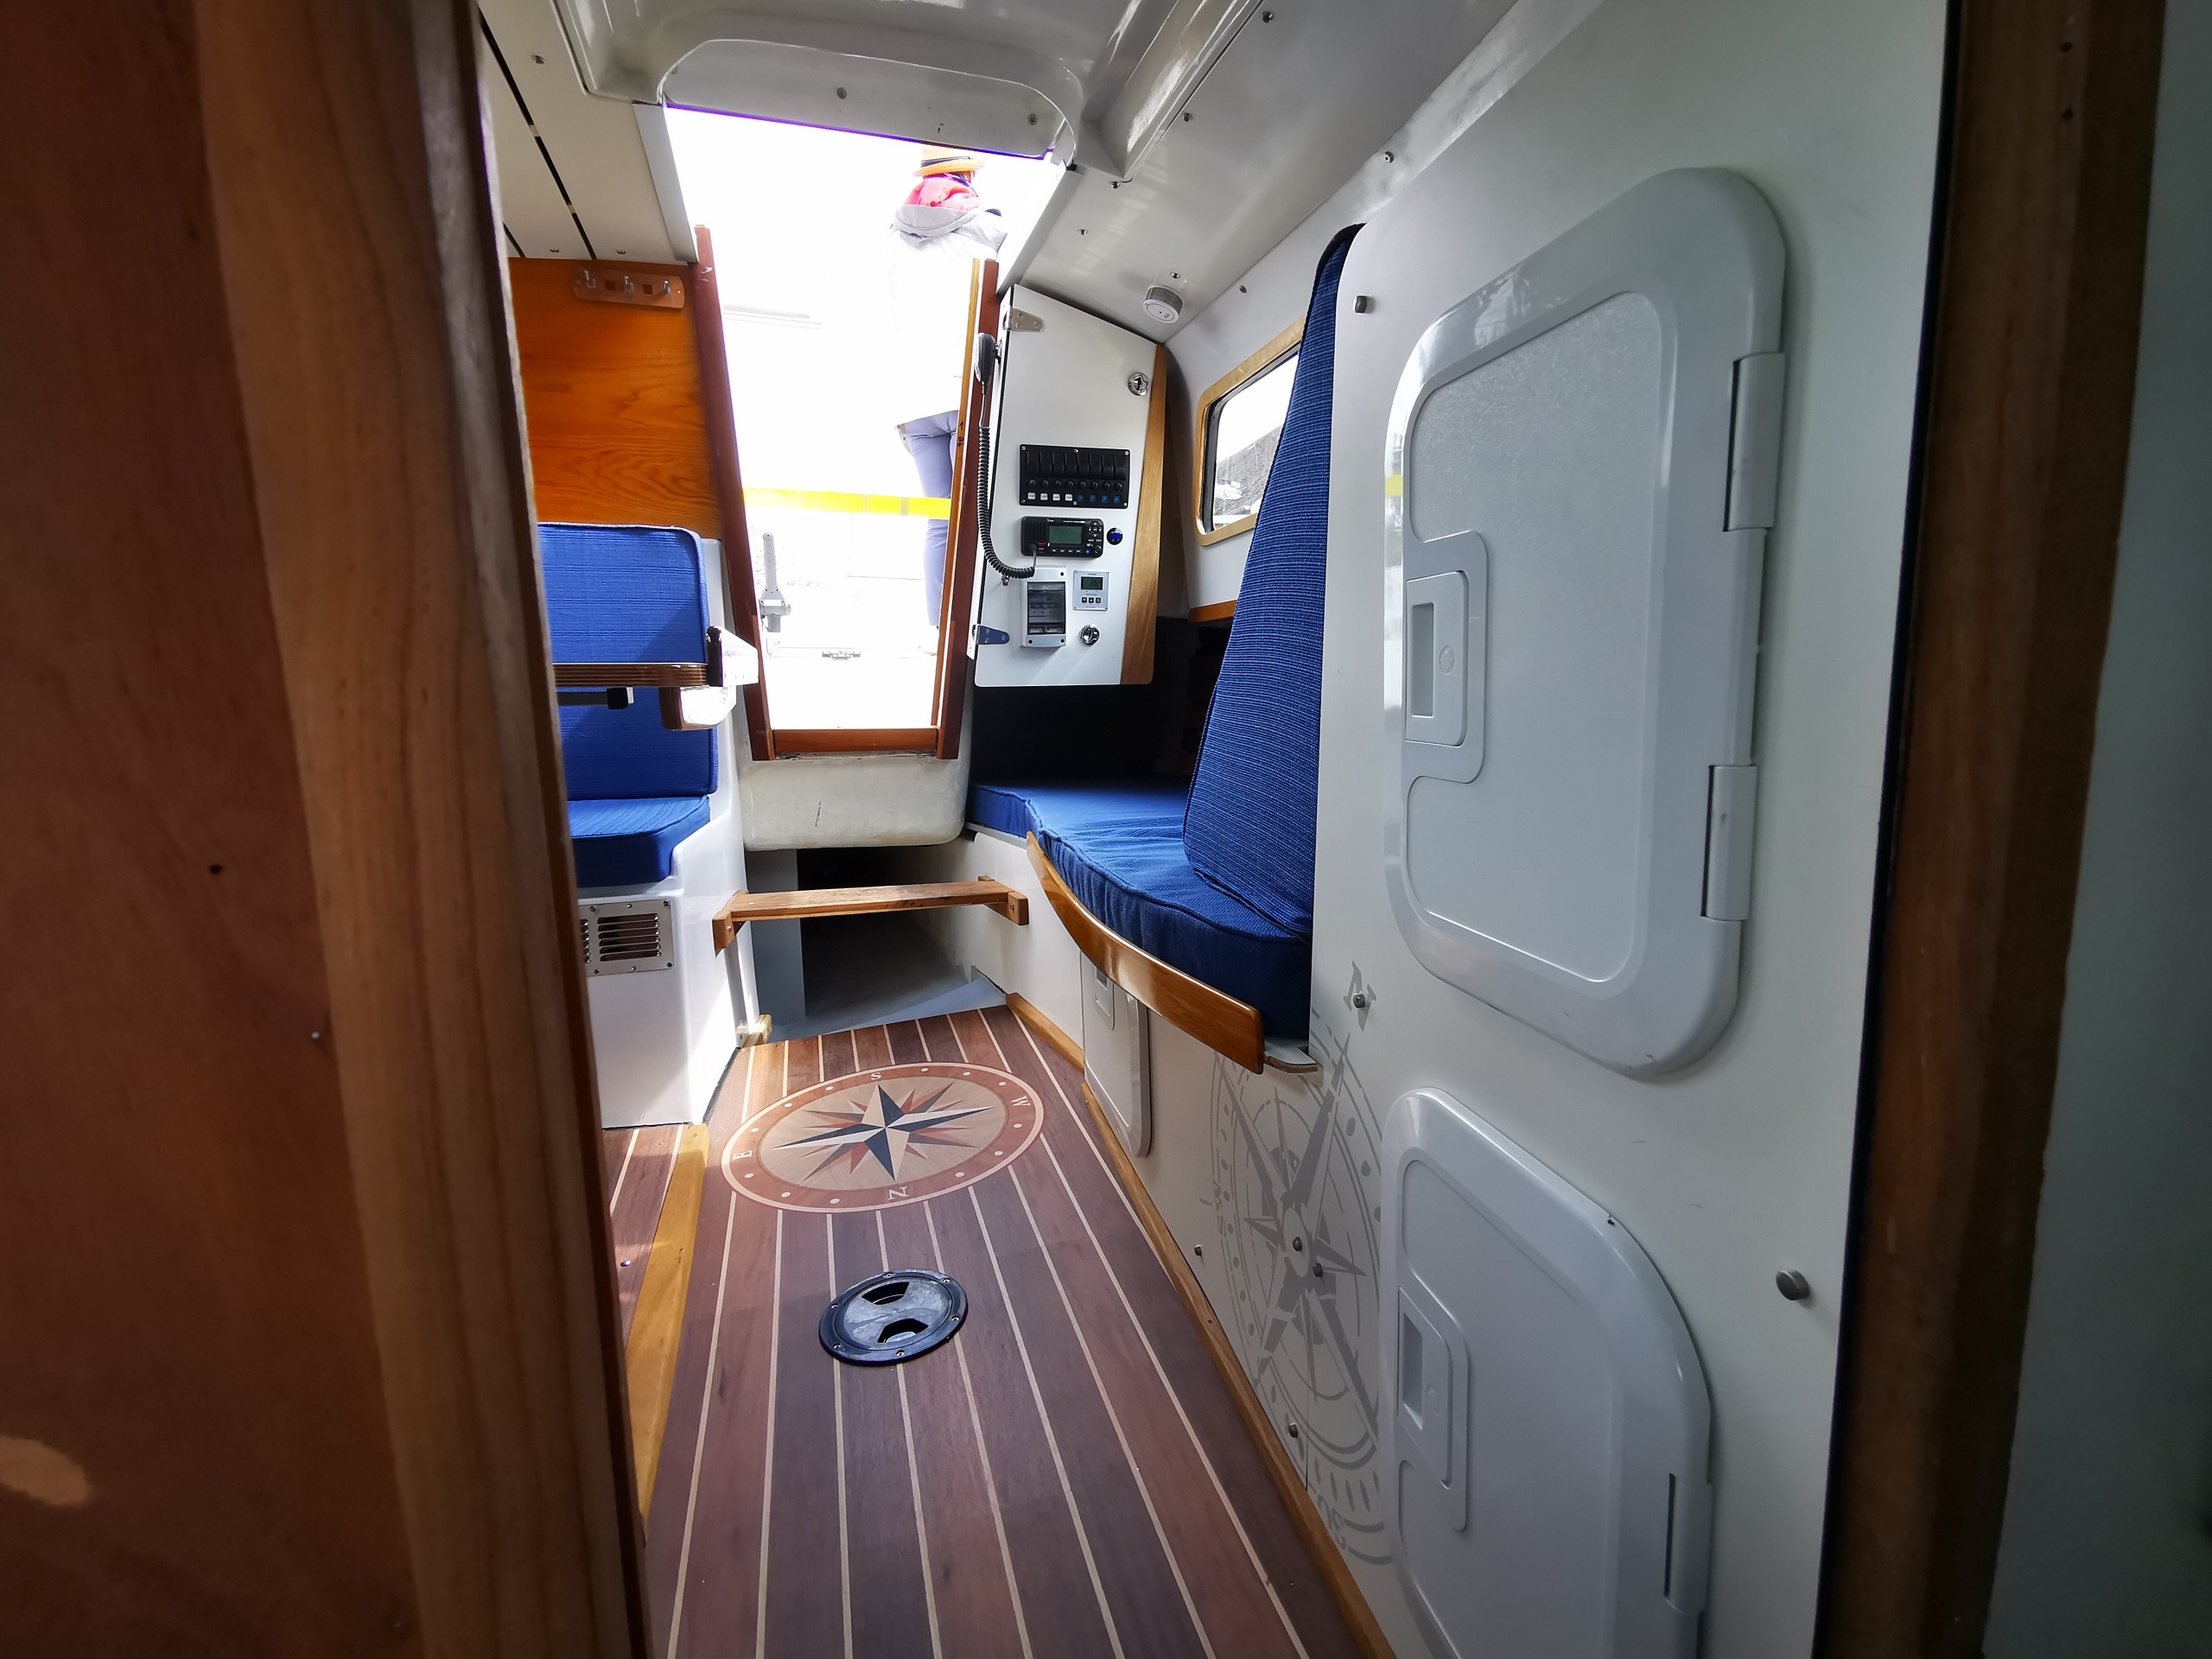
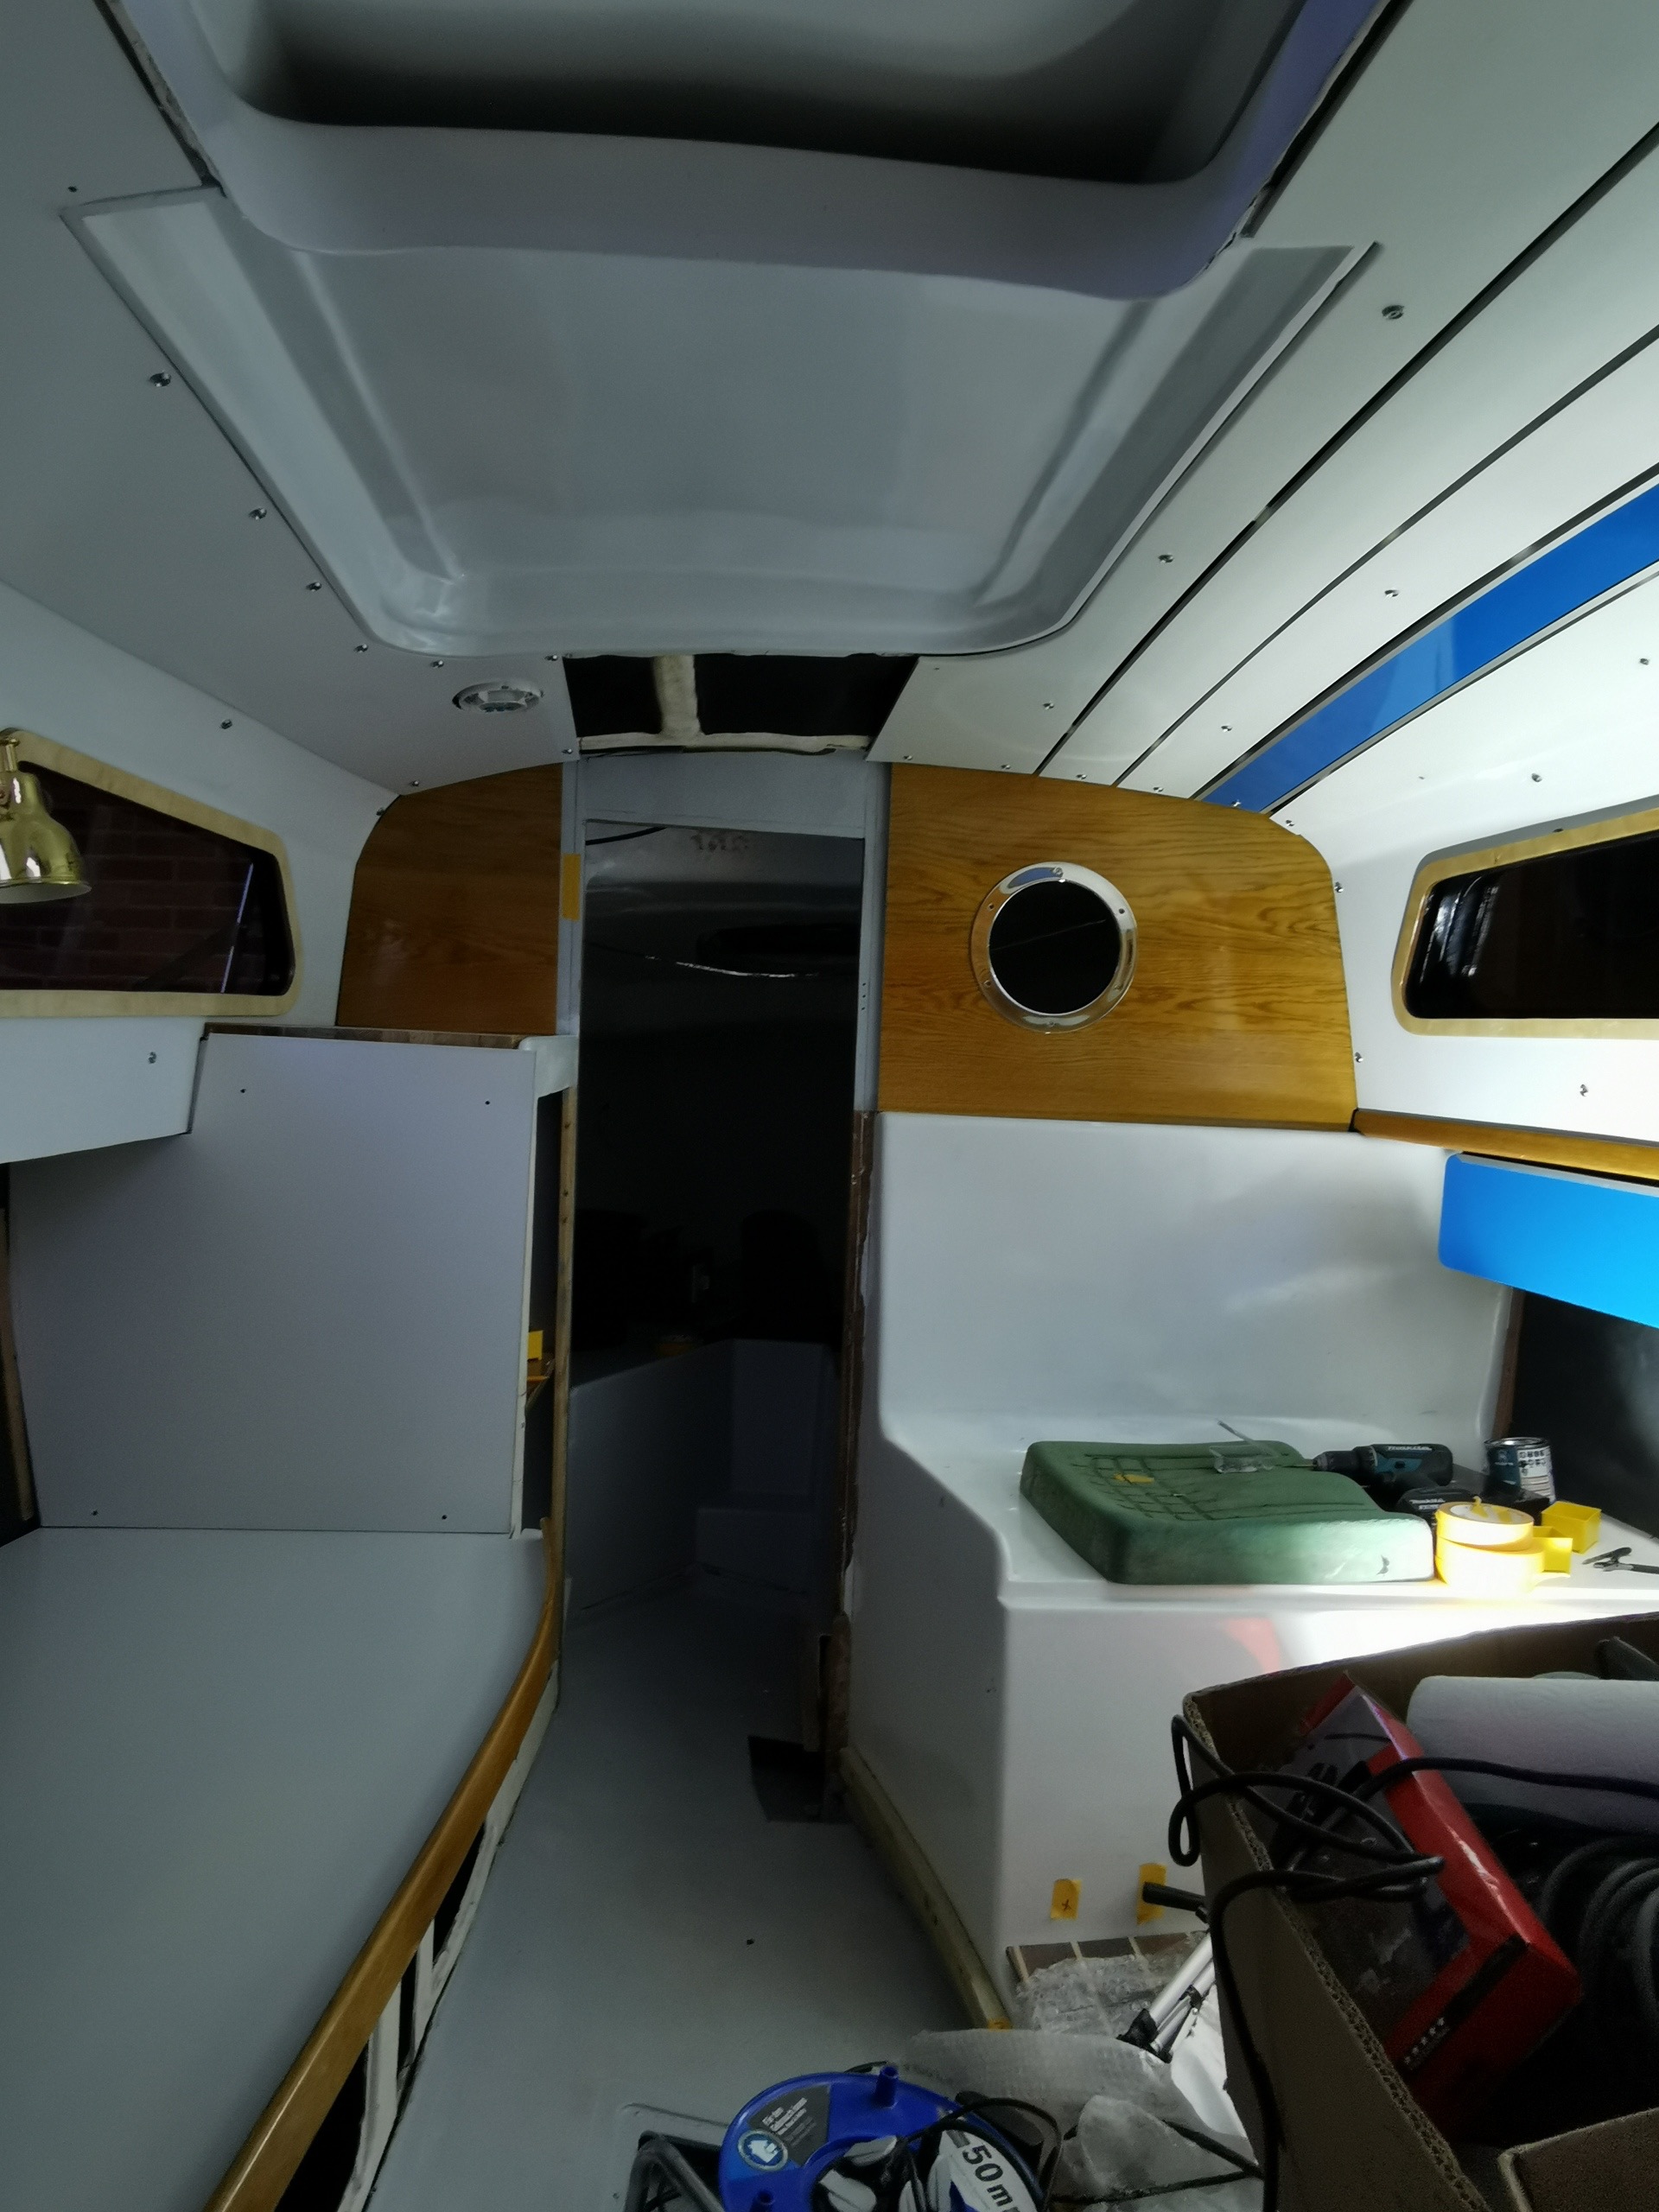
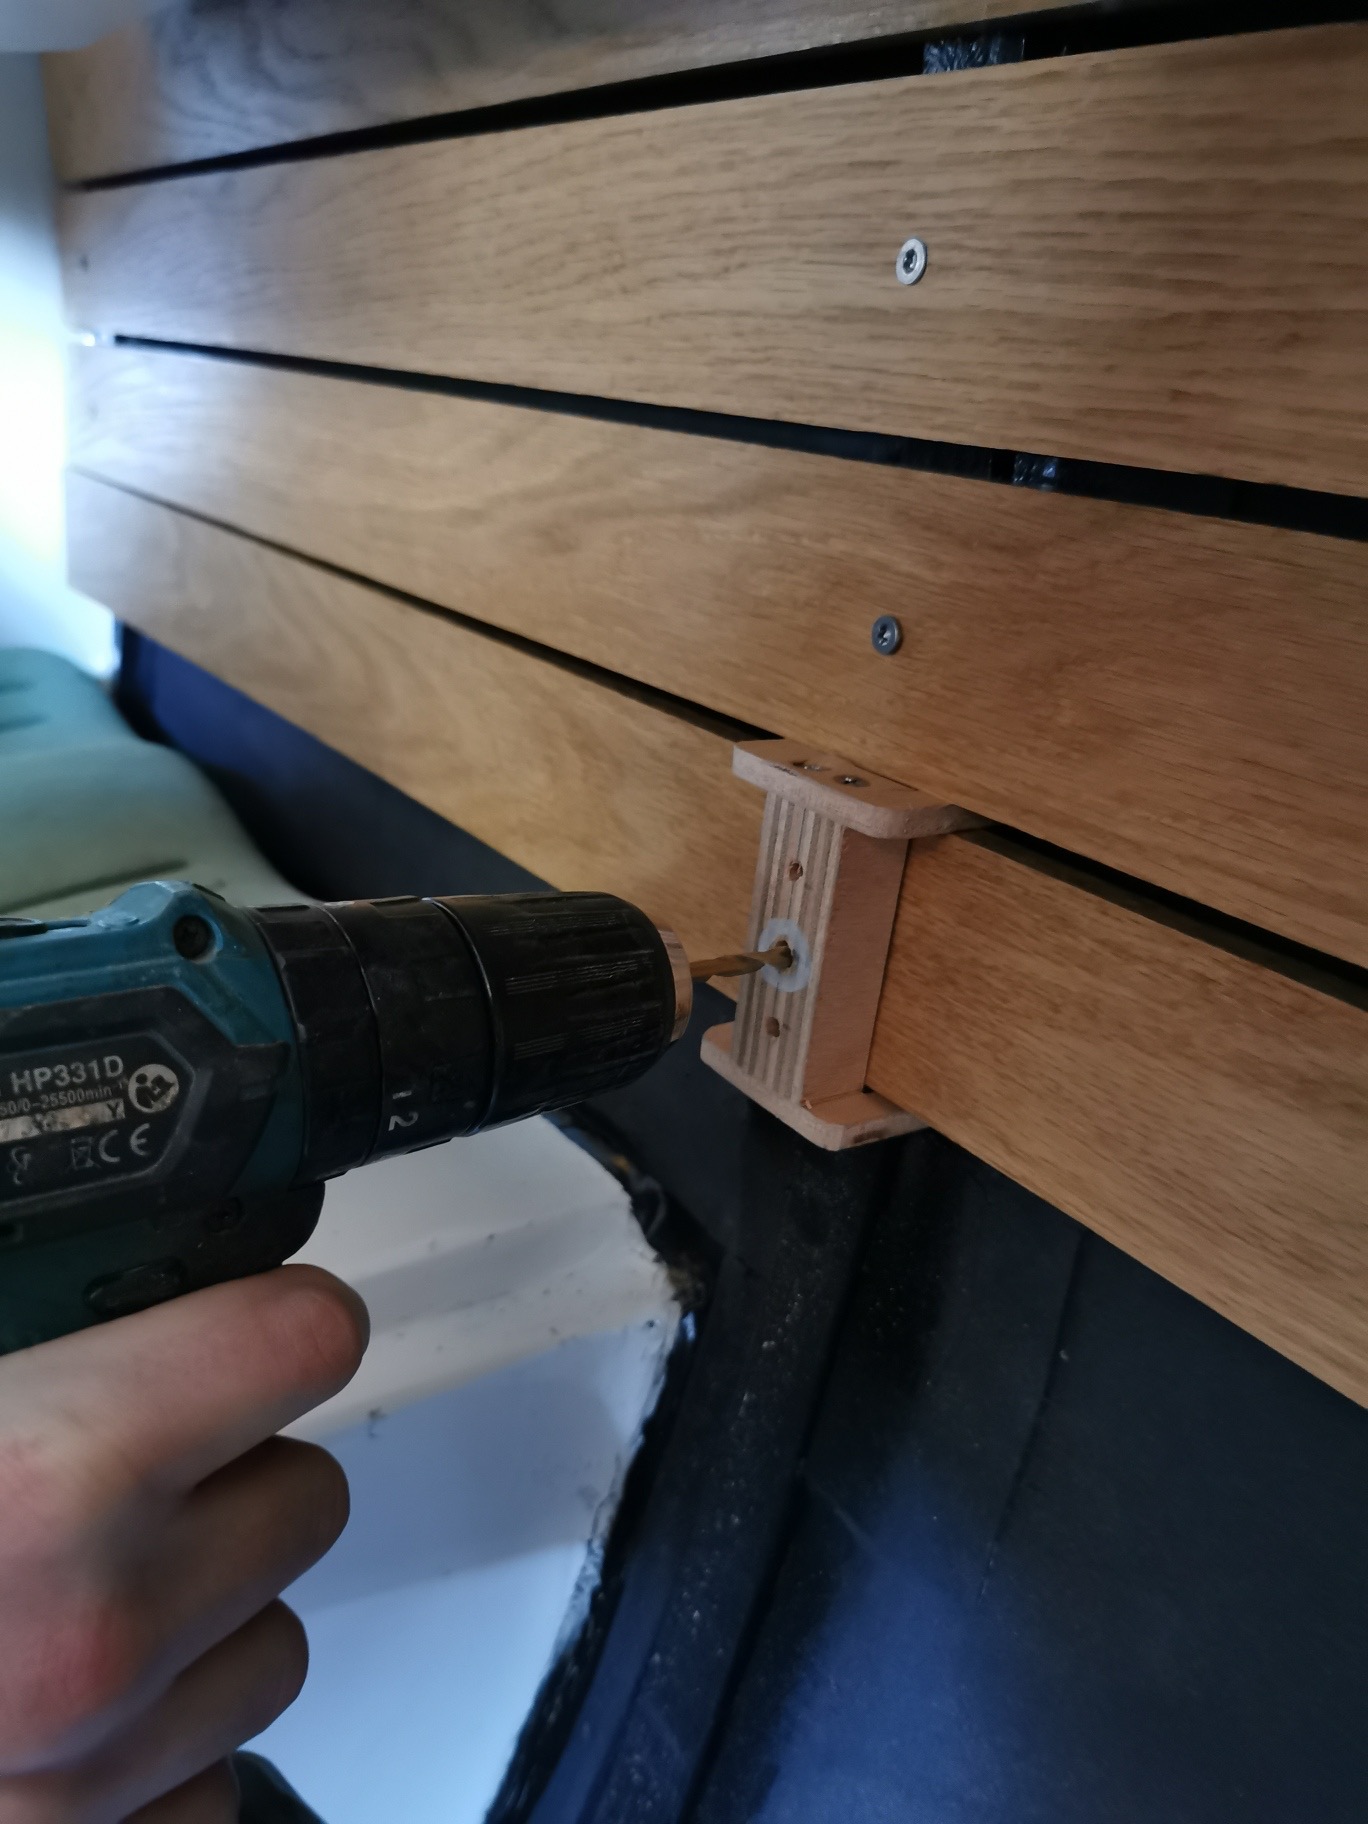
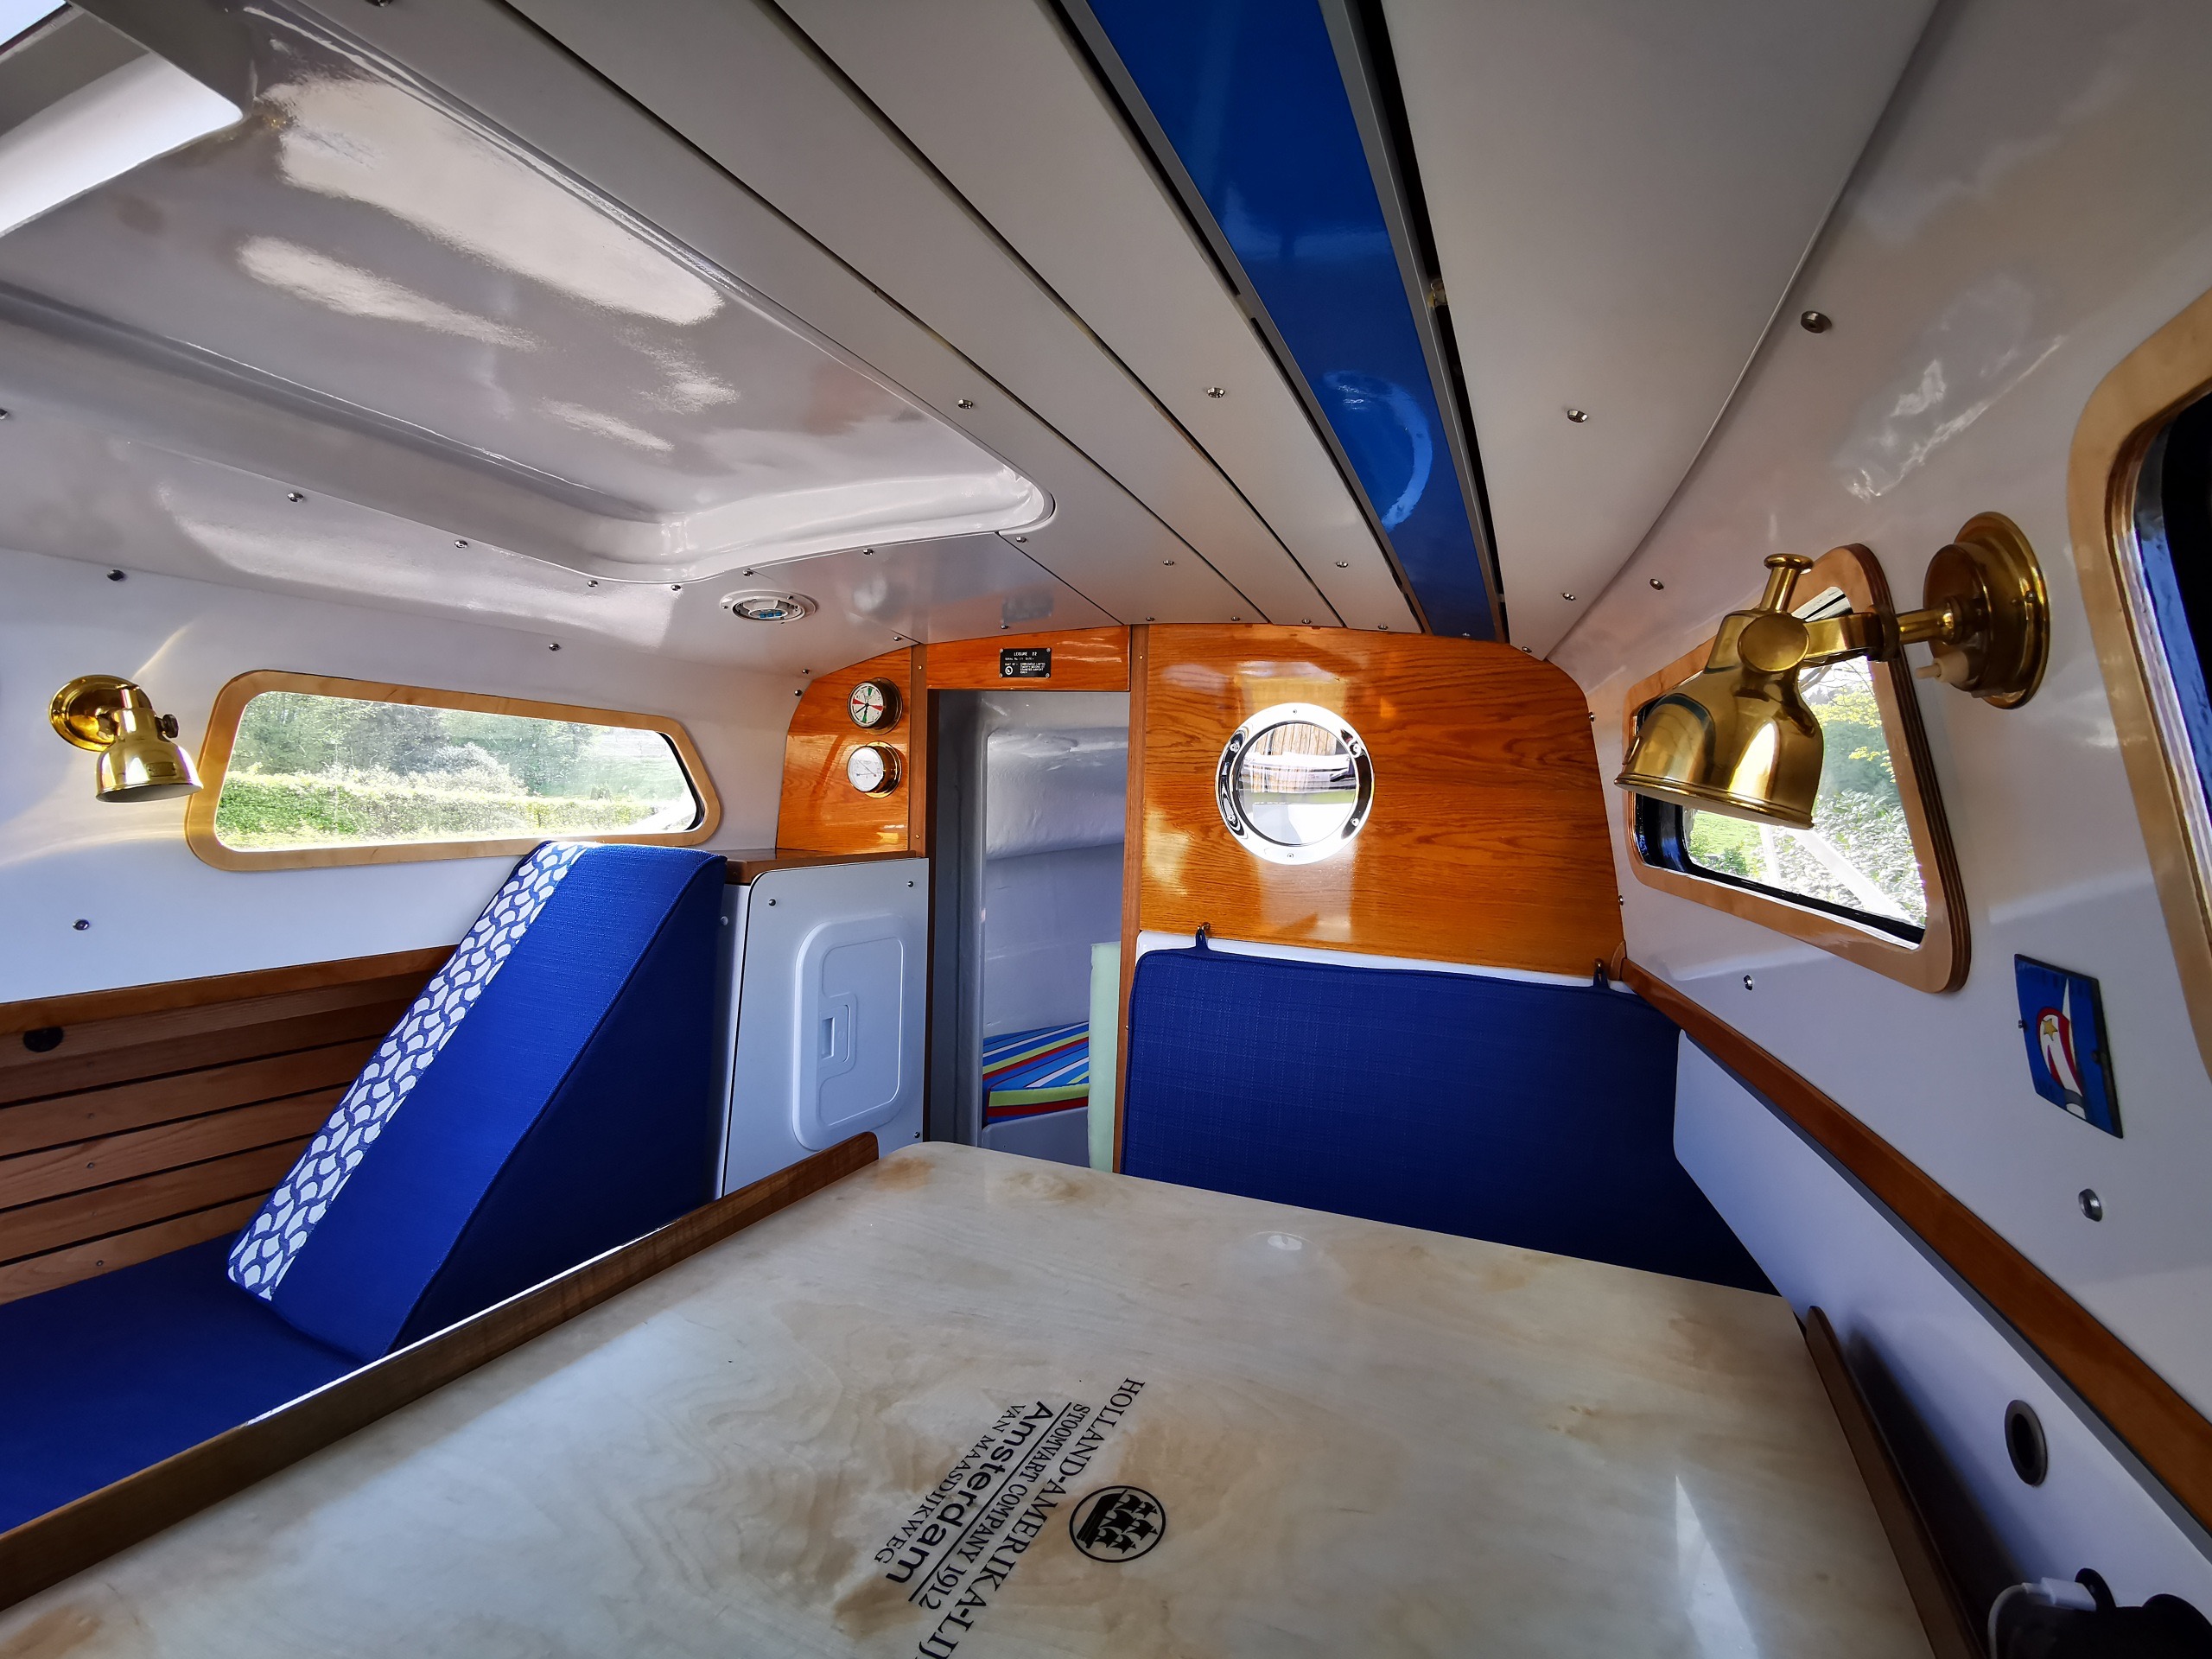
Most of the panels are now attached and would be properly screwed to the frames attached for this purpose.
Slowly you can see the reward for the many hours of effort and I am quite delighted with how everything fits together and it looks.
I can now also see that the work on the interior is slowly coming to an end.
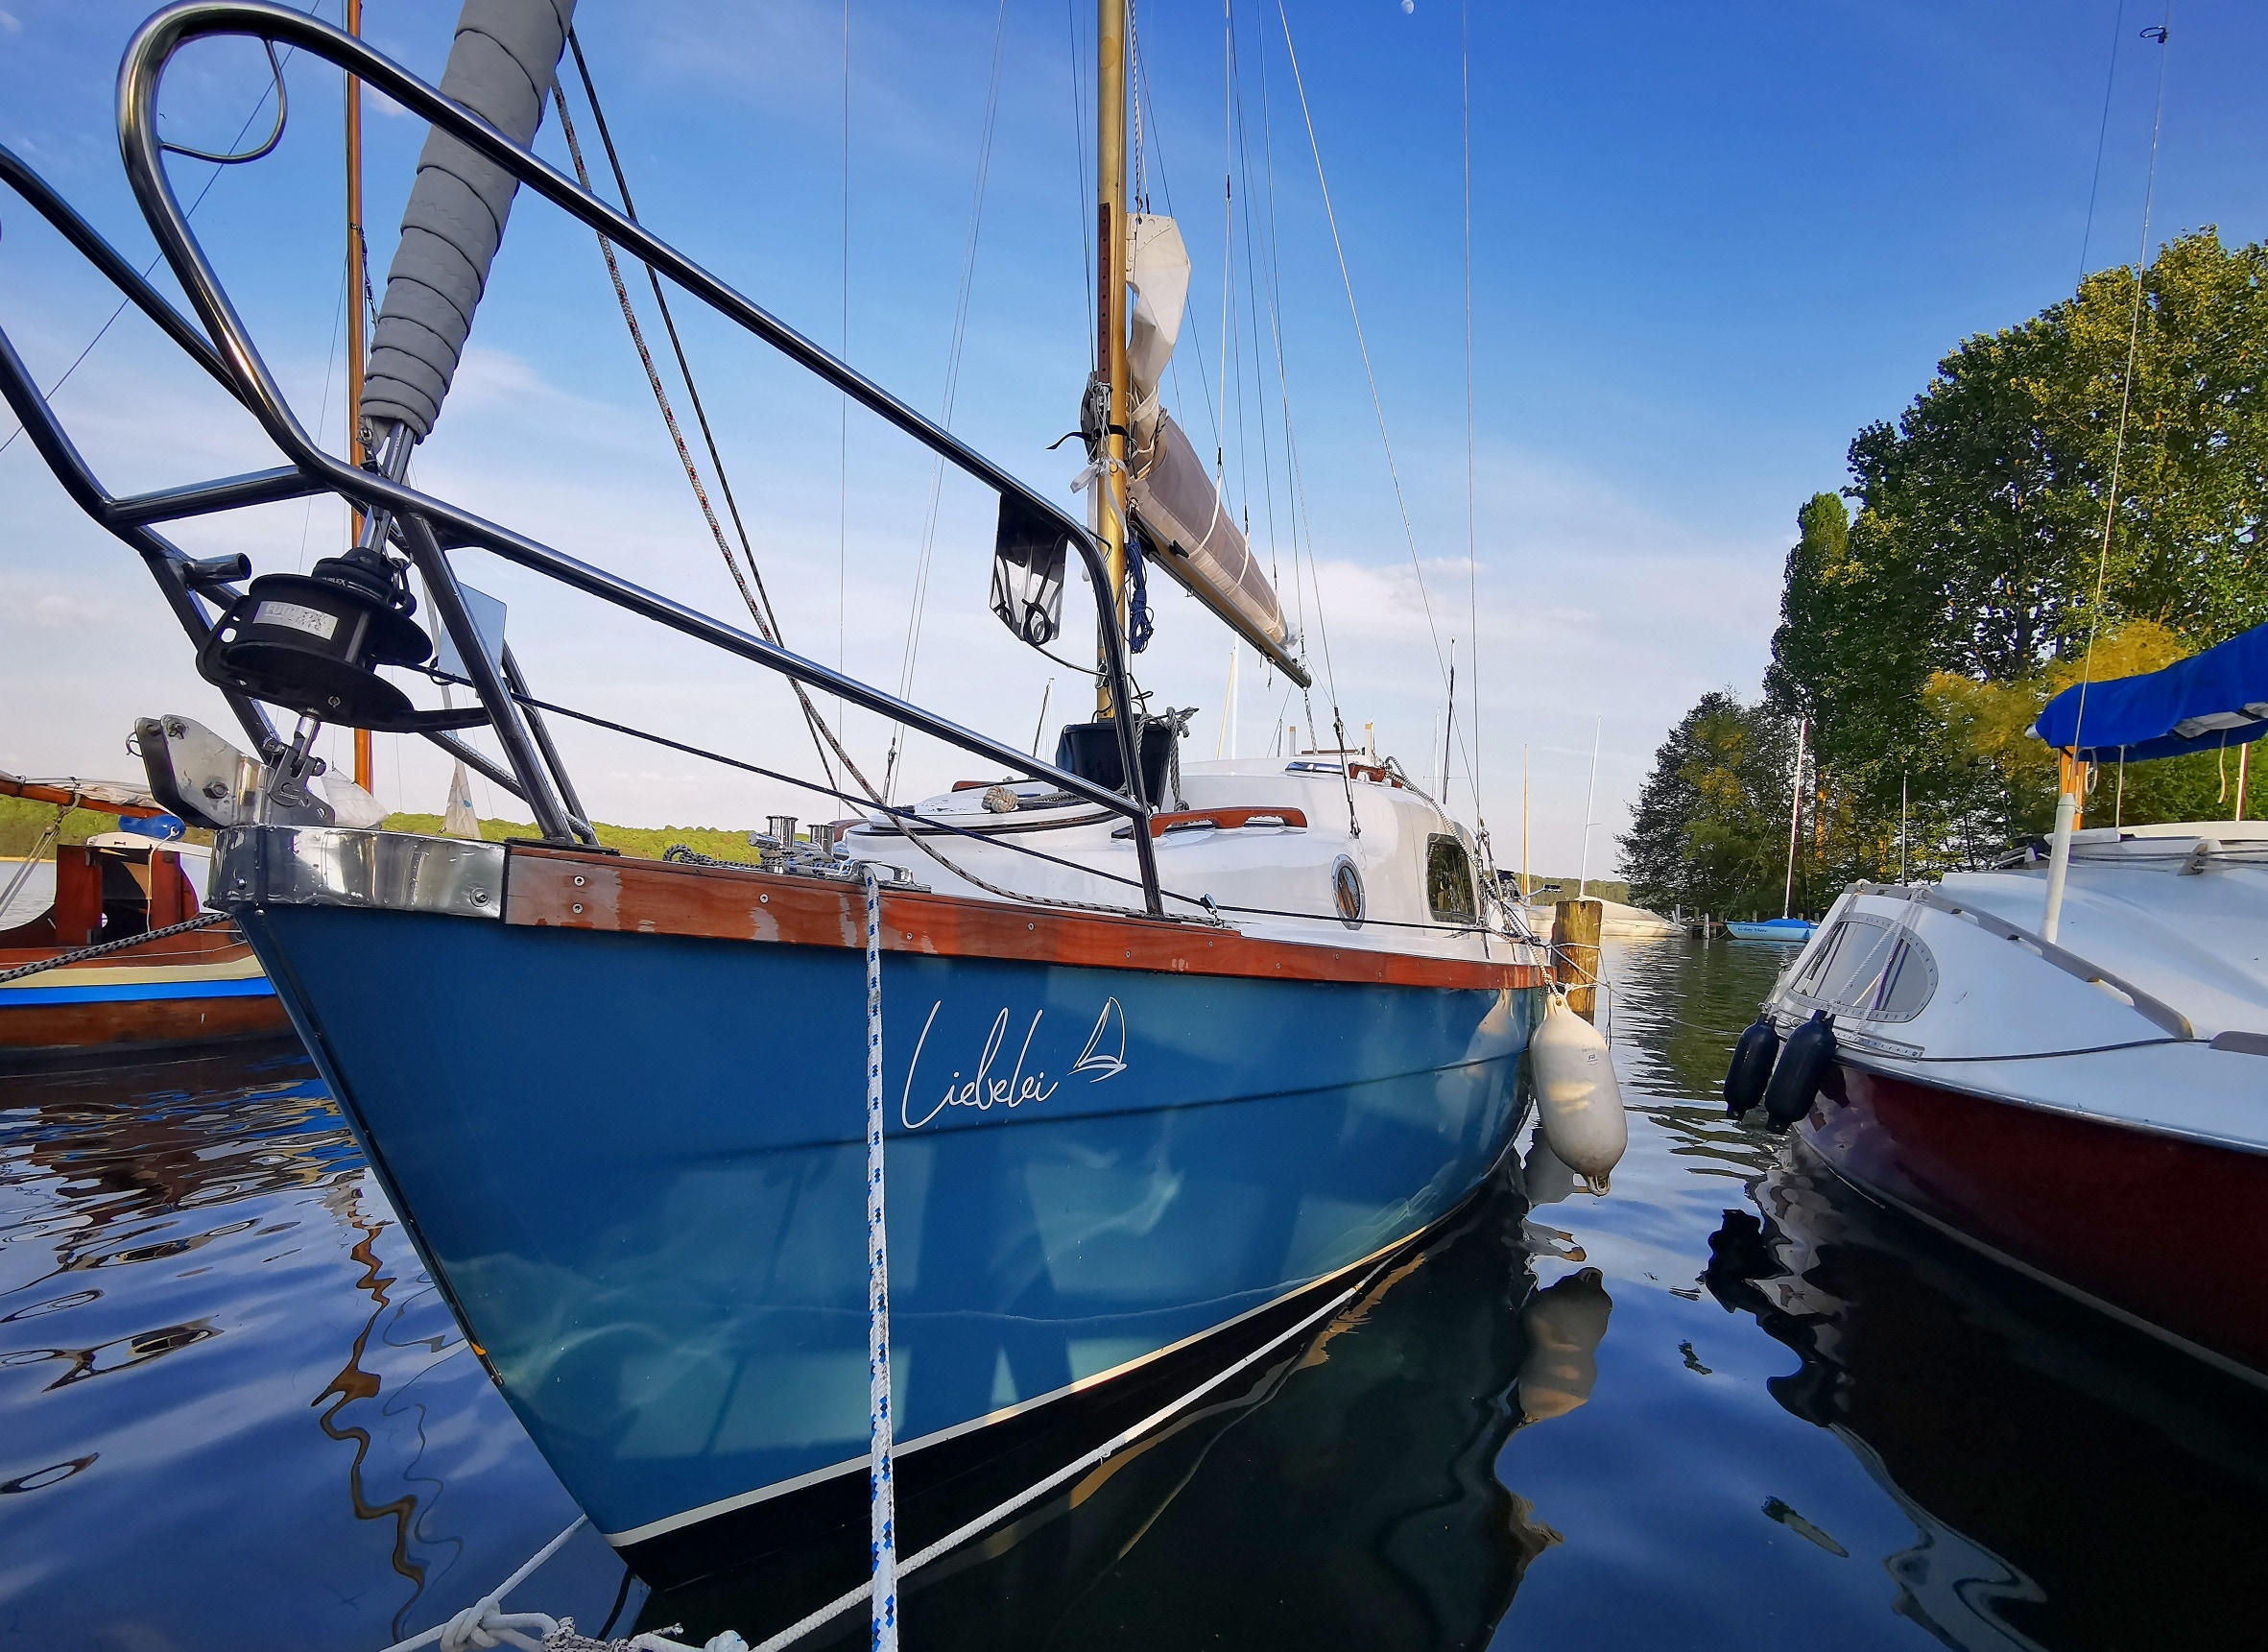
In the second week of May, the "Liebelei" should be back on the water.
Mai 2022
More and more built-in elements find their place, have to be adjusted here and there.
For example, the floor needs a hole before it is laid in, for an inspection cover.
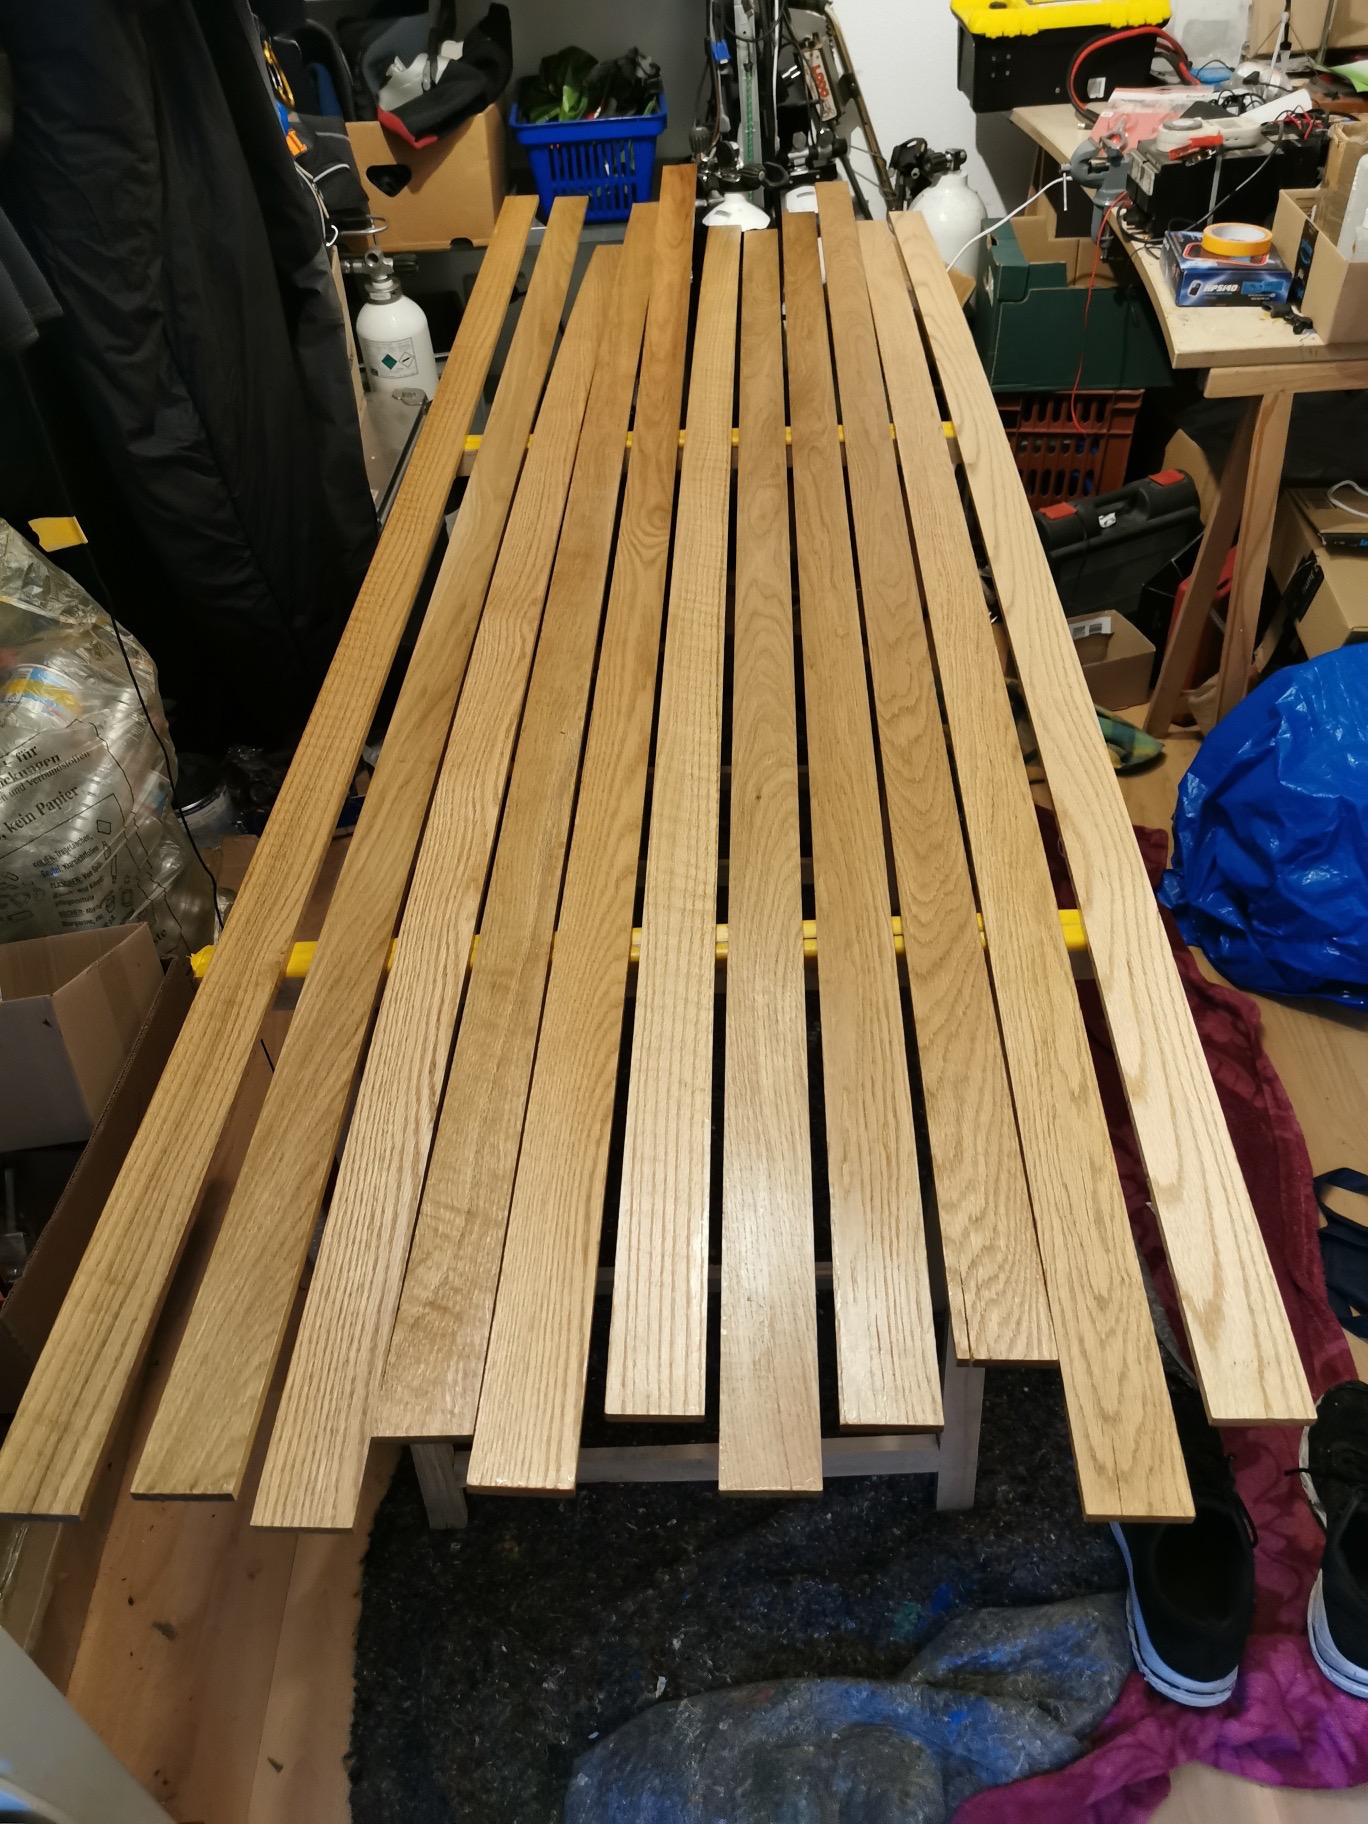
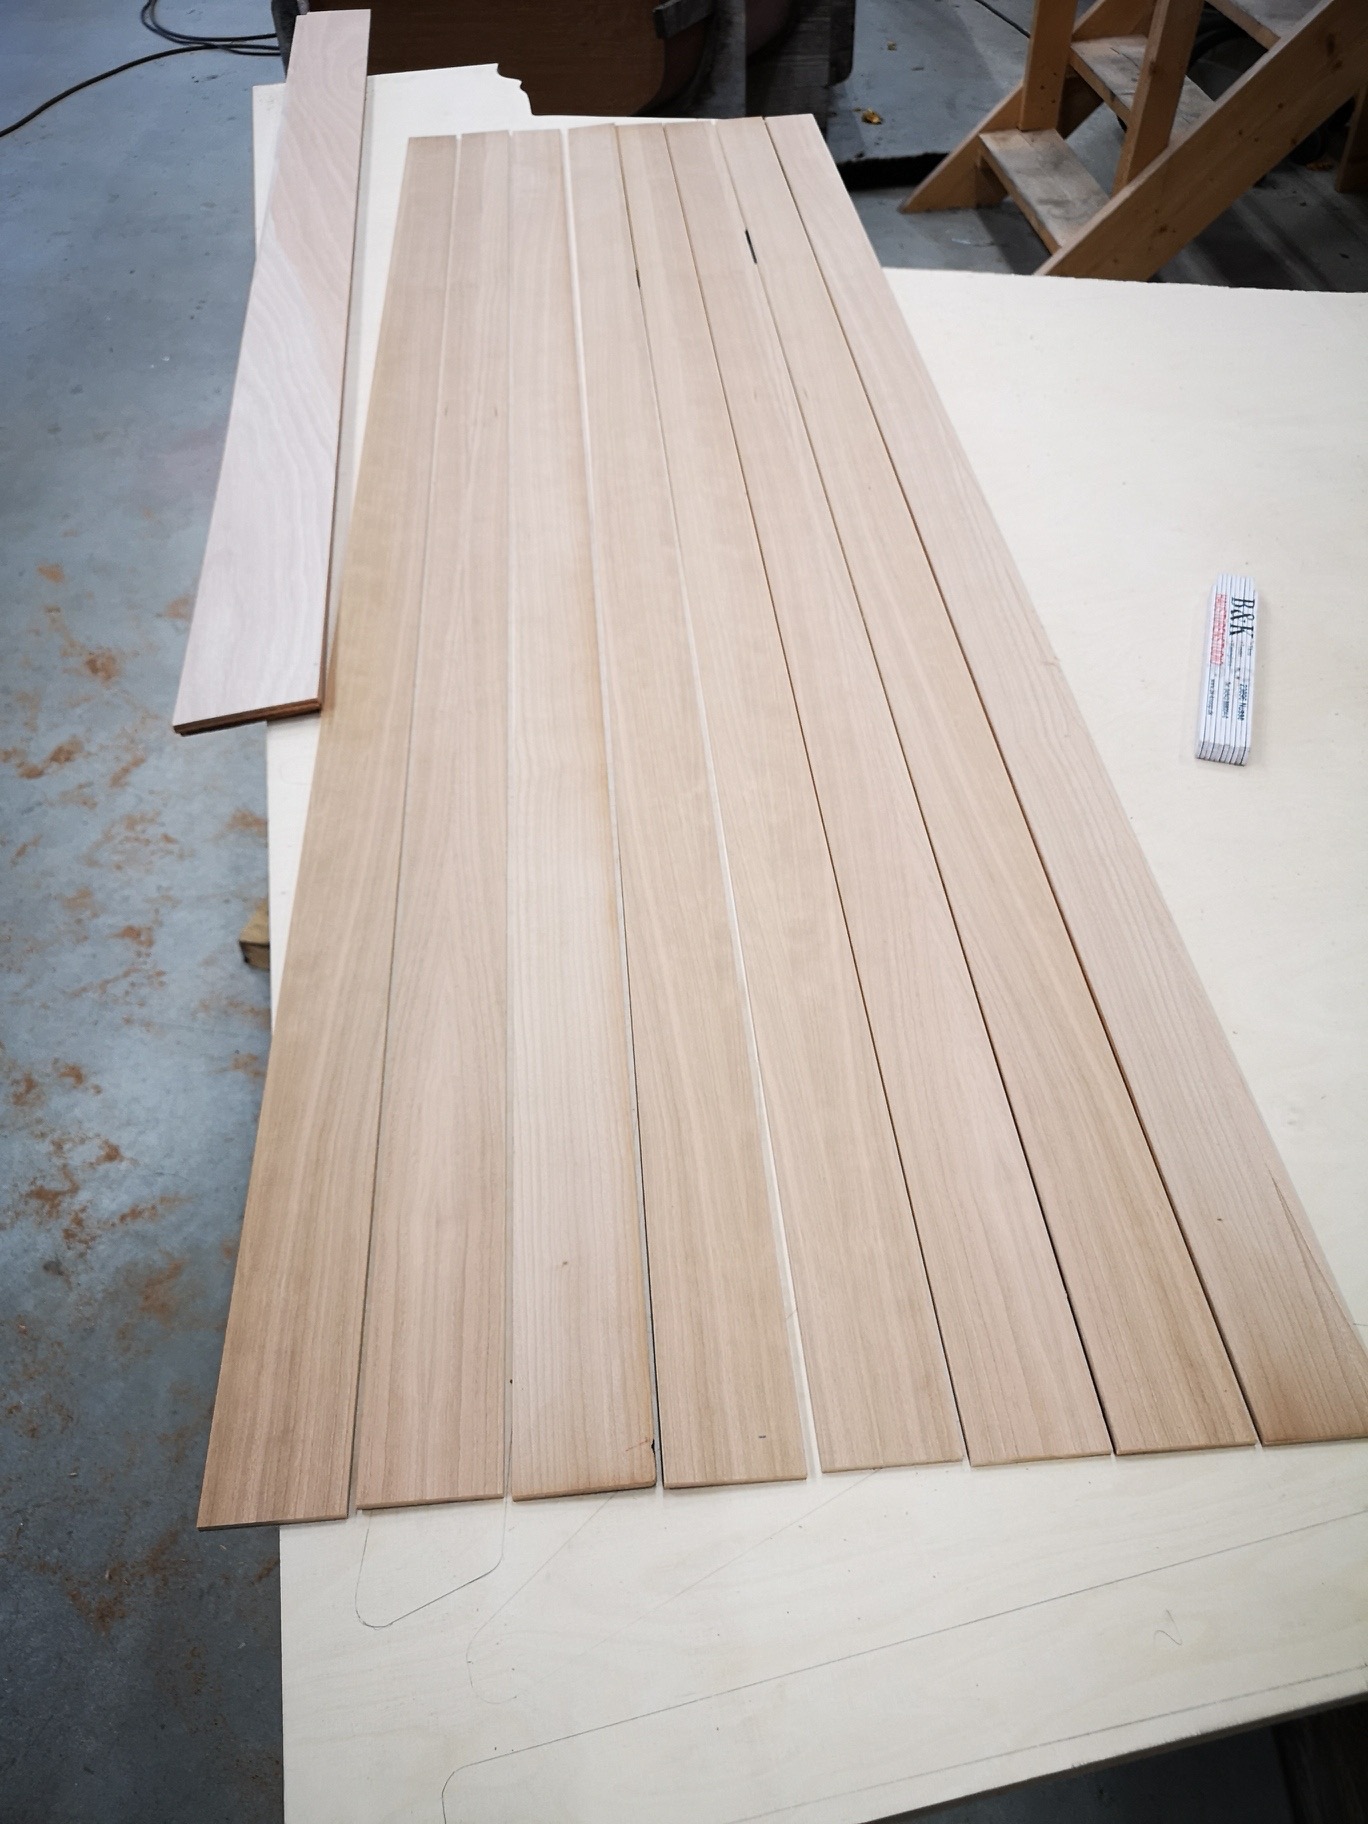
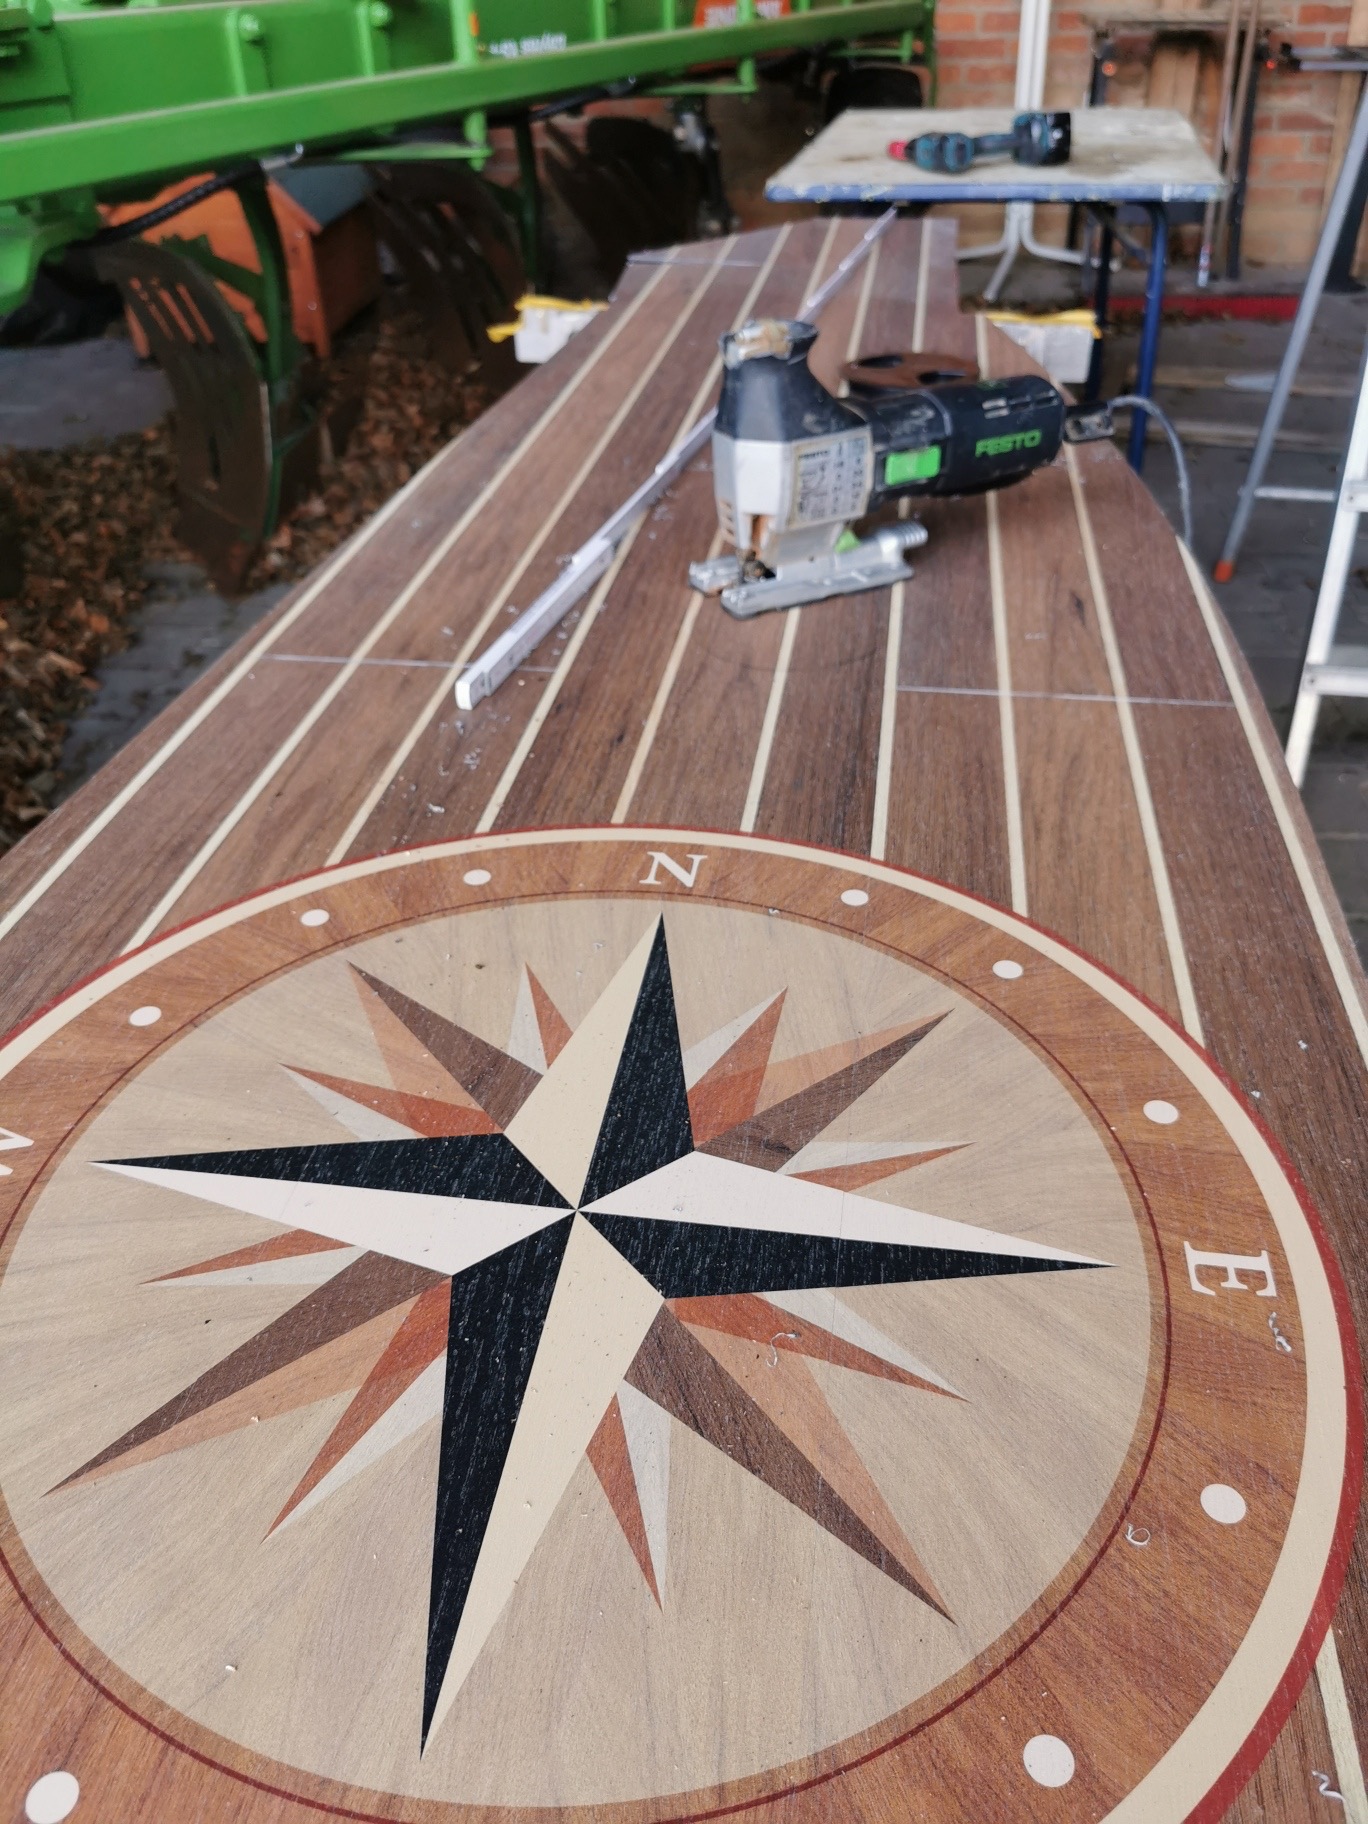
I made the flooring from about 2m long, 1cm thick and 6cm wide oak strips that I bought at the hardware store.
I coated the strips neatly with a wax before installing them.
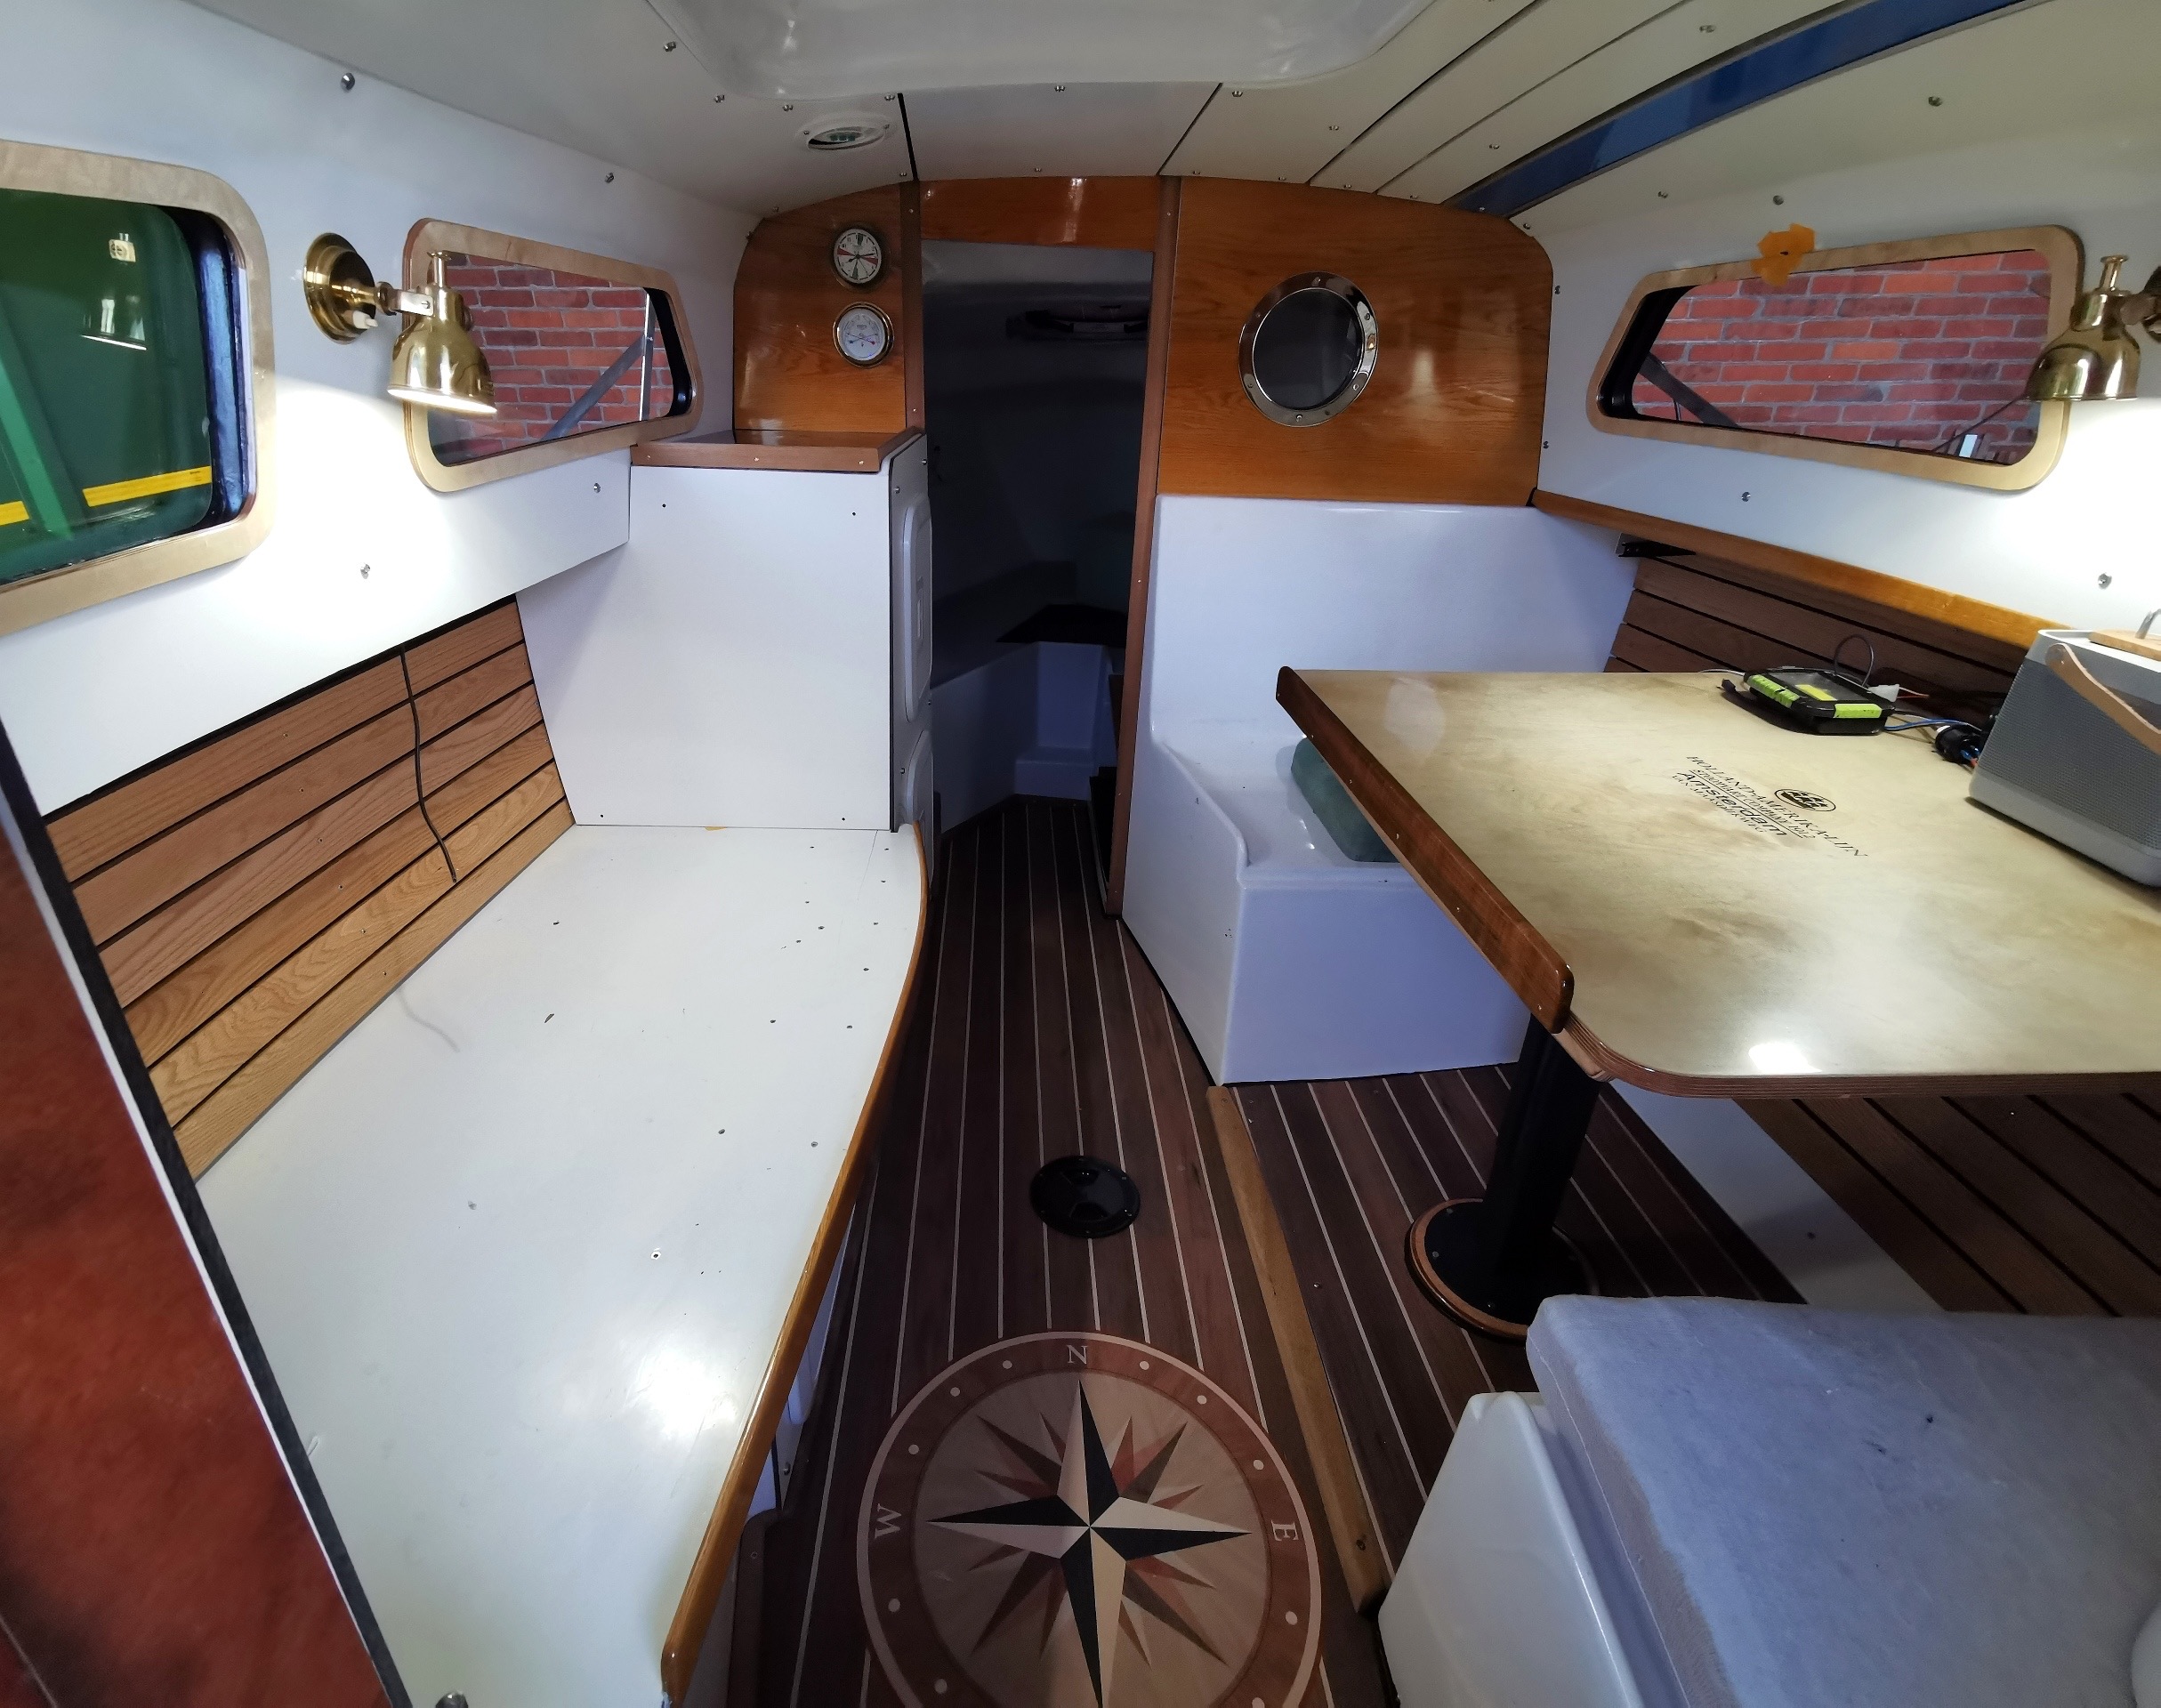
The wood of the flooring brings a lot of warmth to the salon and I think it looks great.
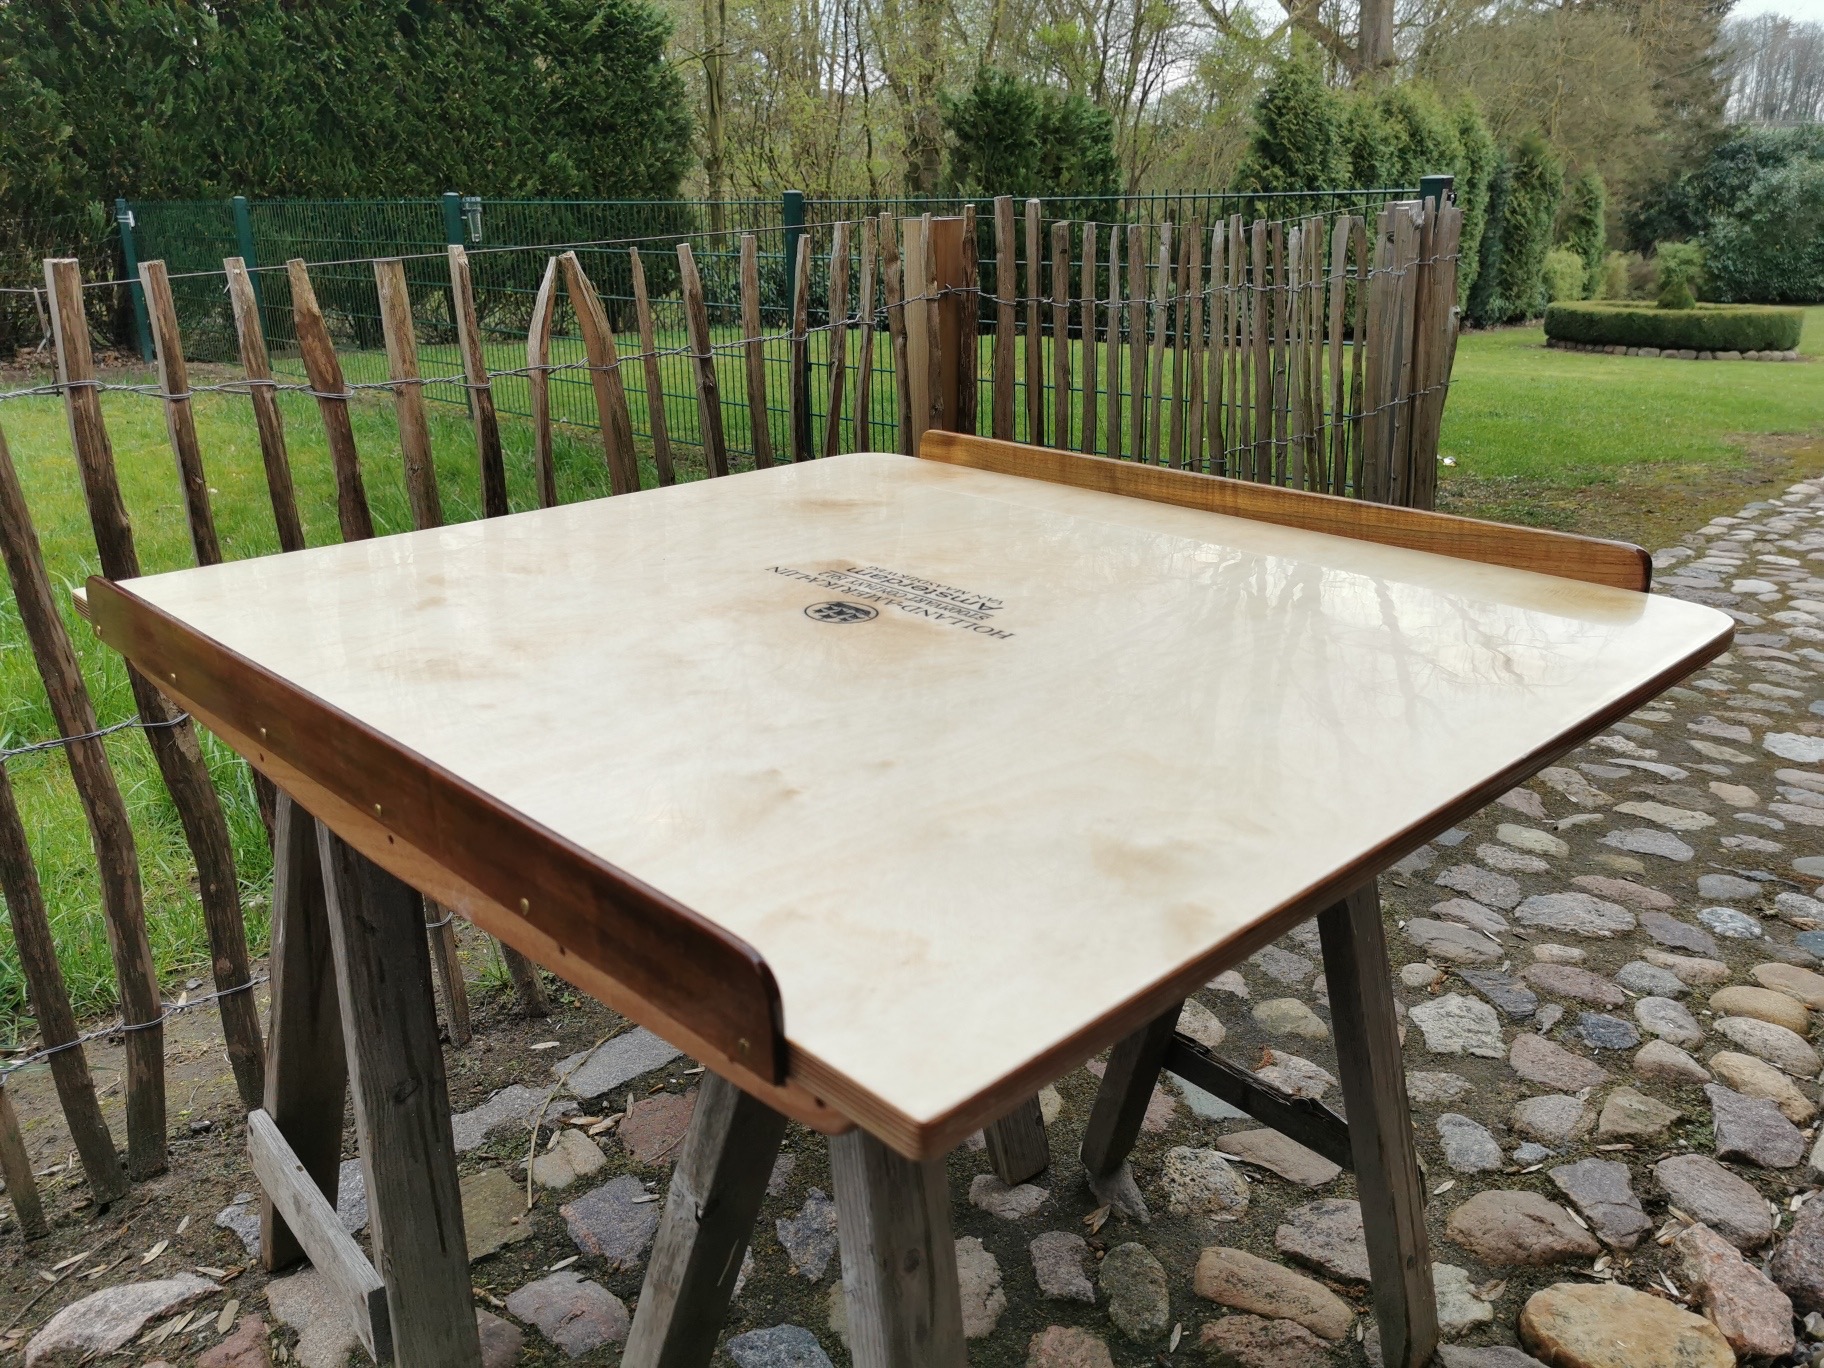
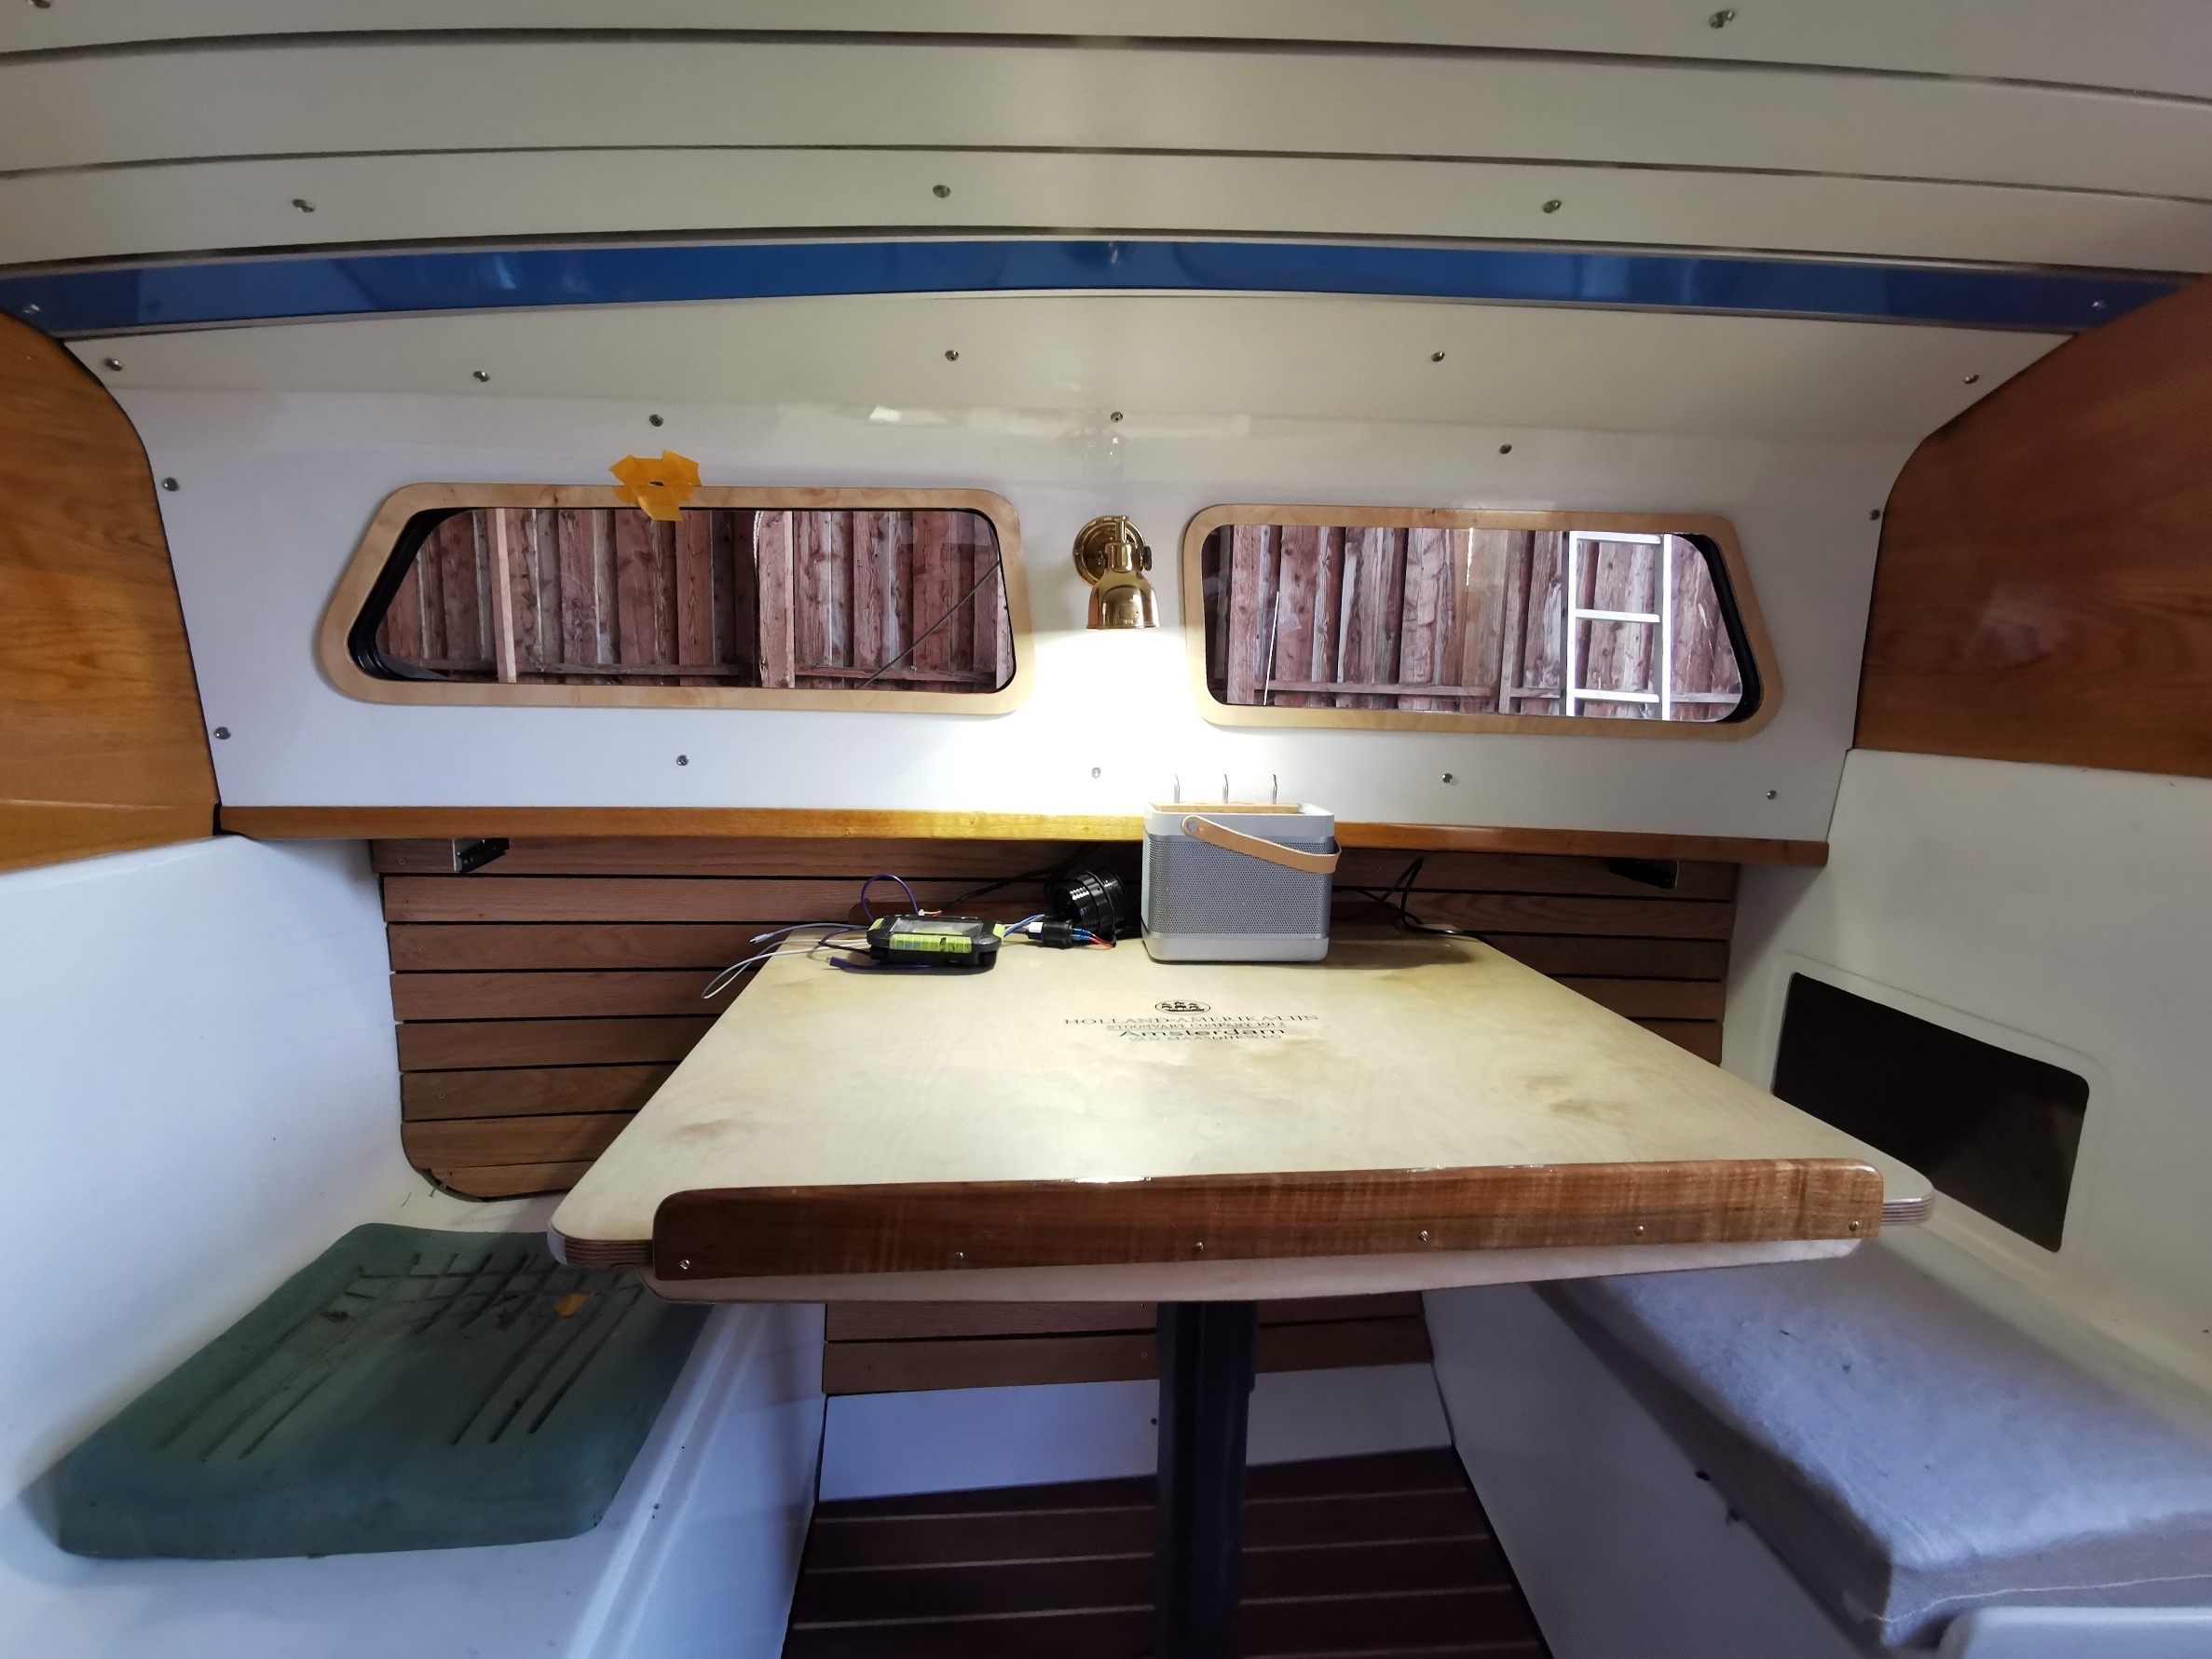
Like many other things, the table had to be recreated. I sawed birch plywood and laminated it with 8 layers of epoxy resin. Then I applied 3 coats of a 2c UV protective coating, otherwise the epoxy would yellow.
1 0 .5.2022
The "Liebelei" is finally back in the water.
Now that I had both sails made new by Clownsails in Hamburg, I also ordered a lazy bag from Clownsails, which I will also present here shortly.
The old upholstery was musty and the covers were washed out, which is why I had new ones made with a high-quality and durable cover fabric and a comfortable foam.
The new upholstery for the dinette and the recamier have now been made and I am delighted.